2BizBox® Manual |
Go back to 22.0 Main |
Job Console, as the name suggests, is where you find and do your jobs. When work orders are scheduled to separated jobs in different work centers, you can assign work centers to workers. In this way, workers will find their jobs in assigned work center as they login the system.
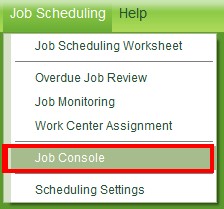
Click “Job Scheduling – Work Center Assignment” to assign work centers to users.
 |
Click “edit” button in the left down corner to open the assignment UI:
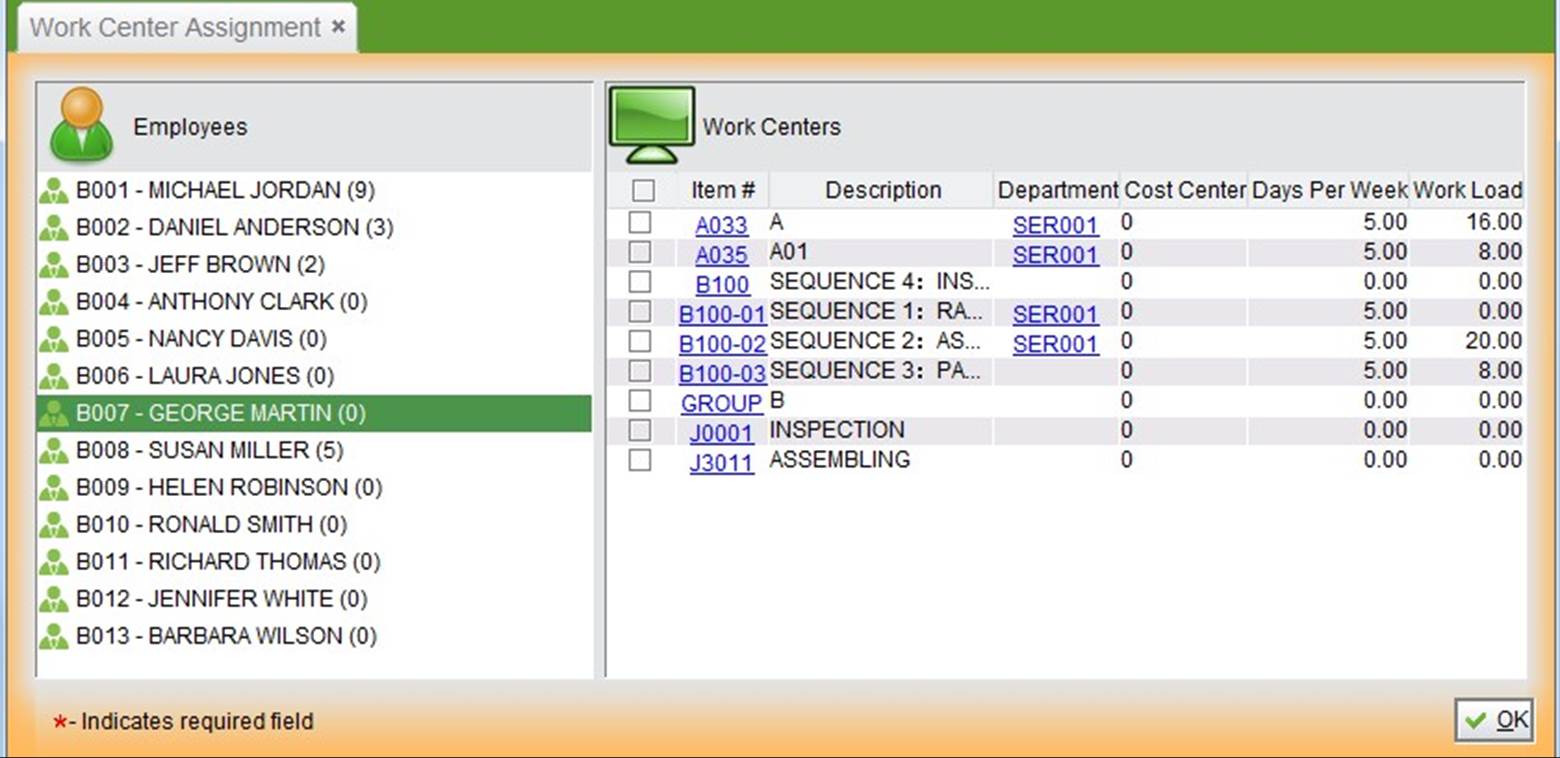 |
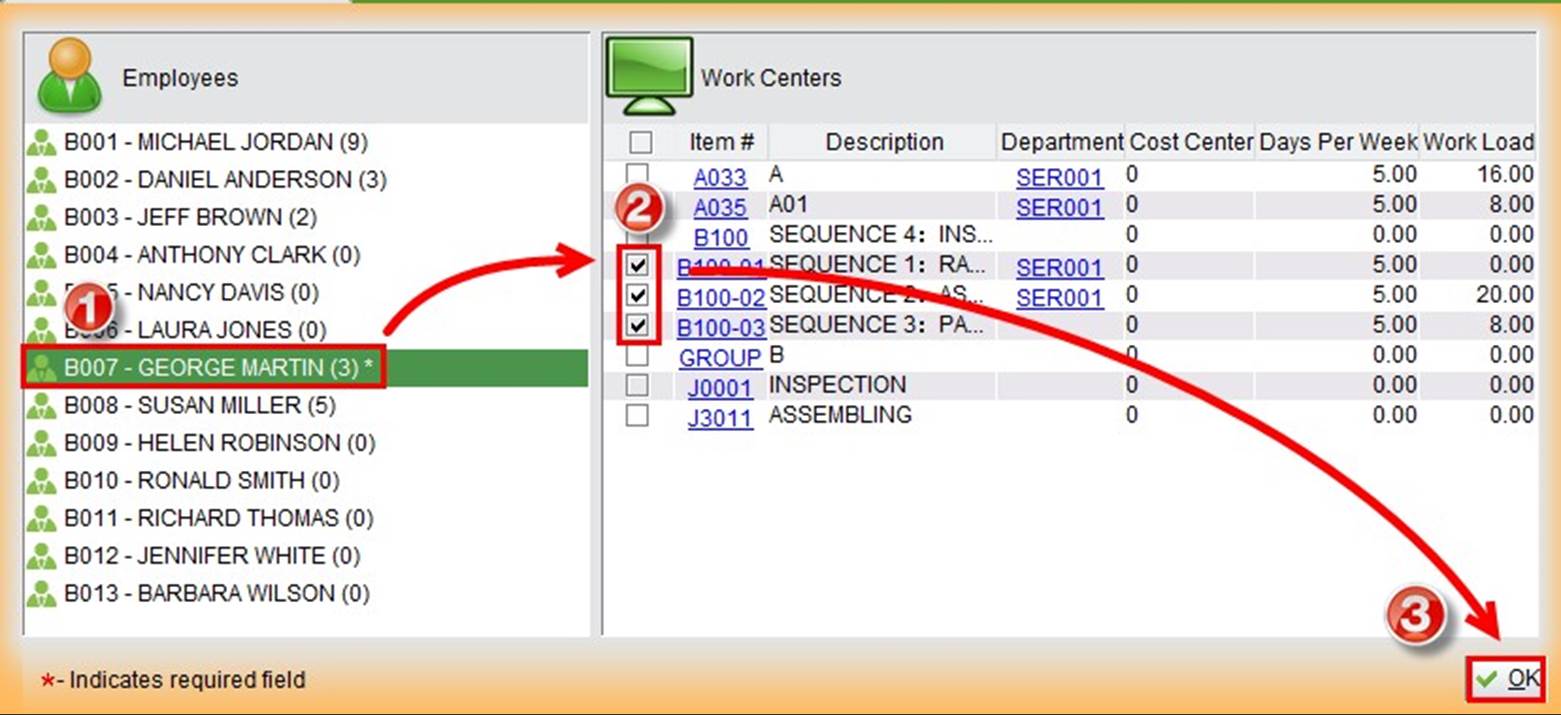
Select a user on the left side, and check work centers of this user on the right side. Click “OK” button at the right bottom corner to finish.
 |
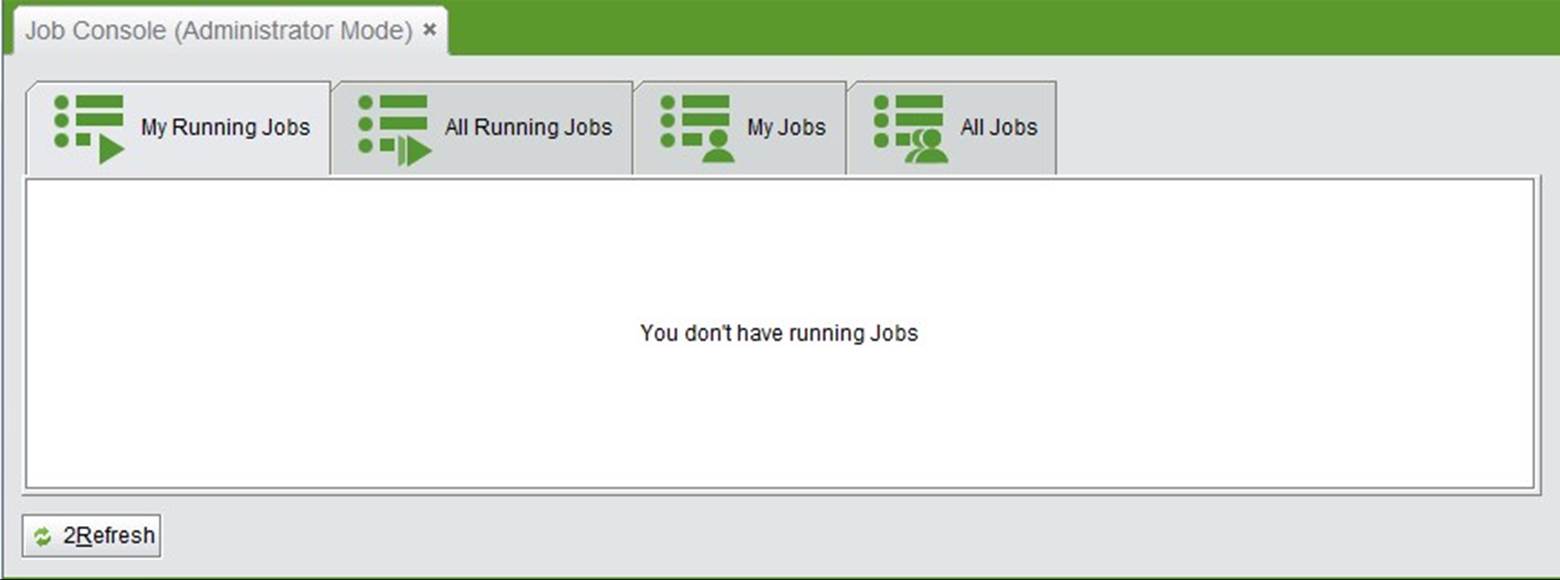
Click “Job Scheduling – Job Console” to open the job console screen with four tabs: “My Running Jobs”, “All Running Jobs”, “My Jobs” and “All Jobs”. This is the administrator mode for Job Console. When workers login, they will see only tabs of “My Running Jobs” and “My Jobs”.
The My Running Jobs tab will be selected once you log in and will be blank since you have not logged in for the day. Click on the My Jobs tab to start logging time towards a job.
 |
At the left of the screen, you can pick your Machine/Work Center from the scroll down list. If there are jobs scheduled on a machine, the little screen icons will be green.
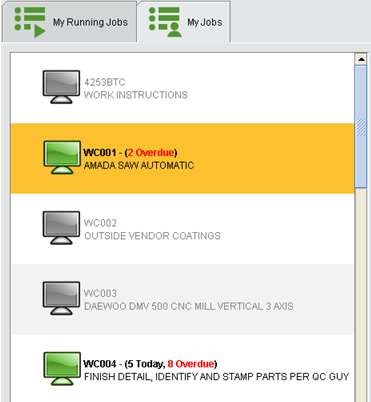 |
In parenthesis there is a summary of all the work available to clock on a machine. The number of jobs for today will be in black and the jobs that are behind schedule are in red.
By clicking on your Work Center you can see all of the jobs that are scheduled to the right under the two tabs of “My Today Jobs” and “My Overdue Jobs” as seen below
 |
Note: If you do not see your job on the My Today Jobs tab, and it is apparent that the work order at your machine is not done, it will most likely be in the My Overdue Jobs tab.
The times scheduled will be in order from beginning to end of the day so if your shift is in the middle of the day, you may have to scroll down the list to find the right time slot.
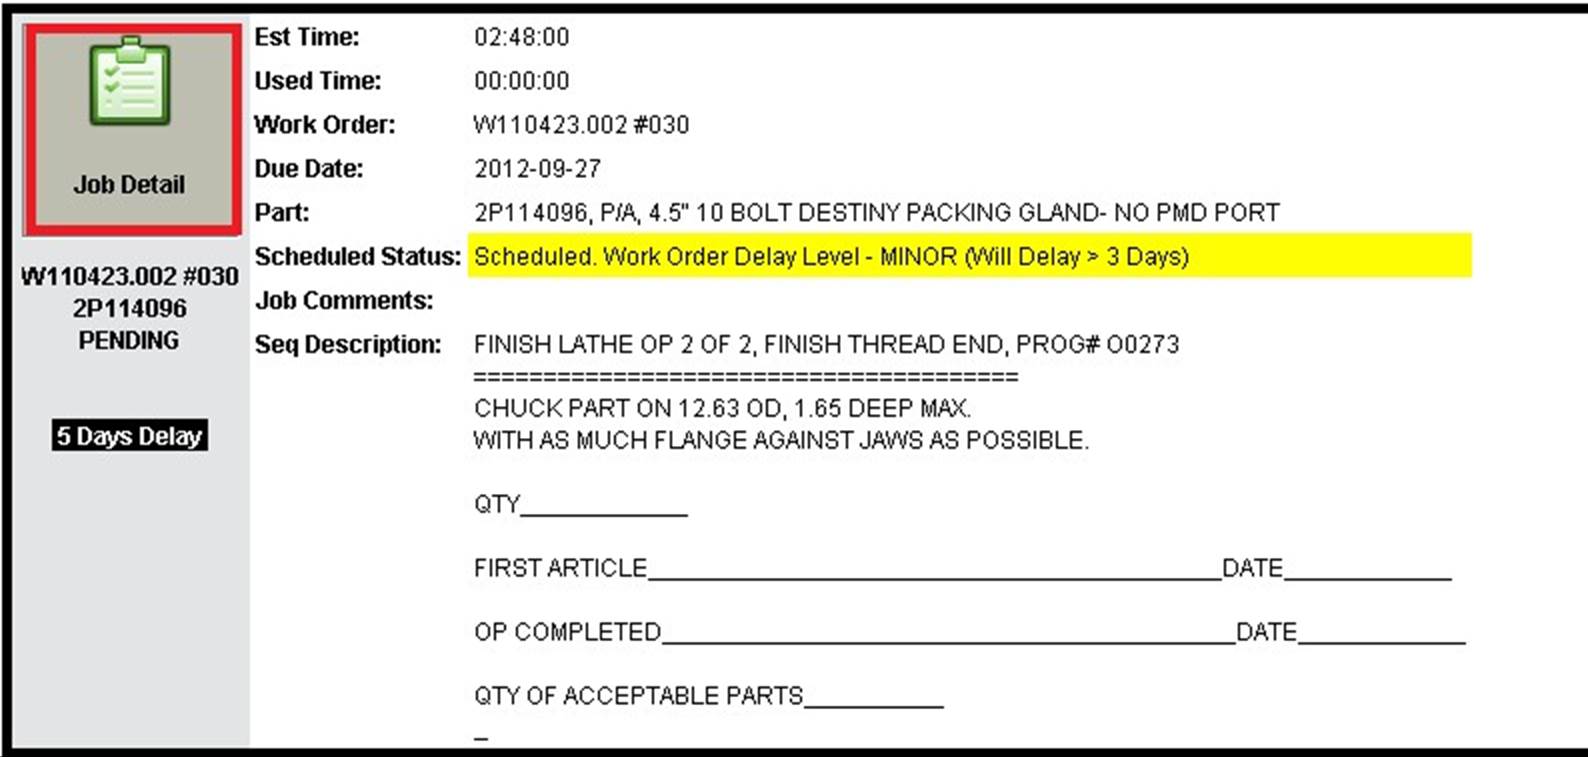
All of the important information regarding the work order is displayed on the right including the estimated time, the work order and line item, the sequence number, the part number, description of the sequence, and also the due date of the work order.
NOTE: The due date for the work order is the day that the work order will be processed to be shipped so the machining, debur, inspection, and warehouse processing must be done by this date to ensure the work order is on time to the customer.
This tab will be selected when you first open the Job Time Card and will be blank since you have not logged in on any jobs for the day.
The My Running Jobs tab is best used to keep track of what jobs you are logged into since it will show all of these jobs regardless of the machine. If you are logged in on two different computer terminals, all of your jobs will show up under this tab.
Be sure to check this tab before you clock out to make sure you are logged off all your jobs because if you exit the Job Time Card, you will NOT be clocked out automatically and you will be charging excess time to the job.
Click on the “Job Detail” button with the clip board on it to read and open job detail screen.
 |
There are eight tabs on this page to access and record information on the work order in 2BizBox.
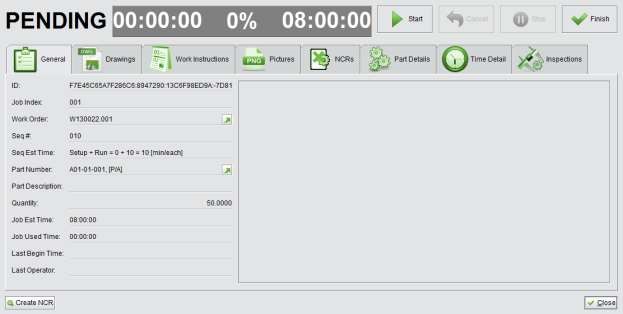 |
General Tab displays all of the general information about the work order.
The drawings revision information along with the actual PDF of the drawing can be found on this tab How to Download a PDF drawing:
After clicking on the Drawings Tab, click on the GREEN DOWNLOAD ARROW like below. A pop up window will come up and choose to OPEN the file.
 |
Note: The PDF drawing can then be zoomed in and out to better see the dimension information for the part.
This tab can be used to find information about the work instructions including revision information, WI author, and approved status.
A soft copy of the WI on the computer can also be pulled up by double clicking the line as shown.
 |
View pictures pertaining to the work order.
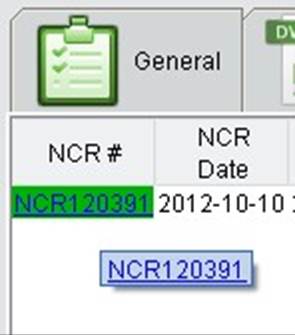
If there has been a NCR created on the work order it will show up on the display. The NCR can be clicked on to view or edit past NCRs.
 |
If a NCR needs to be created, follow the NCR Procedure below How to create a NCR in the Job Time Card:
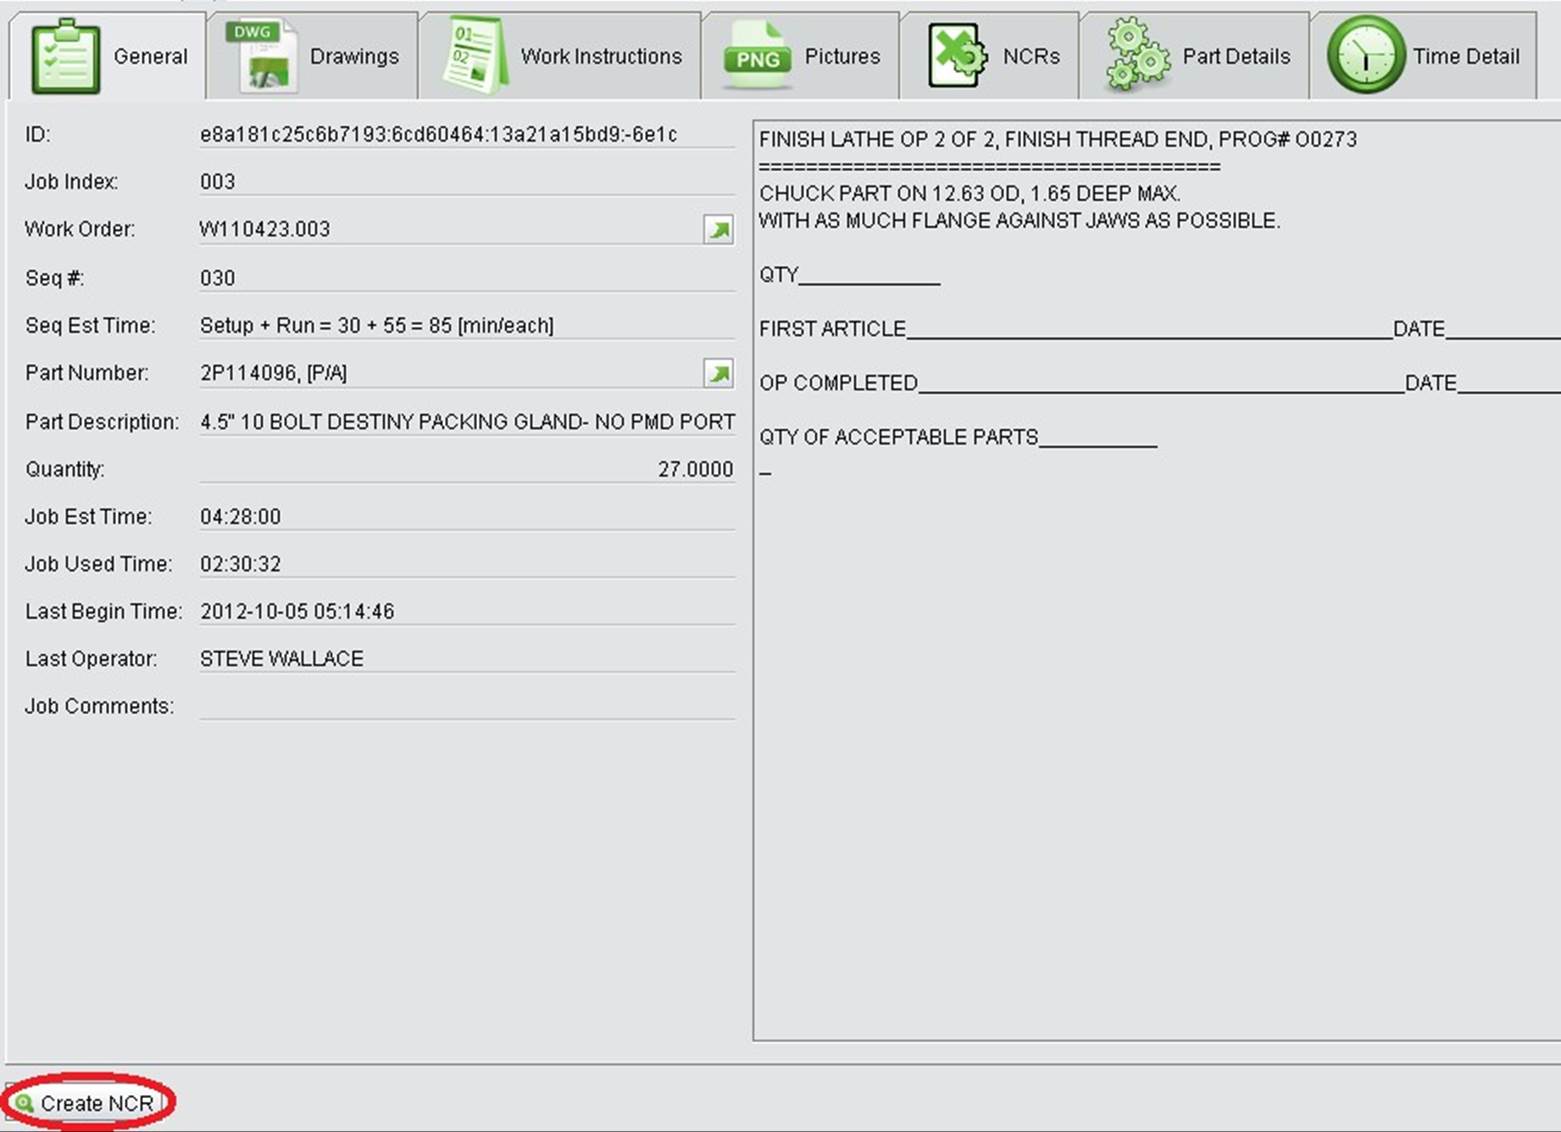
The Create NCR button can be found at the bottom left corner of the Job Time Card screen while viewing any tab.
 |
The next window that will come up prompts the machinist to give a Problem Description. This is where the machinist describes why the part is non-conforming to the print. Also on this screen the pulled quantity on the right hand corner needs to be changed to 0 as seen from the picture below. Click OK to move on to the next screen.
|
The next screen will automatically pull the work order number, part number, the pull date, and the problem description that was just entered from the previous screen Working from the top right of the screen:
Vendor: Click on the refresh symbol on the WO # line. This will automatically fill in the Vendor line at the top with the correct vendor associated with the work order that is being refreshed.
 |
So, if the part was being machined in house, the vendor ID will pop up as ARR001A for Arrow MP
Responsibility: Fill in who is responsible for the non-conforming part. If it was a machining error, put in the employee ID of the person responsible. Other options are Programming and the name of the vendor if the parts are done by an out of house.
SO # and PO#: Inputting the sales order number and the purchase order number is optional and is just there for additional information to identify the part.
Part Serial #: The number of the part in the work order that is being entered.
The rest of the information will be filled out by the quality department, including the Problem Disposition which tells if the part is scrapped or not. Click on the 2update button on the bottom right to save all that was entered into the NCR.
Note: NCR’s can be edited by clicking on the newly created blue NCR link and then clicking the edit button in the bottom corner
 |
 |
The Part Details tab gives more detailed information about the part including the amount issued to the work order and the on hand quantity.
 |
The time Detail tab is where you can view the logged times on a sequence. Along with the times, the machinist who worked on the part is also recorded. If you click on the time detail link that is circled below, you will be forwarded to a Time Detail screen where all of the times that are entered are recorded along with the quantities and rejections.
 |
Time Detail Screen
 |
Note: Times in the Time Detail of the Job Time Card are just what are entered in the given time, but the Time Detail link above has all of the entered times from when the work order was first started.
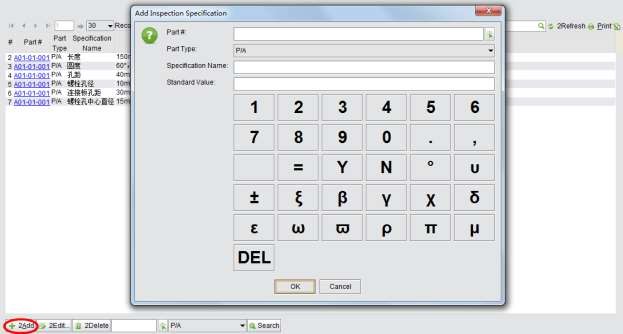
To show the “Inspection” tab, you need to add “Inspection Specifications” first. Click “Time Card - Inspection Specifications” to open the editing page. Click “add” button on the left bottom corner to add inspection specification required by the part.
 |
All the add specifications will be shown in the “Inspection” tab as follow:
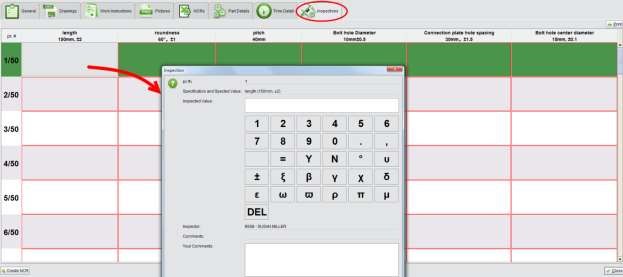 |
Workers are required to enter specifications for each part they finished in the form.
Job Time Card provides a brand new UI that is able to be operated through touch screens in the work shop. By touching the screen, workers can record their finished part quantity, create NCRs and record inspection specifications as mentioned above.
Once you have picked the correct work order, push the start button to begin running your time. The time slots you are given include the set up time, so you must start your time as you begin your set up.
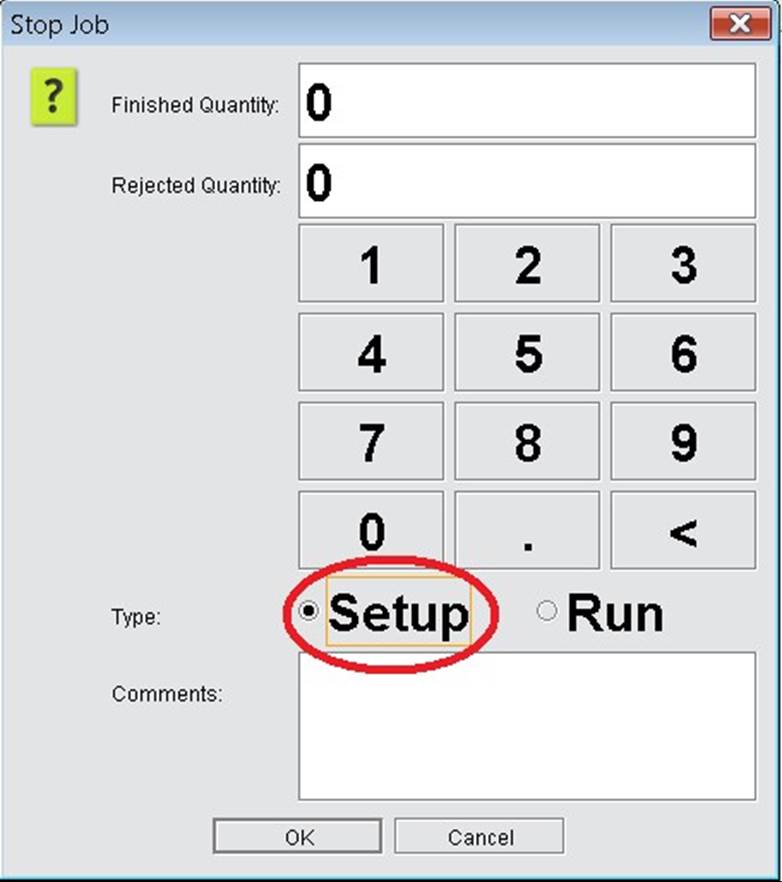
Once you are done with the setup, stop the time so you can distinguish that time as your setup time. This is done by filling in the circle with the Setup indicator on it like below.
 |
Continue the rest of the parts under the Run bullet until the sequence is done or the shift ends. There are two ways to end the recorded times by either stopping or finishing the time sequence.
Stop the time if you have started a part and were instructed to work on another work order. At the end or your shift Finish the time and enter your part totals for the day. If you complete a sequence for the entire quantity before your shift ends then you may finish the time as if it were the end of the shift.
Once you have finished a sequence, go back to your Work Centers Tab and find the next scheduled sequence/part.
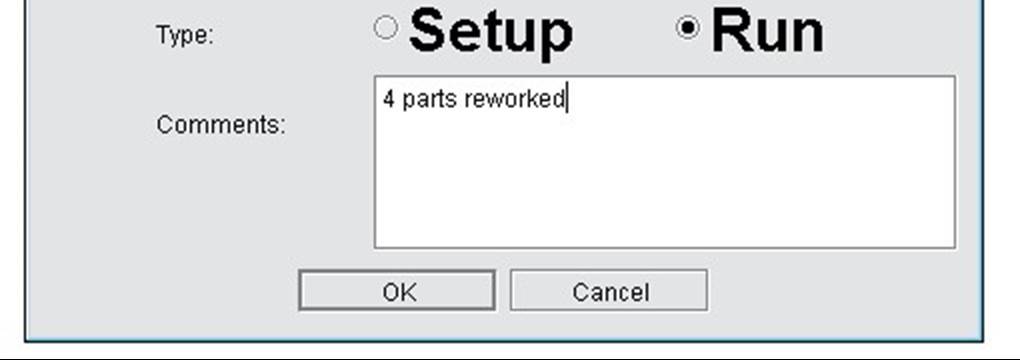
If there are parts that need rework, log into an open sequence for that part to log time. If there is no open sequence ask the scheduler to open up a time. When finished, add in the comments box the number of parts reworked and then press ok.
 |