2BizBox® Manual |
Go back to 18.0 Main |
In addition to Part Drawings, other documents related to Parts can be regarded as Part Documents, such as engineering documents, quality documents, and operation manuals. The “Part Document” sub module helps to easily manage Part Documents.
 |
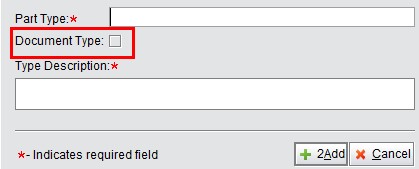
Before uploading documents for Parts, Document Types and upload paths must be set in advance. You can do this when adding a Part Type by checking the box “Document Type” in the Control Panel.
 |
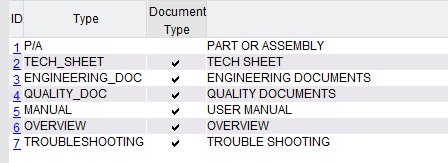
If the initialized settings of 2BizBox are adopted, you may find the preset Part Document Type including the Tech Sheet, Engineering Doc, Quality Doc, Manual, Troubleshooting, etc.
 |
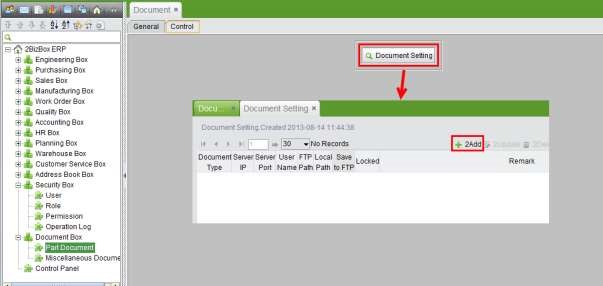
When adding a part document, the path of saving a document should be set. You can click the button “Document Settings” in the “Document Box-Part Document-Control” interface, where saving paths of all documents have been recorded. Then, click the “Add” button at the top of the interface to add a new saving path.
 |
Click the button to enter to the interface to add documents to fill in and set the parameters as follows:
The type of document: you can set a saving path for every document type from the drop-down list. Saving path: You can choose to save documents on the server or FTP.
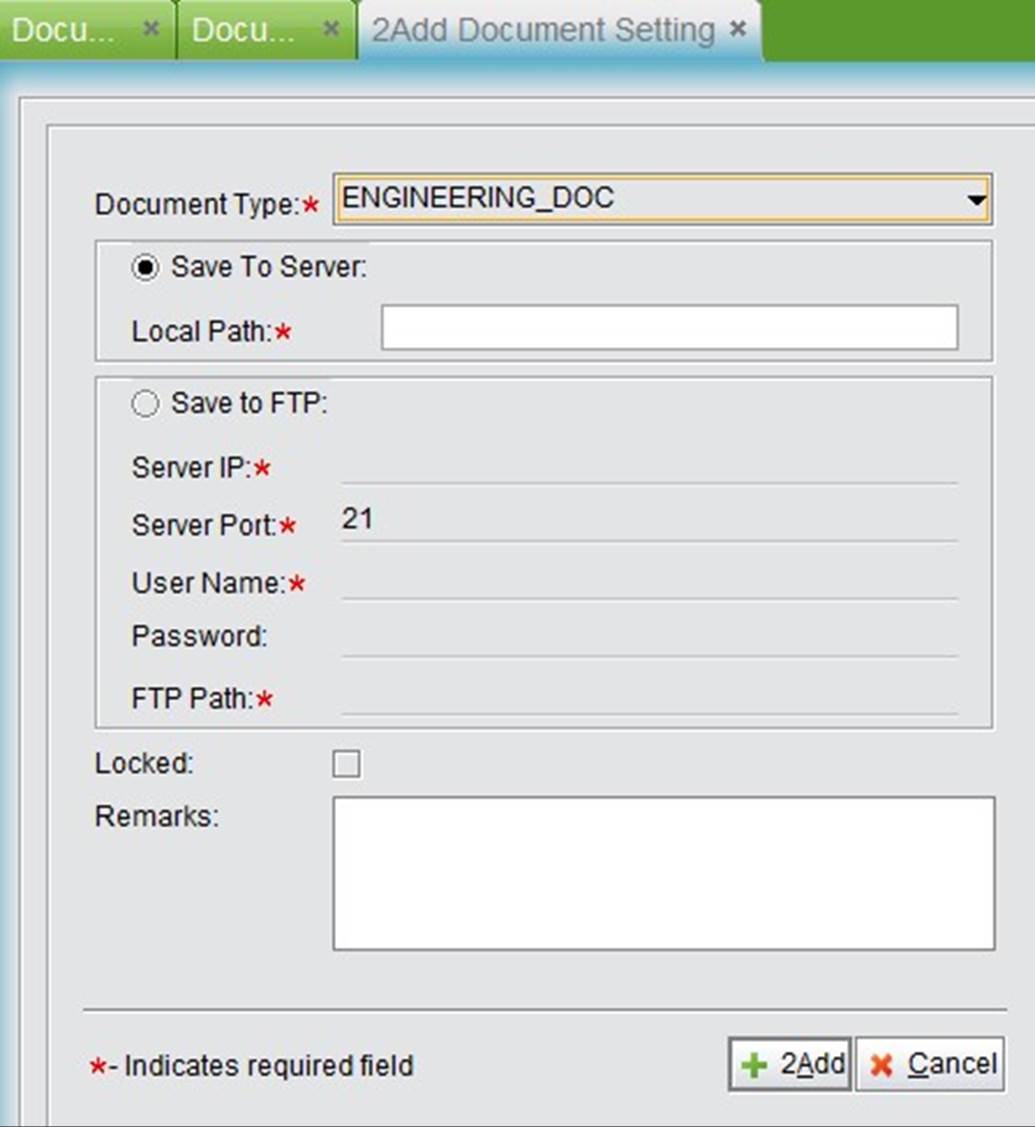 |
Click “Add” to enter the interface to update the settings and then click “Update” to finish adding a path and return to the “General” interface.
Documents can be uploaded when their type and path have been set. In “Document Box-Part Document,” click “Add Documents” to enter the adding interface. When uploading, part document will find the part it belongs to automatially and be saved. Therefore, the naming rules of a part document are very important. As the image shows, part documents must be in ZIP files and be saved in the specified format:
PARTNUMBER_REVISION_language. Pay attention to the upcase revision and lowcase language.
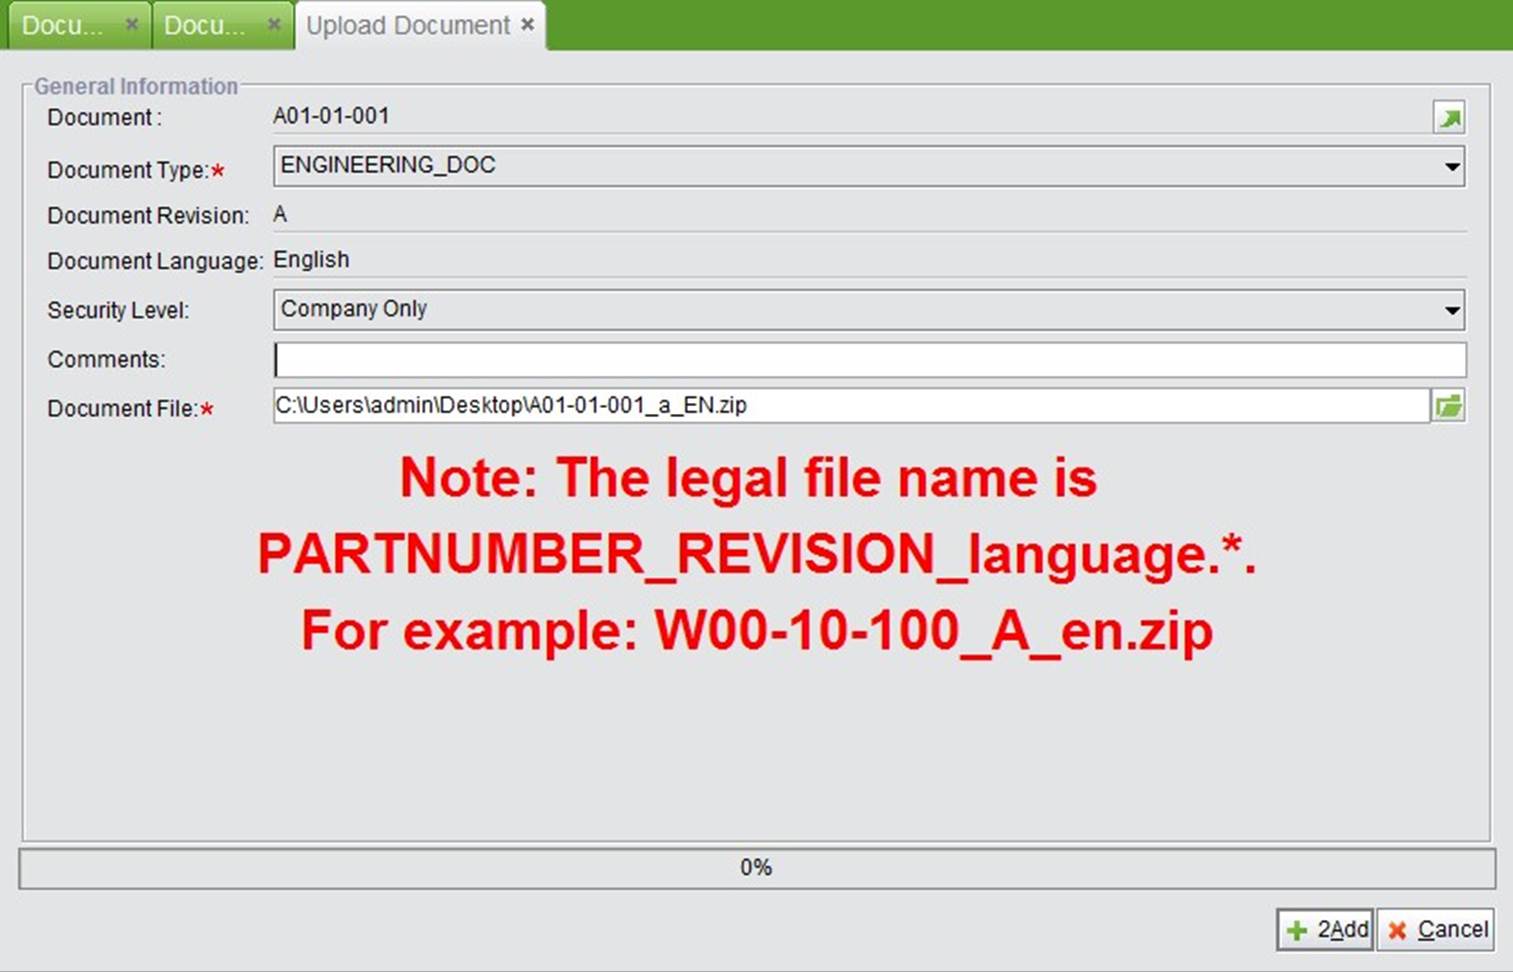 |
In addtion to the file path, you need to choose a desired “Document Type” and “Security Level.” Comments are allowed to input as well. Every document type can have a separate saving path. “Security level” can be divided into “Company Only” and “Public.” Then, click the button “2Add” to finish the uploading.
After a document has been uploaded, you can see its information in the “Document” window in the Part Properties as below.
 |
Click the button “Download”to download the zipfile and click “Download Content” to download the document file directly.
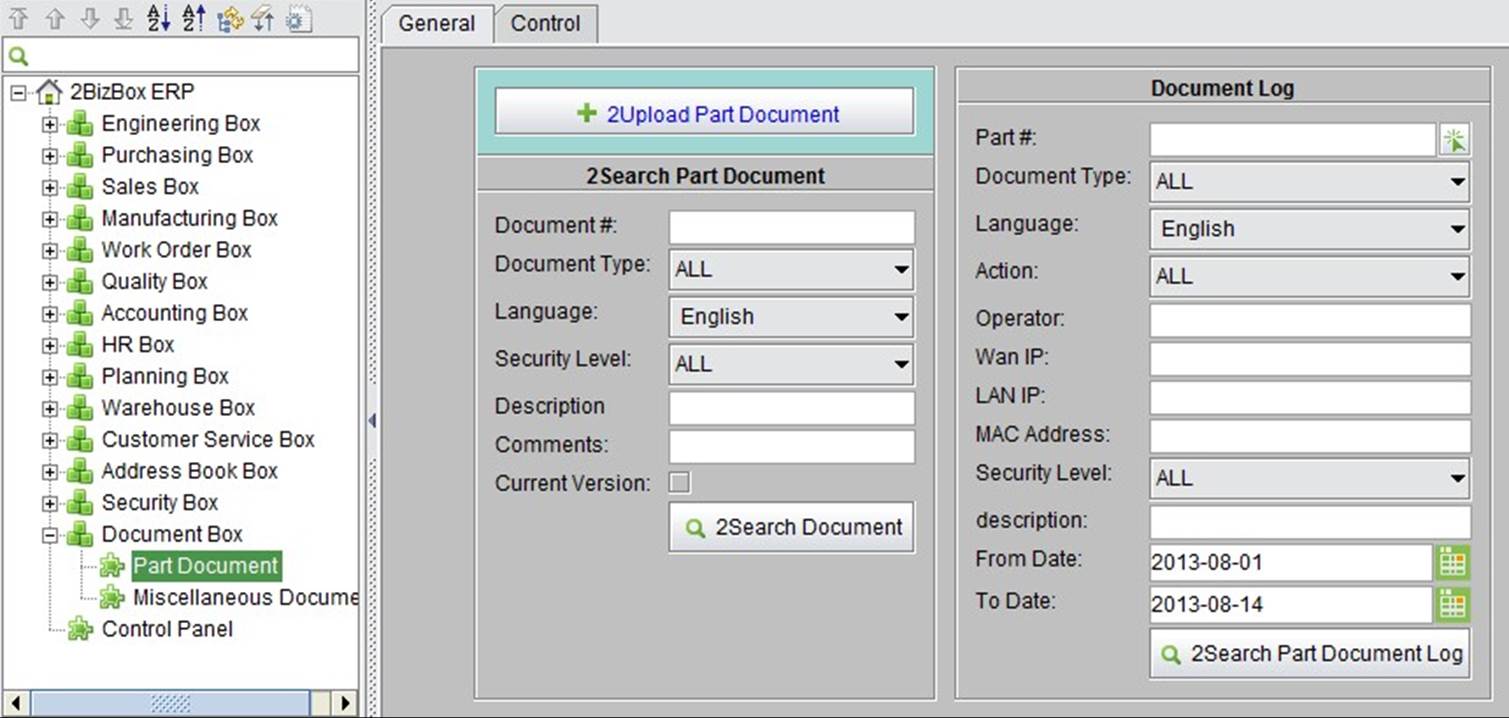
In the “General” interface of Part Document, you can search for documents and document logs by various parameters.
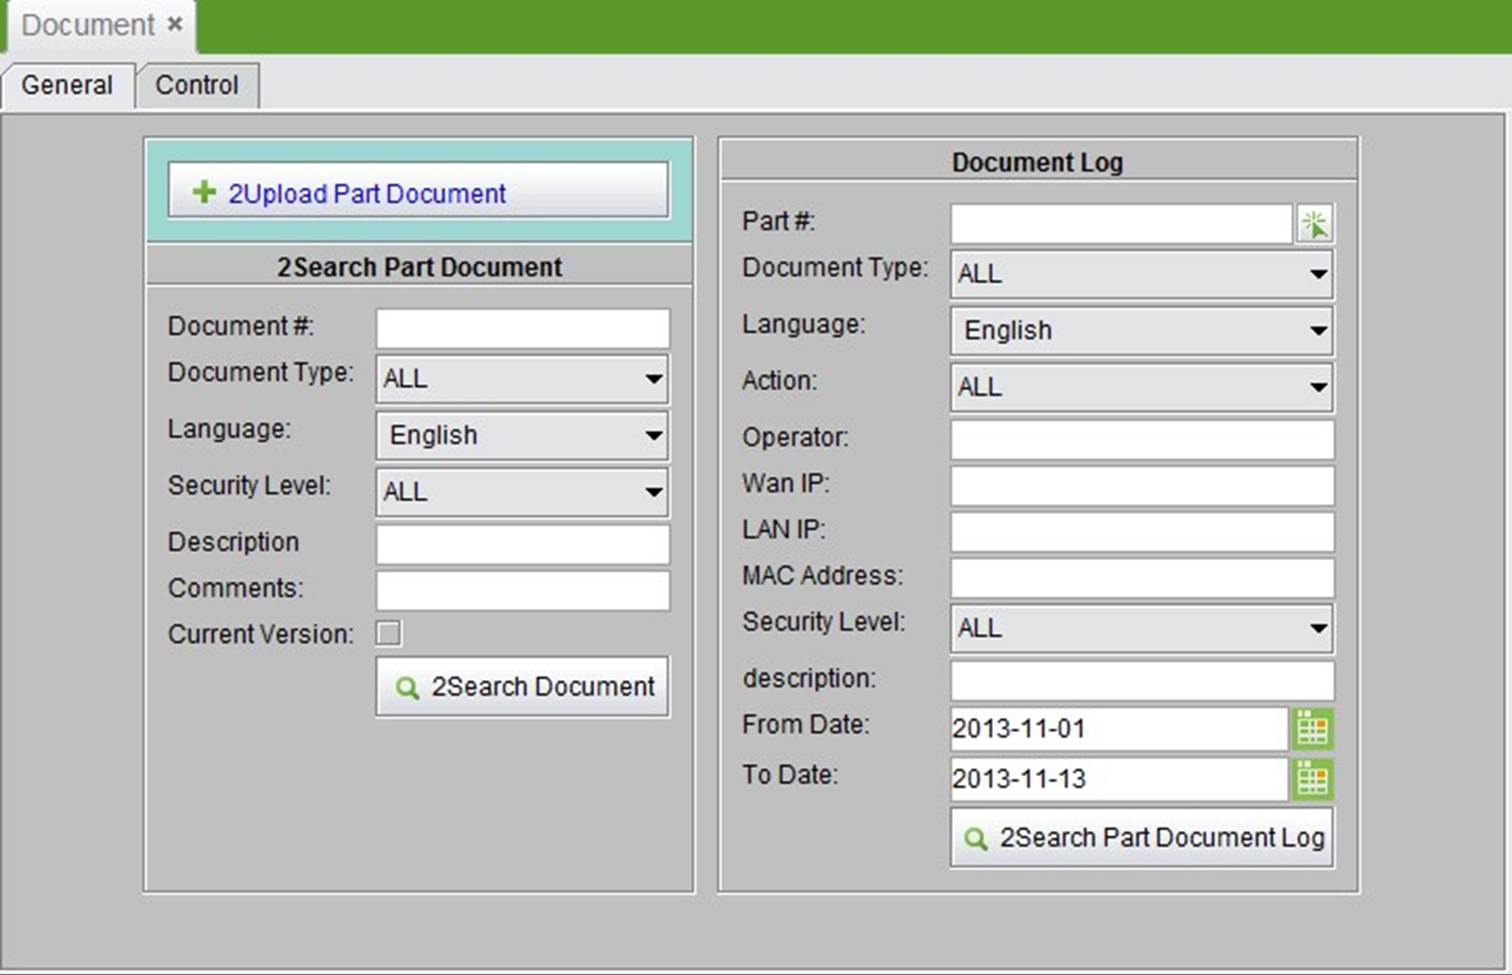 |
You can search for part document added in the system by the following parameters:
Document #: the same as Part #
Document type: select the one from the drop-down list
Language: select the language applied when uploading the document
Security level: selecte the one applied when uploading from the drop-down list
Description: the part’s description
Comments: comments added when uploading the document
Current version: whether to search for documents of the current edition only
In the search results interface, the detailed information about documents will be shown. Click “Download” to download the ZIP package of a part document; click the “Detail” button to enter the interface in which the details of a part document can be seen. Click the “Delete” button to delete a document after selecting it.
 |
The document logs, which cannot be deleted, have recorded the information on uploading and downloading documents in the system, thus improving the security of documents.
You may search for document logs by various parameters including the Part#, Document Type, Language, Action, Operator, Wan IP, LAN IP, MAC Address, Security Level, Part Description, From Date and To Date.
The following image shows the search results. There is no limit to deleting document logs. Click the button “Print” to print the logs.
 |
In the “Document Box - Part Document - Control” interface, you can set the saving path for part documents. Click the “Document Settings” button to see the settings on the paths of all part document types.
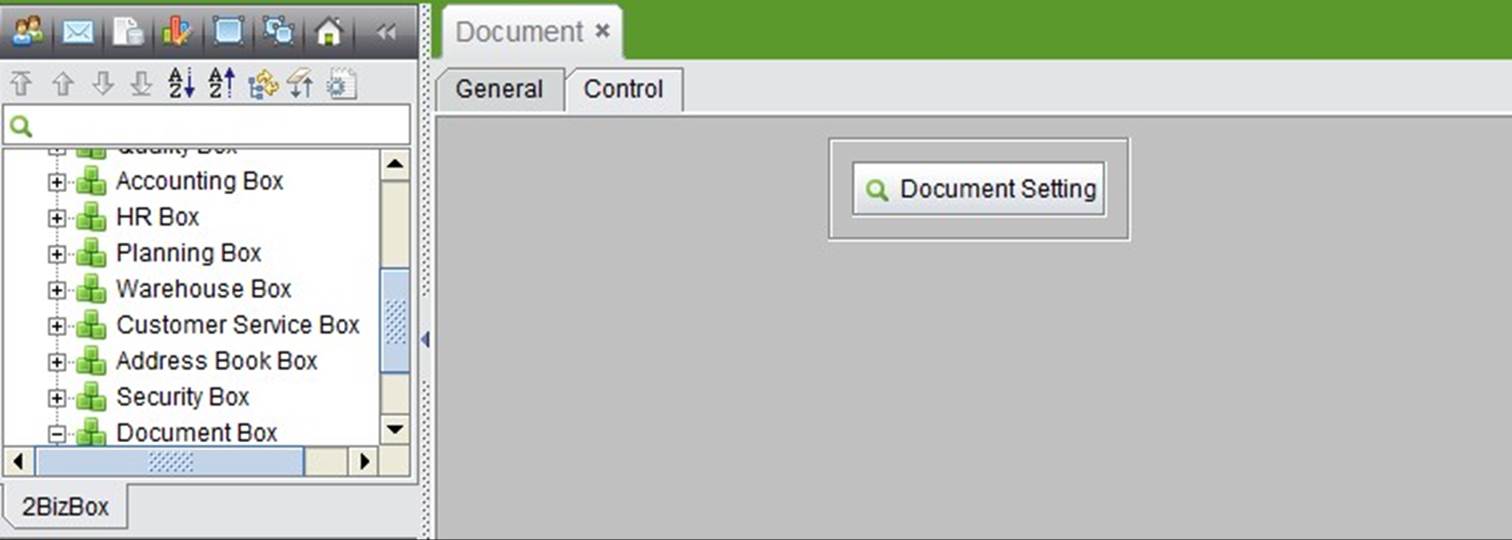 |
Click the ”Add” button to add new path of document types. See chapter “Part Document Upload Path” for details. You can edit or delete a document type after selecting it.
 |