2BizBox® Manual |
Go back to 17.0 Main |
A User is an account used to login to the system. An Admin account is created when you initialize the system, and with the Admin user account, you are able to create other users. For safety consideration, you cannot delete the “Admin” user, and should not forget the admin password, or it will need to be recovered through professional database operation.
Usually, a User is an internal employee of Serva Software LLC. When necessary, temporary users also can be created. In the “User” sub module, you can create user accounts for employees, assign their roles, and monitor user activities flexibly.
2BizBox doesn’t limit User quantity, so you may create users for all employees that need to login to 2BizBox to do their jobs. Since a User is combined with an employee, before adding a user, you must add the employee in the HR Box.
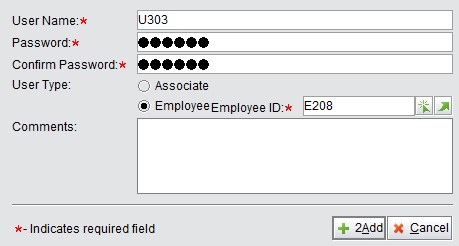
To start adding a User, click the “2Add User” button in the “User” sub module of the Security Box. You need to fill in the following information to create a User:
|
After the required information is filled out, click “2Add” to enter the updating interface of this User. As was mentioned in the introduction, you will need to assign roles to a user according to his/her functional position.
User Name: Created when adding the user.
Expire time: Choose the expiration date of the user account. After this date, this user will not be able to login to the system. You may set the expiration date according to the user’s contract time or actual needs, so as to avoid information leaking and maintain system safety.
Lock this user account: Users can be deleted, but when an account is temporarily paused, it may be locked instead of being deleted. After being locked, the user cannot login to 2BizBox. To unlock the user, open the updating interface to uncheck this option.
Can update closed orders: Please be very cautious when using this option, because it will give this user the permission to update a closed SO/PO/WO… In normal situations, closed orders should not be open and updated, unless very special and irreversibly wrong operations are carried out. This option of the “Admin” user is also unchecked by default.
Company Unit: If you use more than one company unit, select the one this user belongs to.
Employee ID: You may still change the employee ID of the user here. Comment: Fill in any comments pertaining to the user.
After the above information is filled out, you may begin selecting roles for this User. All of the predefined roles will show up below the User’s basic information. If you want to know how to define roles, please read the subsequent “Role” chapter. 2BizBox has provided the main roles, such as “Accounting,” which has the most basic accounting permissions; “Accounting Cashier” has full permissions in AP/AR Cashier and “Accounting Manager” has the complete accounting permissions, as well as permissions in many other modules.
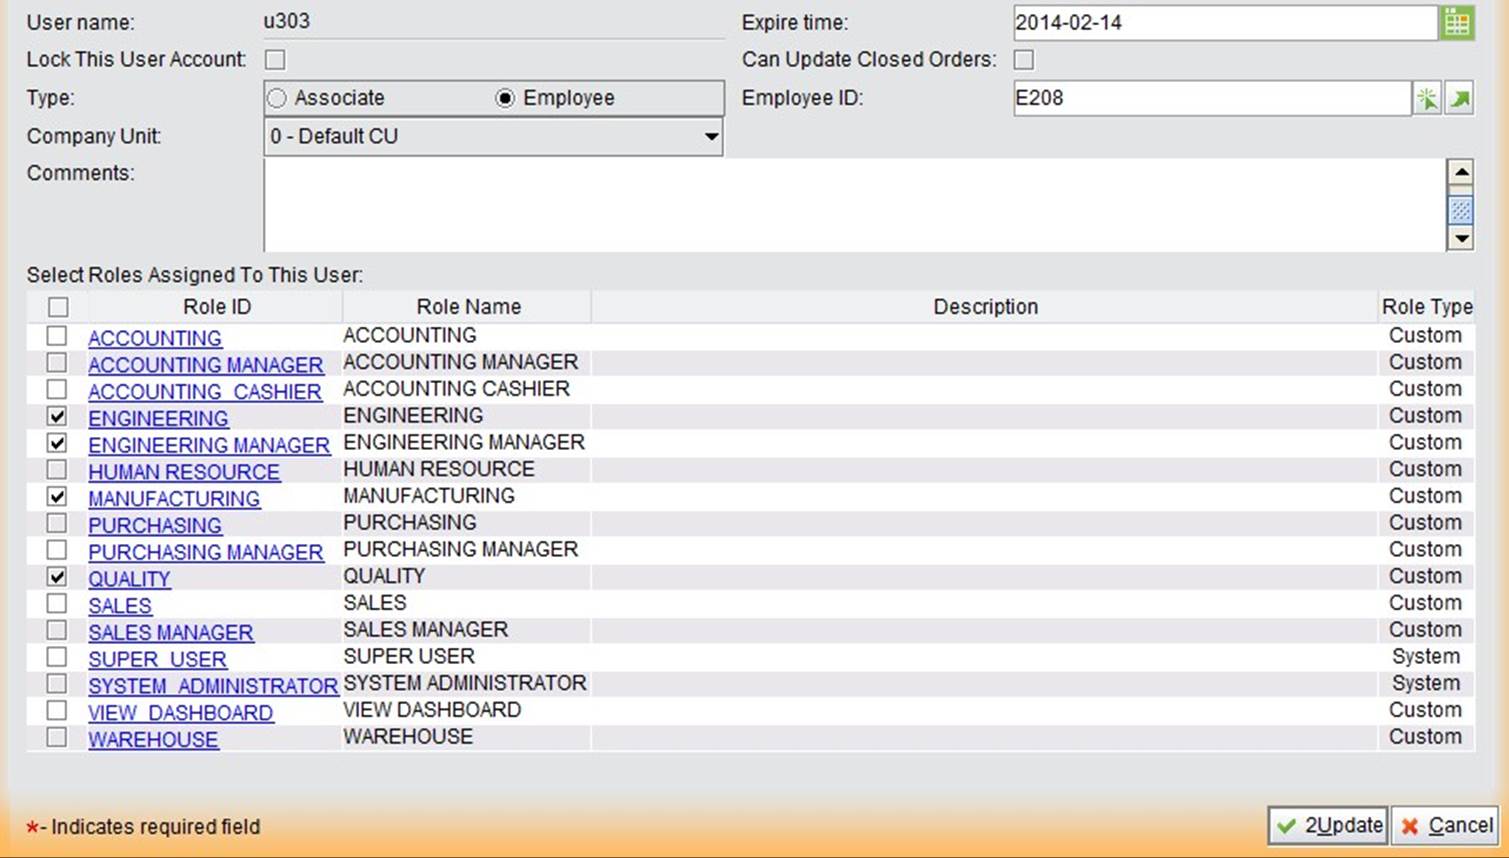 |
Check the boxes of the roles you wish to assign to the user, then click “2Update” to submit these decisions. You will now return to the User Property interface, in which you can see the User’s basic information, all Roles and
Permission. At the bottom, you can reset the password for that user as long as you have the permission “UPDATE_PASSWORD_POLICY.”
If a user forgets his/her password, it can be reset by clicking “Reset Password” at the bottom of the screen.
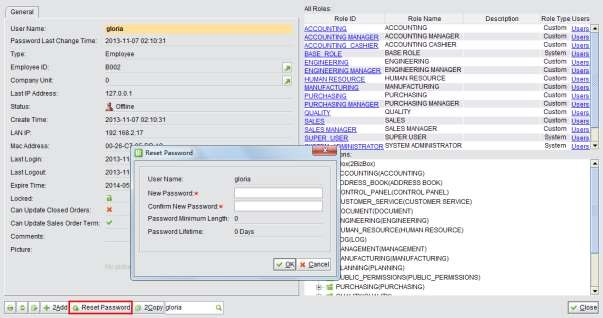 |
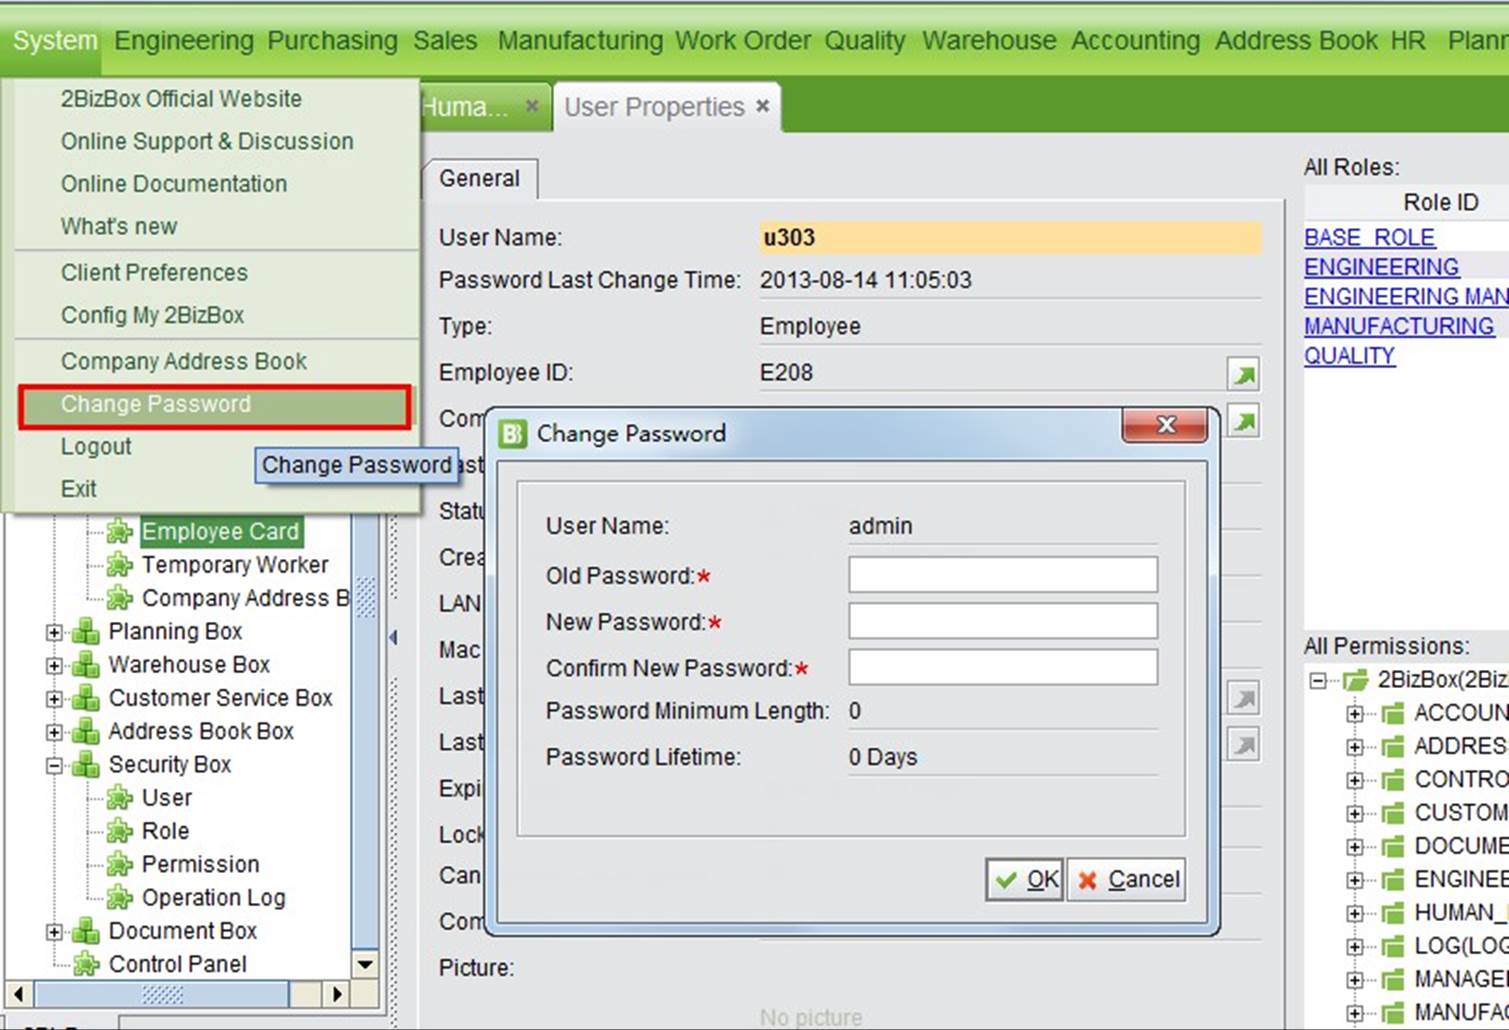
Every 2BizBox User can use the password management function to keep and change their password. After the User logs in, clicking “Change Password” will open the changing window. Here you can fill in the Old Password and New Password to reset it. “Password minimum length” refers to the shortest length of the password allowed by the system; “Password lifetime” refers to the days after which the password must be changed from the first day the user logs in. These settings are required to improve the security of the system. You can set them in “Control Panel - General Settings - Security Policy.”
 |
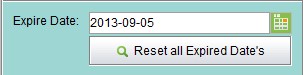
This function allows you to reset all users’ expiration dates to a certain date at one time. Select a date from the calendar, and then click the “Reset All Expired Date’s” button to execute the operation. Be cautious when using this function if you have special expiration time requirements for some users.
 |
Several methods have been provided in 2BizBox to look up, search for and supervise user(s) conveniently.
Click the “All Users” button to see the information of all users in the system, including those who are online, offline and inactivated. In the search results interface, click a “User Name” to open the User Property interface. Click “2Add” to add a user. When a user is selected, you may click “edit” or “delete” to edit or delete the user.
Click the button “All Online Users” to see all online users in the system, including the User’s expiration date, login time and total online time since his/her login.
Use the search box at the top right to search for online users by their user name. Click the “Chart” button to display an online user chart.
Fill in the keyword of a username to search for related users.
Fill in the keyword of an Employee ID to search for related users.
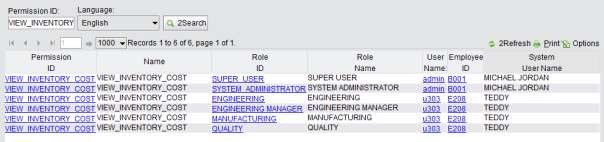
Insert a permission ID to search for users with the specified permission. For example, insert the permission “VIEW_INVENTORY_COST” to view all users with the permission to see the warehouse cost.
 |