
2BizBox® Manual |
Go back to 16.0 Main |
In the “Customer” tab of the “Customer & Vendor” sub module, you can define customer types, add, view and search for customer address books. Also, you can initiate those C/V Addresses to a specific address type.
Click “2Add Customer” under the “Customer” tab to start adding a customer. A self-defined Customer ID and customer name are required to. The customer ID will not be changeable, so you need to determine a numbering rule before adding or importing the Customer Addresses. Customer Names can be updated afterwards.
 |
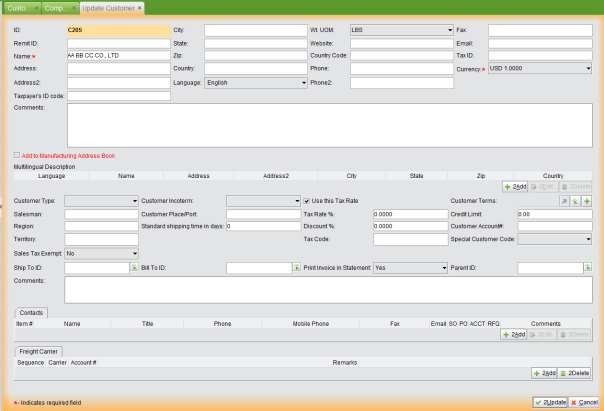
Then click “2Add” to establish the Customer Address Book, and enter the Update Customer interface. After you have filled in all the details, click “Add” to enter the interface to update the information, in which basic address information, description in languages, customer information, contacts, ship, etc. can be edited.
 |
 |
The parameters of the “Basic Information of Address” are listed as follows:
Parameter |
Description |
ID |
The customer’s address ID; unable to be changed once it is generated. |
Remit ID |
Specify the remit ID for accounting. |
Name |
The customer’s company name; required. |
Address |
The customer’s specified address, usually the shipping address. |
Address2 |
Address line 2. |
City/State/Country |
The customer’s city, state and country address information. |
Zip |
The customer’s zip code will be utilized for tax calculation. |
Language |
The default language when trading with the customer. |
Weight UOM |
The basic weight unit used when trading with the customer, which can be added in the control panel. |
Website |
The customer’s company website information. |
Country Code |
The customer’s international dialing code. |
Phone/Phone 2/Fax |
Fill in the customer’s contact information. |
Fill in the customer’s main email. |
|
Tax ID |
The customer’s tax code for international trading. |
Currency |
The currency used when trading with the customer, which can be added in the control panel. (Required). |
Comments |
Fill in any relevant comments for the customer. |
Add to Manufacturing Address Book |
If this box is checked, the customer address book entry will be directly copied to a new manufacturing address book when it is submitted. |
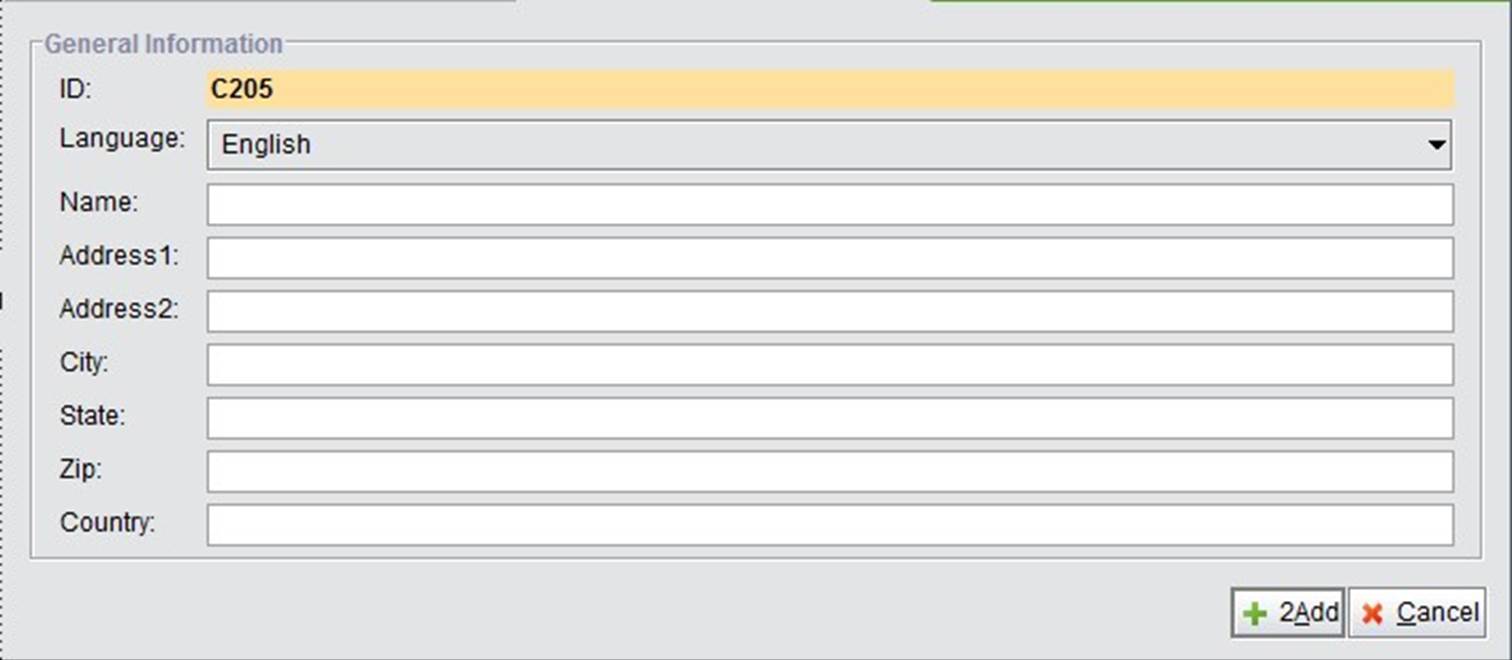
A customer’s information can be shown and printed in multiple languages after adding multiple descriptions to it. Below the general information, you can add, edit and delete these language descriptions. Currently we provide English, Simplified Chinese and Traditional Chinese language descriptions.
Click the button “2Add” to enter the interface of adding language descriptions as shown below. Select the language from the dropdown menu, and then add the customer’s “Name,” “Address,” “City,” “State,” “Zip,” and “Country” information in the target language. Click “2Add” to submit the new language description and return to the Update Customer Interface.
 |
Below the multi-language description, you may update the customer’s advanced information as shown below:
 |
The parameters in the interface of customer information are explained below:
Parameter |
Description |
Customer Type |
The customized type of customer, which, for example, can be classified according to a customer’s territory. You may add and edit customer types under the “Control” tab of the “Customer & Vendor” sub module. |
Salesman |
Fill in the name of the salesman of the customer’s company. |
Region |
Fill in the region the customer company belongs to. |
Territory |
Fill in the territory the customer company belongs to. |
Customer Incoterm |
Select incoterm from the dropdown menu, and add it under the “Control” tab of “Sales Box – Sales Order” sub module. |
Customer Place/Port |
Fill in the customer’s shipping place/port. |
Standard Shipping Time in Days |
Fill in the standard shipping days, to be used in the Sales Order. |
Tax Rate % |
Fill in the tax rate for the customer in the sales business, to be used as the default tax rate in the Sales Order if you check “Use this tax rate” above. If not checked, SO will use the zip code sales tax, or leave the field blank. |
Discount Rate % |
Fill in the Discount Rate for the customer, and it will be used as the default discount rate in the Sales Order, with the prerequisite that the address discount get the priority. |
Tax Code |
Fill in the tax code of the customer. |
Customer Terms |
The payment terms of the customer. This will be used as the default payment term in the Sales Order. |
Credit Limit |
The maximum payment amount due for a customer. Once exceeded, you will receive a warning when creating new sales orders for the customer. |
Customer Account # |
Fill in the Customer’s Account Number. |
Special Customer Code |
Choose a special customer code from the drop-down menu. |
Sales Tax Exempt |
If the customer’s sales tax can be exempt, select “yes” from the dropdown menu and continue to set its Sales Tax #, Expiration Date and Tax Type. |
Ship To ID |
The default “Ship To ID” when adding a Sales Order. |
Bill To ID |
The default “Bill To ID” when adding a Sales Order. |
Print Invoice in Statement |
Set whether to print the invoice in the customer statement. |
Parent ID |
If the customer address ID belongs to another company, you can set it here. |
Comment |
Fill in any other comments relevant to the customer. |
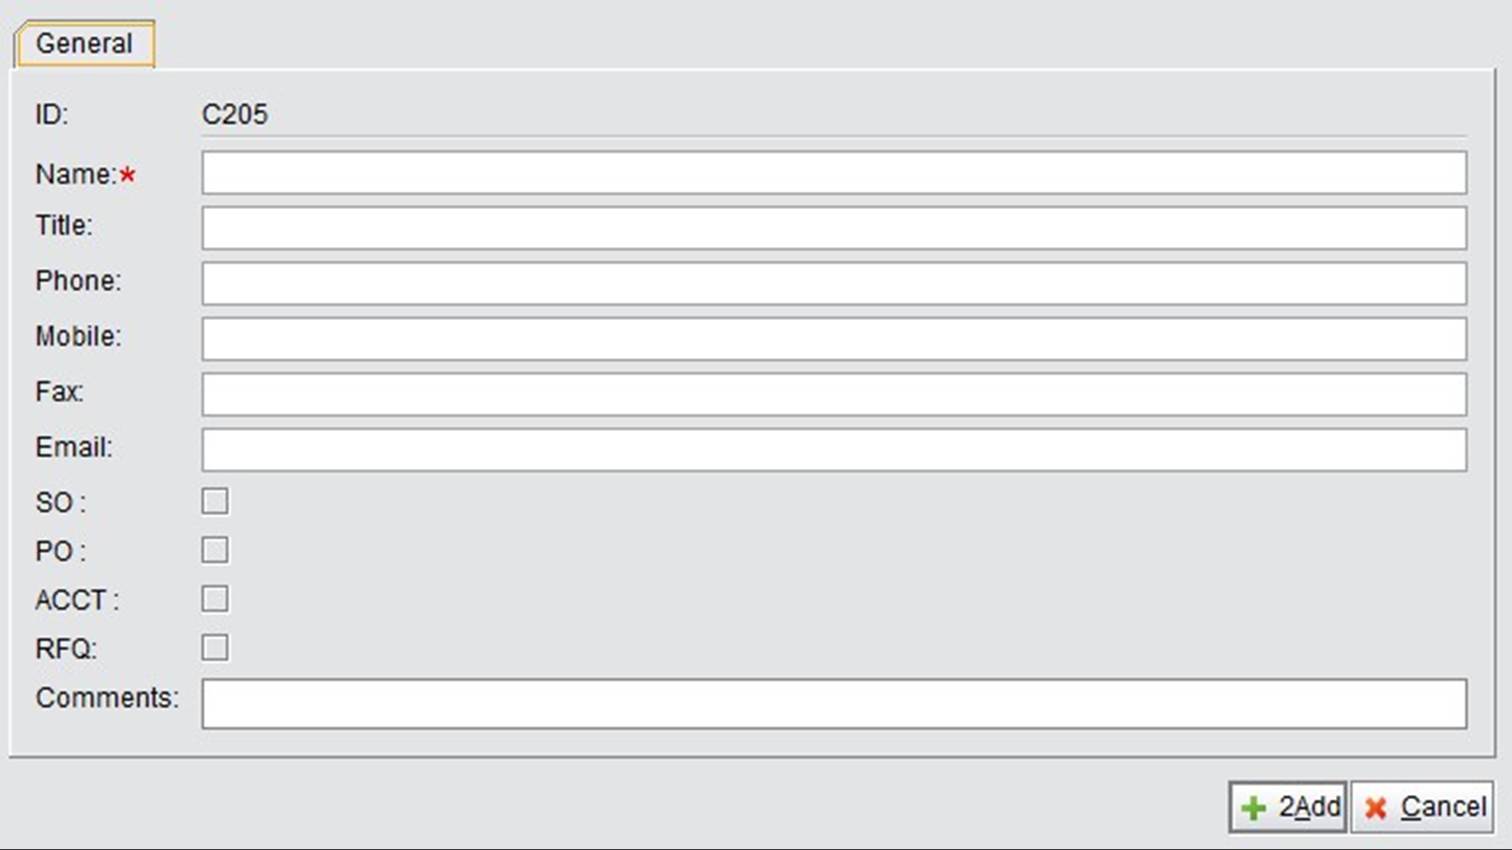
If there is another contact person in the customer company, you might add their information here, including the contact’s name, title, phone number and email.
 |
Click the “Add” button to enter the interface in which contacts can be added. The information you need to add is shown in the image below.
 |
Freight Carriers added here will show up in the customer’s SO Update interface. You can directly fill in the freight carrier’s Sequence #, Carrier Name, Account# and remarks in the red textbox. Click “2Add” to add a new line.
 |
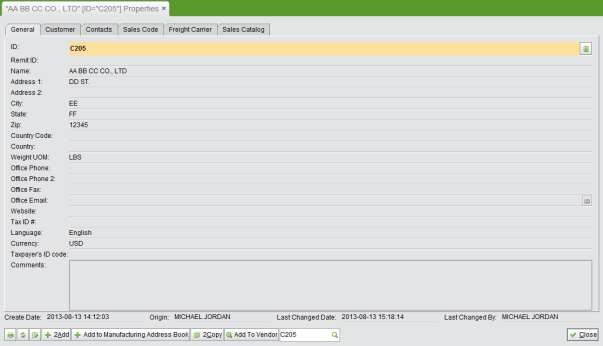
After filling out all the required information, click the “Update” button in the bottom right corner. You will be guided to the Customer Address Properties Page as shown below. You may click the tabs to view the different customer information pages.
 |
At the bottom of the Customer Properties, you may:
Now we will introduce the other five tabs of Customer Properties.
By clicking the “Customer” tab, you will see the customer’s advanced information. Except those added when updating, statistics of “Invoice Total,” “Past Due” and “The Last 12 Months sales” are also shown here.
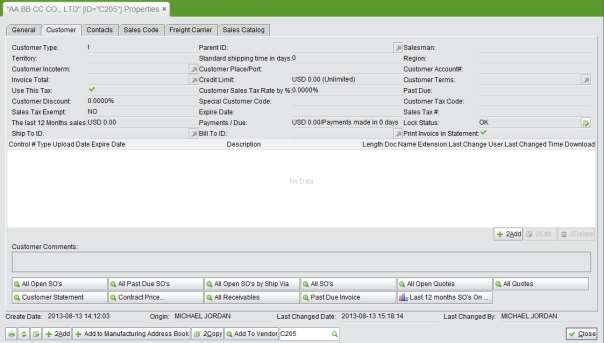 |
Below the customer’s advanced information, you can upload documents pertaining to the customer, such as the customer’s company file and agreement. Click the “2Add” button to open the adding window. If you haven’t set the uploading path for the customer document, you will be required to do so after selecting the file.
Below the document box, many report short cuts are provided for you to look up the customer’s sales order report.
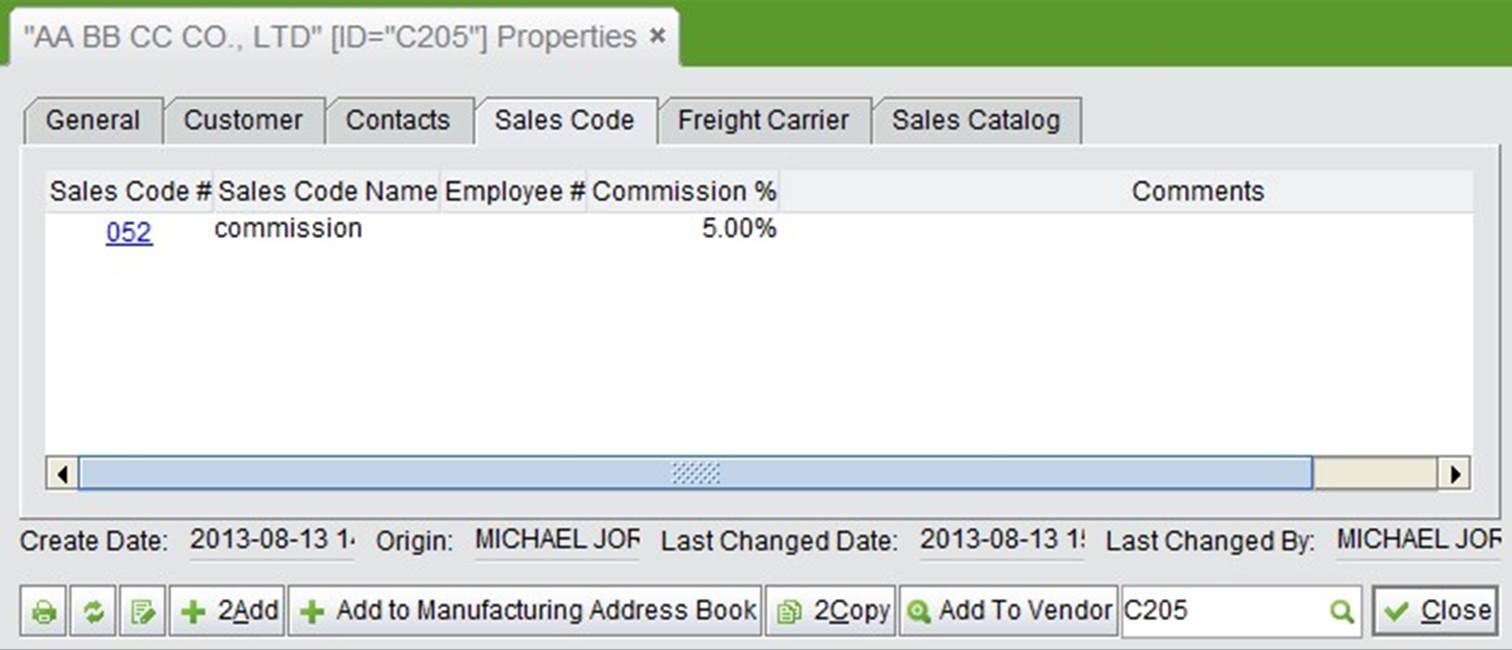
If the customer is a distributor, you can see his commission rate under the tab “Sales Code.” It can be added under “Sales Box-Sales Order.”
 |
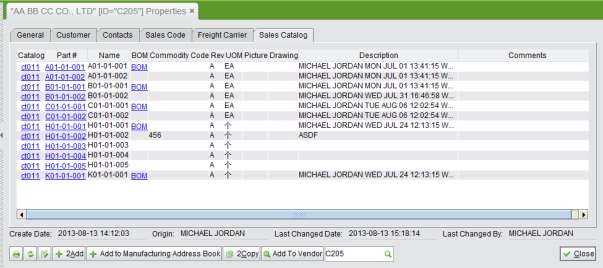
Under the “Sales Catalog” tab, the customer’s sales catalog is shown, which is added for CG Users. Please refer to the corresponding section in the Sales Box Chapter about how to make a sales catalog for a customer.
 |
Fill in the complete Customer ID to view a customer’s detailed information.
Fill in the keywords of a Customer ID to search flr related customer addresses.
Search for a customer address by the keywords of a customer name and language.
If the customer is exempt from sales tax, you have to set an expiration date of the exemption for the customer.
This function allows you to search customer addresses by the sales tax exemption expiration date.
Use a Customer Address ID, Customer Name and Customer Type to search for related customer addresses.
Click this button to view all customer addresses listed by customer ID in the system.
Fill in the keywords of a “Region” to search for related customers.
When you no longer sell products to a particular customer, you can inactivate the address to avoid misuse. In the customer search result interface, the “Inactive” button lies at the top right side of the screen and will be available after a customer is selected.
 |
If you want to activate that customer, first search for him/her through “Inactive Customers.” At the search result, select the customer and click the button “Activate” at the top right.
 |
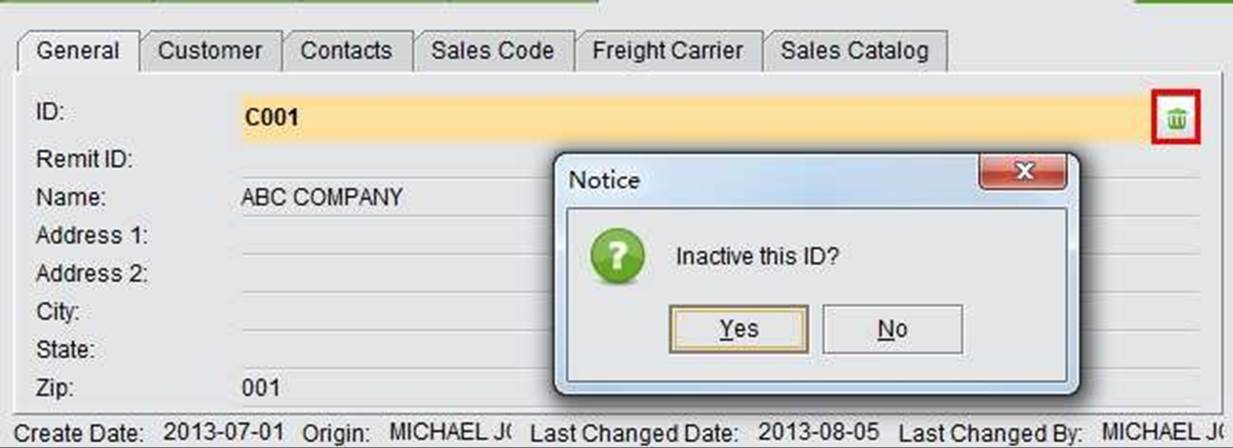
In addition, you can also click the “Inactivate” button beside the customer ID in the customer-property interface to inactivate the customer.
 |
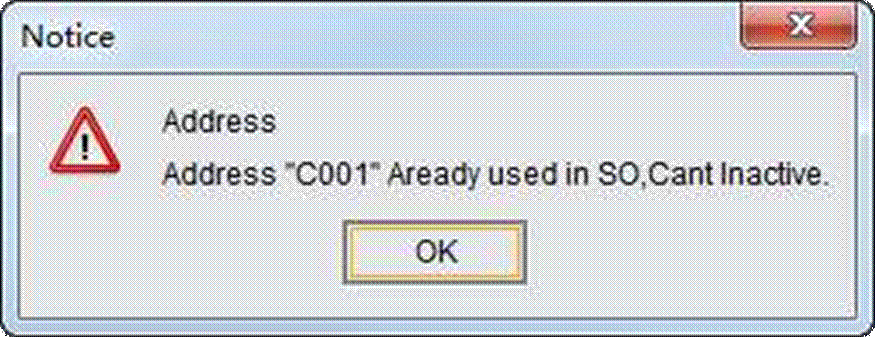
Please note that you cannot inactivate a Customer when the customer is still in use, such as involved in an open SO, AR, RMA, etc.
 |
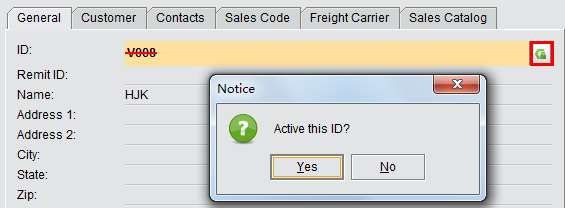
On the properties page of an inactivated customer address, you can click the button “Inactivate” to reactivate it.
 |
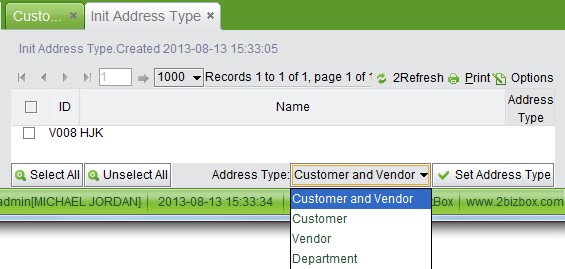
The “Init Address Type” button at the bottom of the “Customer” interface is used to initiate addresses without type. If the addresses are added or imported before separating CV Addresses, you will need this function.
Clicking the button will cause all addresses without address type to be listed in the screen. To assign a new type to an address ID, check the address ID and select an address type at the bottom, then click “SET Address Type” to finish the operation.
 |