2BizBox® Manual |
Go back to 13.0 Main |
For Serva Software LLC, AP Prepay happens occurs in purchasing activities. This chapter will introduce how to create AP Prepay and make payments.
When a Purchase Order is confirmed, the vendor usually requires a down payment. In 2BizBox, you can create an AP Prepay as the payment notice, then make the payment after the money is transferred to the Vendor.
There are several ways to make an AP Prepay.
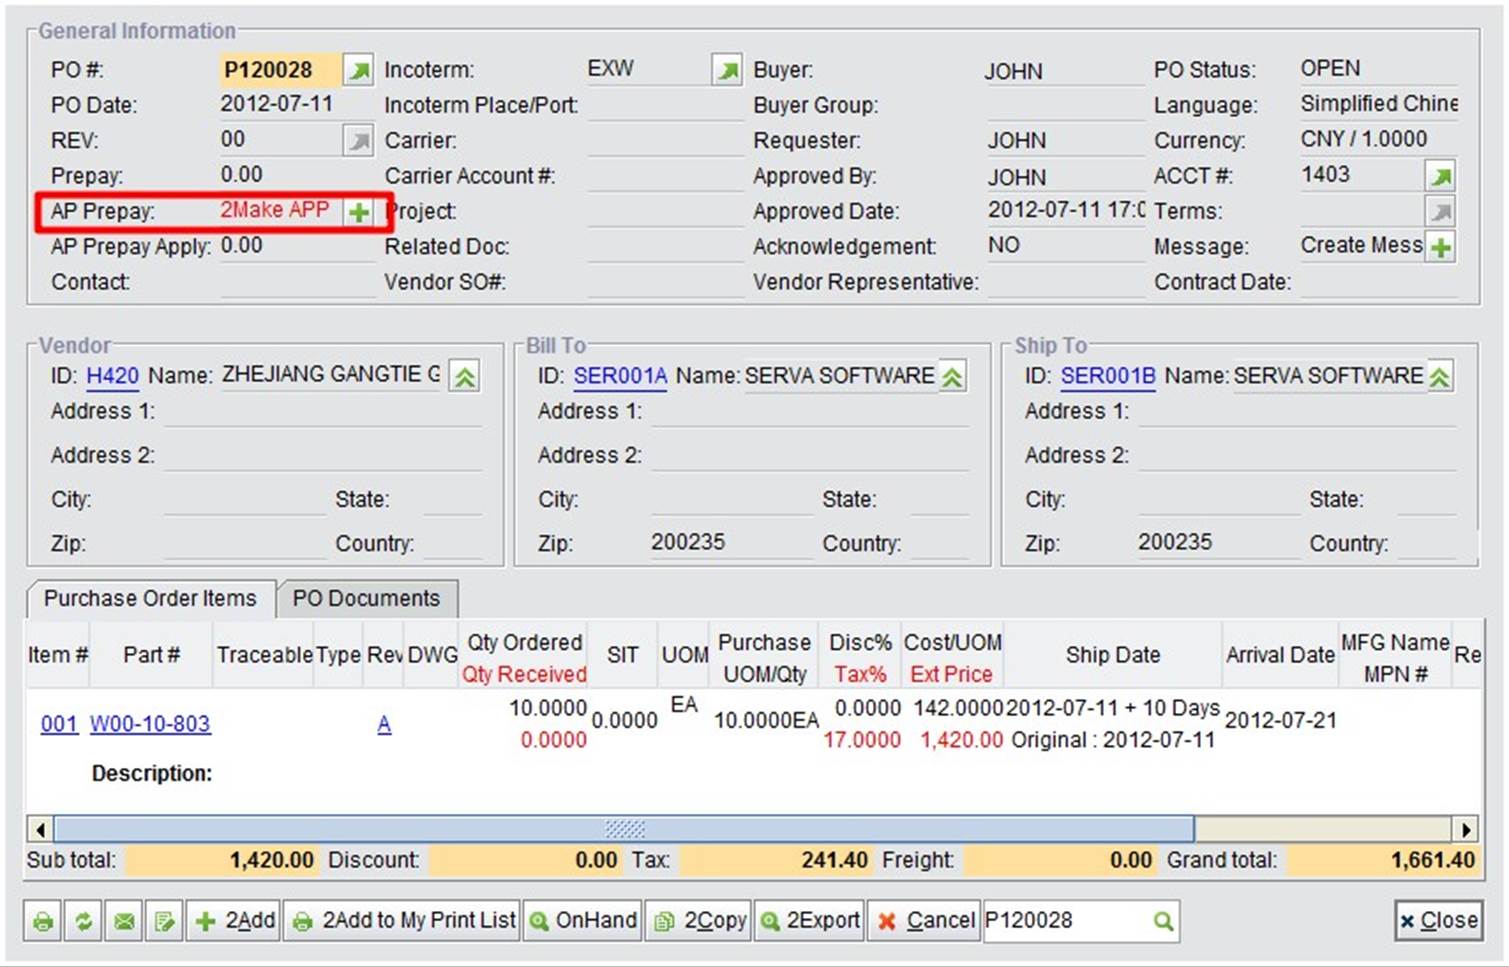
In the PO Property interface, click “2Make APP” to make an APP, and the Update APP interface will open.
 |
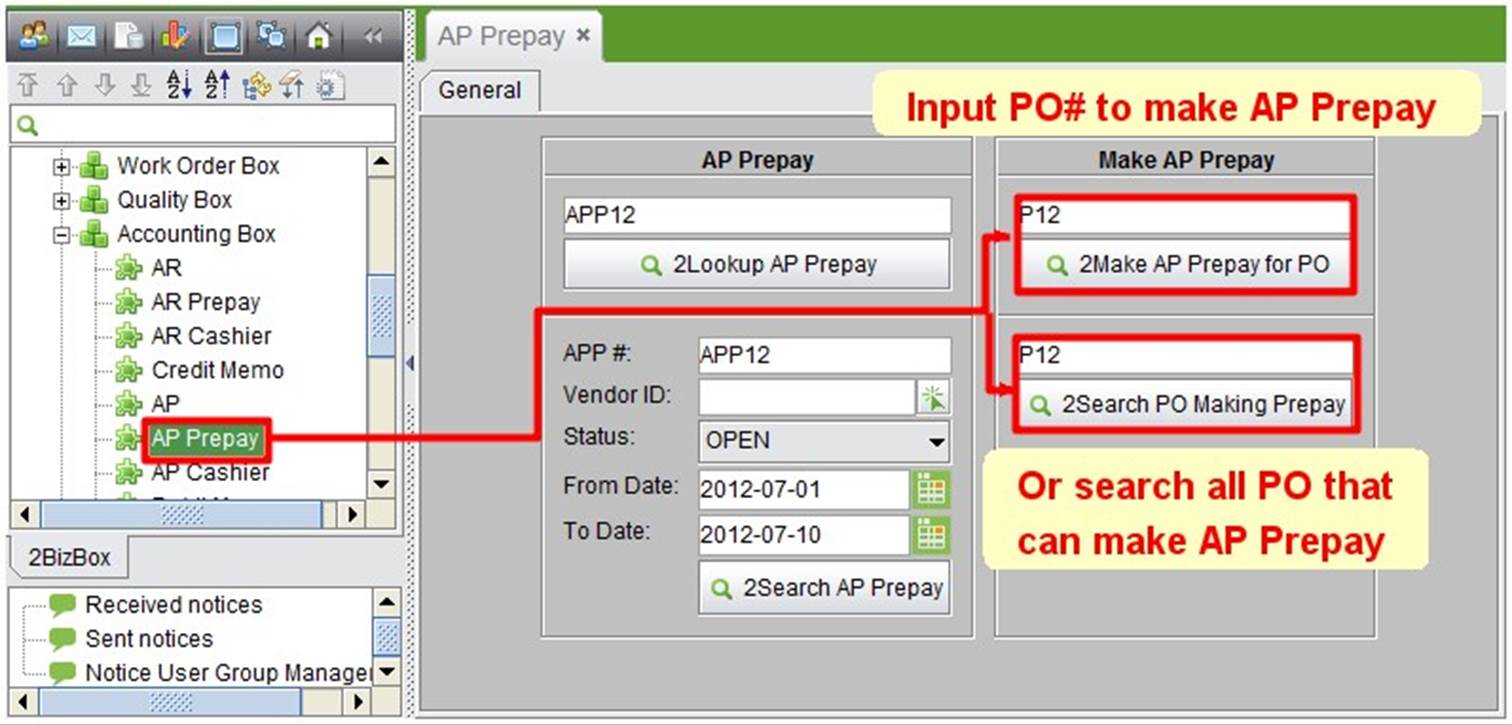
In the “Accounting Box – AP Prepay - General” interface, find a PO by entering its PO# to make an AP Prepay directly, or search for all POs that can make AP Prepay.
See instruction in the following image:
 |
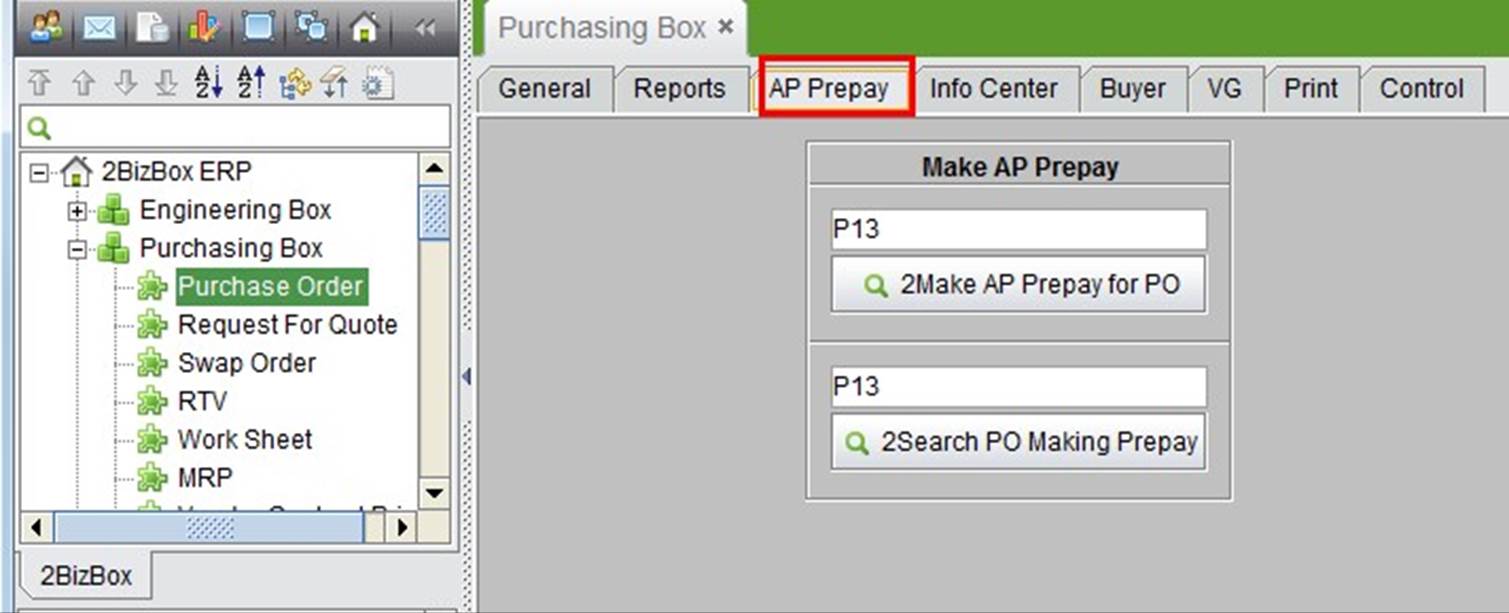
A shortcut of the same function is also provided under the “AP Prepay” tab in “Purchasing Box – Purchasing Order.”
 |
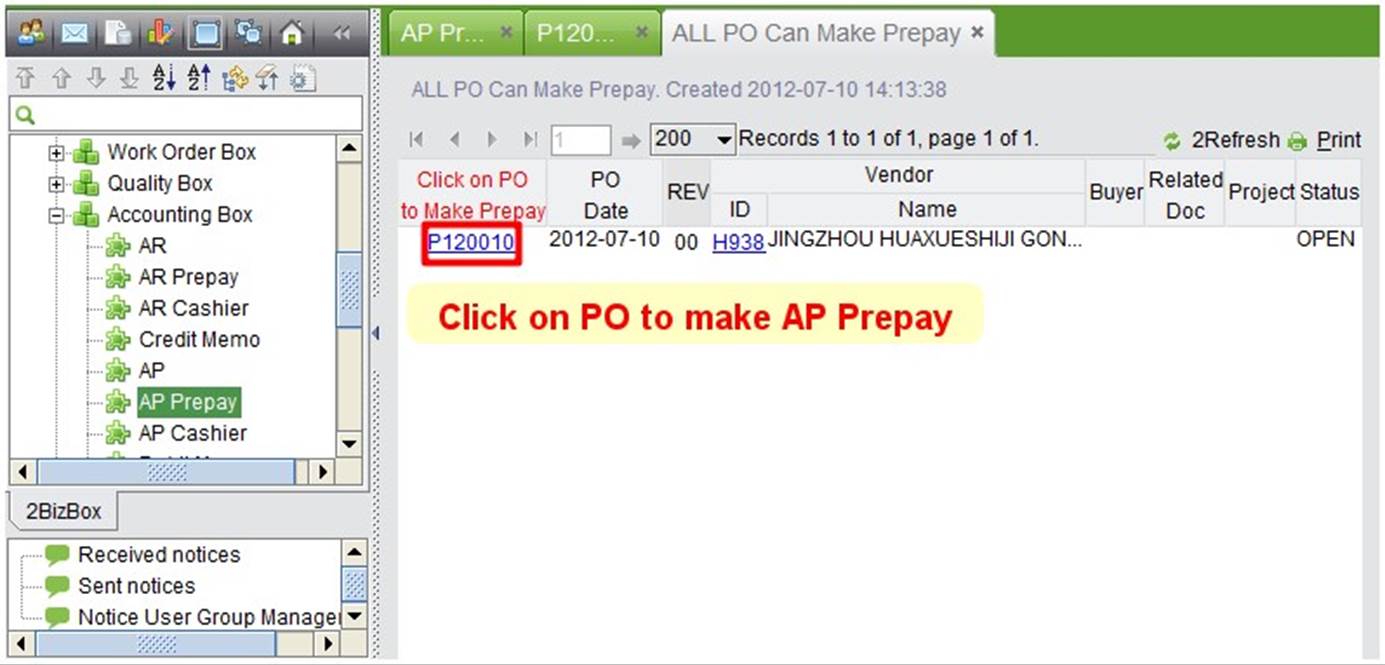
In the search results, click PO# to make the AP Prepay.
 |
With the above-mentioned methods, you can create an AP Prepay and open the Update APP interface as follows:
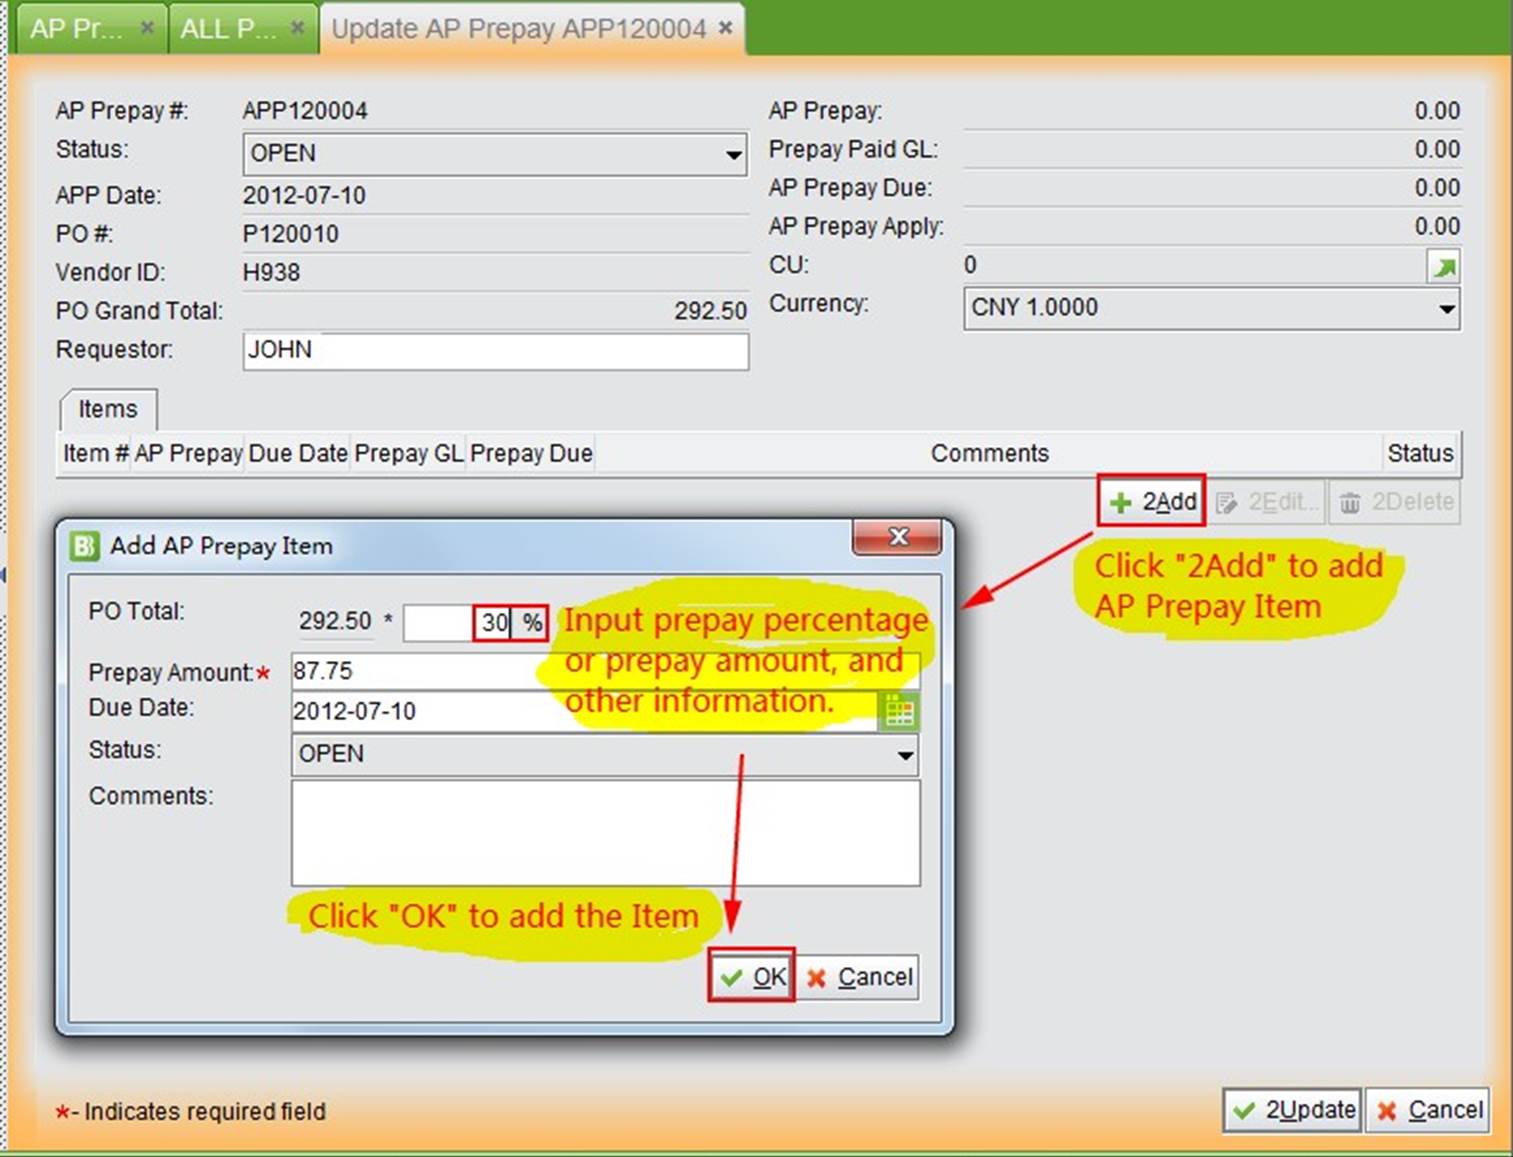 |
Click “2Add” to add an item. In the pop up window, fill in the required information. You can add the prepay amount by percentage of the PO Total, or by any amount you want.
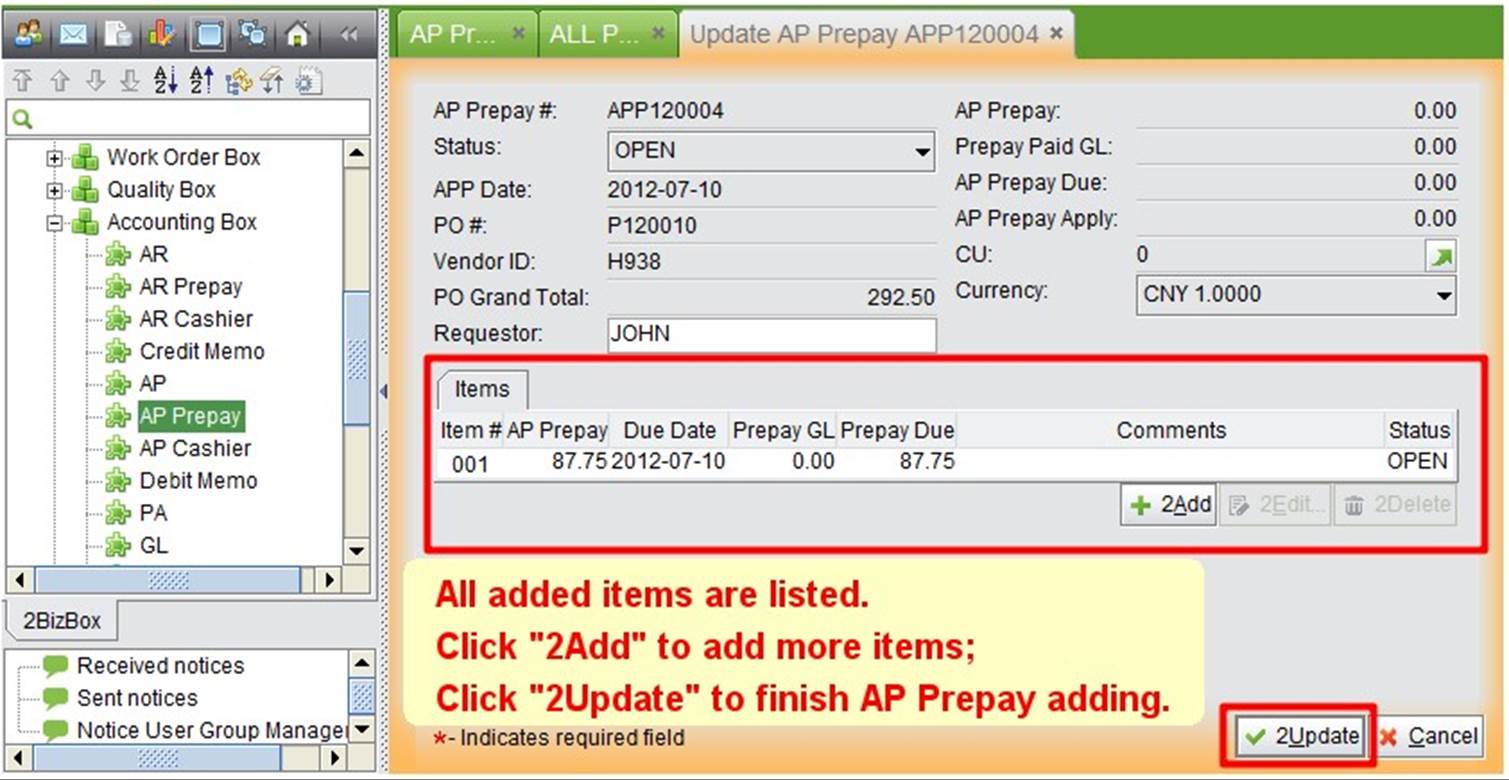 |
Click “2Add” to add more items and click “2Update” to finish adding AP Prepay items. By now, the AP Prepay is finished. We can go to the bank to remit the prepayment.
After prepayment is remitted in the bank, begin to make payment to the AP Prepay in 2BizBox. There are several ways to do this as well.
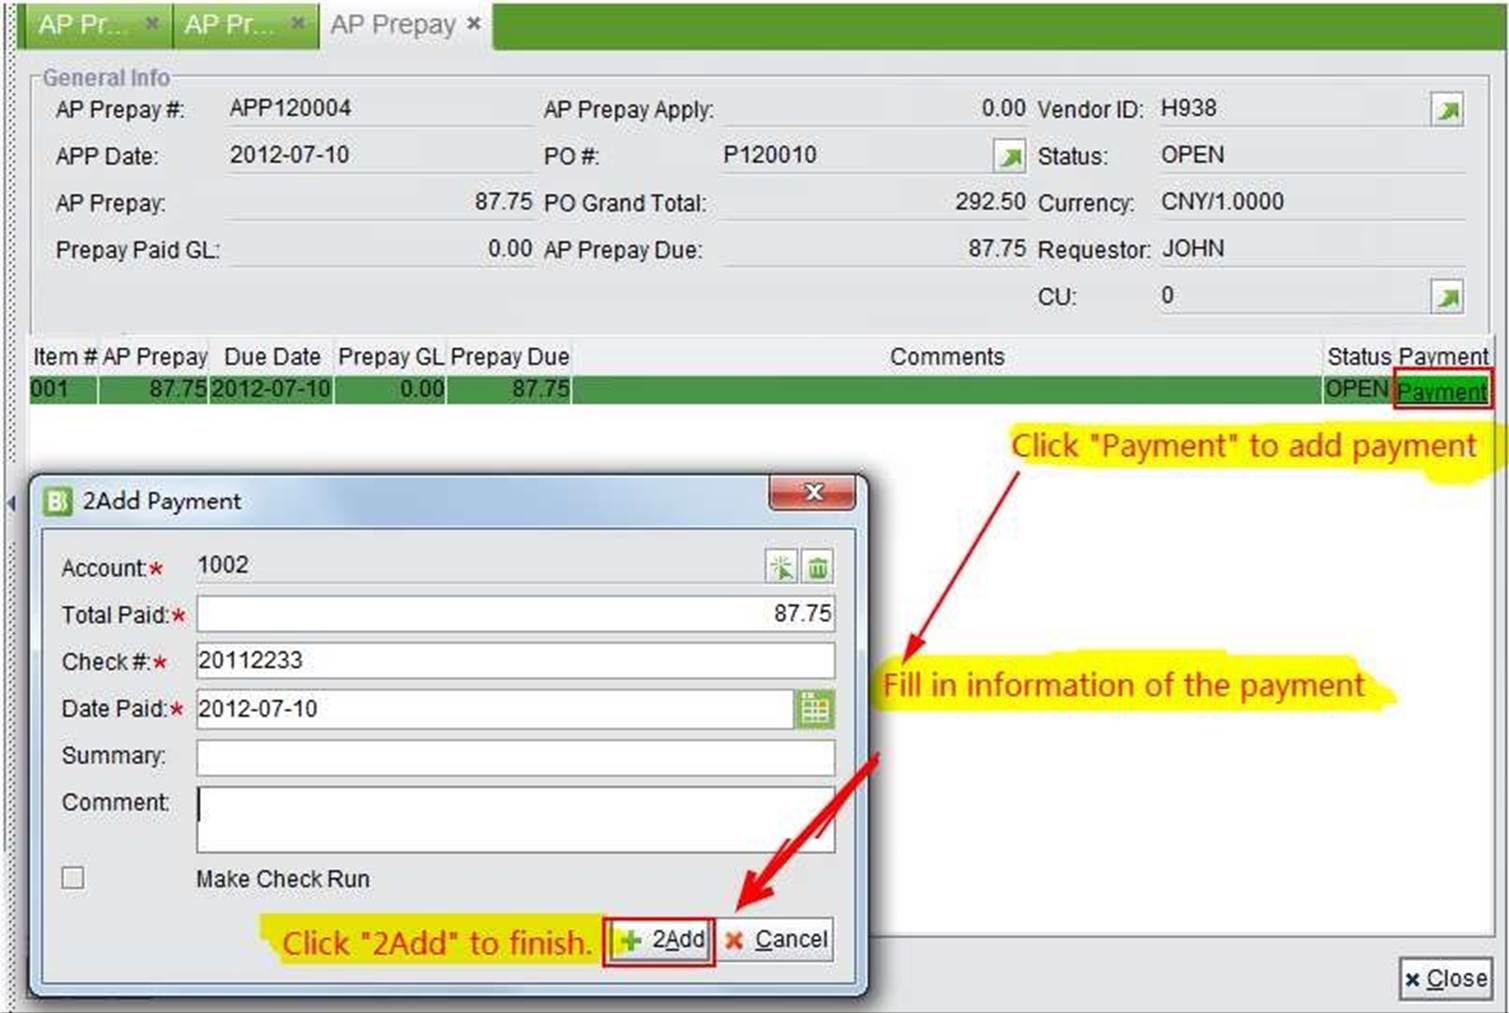
In the APP interface, click “Payment” to add payment. Fill in the information in the popup window and click “2Add” to finish adding the payment.
 |
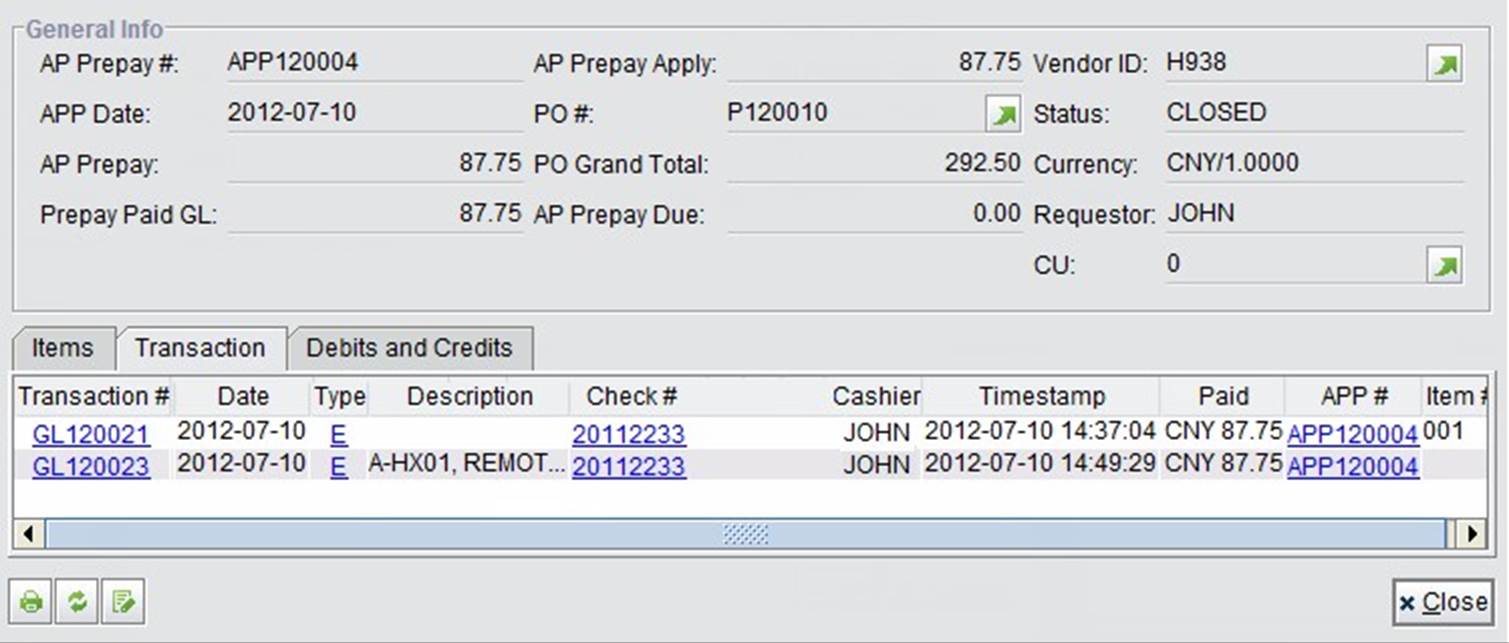
After the prepayment is cleared, the APP will be closed. You can click on the “Transaction” tab to view GL Transactions.
 |
AP Prepayment can be added in the AP Cashier by adding Check Run, Single Check and Wire Transfer. You may process prepayment to vendors flexibly.
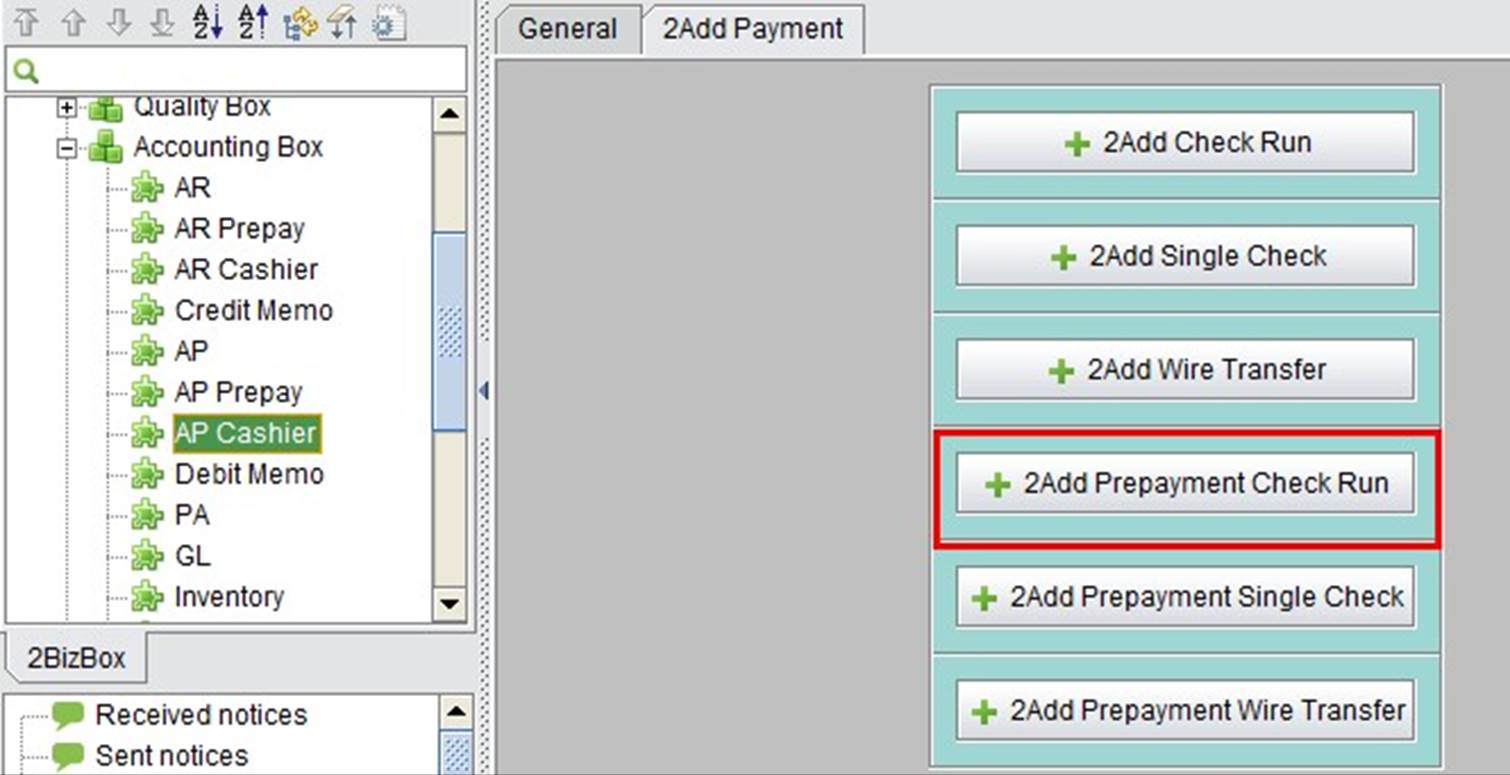
The most common way to make payment is by check to Serva Software LLC. Under the “2Add Payment” tab of “Accounting Box – AP Cashier,” you may click “2Add Prepayment Check Run” to make batch AP Prepayments.
 |
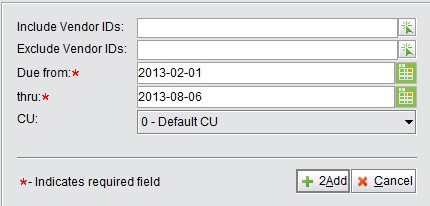
Click the button to start searching for AP Prepays by include/exclude Vendor ID, APP Due Date Range and the Company Unit to which it belongs. Then, click “2Add” to view all APPs that need to make payment within the criteria.
 |
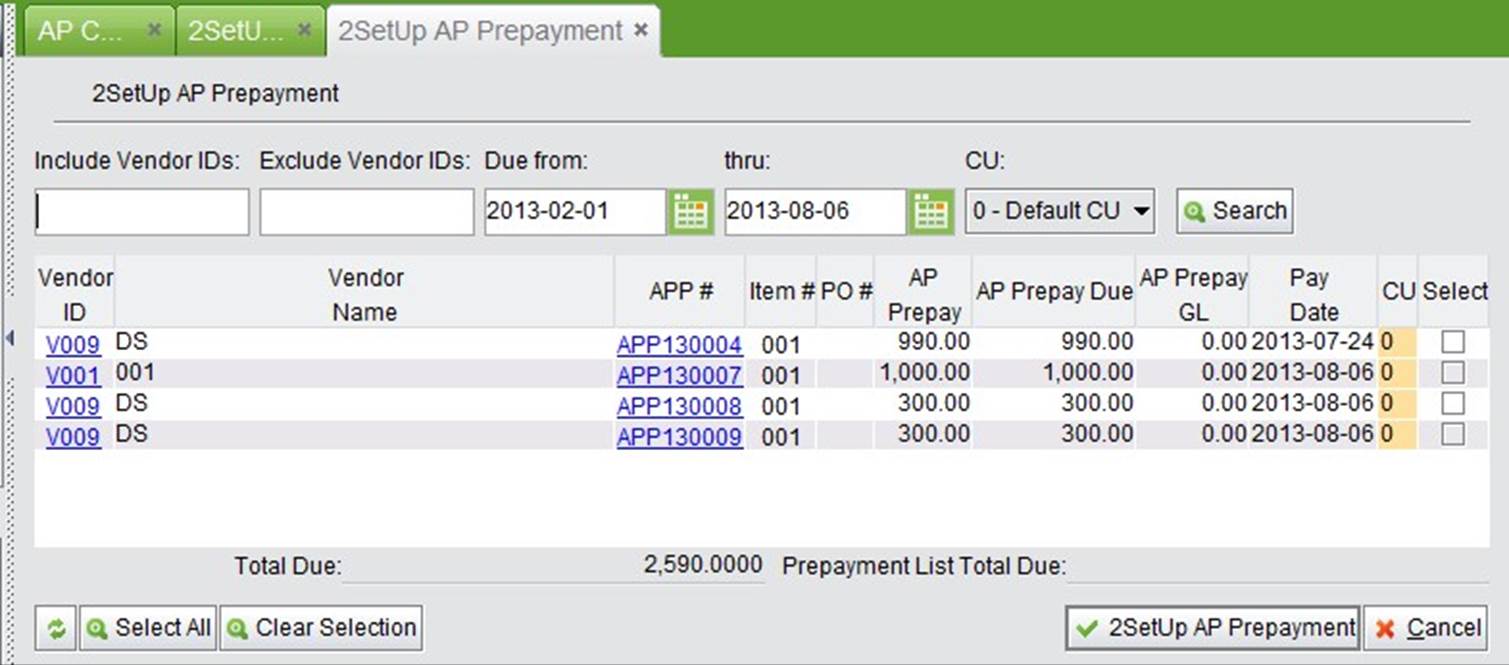
In the next screen, you will see the APP due in the list. Check APPs to which you have made the payment, then click “2SetUp AP Prepayment” to make the Payment Run for the selected APPs. You may select an APP of multiple vendors here, and the system will generate a Check Run for each vendor.
 |
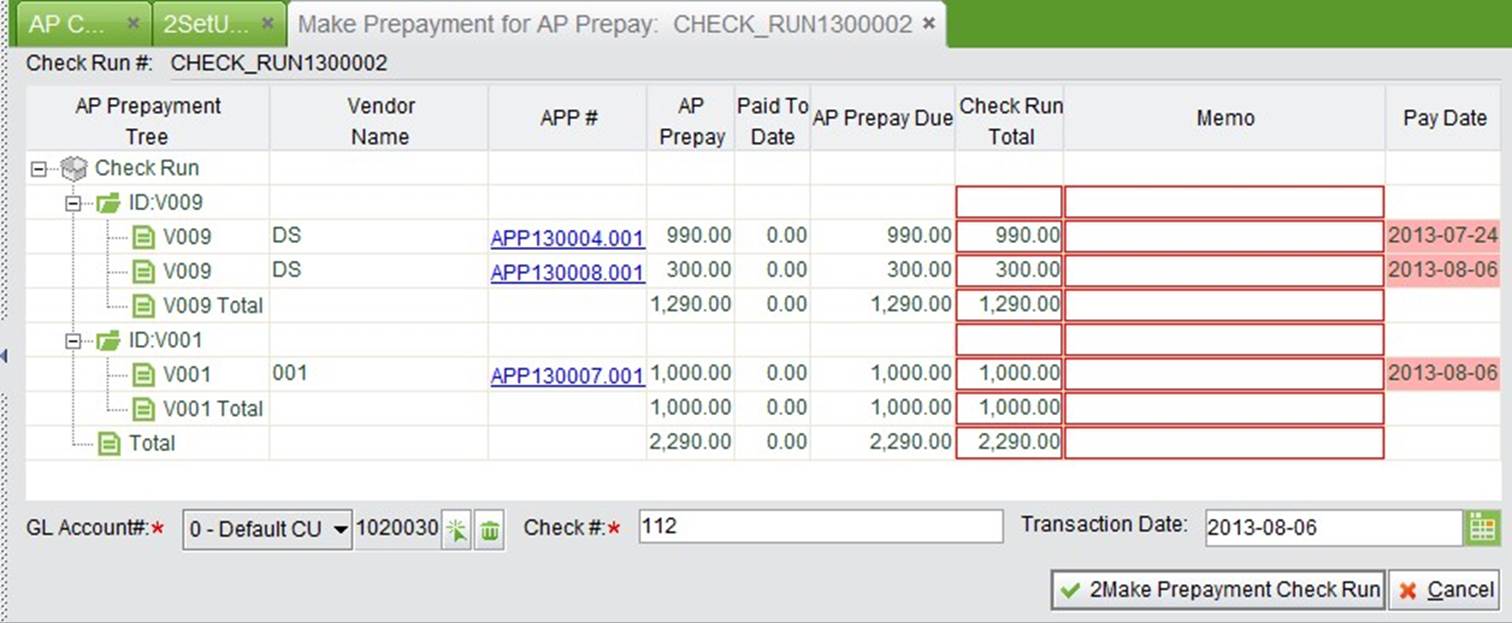
In the next screen, you may edit the selected AP Prepay’s Check Run Total, Pay Date and add a memo if necessary. At the bottom, the Check # is automatically entered if you have set the “Next Check Number” feature in “Company Accounting Settings.”
 |
When all the information is filled out, click “2Make Prepayment Check Run” to finish, and you will be directed to the Check Run Preview interface. You may still come back to the previous page to revise information by clicking “Back” in the bottom left corner. Click “OK” to commit the Check Run.
 |
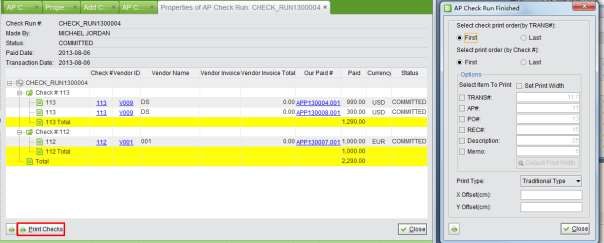
The print check setting window will automatically open after the Check Run is committed. If you do not want to print it right now, you may search for the Check Run later and click “Print Checks” at the bottom left corner to print it.
 |
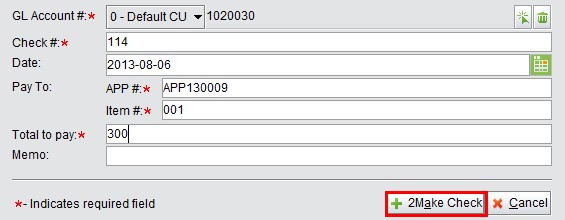
If there is a single prepayment transferred to a vendor, you may add a single check quickly by clicking “2Add Prepayment Single Check” instead of add Check Run. In the adding interface below, fill in the required information and click “2Make Check” to generate the single Check.
 |
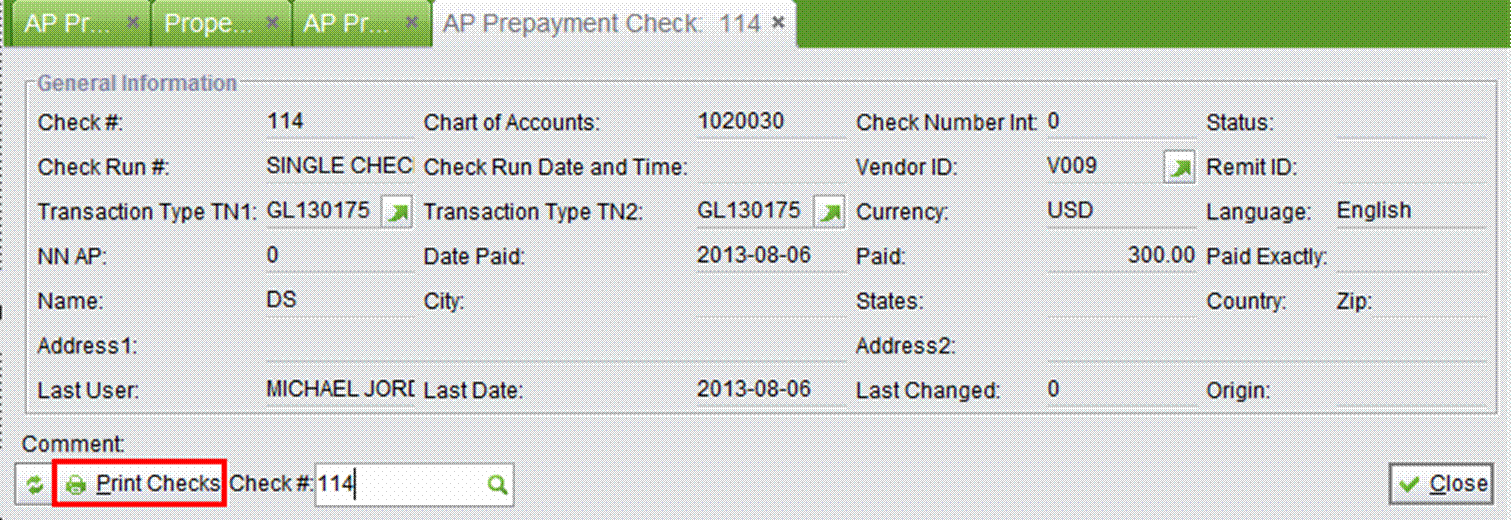
You will be guided to the Check properties as below. Click “Print Checks” at the bottom left corner to print the Check.
 |
If the prepayments are made by wire transfer, you may add these payments by clicking “2Add Prepayment Wire Transfer” in the AP Cashier sub module.
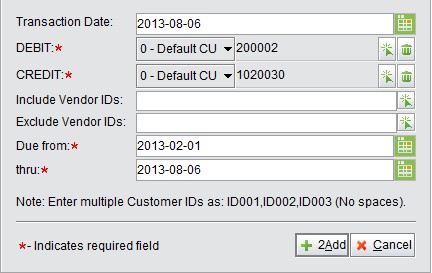
In the adding interface below, fill in the required information for the wire transfer to search for APPs, then click “2Add” to start setting up the prepayment.
You can use “Include/Exclude ID” to filter Vendor IDs, and the entry can be multiple IDs separated by commas.
 |
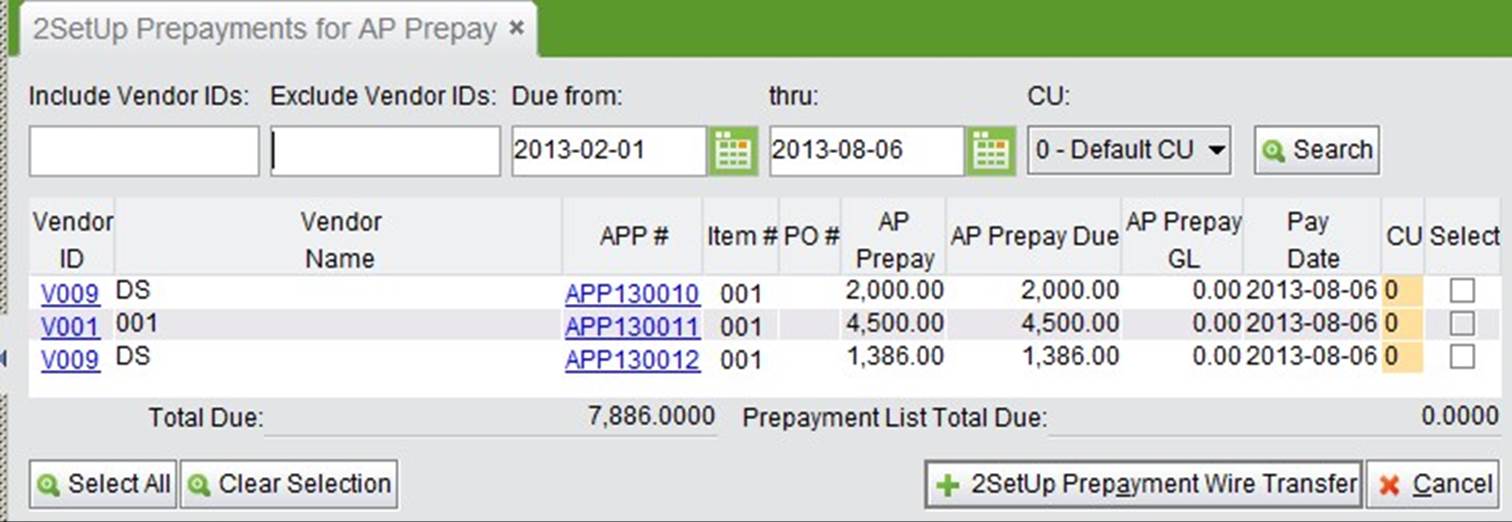
Check the APPs you have paid in the search results, then click “2SetUp Prepayment Wire Transfer” to go to the next step. You may check APPs of different vendors here, and the system will generate Wire Transfers for each vendor separately.
 |
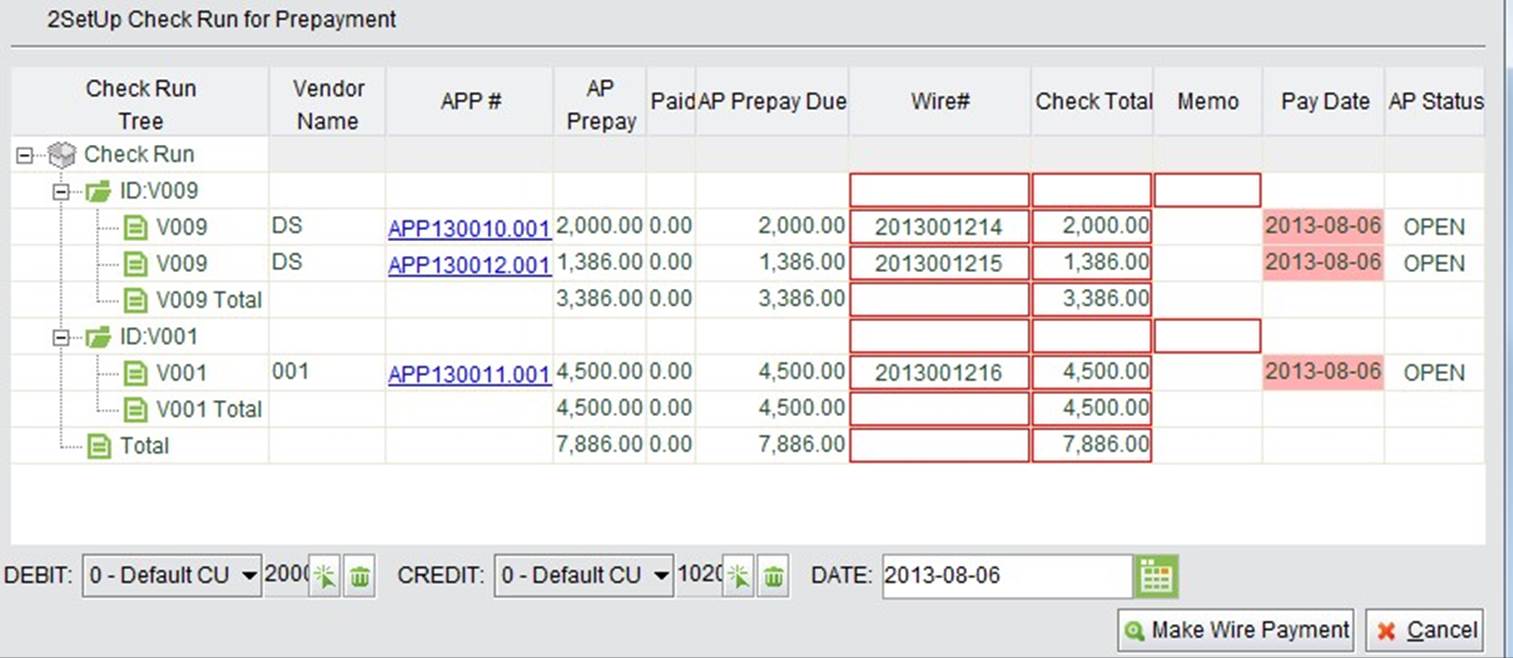
In the next screen, fill in the Wire# for each payment, then click “Make Wire Payment” to preview the payments.
 |
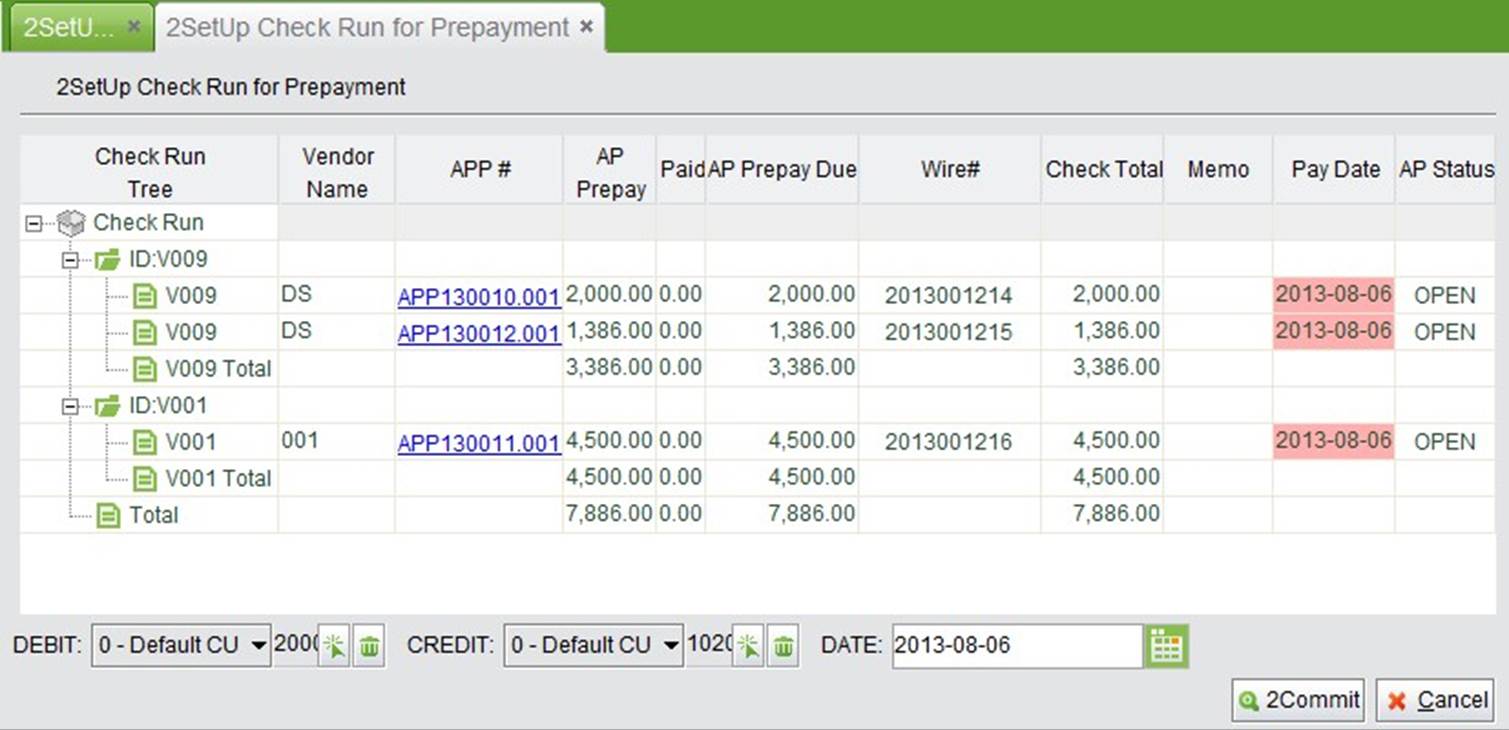
This is the last chance you have to make changes to the payments added. Click “Cancel” to return to the Setup screen, and click “2Commit” to commit and print the Wire Transfer.
 |
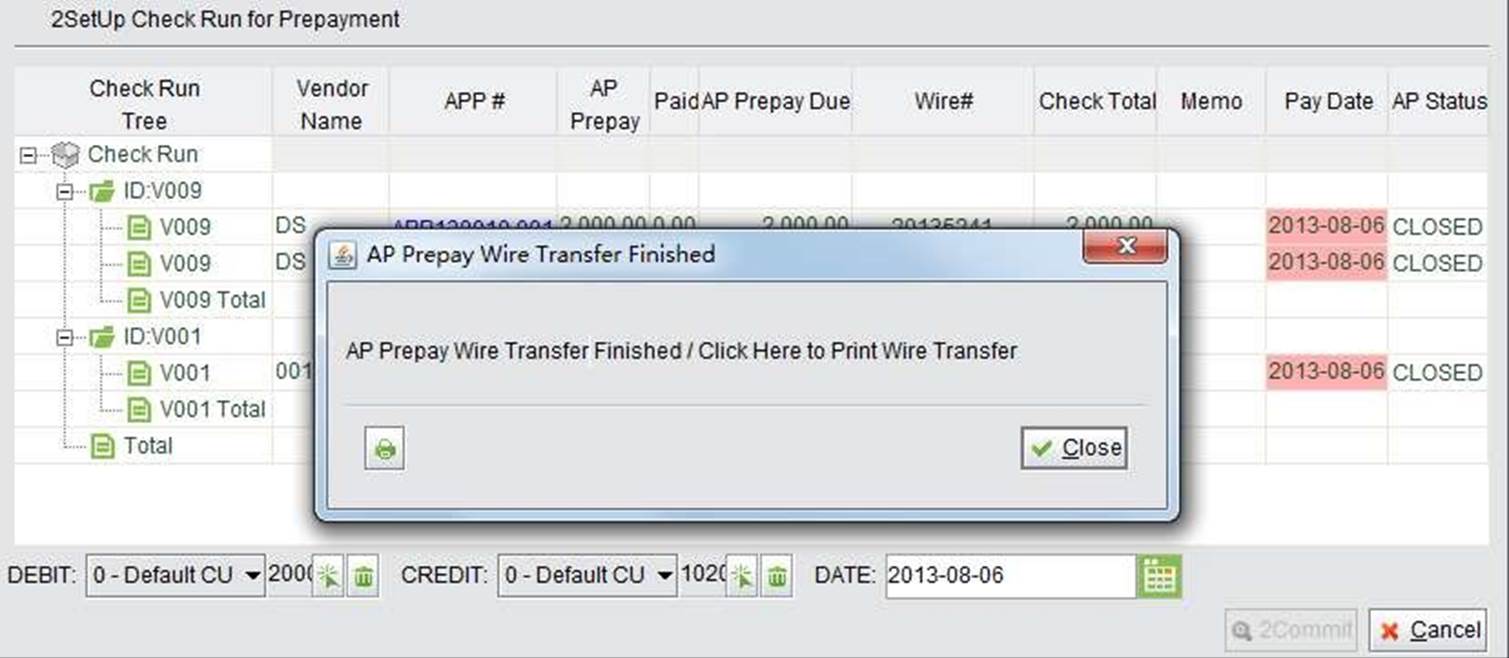
To print the Wire Transfer, click the “Print” button on the pop up window.
 |
Under the “General” tab of “Accounting Box –AP Prepay” the basic lookup and search function for AP Prepay are provided.
This is the basic lookup function. Fill in the complete APP# and click this button to view the APP.
This is a comprehensive search for AP Prepay. Use APP#, Vendor ID, APP Status and Date Range to search for AP
Prepay. The search results will show APP Total, APP Due, APP GL, APP Apply for each APP and all APPs searched.