2BizBox® Manual |
Go back to 13.0 Main |
Accounts Receivable refers to the money owed to the company by its clients. In most business entities, Accounts Receivable is executed by generating an invoice and either mailing or electronically delivering it to the customer, who, in turn, must pay it within an established timeframe.
In the AR sub module of the Accounting Box, users may process AR related activities including, but not limited to: creating and sending bills, receiving and processing payments, tracking both what money is on hand and what is still due, and making AR reports.
Depending on the circumstances of the business, Accounts Receivable can be created either from Shippers, Shipper Items or Customers.
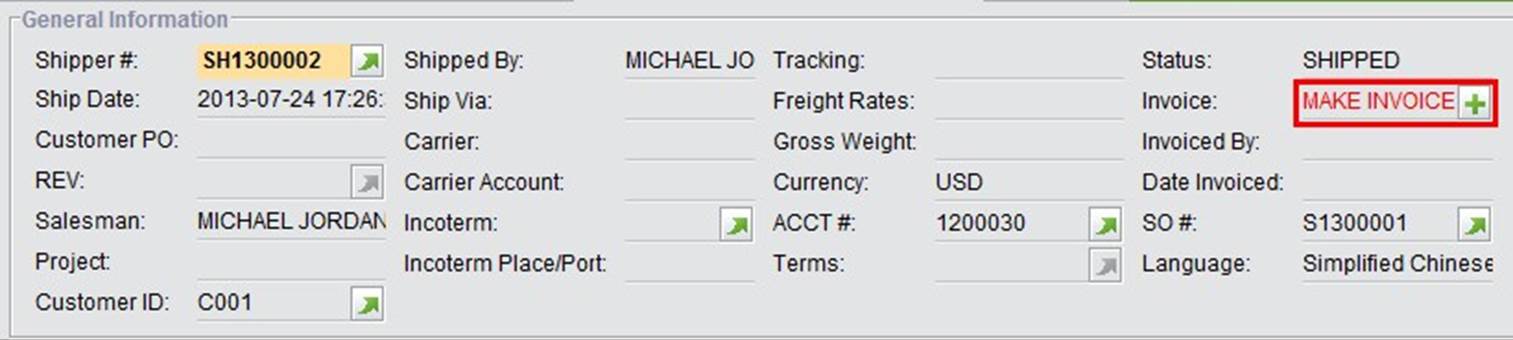
When the SO is shipped, you can make an Invoice in the Shipper Properties and send it directly to the customer with the goods. To create this Invoice, click the “+” button next to “MAKE INVOICE” as shown below:
|
By clicking the “+” button, the “Make Invoice from Shipper” interface will open, in which all items and costs are copied from the Shipper Items.
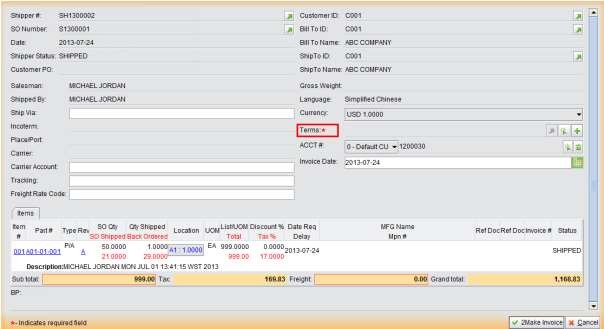 |
In the “2Make Invoice” interface, you cannot edit the items. Terms of payment is a required field here if it was not set in the Sales Order. You can update “Freight,” which will alter the “Sub Total.” Subsequently, click “2Make Invoice” to generate the Invoice. You can update the Invoice items by clicking the “Update” button at the bottom of the screen.
Another way to make an Invoice from a Shipper is to use the function “2Search Shippers without AR” under the “General” tab of “Accounting Box – AR.” Set the search conditions and click “2Search Shipper Without AR” to view the Shippers within the search criteria.
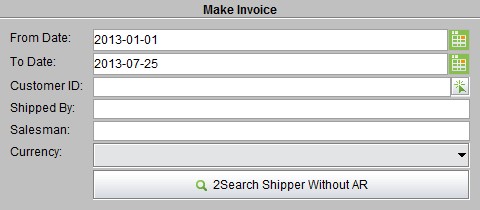 |
In the search results, clicking “Shipper#” will also open the “Make Invoice from Shipper” interface.
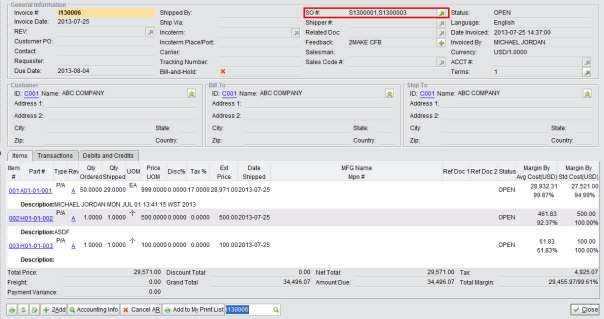
Fill in the required information and click “2Make Invoice” at the bottom right corner to make the Invoice. Below is a screenshot of an Invoice. The status is “OPEN” before the full payment is received from the customer.
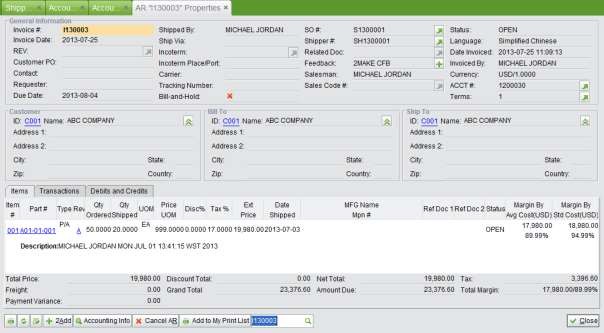 |
On the Invoice Properties, you can:
chapters.
When the warehouse ships out goods, but a formal Invoice is not required, you can make an Unbilled Invoice in order to perform the accounting functions. Two prerequisites of making Unbilled Invoices are:
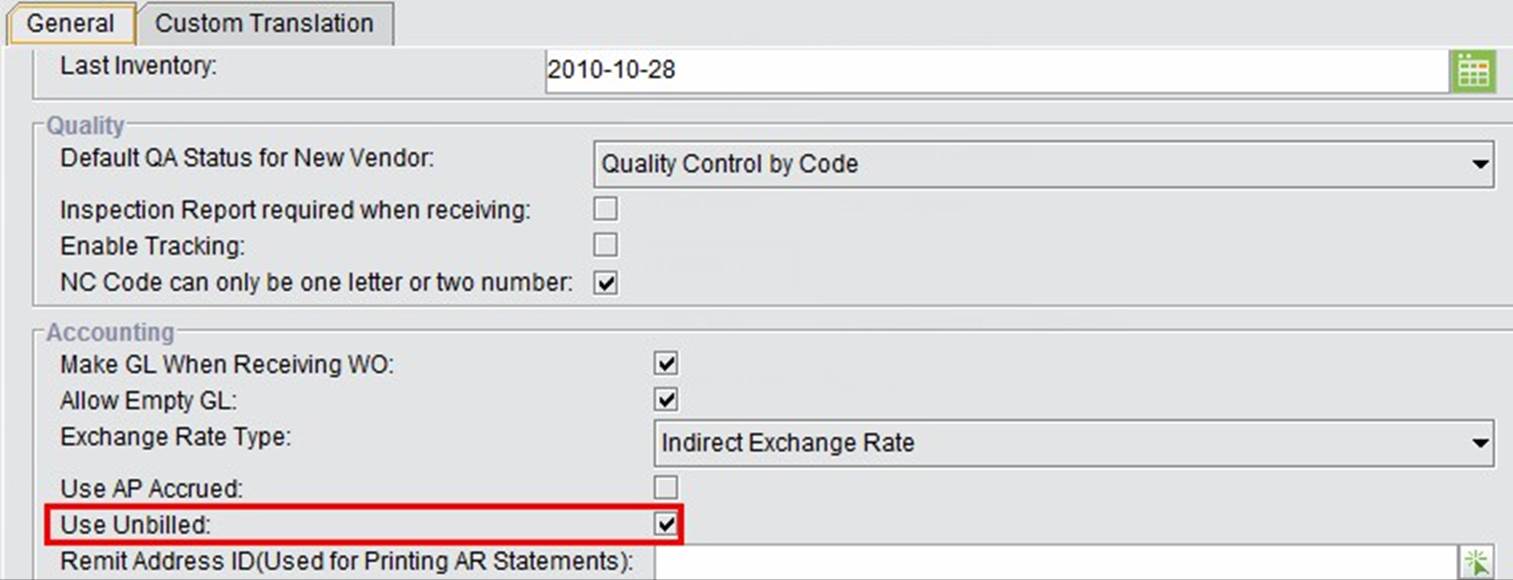
1. Check “Use Unbilled” in the Company Settings in the Control Panel.
 |
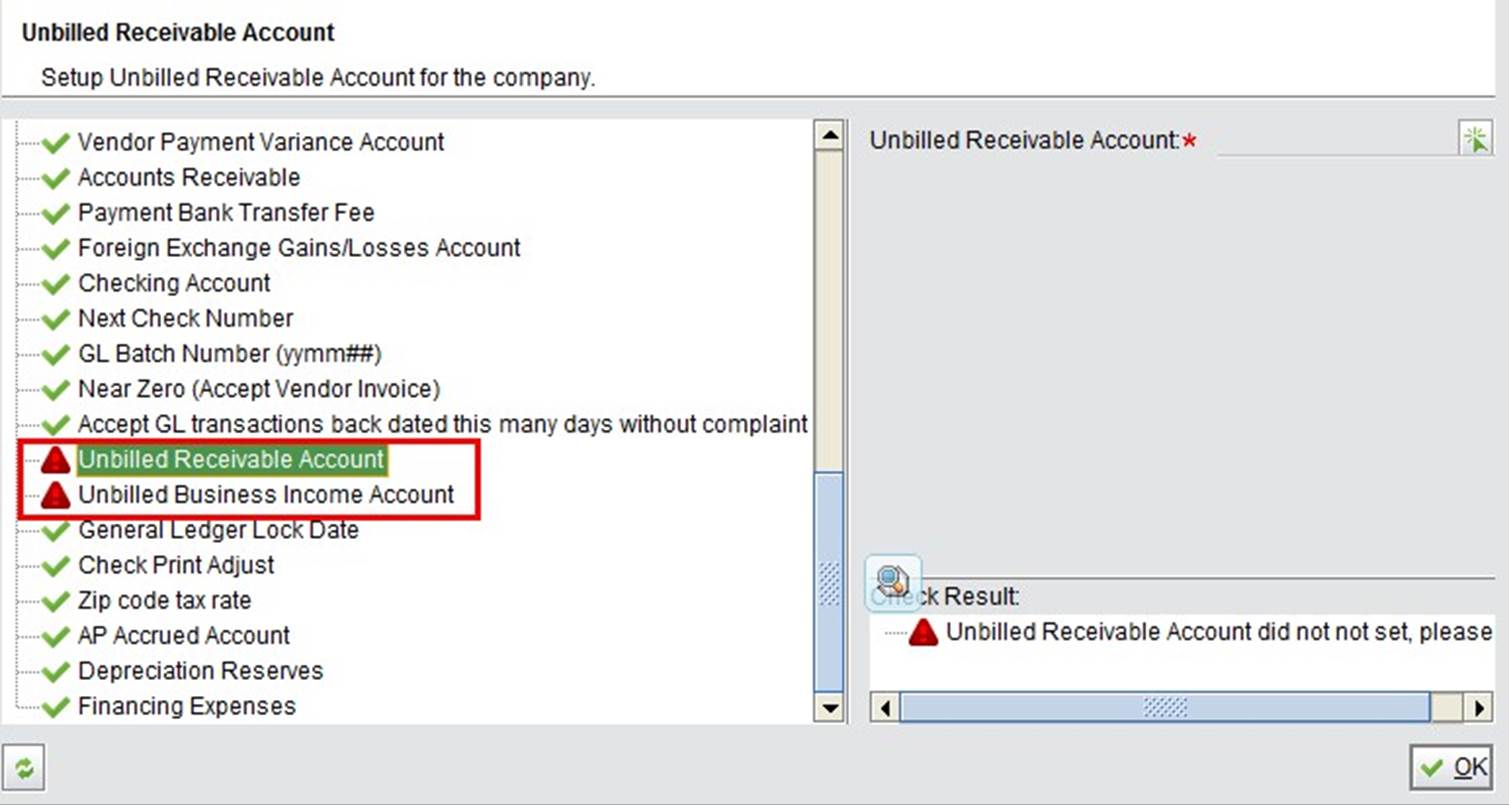
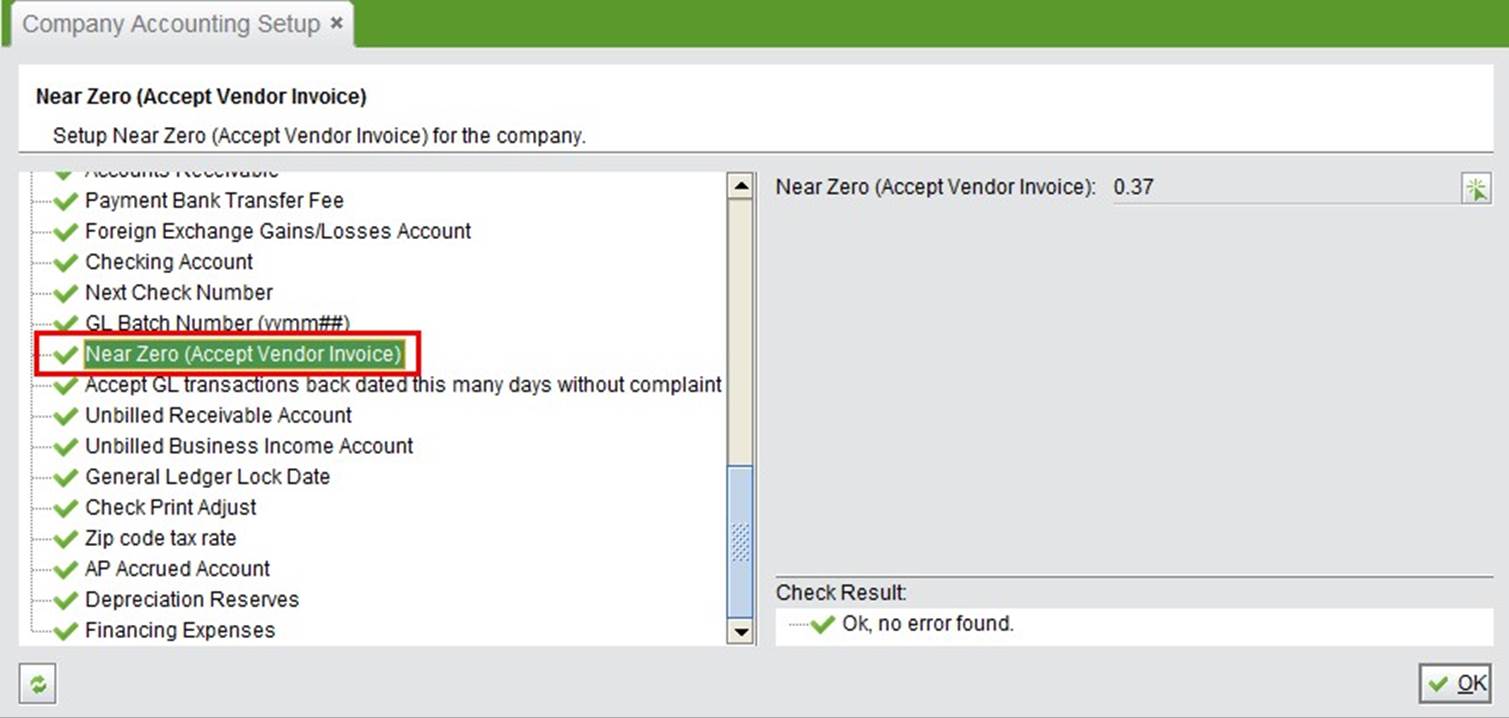
2. Set the “Unbilled Receivable Account” and “Unbilled Business Income Account” in the Company Accounting Settings:
 |
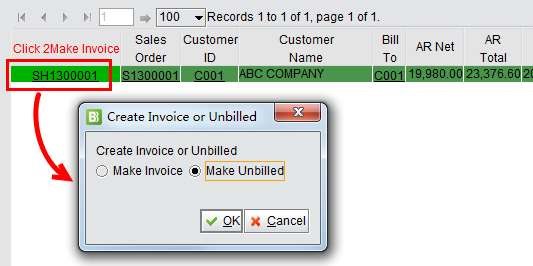
After you complete entering the Unbilled settings, click Shipper# to prompt the choice box. Choose “Make Unbilled” to make an Unbilled Invoice for the Shipper.
 |
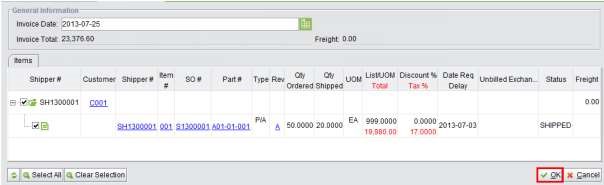
In the subsequent interface, check Shipper Items and click “OK” to perform the GL Transactions.
 |
You will be guided to the GL Transaction Properties.
 |
The GL Transaction will be shown in the Shipper Items as “Unbilled GL,” and the Shipper status will also become “Unbilled.”
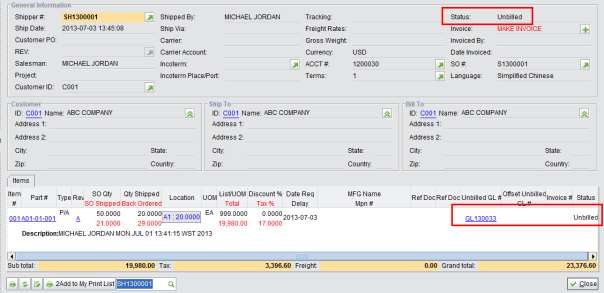 |
In the future, if you would like to make a formal invoice for these Unbilled Invoices, click “MAKE INVOICE +” to create the invoice. Two GLs will be generated for the new invoice: one is the formal GL for the AR, and another one will write off the Unbilled Invoice.
 |
You can also make Unbilled Invoices for Shipped Items of the same customer. Under the “General” tab of
“Accounting Box – AR,” click “2Add Unbilled for Shipped Items” to search for items and make the Invoice.
Under the “General” tab of the “Accounting Box,” there are multiple methods of creating Accounts Receivable.
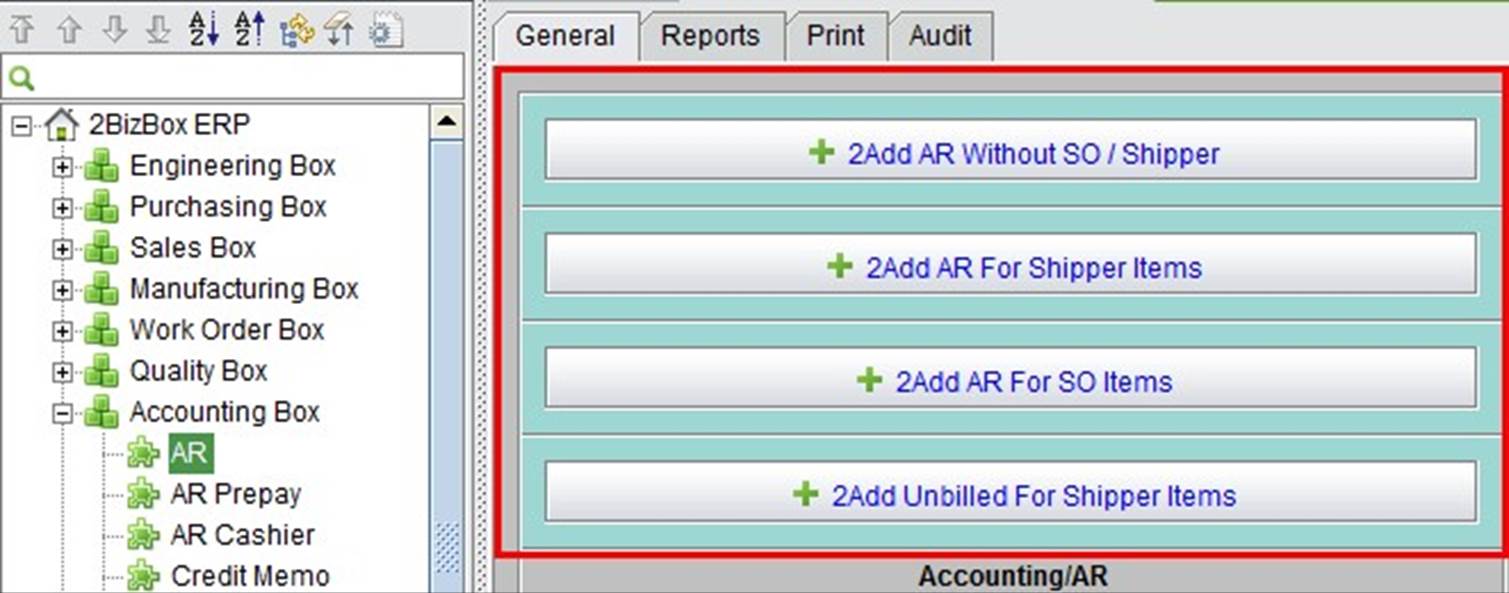 |
Add AR Without SO/Shipper
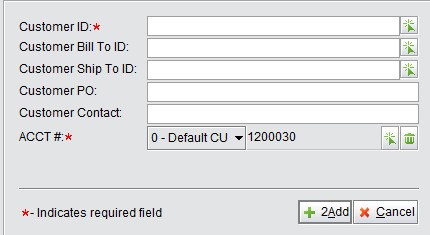
If the Accounts Receivable have no related Sales Order or Shipper, you can add AR by clicking “2Add AR Without SO/Shipper” for a customer.
In the adding interface, fill in a Customer ID and other information, then click “2Add” to open the Update AR interface. You can add AR Items as needed.
 |
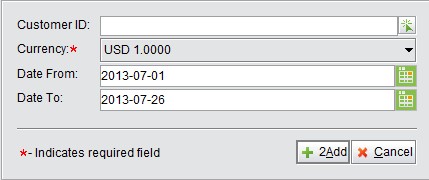
In addition to making an Invoice from Shippers, Invoices also can be made from Shipper Items belonging to the same Customer. Click “2Add AR for Shipper Items” to set filter conditions in the adding interface. Then click “2Add” to view search results. Please note that “Currency” is a required condition here.
All Shippers within the search criteria will be listed in the next screen.
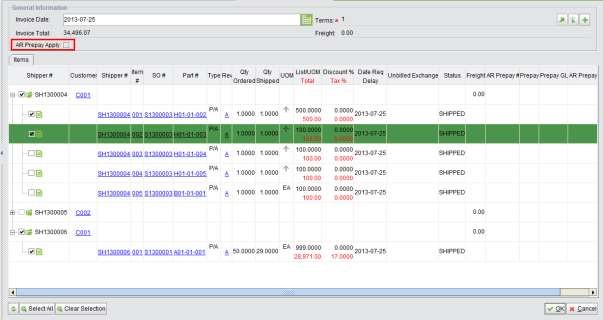 |
General information is required as follows:
To expand the Shipper Items, click the “+” button to expand the Item details. Check the items and then click “OK” to make the Invoice. You can only check items belonging to the same Customer.
The Invoice created is “OPEN” before the customer payment is received. If the items are from different Shippers, the SO# on Invoice Properties will show the related Sales Order Number.
 |
Add AR for SO Items
If an Invoice is required before all SO Items are shipped, you can use “2Add AR For SO Item” to make the AR. In 2BizBox, this is called a “Bill and Hold” Invoice.
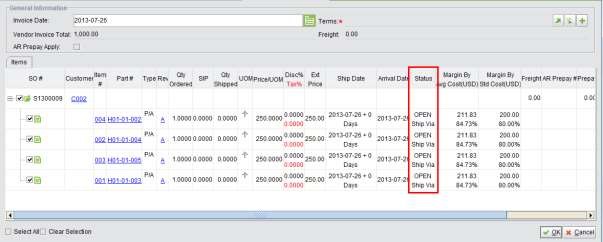
Click “2Add AR for SO Items” to start searching for SO Items as needed.
 |
In the search list of SO Items, check the ones you will use to make the Invoice and click “OK” to finish the Invoice.
 |
The Invoice will be marked as “Bill-and-Hold.”
 |
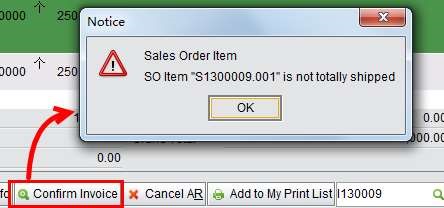
After the items are shipped, you can click “Confirm Invoice” to turn it to a normal Invoice.
 |
If there are items in the Invoice that have not shipped yet, the operation will be banned with a warning like the one below.
 |
Add Unbilled for Shipped Items
Click this button to search for shipped items and make an Unbilled Invoice. You can refer to the “Make Unbilled
Invoice from Shipper” Chapter for the detailed explanation of an “Unbilled Invoice.”
In the previous chapter, we introduced various ways to make Invoices in different sales activities. When the payment arrives, you will need to add payment and close the Invoice. Provided the different methods of payment, you can receive payment in 2BizBox flexibly.
A common way to add an AR Payment is processed on the Invoice Properties. Find and open the AR, and click “Accounting Info” at the bottom to view the Accounting information of the Invoice.
The “Accounting Info” tab will appear beside “Items” to show the payment of this Invoice.
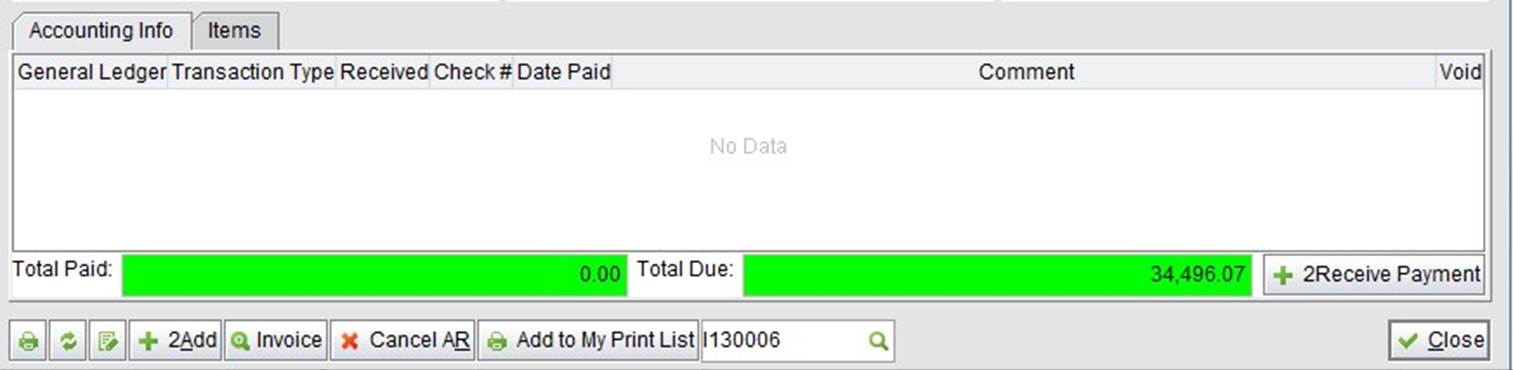 |
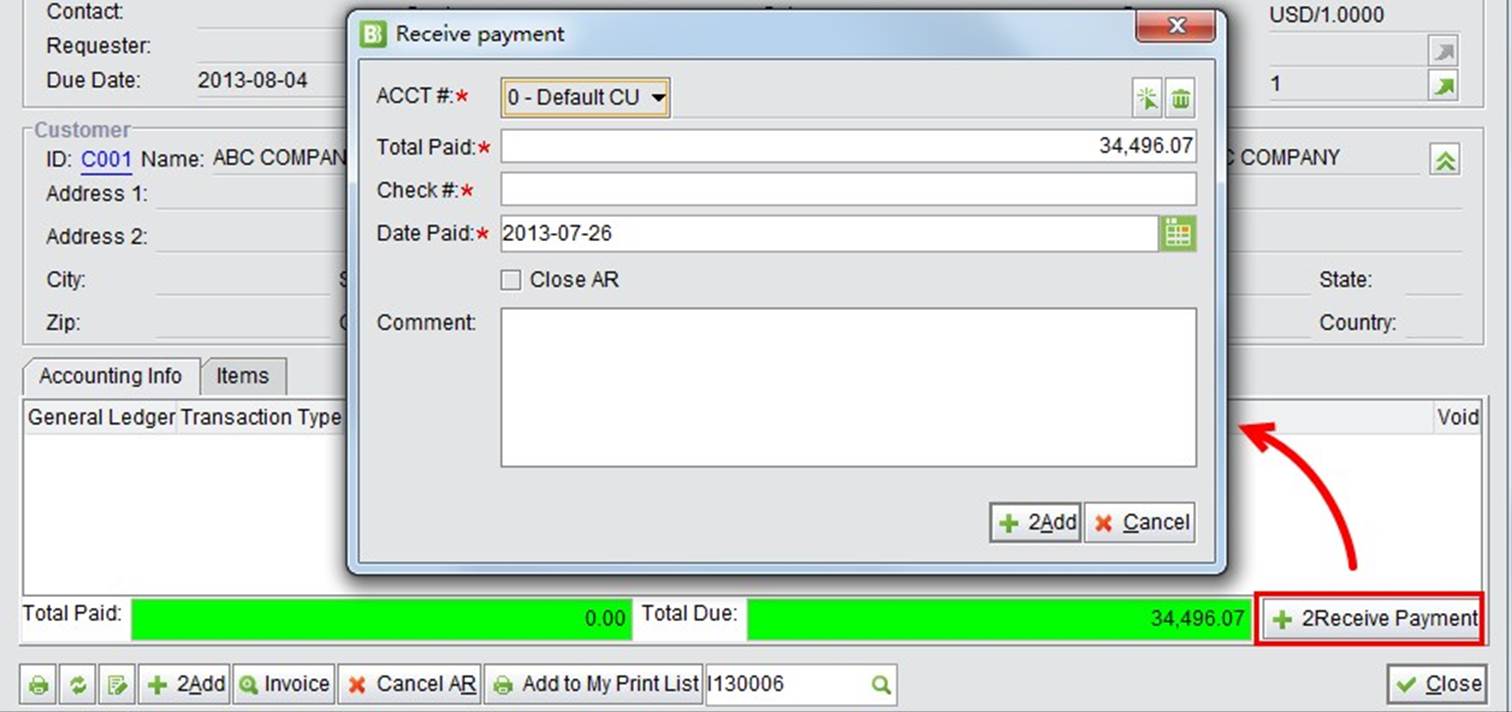
Click “2Receive Payment” at the bottom right corner to add payment received. In the pop up window, you need to fill in the payment information as explained below:
 |
For example, if the total received amount is 34,496.01 after international transactions, fill in “34,496.01” and check “Close AR,” then click “2Add.”
 |
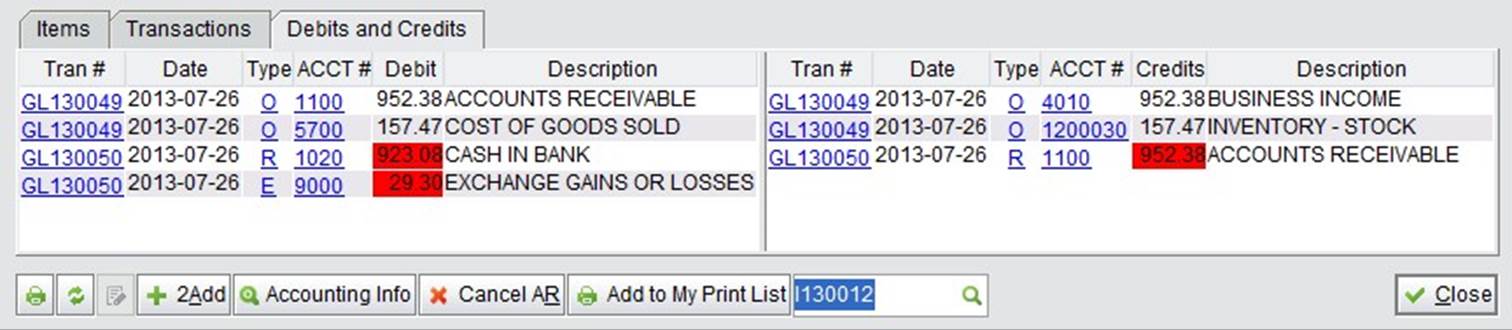
The Invoice will be closed, and the GL Transactions generated as follows:
 |
We have mentioned in creating the AR that if a prepayment of the SO has arrived, you can apply the prepayment in creating the AR. Similar to this method, making an AR Payment will deduct the prepayment. If the AR Prepay is created, but payment not received, AR will not apply the prepayment.
If the SO is processed in a Foreign Currency, you will need to fill in the “Exchange Rate” of the Foreign Currency. The exchange rate set for the currency in the currency accounting period will be filled by default.
 |
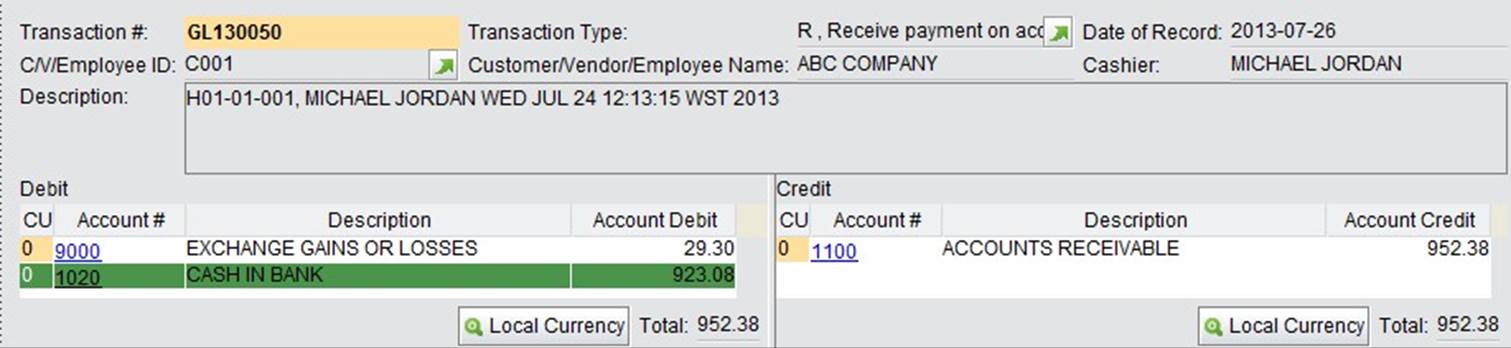
If there is variance between the actual exchange rate and the pre-set one, the GL will record the “Exchange Gains or Losses” as shown below:
 |
Though received in foreign currency, the GL will convert the amount to Local Currency to record the journal entries.
 |
If you fill in the wrong payment and submit the Invoice, you can cancel the Invoice by first voiding the GL. This will clear the payment and turn the AR Status to “OPEN” again. Click “Accounting Info” on the Invoice, then click “Void” in the GL to void the GL as below:
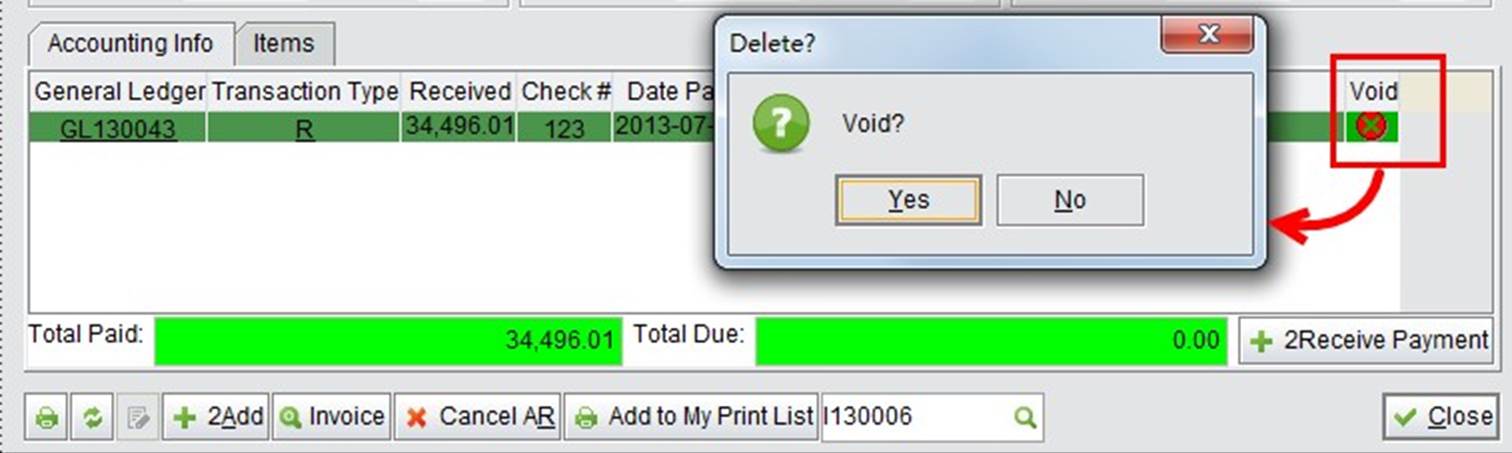 |
Click “Yes” will void the GL. You can click “Transaction” tab on the Invoice to view the voided GL.
 |
If you have to cancel the Invoice, you can first void all the GLs, then click “Cancel AR” to cancel it, or a warning window will pop up as below:
 |
In “Accounting Box – AR Cashier” you can add AR Payment Run and Wire Transfer Payment in a batch.
 |
Add AR Payment Run
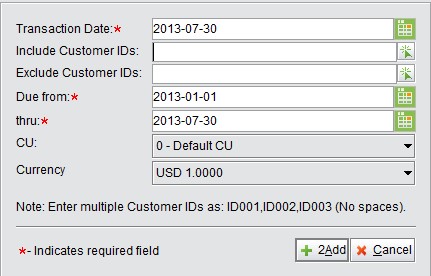
“Add AR Payment Run” can receive payment from different customers at one time. Click the button to filter AR by Customer ID, Due Date Range and Company Unit.
 |
Then, click “2Add” to view AR (including Credit Memo) within the search criteria:
 |
AR Prepay applied in AR will also be shown in the search results. Negative Due, Past Due Pay Date and AR Prepay that have not been applied will be highlighted. To make the Payment Run, select AR and click “2Setup Receivables” to set up the Payment Run:
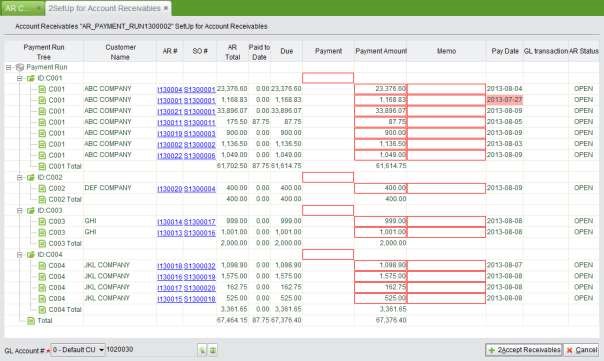 |
Payment Run is sorted by Customer ID, and will generate one Payment Run for each customer. In the setup interface, you will need to fill in a Payment# for each customer Payment Run in the red textbox, and fill in a memo for each invoice if there is one. Then, click “2Accept Receivables” at the bottom right corner. This will open the preview interface of payment, so you still have the chance to revise the payment info:
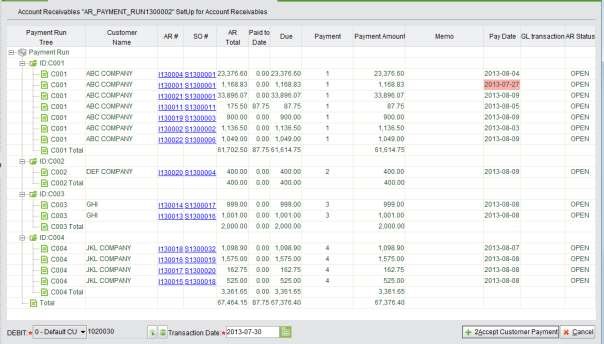 |
In the preview interface, click “2Accept Customer Payment” to confirm the payment and generate a Payment Run. By now, all the AR will be closed.
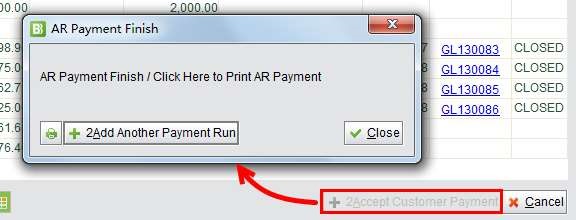 |
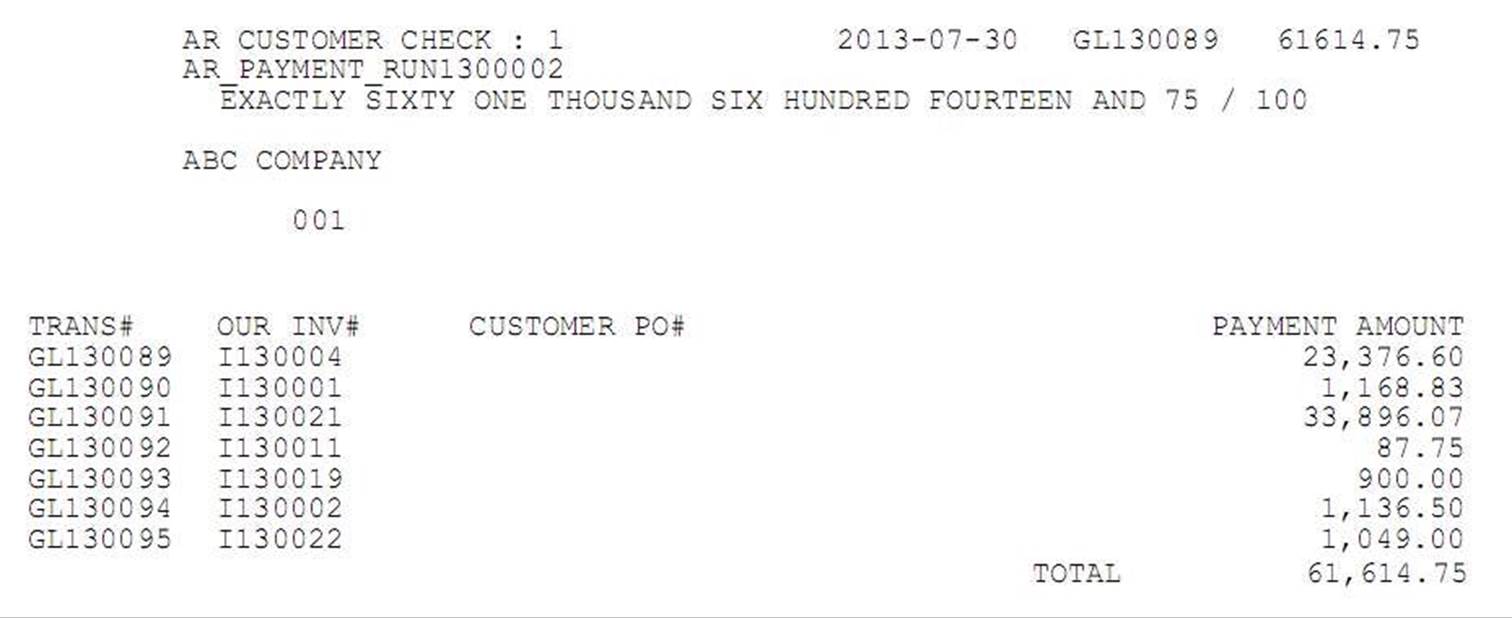
You may click the “Print” button to print these Payment Runs.
 |
Add AR Wire Transfer Payment
For AR Payment that arrived as a Wire Transfer, click “2Add Wire Transfer Payment” to add payment in batch. In the adding interface, you need to filter invoices by Customer ID, Due Date Range, Company Unit and Currency.
 |
Click “2Add” to view the AR (Including Credit Memo). You will be warned if there is unapplied AR Prepayment by red highlight. Check the AR and click “2Setup Wire Transfer” to open the set up interface.
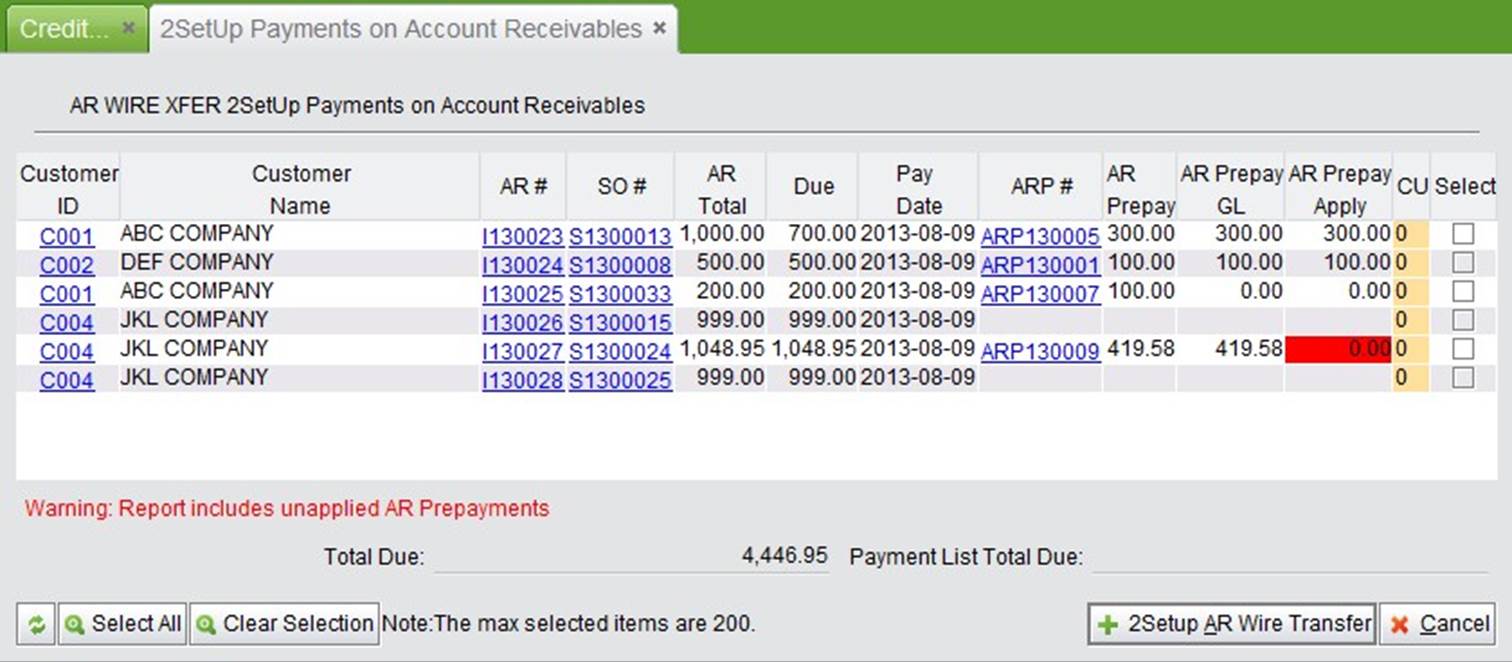 |
The set up interface is quite like the one when setting up a payment run. You need to fill in a “Customer Wire #” for each customer. At the bottom of the screen, fill in the total Wire Transfer Fee, and set up credit and debit accounts, then click “2Make AR Wire Payment” to preview the payment.
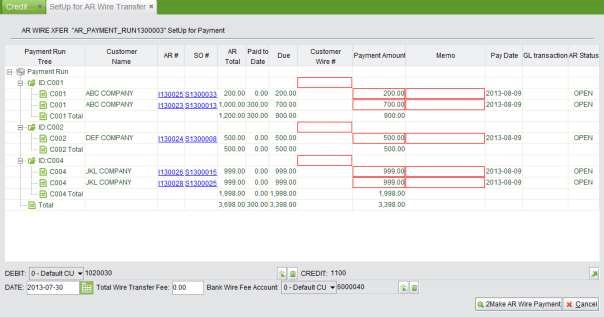 |
Finally, click “Commit” at the bottom right corner to complete the payment.
This is a basic look up function. Fill in the complete AR # in the textbox and click the button to view AR Properties.
This is a basic search function. Fill in the keywords of an AR # and status (Open, Closed, Cancelled, All) and click this button to view AR within the search criteria.
This function allows you to search for Invoices by Customer ID. At the bottom of the search results, the sub total of the Invoices is listed.
This is a comprehensive search function. You can use the search conditions to find Invoices flexibly. At the bottom of the search results, the statistics of the listed Invoices are shown.
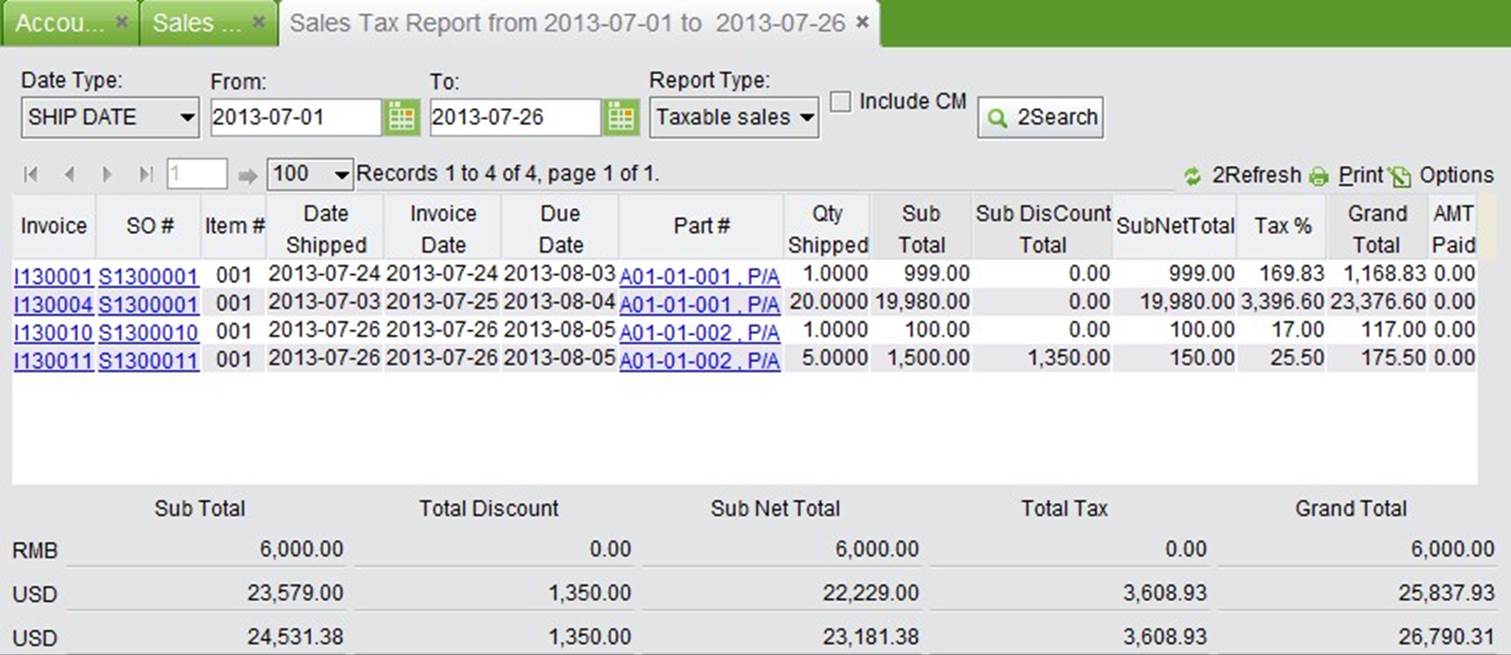
The Sales Tax Report shows the Sales Tax Amount in the SO with AR or Credit Memo.
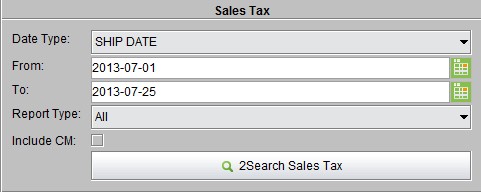 |
At the bottom of the search results, you can view sales tax statistics in all currencies.
 |
Use a Customer Statement to look up a Customer’s Balance Due, including the Accounts Receivable, Credit
Memo and Accounts Receivable Prepay. This statement can be printed or emailed to the customer for billing.
Lookup Statement by Customer ID
Under the “General” tab of “Accounting Box – AR,” select a Customer ID and Currency, then click “2Lookup
Statement by Customer” to view the statement. On the statement, the customer’s AR Statement and ARP
Statement are separated, and each total payment due is listed by the past due date
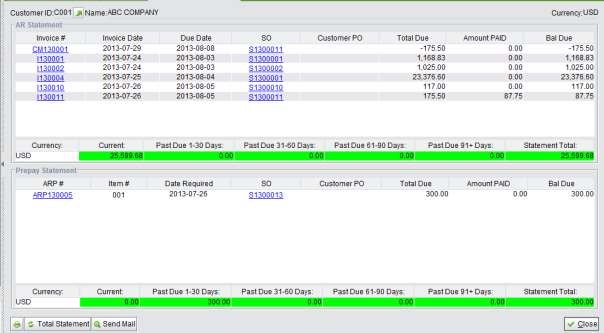 |
At the bottom of the statement, click “Print” to print the statement; click “Total Statement” to refresh the screen data; click “Send Mail” to email the statement to the customer as an attachment.
Clicking “All Statements” will list all customers’ payment due by customer. Click “Detail” to view the customer’s detailed AR, Credit Memo and ARP. You can also send these statements to different customers at one time by selecting customers and clicking the “Send Mail” button in the bottom left corner.
Fill in a Bill to ID and select a currency, then click “2LookUp Statement by Bill To ID” to show the Bill To ID’s Statement.
Fill in the Tracking # or Vendor Invoice # to search for AR and AP, and show the total amount in the search results. The Tracking # can be filled in the AR basic information. Vendor Invoice # can be filled in the AP basic information.
 |
Click this button to list all customers on Credit Hold.
When a customer is over their credit limit, you can put them on hold in the address box as below:
 |
Click this button to view all customers with payment due over their credit limit. You can set up a customer’s credit limit when updating the customer address in the Address Box.
Under the “Report” tab of “Accounting Box – AR,” you can search for AR and generate AR Reports by AR Status.
Click this button to view AR in all statuses in the system. Search results list AR by AR #, and show AR detailed information in each line.
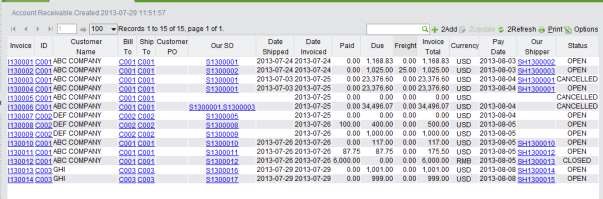 |
Use this function to search for open AR by customer ID. Fill in the keywords of a customer ID to search. You may decide to include or exclude Credit Memos in the search results. Search results will also sum up “Total Paid,” “Total Due” and “Grand Total” of the listed Open AR.
 |
Use this function to search for Past Due AR by customer ID. Fill in the keywords of a customer ID to search. You may decide to include or exclude Credit Memos in the search results. Search results will also sum up “Total Paid,” “Total Due” and “Grand Total” of the listed Past Due AR.
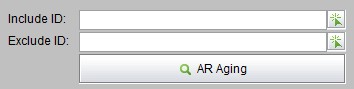
The Accounts Receivable Aging Report is a report showing how long invoices from each customer have been outstanding. You can filter customer IDs by setting the Include ID and Exclude ID parameters. Then, click “AR Aging” to view the report. Search results will break down AR into categories by length of time outstanding.
 |
The basic report is sorted by customer. Click “Detail” to view the customer statement. If you fill in a date and check the “AS OF” option, the search results will show AR as of the entered date.
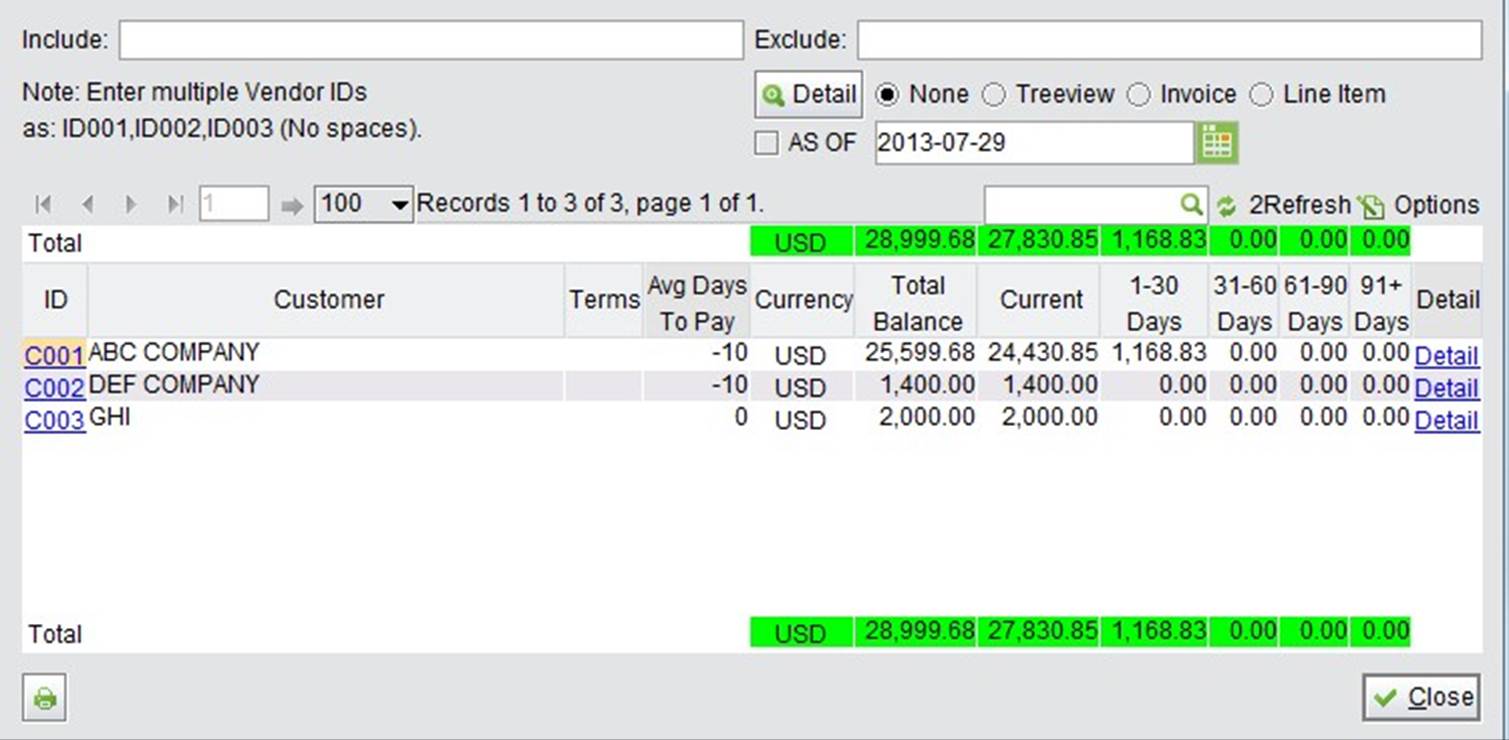 |
At the top right of the screen, you can manage viewing of the search results details by “Treeview,” “Invoice” or “Line Item.” Select an option, then click “Detail” to view the search results.
An AR Aging Treeview Report shows AR in the tree category with the sequence from “Aging Period” – “Customer ID” – “Currency.”
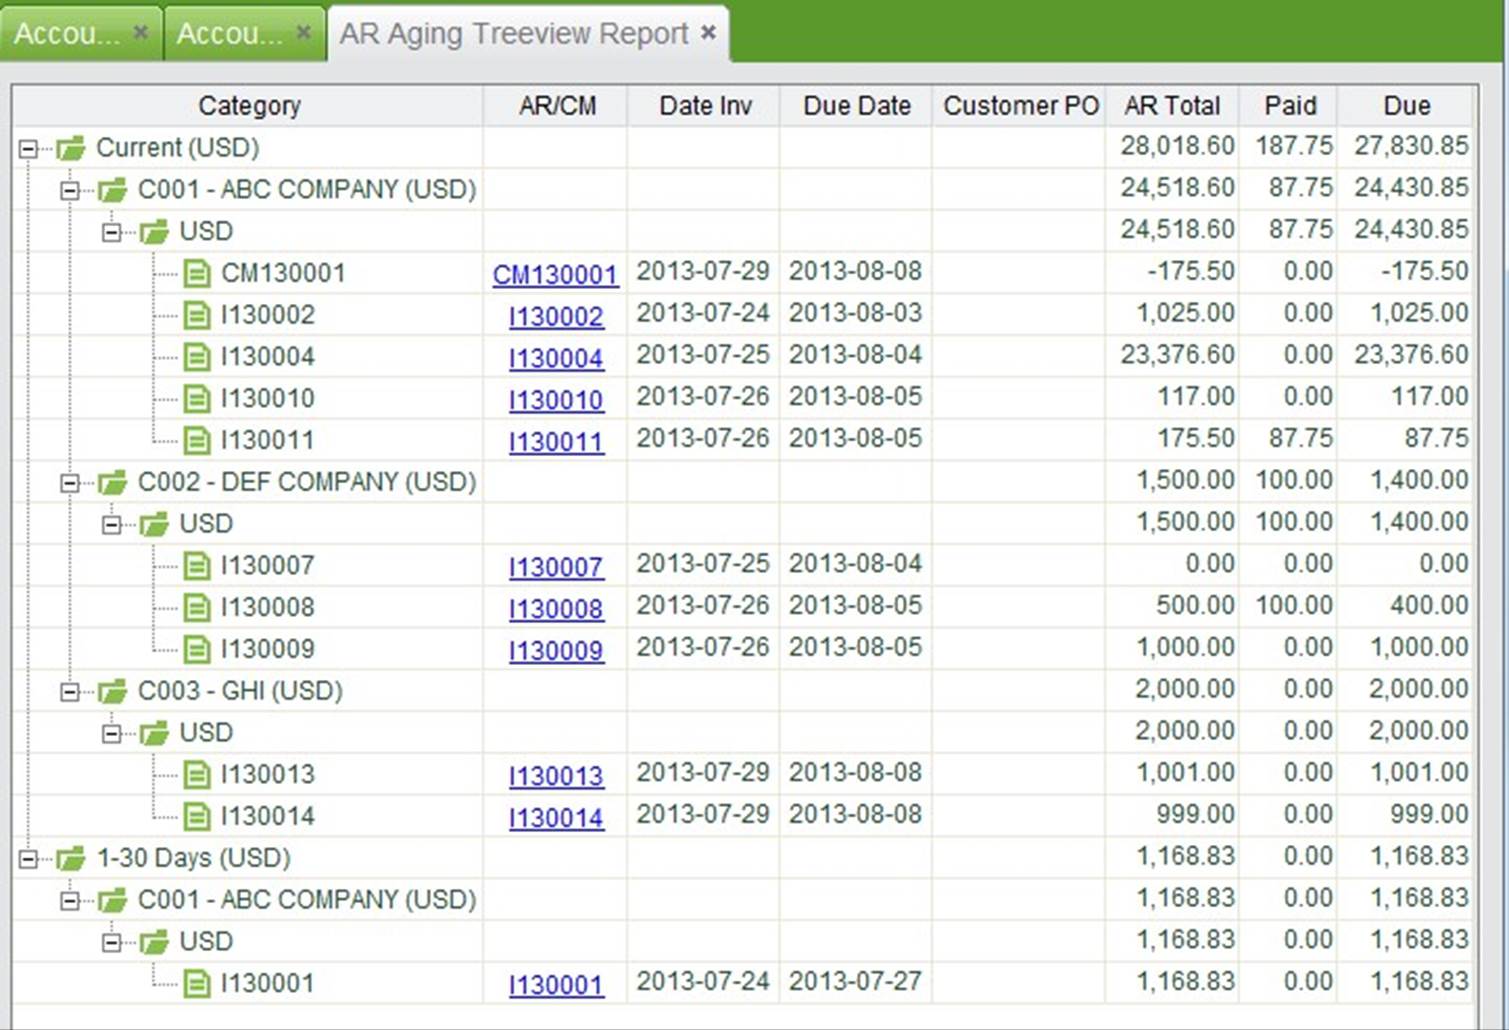 |
Selecting “Invoice” and clicking “Detail” will show the AR Aging Report by Invoice Numbers (and Credit Memo, if there is one). In each line, you can see the “Total Due,” “Amount Paid” and “Balance Due” of the Invoice. Click “Detail” to open the Customer’s Invoice Statement.
Selecting “Line Item” and clicking “Detail” will show the AR Aging Report by Invoice Items, including the item’s detailed information such as quantity, price, discount, margin and margin percent.
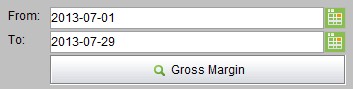
Fill in a date range to search for the gross margin report within the specified period.
 |
The report detail is shown by customer ID in the local currency. Click “Detail” to view the customer’s detail margin by invoice number. At the top and bottom of the report, you can see the Total Margin in all occurring currencies.
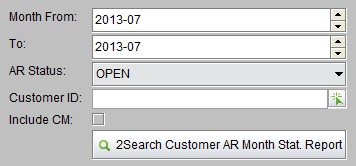
Set a month range, AR status, Customer ID and whether to Include Credit Memos or not, then click this button to view the AR Statistics Report. The report shows AR statistics by month and customer ID, with the Total AR Amount at the top and bottom of the report for quick viewing.
 |
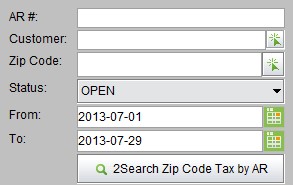
This is a Sales Tax Report displaying the total tax of each customer by Customer ID by searching ARs. Set zip code in the Address Box and sales tax rate in the Control Panel.
 |
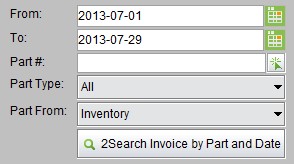
Fill in the date range and part information to view the Report of Accounts Receivable sorted by Part Number. This report shows the Qty Shipped, Avg Cost Total, Std Cost Total, Sub Total and Grand Total of the Invoiced Part within the period.
 |
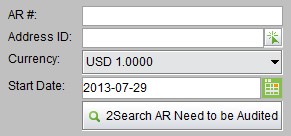
Under the “Audit” tab of “Accounting Box – AR,” you can audit and correct Accounts Receivable.
Fill in the search conditions including AR#, Address ID, Currency and start date. Then, click “2Search AR Need to be Audited” to view Accounts Receivable’s GL Transactions that the Total Transaction does not equal Total R, or Net Accounts Receivable does not equal the calculated result.
 |
Click this button to view all AR without a tracking #.
The “AR Print List” function under the “Print” tab of “Accounting Box – AR” makes it easier and quicker to print the AR you need to bill your customers.
 |
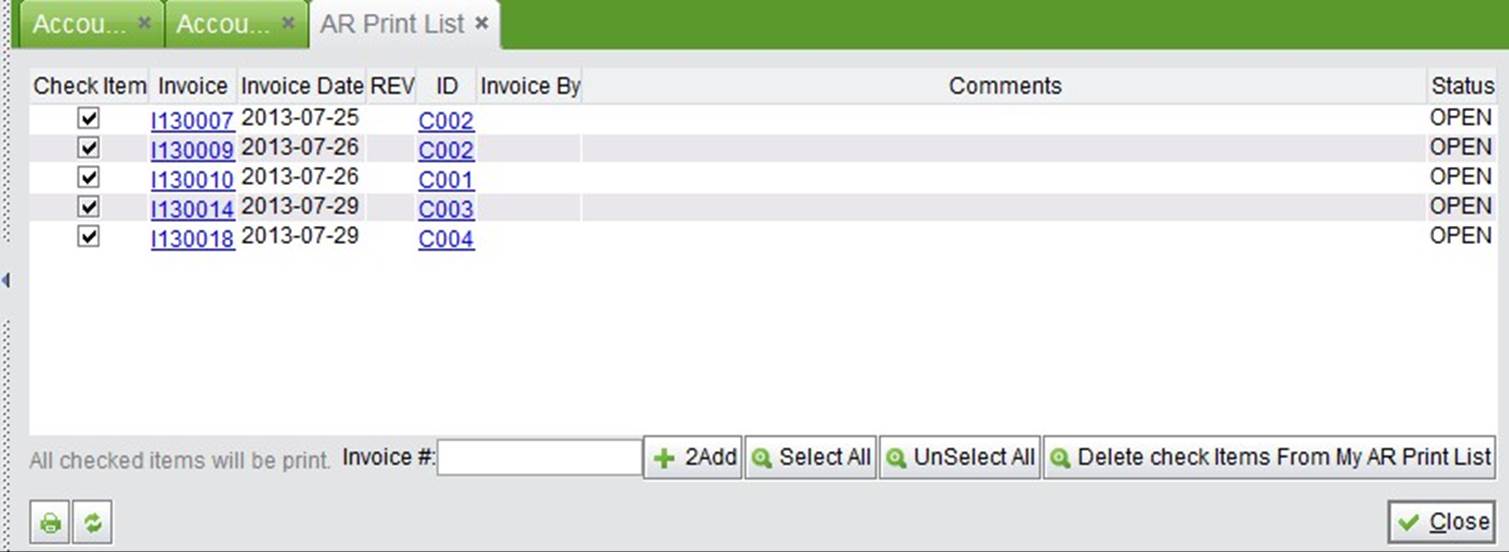
On the properties of an Invoice, you can click “Add to My Print List” at the bottom to add the Invoice to the print list.
Then, click “My AR Print List” to show all the AR you have added before. Check the Invoice and click the “Print” button to print these Invoices as separate PDF files.
 |
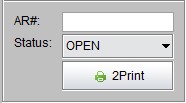
This is a batch printing function for AR. Fill in the keywords of an AR# and select an AR status. Then, click “2Print” to list all ARs within the criteria.
 |
Check the desired AR and click “Print” at the bottom left corner to print these Invoices as PDF files.