2BizBox® Manual |
Go back to 13.0 Main |
The sub module “Inventory Management” exists in the Accounting Box to give the accounting staff a clearer understanding of the inventory amount. Most of the functions are exactly the same as in the Warehouse box. In this chapter, we will introduce functions that are closely related to accounting management.
In other boxes, users can adjust the location and quantities on location, but are not allowed to change the total quantity. In the Inventory sub module of the Accounting Box, you can change the inventory total quantity and Average Cost as well.
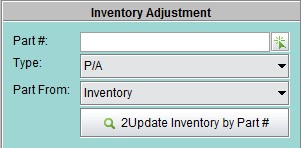
Under the “General” tab of “Accounting Box – Inventory,” you can adjust a Part’s inventory quantity and cost and reset its average cost. Fill in the Part#, Type and “Part From,” then click “2Update Inventory by Part #” to view the Part Inventory. If you select “Tool Room,” you can update the Tool’s inventory.
 |
As you can see from the screen, you can edit data in the red textboxs, including the Location, Onhand and Average Cost. Under the editable locations, you can also add a new location, quantity and average cost for the part. Fill in the information, then click “+” to add a line. When you finish, click “2Update” to submit the changes.
Although the Accounting Box gives the highest permission to revise Part Inventory and Cost, we do not suggest any company to use it to modify inventory. When there is variance between real inventory and book inventory, the Physical Inventory Worksheet will help to correct the variance and generate GL Transactions for accounting.
2BizBox provides two ways to calculate Standard Cost: “Cost Roll Up Worksheet” is used to calculate the
Standard Cost automatically, while “Standard Cost Change Worksheet” allows users to manually roll up the cost.
In 2BizBox, a Material’s Standard Cost is calculated by the BOM; that is, if the Material is “Made,” its Standard Cost equals the summary of all materials in the BOM after rolling up; if the Material is “Purchased,” instead of rolling up the cost, you can directly change its standard cost with the “Standard Cost Change Worksheet,” or update it in the Part Master.
Under the “Standard Cost Rollup” tab of “Accounting Box – Inventory,” you can add “Cost Roll Up Worksheet” to roll up Standard Cost by Material’s Average Cost or Standard Cost.
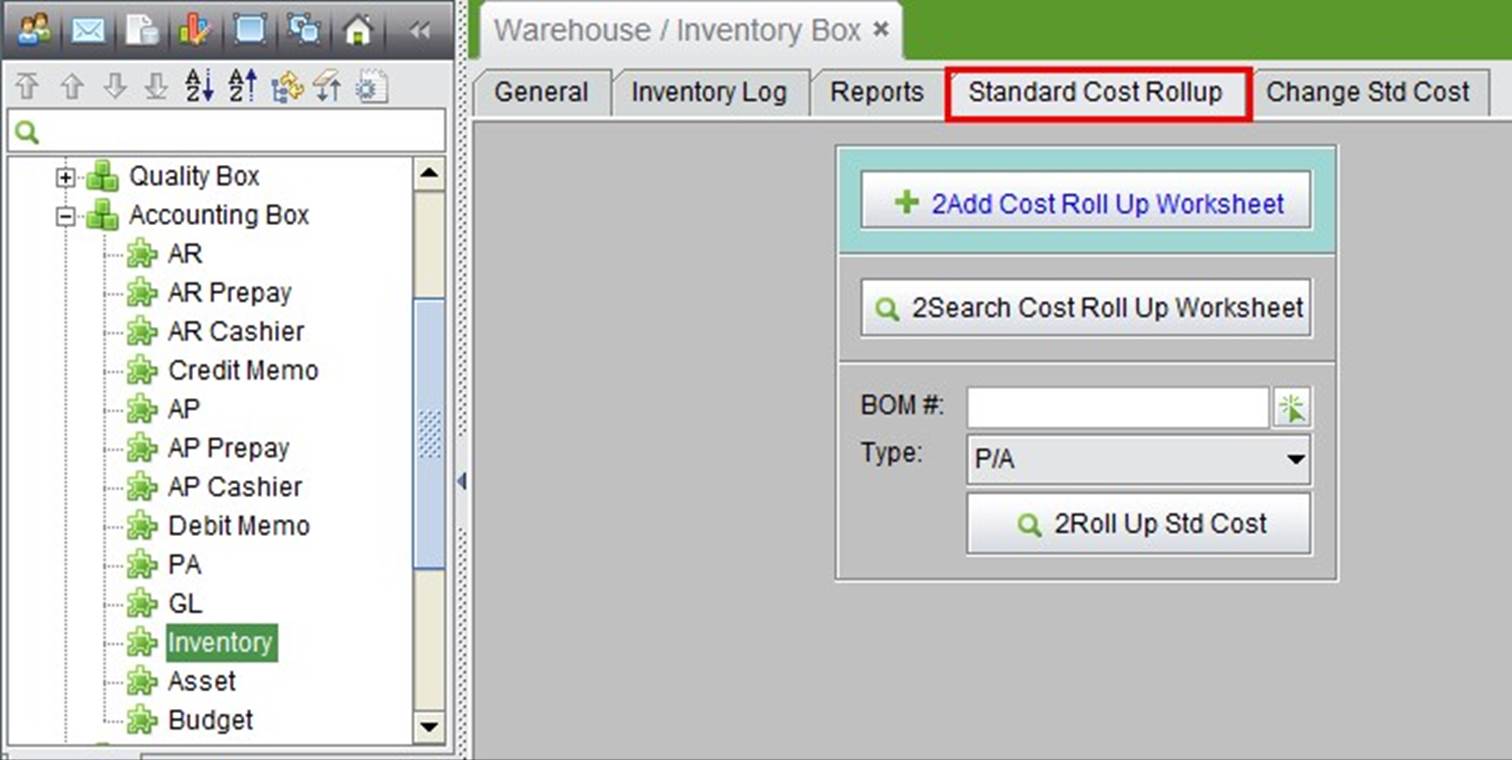 |
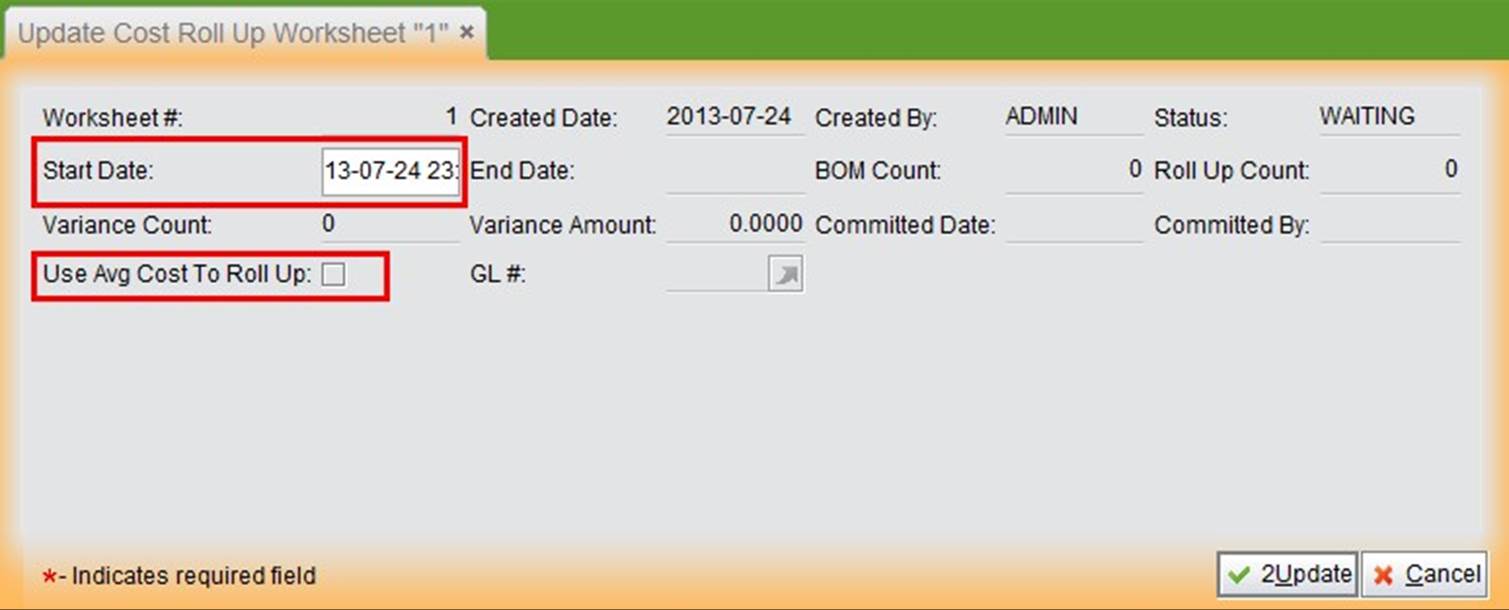
Click “Add Cost Roll Up Worksheet” to start adding the Worksheet. You will be required to set the execution time for the Worksheet. Click “2Add” to open the Updating interface.
Click “2Update” to submit the Worksheet; the system will start rolling up at the start time.
 |
2BizBox will start rolling up at the set time. When it is finished, the status of the Worksheet becomes “FINISHED,” and all materials that have a different standard cost will show up.
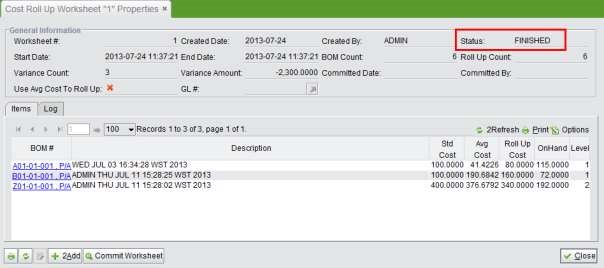 |
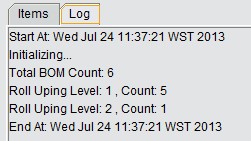
Click “Log” to view the time and number of rolling up details.
 |
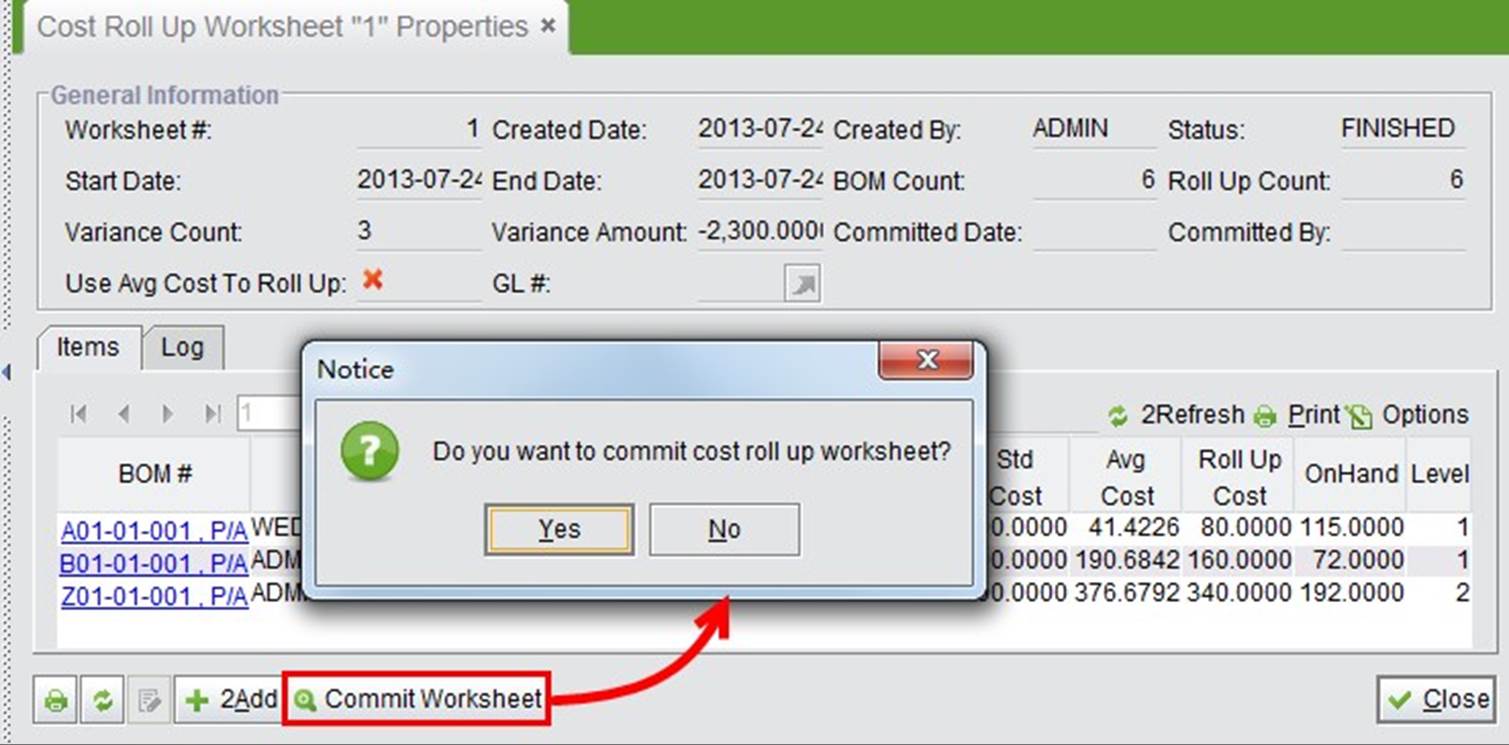
The “FINISHED” Worksheet performs the calculation, but will not update the Standard Cost for the Materials. If you are satisfied with the results, click “Commit Worksheet” at the bottom right corner to submit the results. A notice will pop up to confirm your operation. Click “Yes” to confirm, and click “No” to halt the operation.
 |
By committing the worksheet, a Part’s standard cost is updated, which will cause variance between the planned standard cost and actual standard cost. The company accountant will need to carry over the variance by clicking “Overcarrying Variance” in the committed Worksheet.
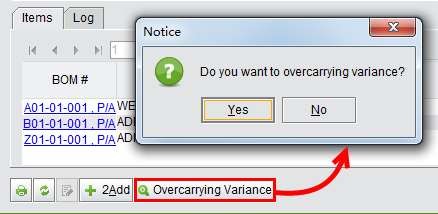 |
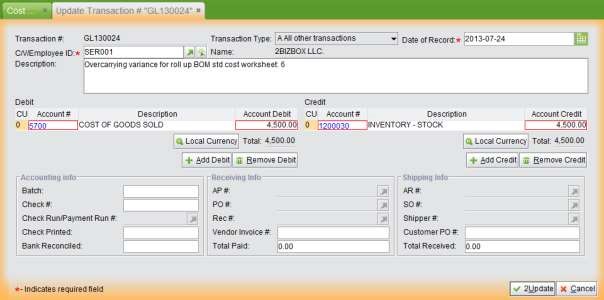
On the pop-up confirmation window, click “Yes” to generate the GL. Set the debit and credit accounts according to the company’s actual situation. Then, click “2Update” to finish the GL.
 |
Clicking “2search Cost Roll Up Worksheet” will show all the Worksheets in the system, including the created date, start and end time, roll up count, variance amount and GL.
Use the “2Roll Up Std Cost” function to roll up the standard cost of a specific BOM. Fill in the BOM# and type, then click the button to view the BOM in the search results.
 |
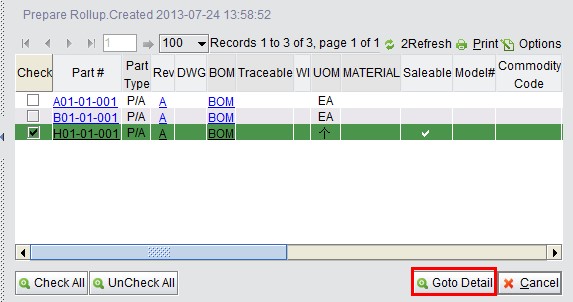
Check the BOMs you are going to calculate and click “Go To Detail” to go to the next stage.
 |
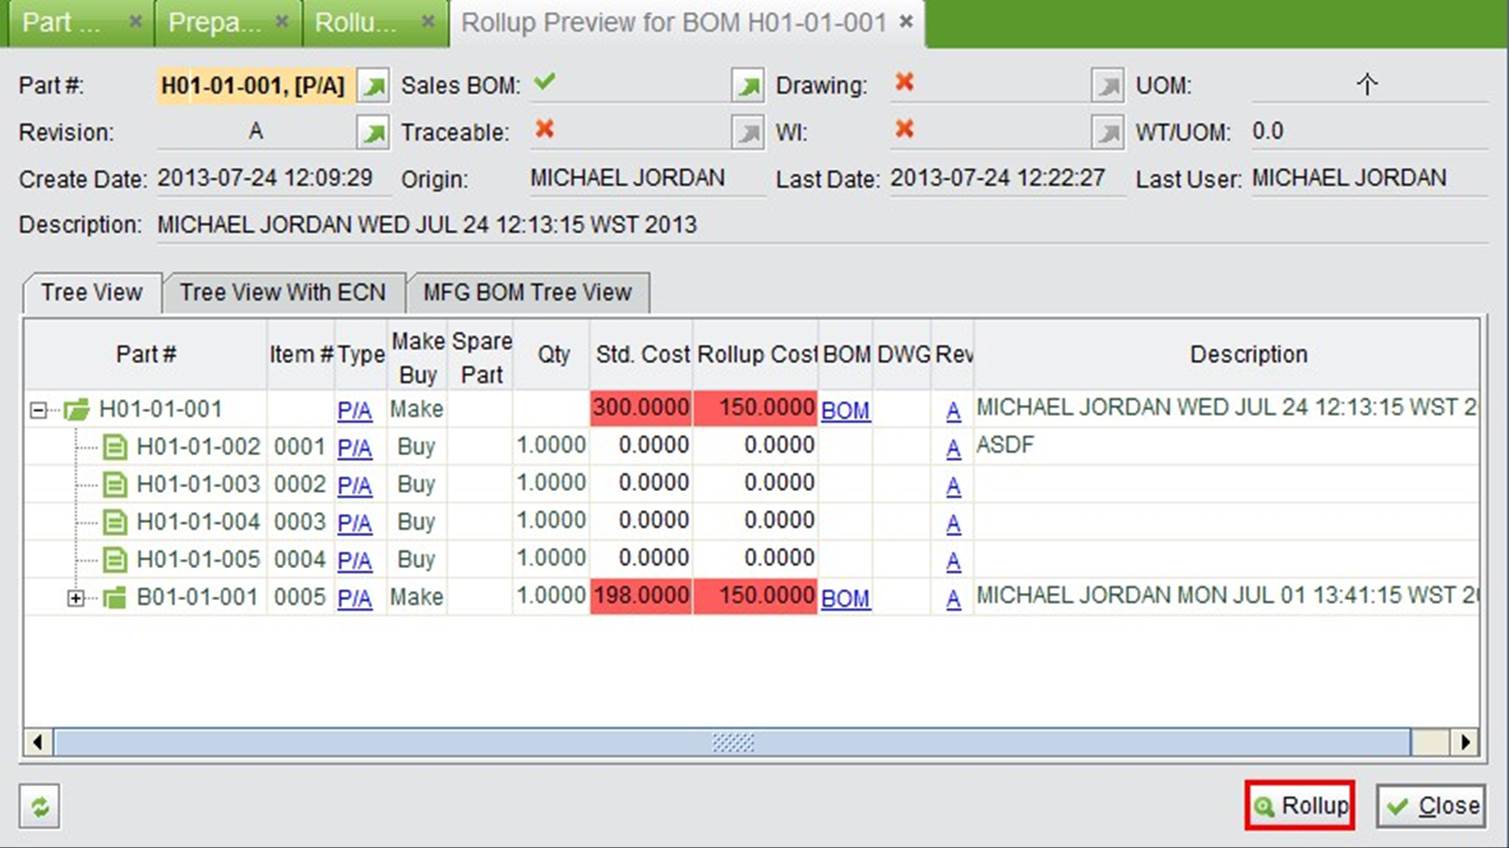
The next screen will show sub-BOMs that need calculation, current standard cost and the cost after rolling up.
 |
On this screen, you can:
 |
If the Standard Cost is not rolled up by BOM Cost, you can use the “Standard Cost Change Worksheet” to change the material’s Standard Cost instead.
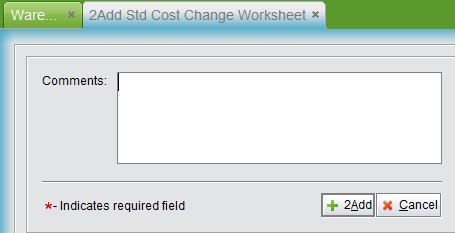
Under the “Change Std Cost” tab of “Accounting Box – Inventory,” click “2Add Std Cost Change Worksheet” to add a Worksheet. In the Worksheet Properties, you will need to add items, so you only need to fill in the comments and click “2Add” to update and submit the Worksheet.
 |
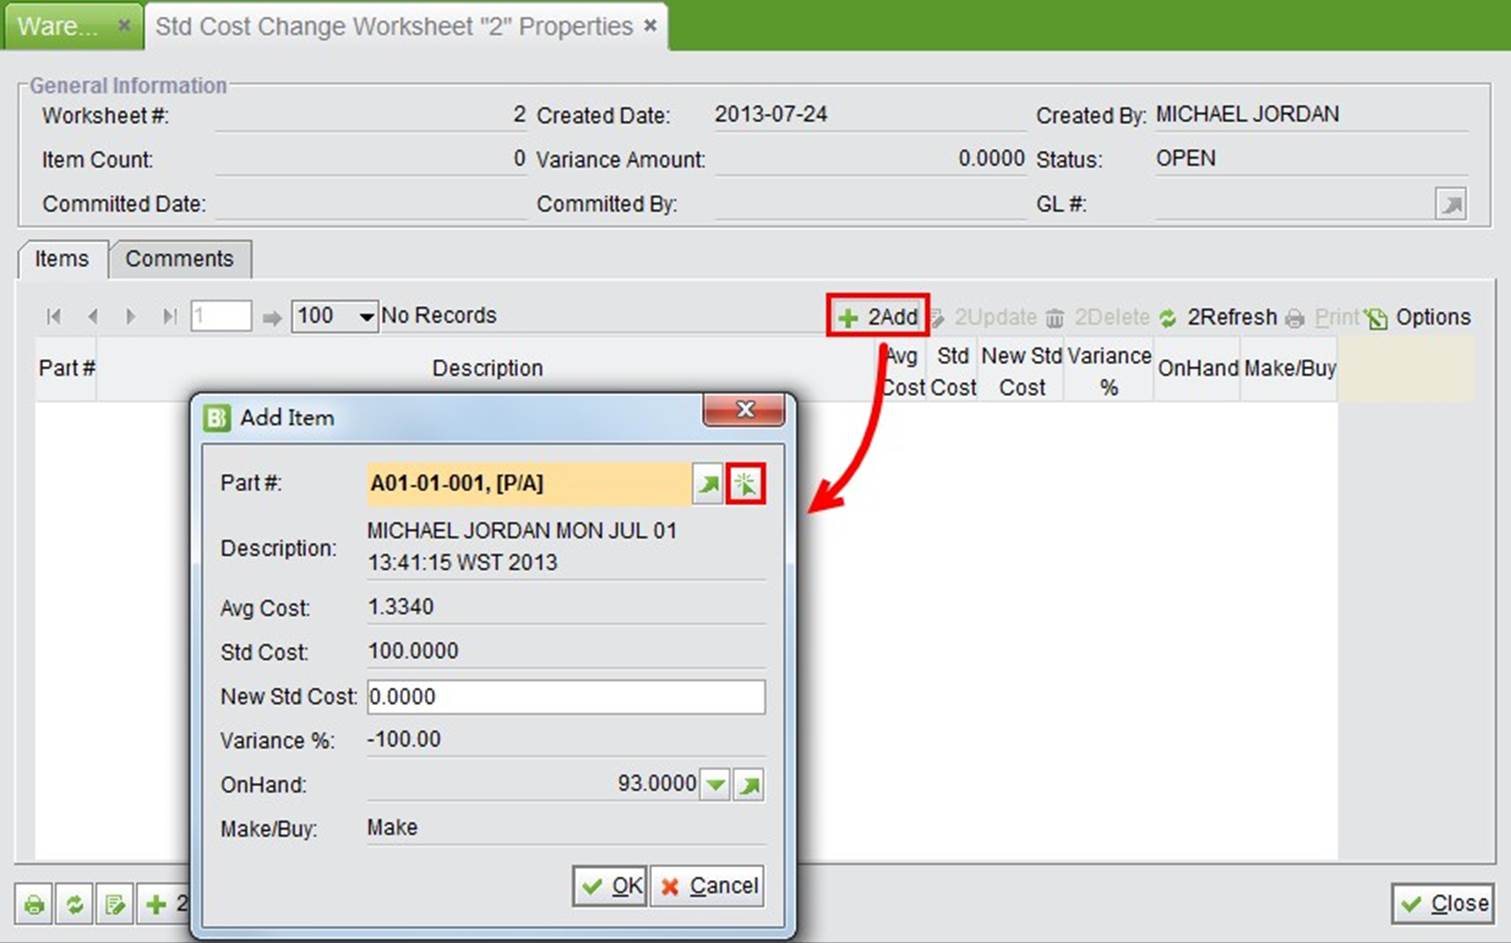
In the submitted Worksheet, click “2Add” to add an Item. In the pop up window, click “![]() ” to select parts, and the selected part cost details will show up in the window, including average cost, standard cost, variance, etc. Fill in the new standard cost in the textbox and click “OK” to add the item.
” to select parts, and the selected part cost details will show up in the window, including average cost, standard cost, variance, etc. Fill in the new standard cost in the textbox and click “OK” to add the item.
 |
After all items are added, click “Commit Worksheet” to apply the new Standard Cost to the Parts.
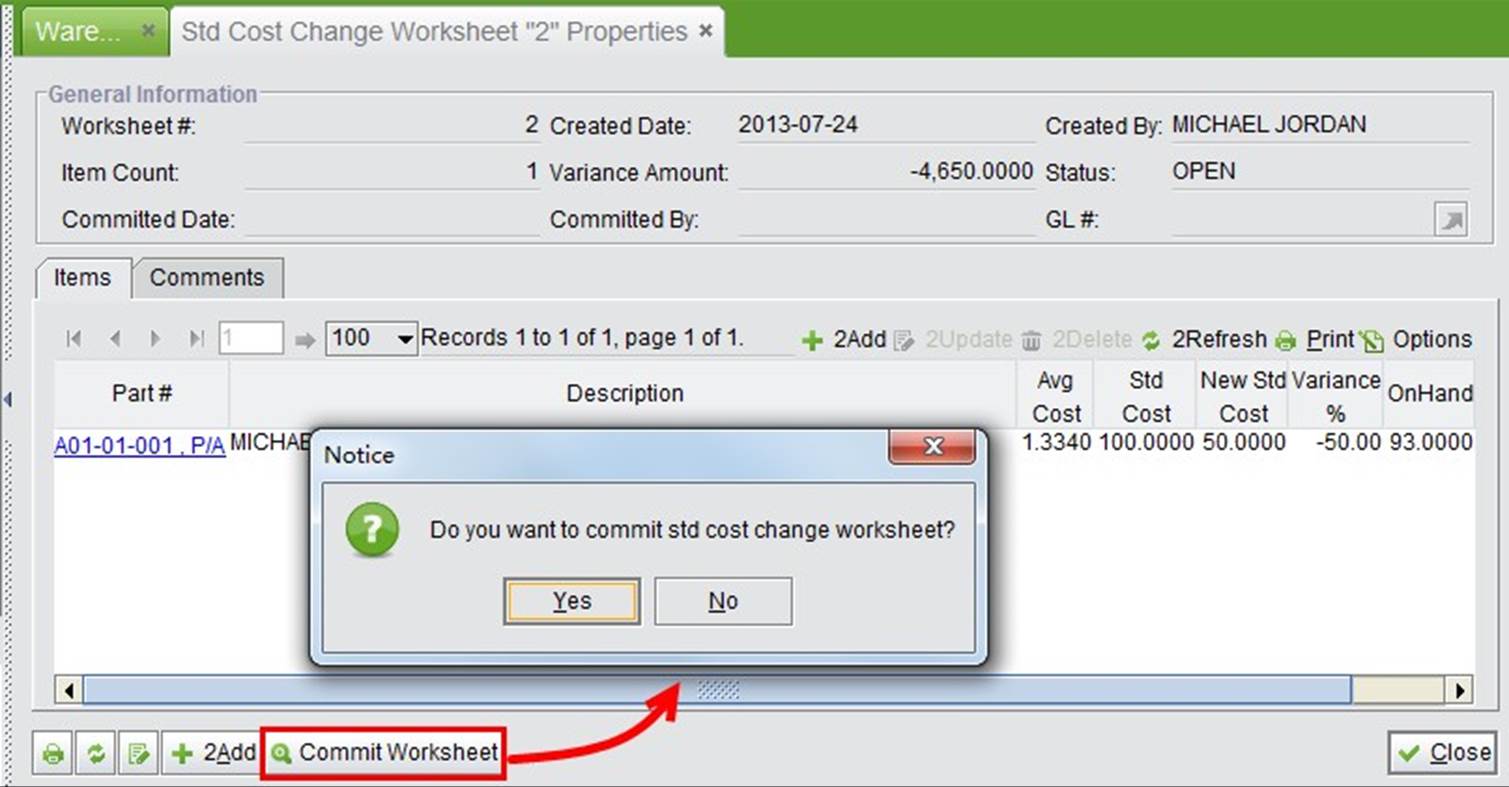 |
Similar to the Roll Up Worksheet, GL Transactions are required to record the committed Standard Cost variances. Click “Overcarrying Variance” to generate the GL.
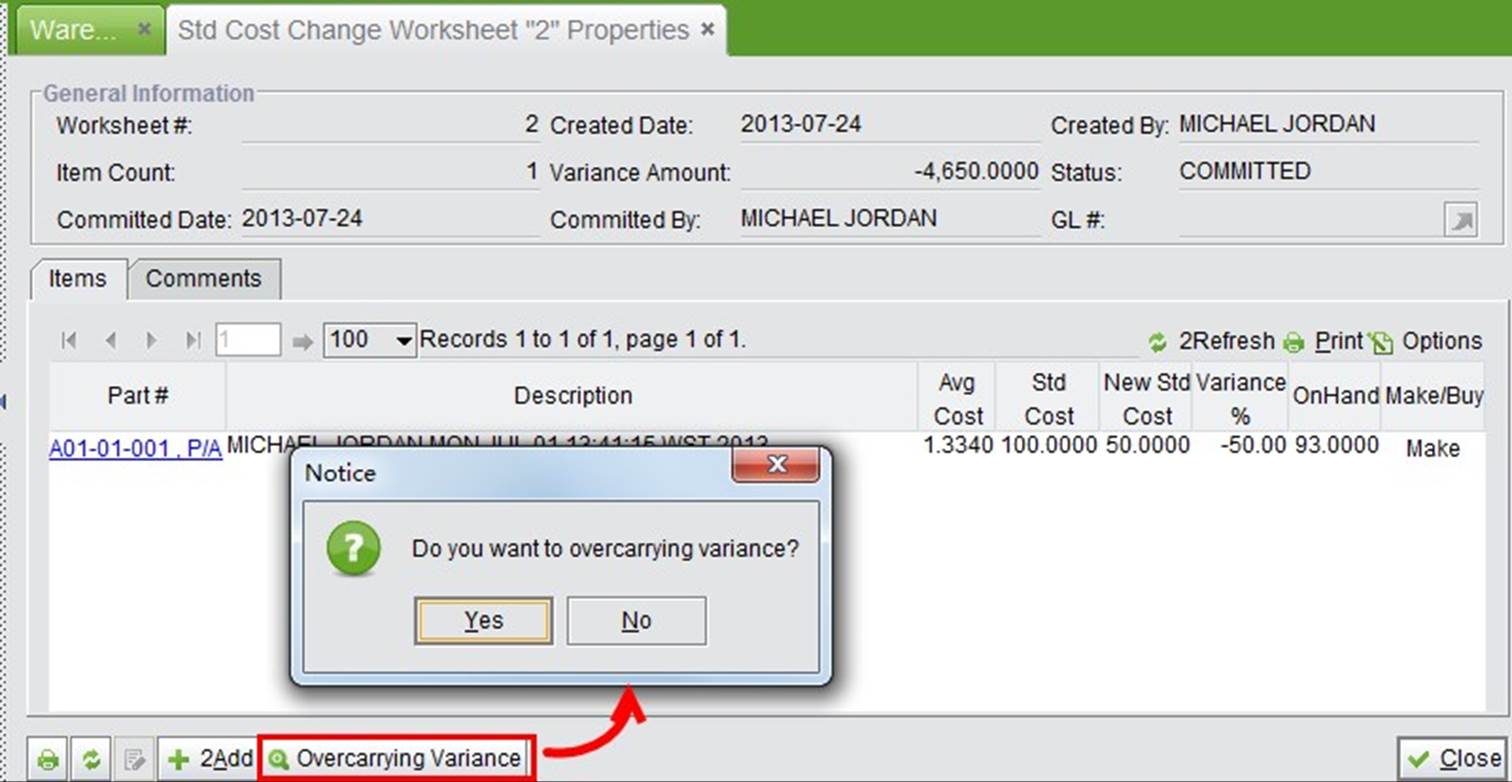 |
Set the debit and credit accounts and click “2Update” to submit the GL. The GL will show up in the Worksheet Properties.
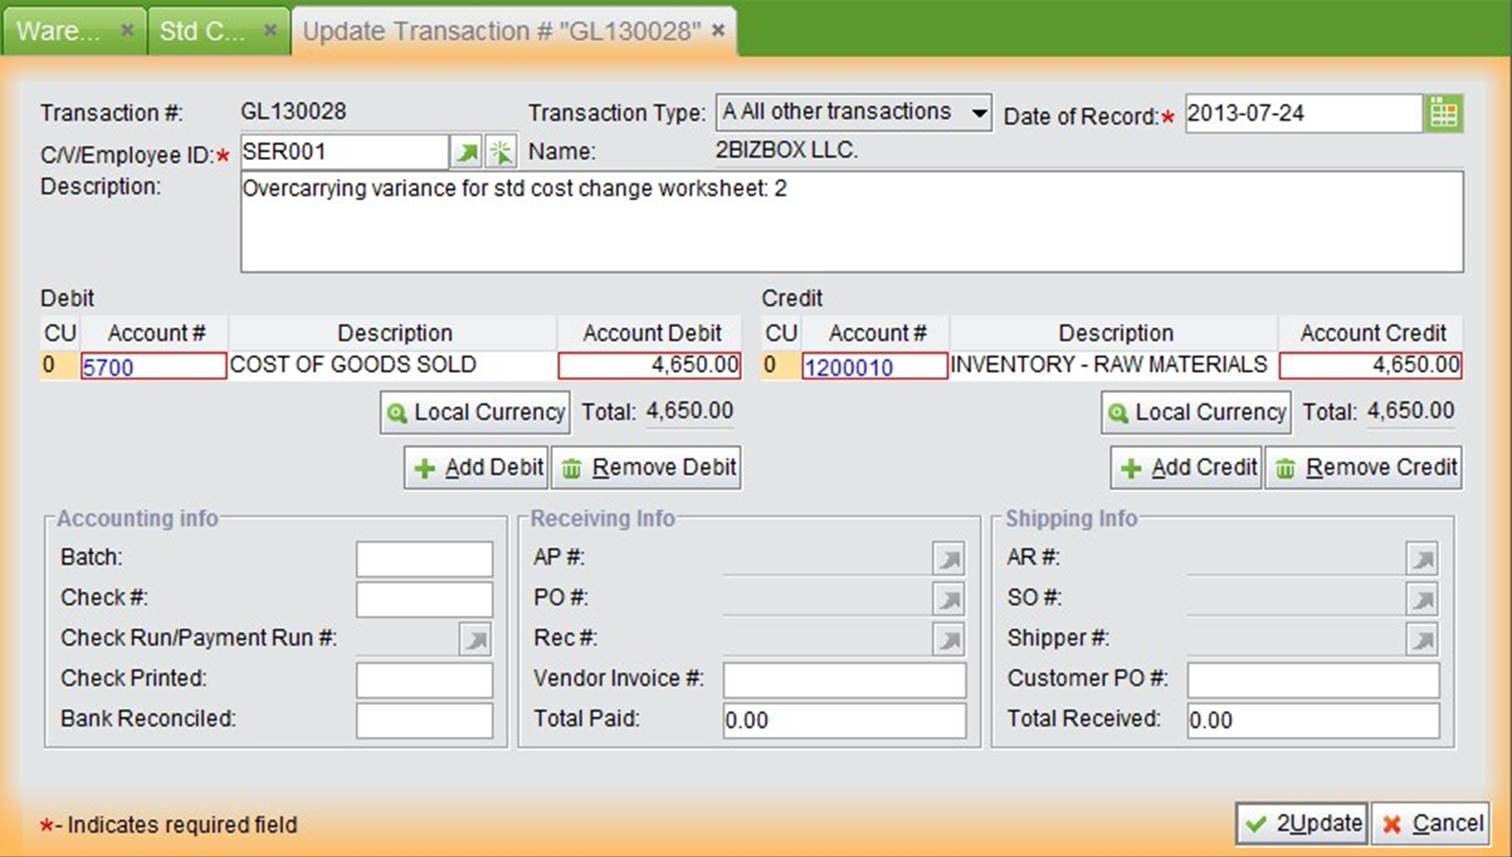 |
Clicking “2Search Std Cost Change Worksheet” will show all of the Worksheets in the system, including their created date, item count, variance amount and GL.
This search function will show the Variance Amount and Percent of a Part’s Standard and Average Cost. The part’s last PO Cost will also be listed for reference.
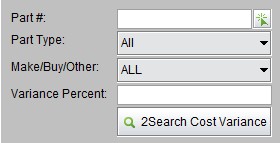 |