2BizBox® Manual |
Go back to 13.0 Main |
Originally designed and developed in the United States, 2BizBox’s accounting box adopts the universally accepted accounting functions of the US and international practices. You have two options in the local accounting settings: USA and China. Read the “Control Panel” Chapter for more information on accounting settings. In this Chapter, we will introduce how to use the Accounting Box to manage the financial status of the accounting entity.
The general ledger is the complete record of all business transactions, and thus represents the main and current elements in the rendering of accounts. In 2BizBox, the General Ledger is generated automatically for many related business activities, and can also be edited manually in the Accounting Box.
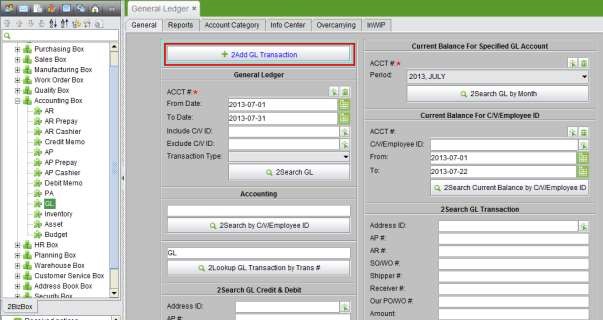
Under the “General” tab of “Accounting Box – GL,” click “2Add GL Transaction” to open the adding interface of the General Ledger.
 |
The transaction can be from an Address ID, or an Employee. By default, it is the company ID.
Transaction Type is pre-defined in the system. (View all transaction types at Control Panel – Accounting – Transaction Types)
 |
Fill in the Transaction ID and Type, then click “2Add” to open the Update Transaction interface.
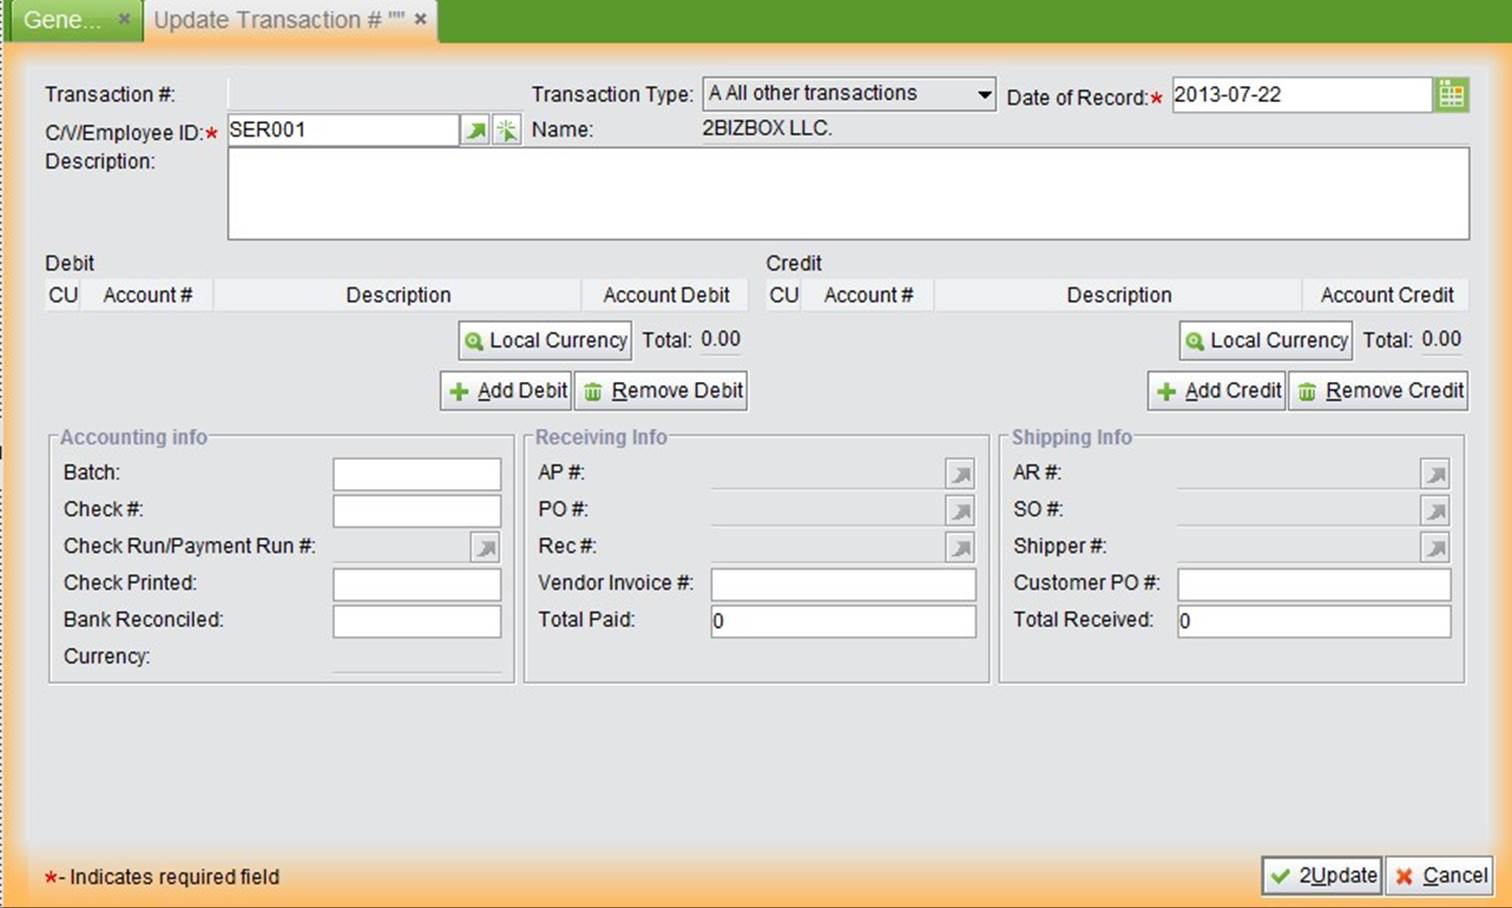 |
At the top of the Update Transaction interface, you can fill in the basic information of a Transaction.
 |
Below the basic information, you can edit the debit and credit accounts of the transaction. Click “Add Debit” to add a debit account at the left and click “Add Credit” to add a credit account at the right. You will be asked to select the account number.
 |
 |
Settings on the Credit side are similar to the Debit Side. After the Debit and Credit Accounts are added and balanced, continue to finish other parts of the Transaction: Accounting Information, Receiving Information & Shipping Information (if there is any). Finally, click “2Update” to submit the Transaction.
Requires an Account # to search for the GL; other optional search criteria include From Date, To Date, Include C/V ID, Exclude C/V ID and Transaction Type.
Use the Address or Employee ID to search for GL Transactions.
Fill in the complete GL # to view the GL Transaction.
Use comprehensive conditions to search for a single account in the GL.
You can manage the Account Category under the “Account Category” tab of “Accounting Box – GL.” The Balance Sheet Account Category is finished, while “Profit Loss Account Category Management” is still under construction.
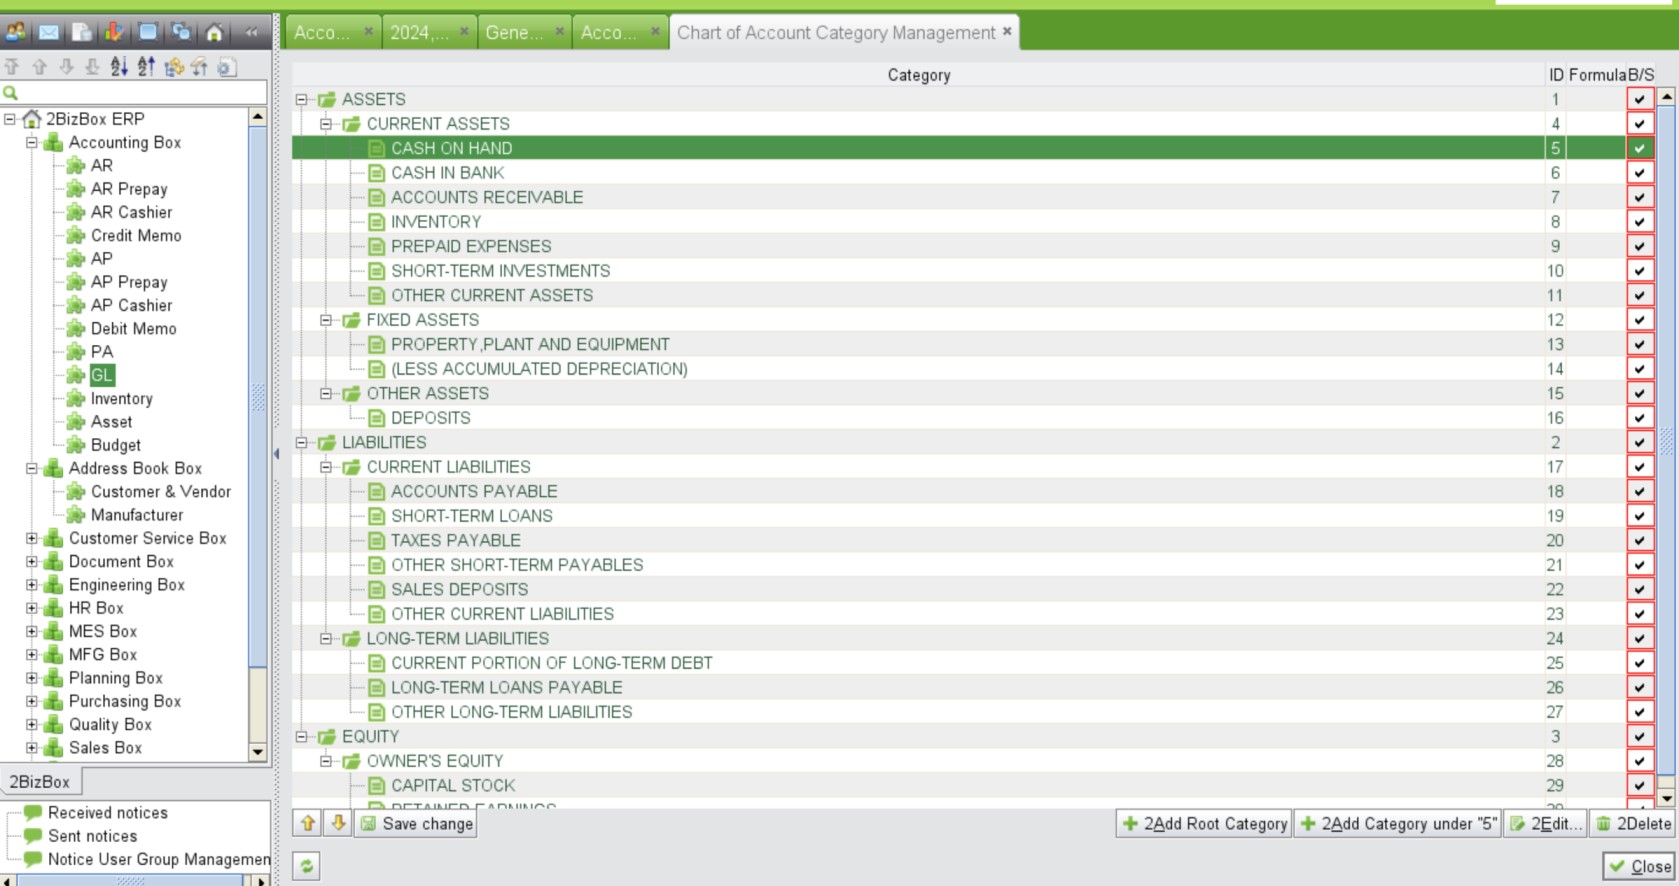 |
Click “Balance Sheet Account Category Management” to view and manage the current categories. You can adjust the category orders, edit or delete categories, add Root category and sub categories, etc.
Reserved function.
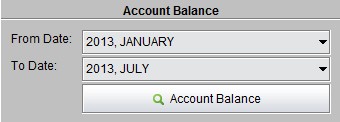
Show the balance of every account by calculating all the Transactions of these Accounts. Select the start and end Accounting Period, and click “Account Balance” to view the results.
 |
To view the Balance Sheet, go to “Accounting Box – GL – Info Center” and click “Accounting Info Box - Balance Sheet.” You can view the Balance Sheets of different Accounting Periods by selecting the periods at the bottom; and click “2LookUp” to the reports. Click “Save As Document” to save the Balance Sheet as a DOC document.
When a business has more than one currency to calculate in the Accounting functions, except the instant exchange gain/loss when paying or receiving foreign currencies, at the end of the Accounting Period, the Foreign Account Balance should be converted by the Period-end exchange rate.
Under the “Overcarrying” tab, you can adjust the Period-end Exchange Rate to process the exchange gain and loss. Select an Accounting Period from the dropdown menu and click “Period-end Exchange Rate” to open the adjusting interface as below:
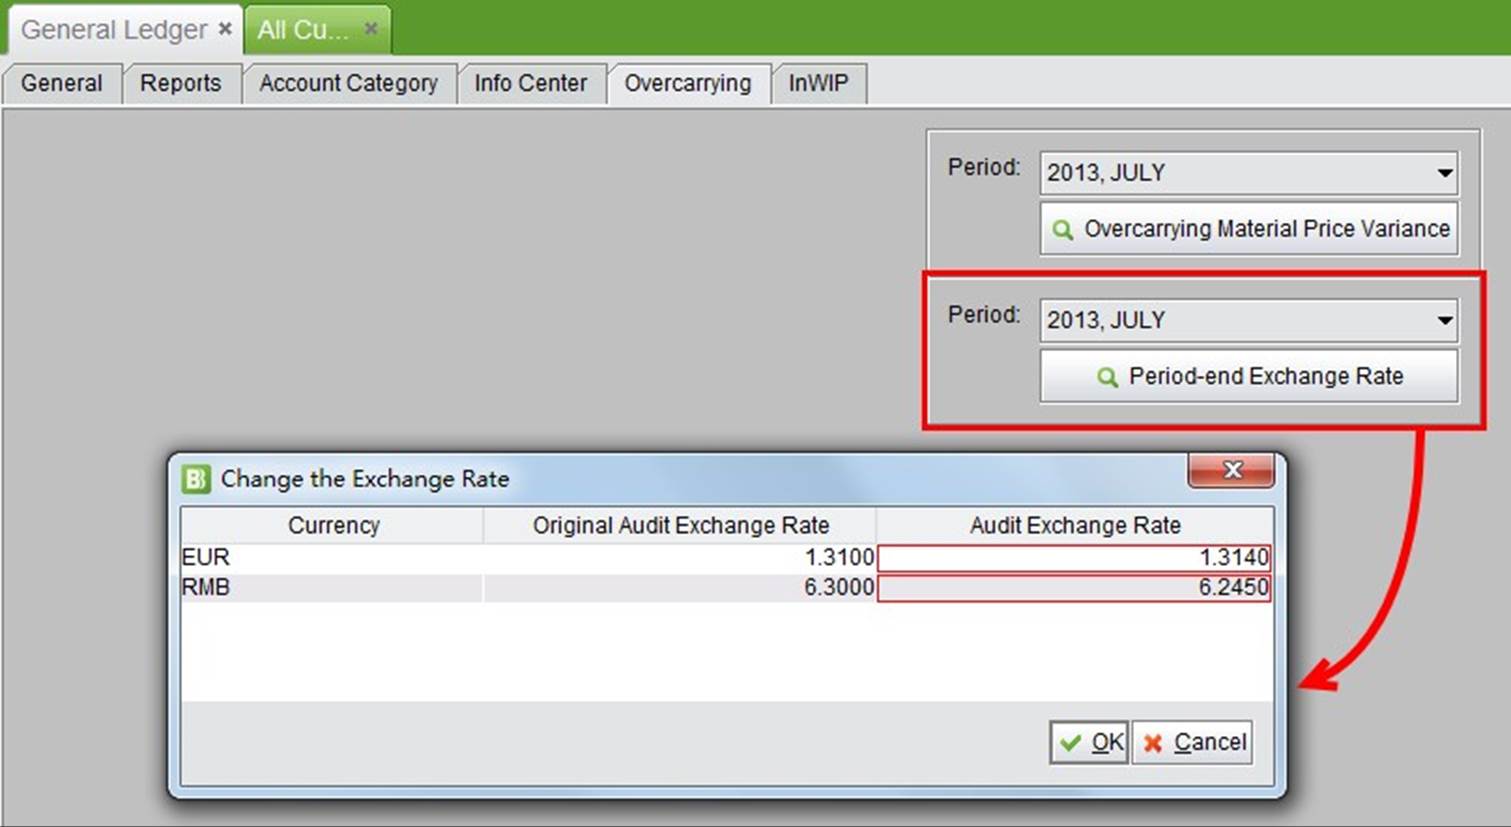 |
After the Audit Exchange Rate is filled in, click “OK” to submit and view the details. Click “Adjust the Exchange Rate” to generate the GL Transactions. For more information about how to “Calculate Foreign Currencies” and the “Foreign Exchange Gain/Loss Account,” please refer to the corresponding chapters.
When a Disassemble Work Order is received and the cost of assembling parts changes, you need to make up for the Cost Variance. Click “Create GL for DWO Receiving” under the “General” tab of “Accounting Box – GL” to open the adding interface.
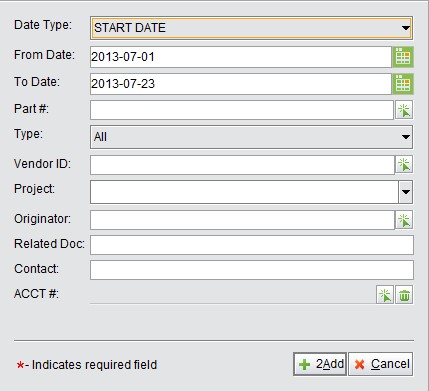
You can use various conditions to search and filter the Disassemble Work Orders you are looking for in the adding interface. Then click “2Add” to view search results.
 |
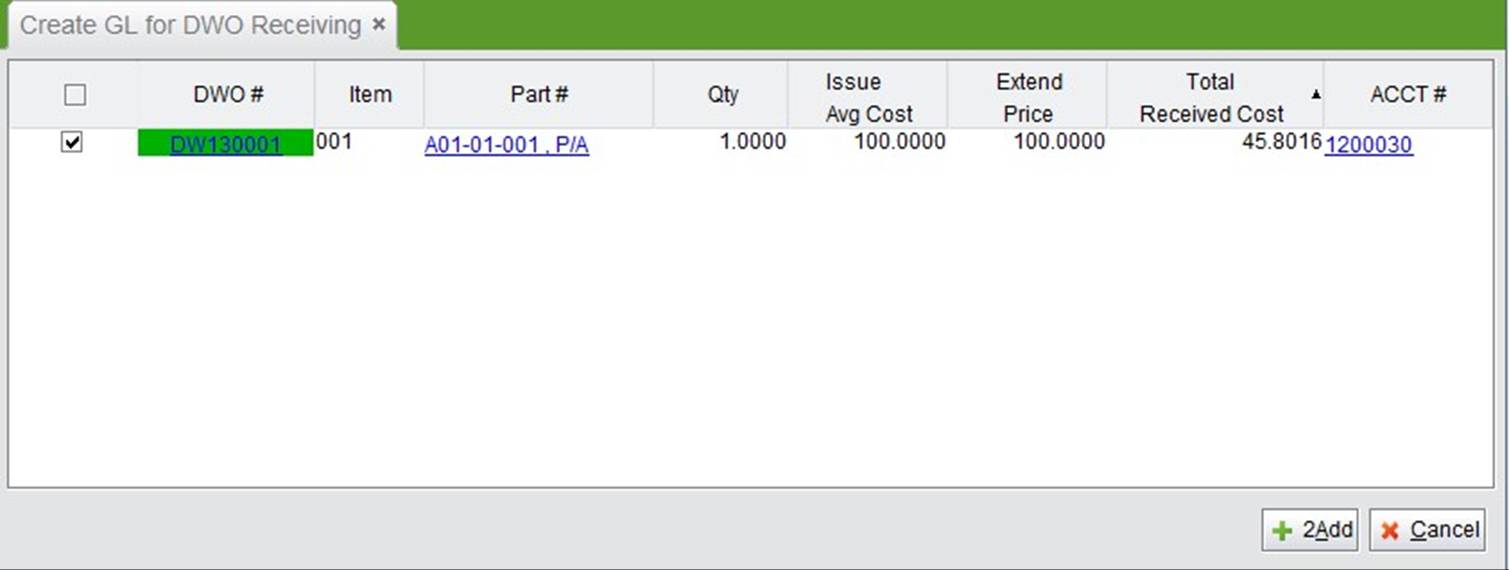
The search results lists all the DWOs within the criteria, including the issuing & receive costs. Check the ones with Cost Variance and then click “2Add” to generate the Transactions. The Debit and Credit Accounts of the Transaction should be pre-defined in the “Company Accounting Settings” – Work Order Debit Account and Depreciation Reserves.
 |
A Nonproductive Picking Report is used in managing the materials that are not applied in production, but still require accounting management. When the Nonproductive Picking Report is created and issued, you can go to “Accounting Box –GL” and click “Nonproductive Picking Item Report” to make GL Transactions.
 |
By clicking this button, all issued Nonproductive Picking Report of the selected Accounting Period will be shown. The Accounting Period can be changed from the dropdown box; click “Search” to view the new list.
The Debit Account of a Nonproductive Picking Report Transaction is set when adding the Nonproductive Picking Type in the Warehouse Box; the Credit Account is set at the bottom of the screen, as below:
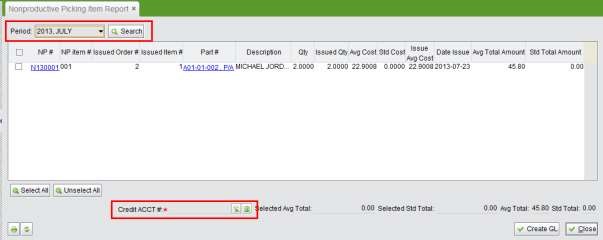 |
After the Account is set, check the Nonproductive Picking Reports and click “Create GL” in the bottom right corner to make a GL.
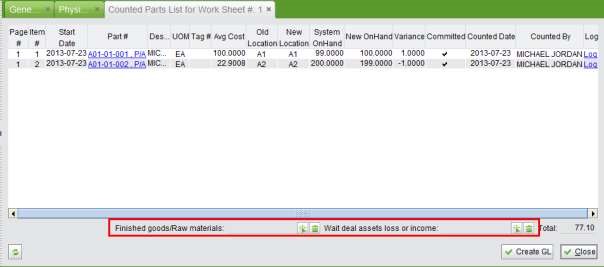
After the Warehouse staff finishes taking inventory and finds the variance from the book balance, they will submit the physical inventory sheet. Whether there is a gain or loss in inventory the accountant needs to make GL Transactions for the variance.
Under the “General” tab of “Accounting Box – GL,” use “Physical Inventory Accounting Treatment” to make the GL Transaction. Fill in the Worksheet# and other search conditions, then click the button to view the parts with new inventory, as below. At the bottom of the screen, you need to establish settings for the Account of Finished goods/Raw Materials and Wait deal assets loss or income, then click “Create GL” to make the GL Transactions.
 |
If the “Inventory Cost Valuation Method” is set as “Standard Cost,” you will need to carry over the variance caused by Standard Cost and Price of the Raw Materials. Under the “Overcarrying” tab of “Accounting Box – GL,” select an Accounting Period and click “Overcarrying Material Price Variance” to view the variance:
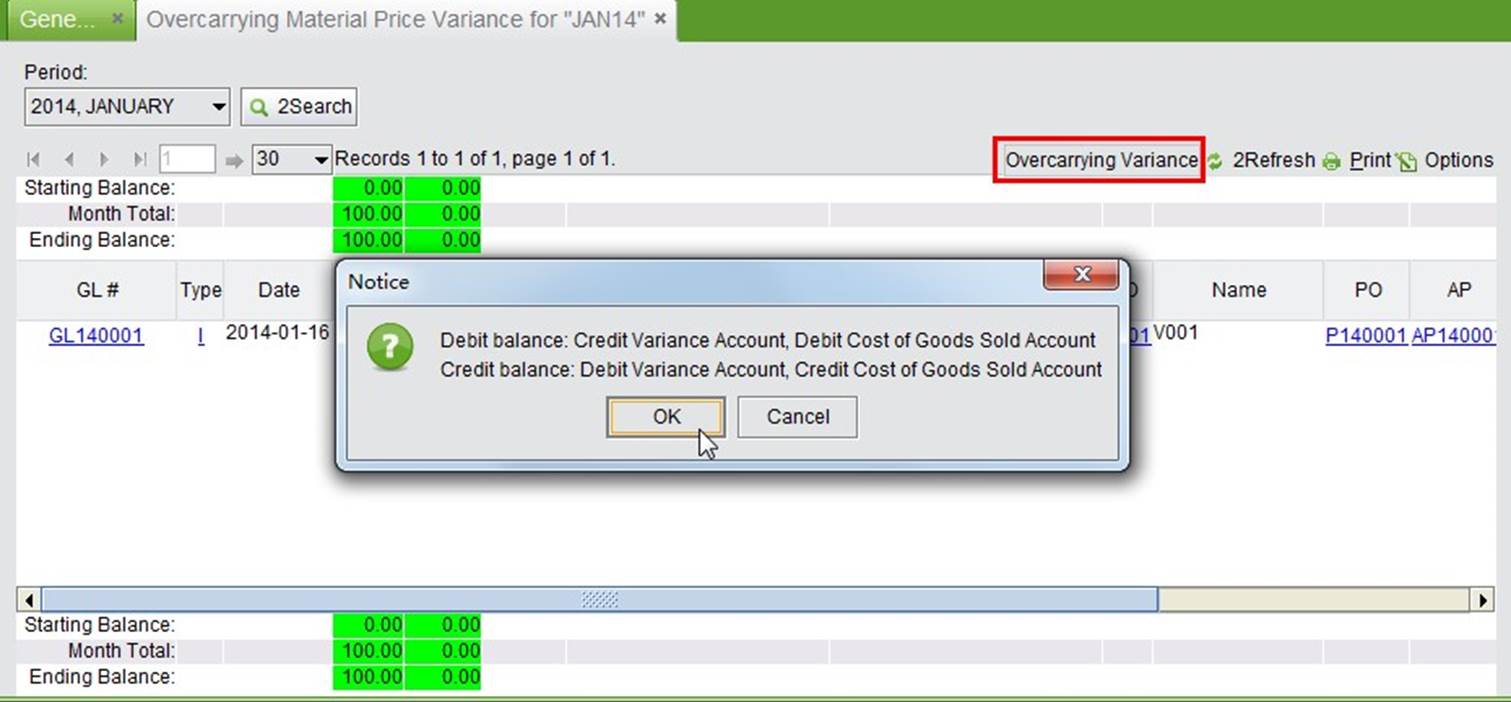 |
Click “Overcarrying Variance” – “OK” to generate the GL transaction for the variance.
The Cost of Raw Materials that are issued to the Work Order also requires calculation. The “WO Item InWIP Report” under the “InWIP” tab of “Accounting Box –GL” will do the InWIP material accounting. Click the button to view all Materials issued and their costs. Click “Create GL” to generate the Transaction.
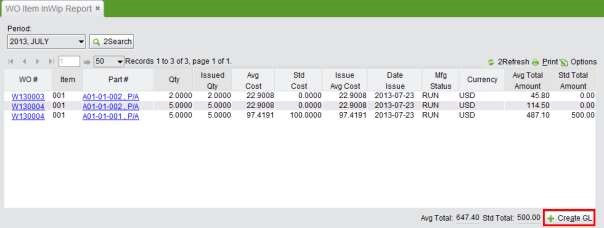 |
Two settings in “Company Account Settings” are required to make the InWIP Transactions: “WIP Start Using Date” and “Work In Process Account.” Usually, the Transaction debit account “Inventory - Work In Process” and credit account “Inventory – Raw Materials.” About the start time, the rule is that materials that are issued before you do the setting or before the start date won’t be counted.
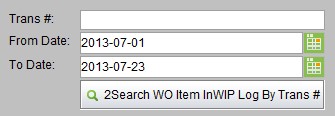
You can use the search function below to search for the InWIP Transactions.
 |
When Parts in an NCR are required to be scrapped, there are two ways to make a GL for the scrapped Parts. On the bottom of NCR Properties, click “Make GL” to make a GL. Or, you can do it in the Accounting Box. Find “2Search NCRs to Create Scrap GL” under the “Reports” tab and set the search conditions.
Search results show all NCRs that have scrapped Parts without GLs.
 |
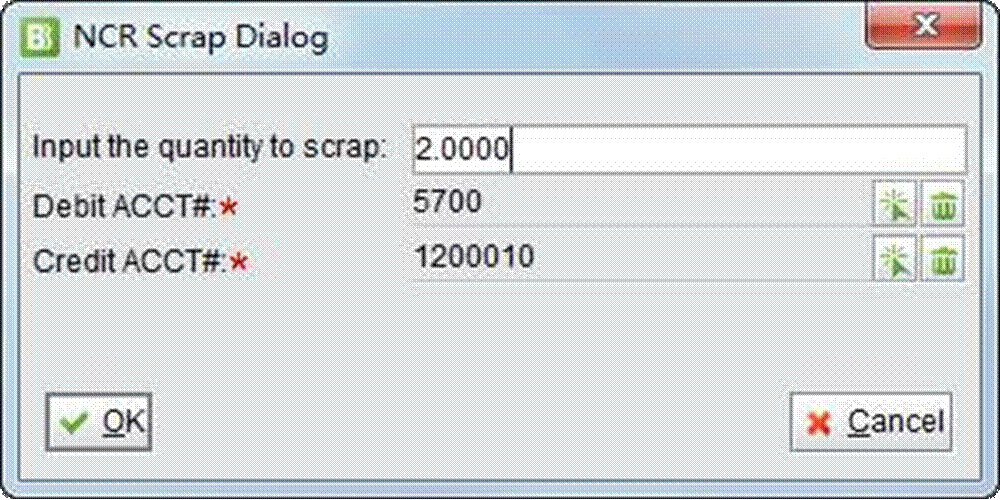
On the popup dialog window, set the debit and credit account, then click “OK” to finish the GL.
 |
You can use the search function below to look for the NCR Scrapped Report. At the search results, total debit and credit are calculated.
Most of the important financial reports are available in the Info Center of the Accounting Box. Besides, you can back up and search for accounting documents in the Info Center.
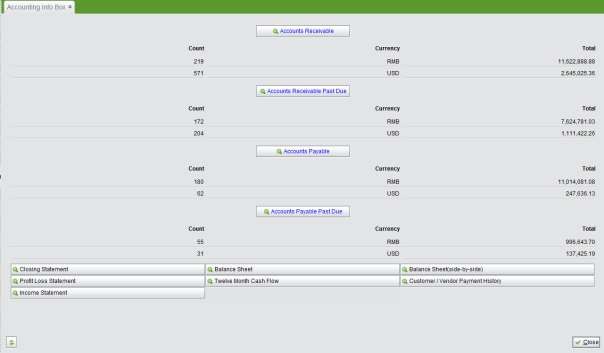
Click “Accounting Info Box” under the “Info Centre” tab in “Accounting Box - GL” to view all of the accounting reports. Click a report name to view detailed reports.
 |
Fiscal Year Documents, including the Balance Sheet, Balance Sheet (Side by Side), Profit Loss and Closing Statement can be backed up by clicking “Save Document” individually. The Accounting Box Info Center provides an easier way to back up these documents. Click “Back up Document by Fiscal Year” in the Accounting Box Info Center to open the backup interface where you can select a Fiscal Year and a document type, then click “Back up” to back up the documents. Select “Backup All” to back up all of these documents in the selected Fiscal Year.
Before back up, you need to go to the “Document Box” to set the backup path for each document type.
You can search for the backup Balance Sheet, Balance Sheet (Side by Side) and Closing Statement with the search criteria of Doc Type, CU and Accounting Period.
You can search for the backup Profit Loss document here.
Under the “General” tab, you can search for the GL of a specified account in an Accounting Period. Search results tell the Debit and Credit amount during the Accounting Period, the starting balance and ending balance, and General Ledgers Ending Balance that are not accounted.
Using this function, you can search for account balance by Address ID or Employee ID. Search results are shown by ID. Click “Detail” in the line to view all GLs of this account and ID.
 |
This is a comprehensive search function for General Ledgers. Debit, Credit and other information will be shown in the search results.
Fill in an amount to search for GLs with perfectly matching debit and credit amounts.
Use this function to search for payments that are made or received by Check. Select the CU, Account,
Accounting Period and fill in the ID. Then, click the button to see the total amount of the Check Register.
Bank reconciliation is a process that explains the difference between the bank balance shown in your bank statement, as supplied by the bank, and the corresponding amount shown in the your own accounting records at a particular point in time. Here, you will use “Bank Reconciliation” to see your balance in 2BizBox, and compare with your bank statement.
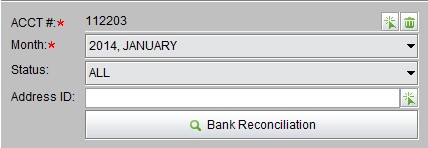
ACCT#: pick an account # that you need to search for the balance
Month: select an accounting period
Status: Checks have two statuses “cleared” and “outstanding.” In search result, you can mark a check as “clear” if it is in accordant with your bank balance.
Address ID: fill in an ID, or leave it blank to see checks for all addresses of the account
 |
In search results as below, all checks are shown. Mark a check with “clear” and click “save,” it’ll become a “cleared” check. The rest will remain “outstanding.”
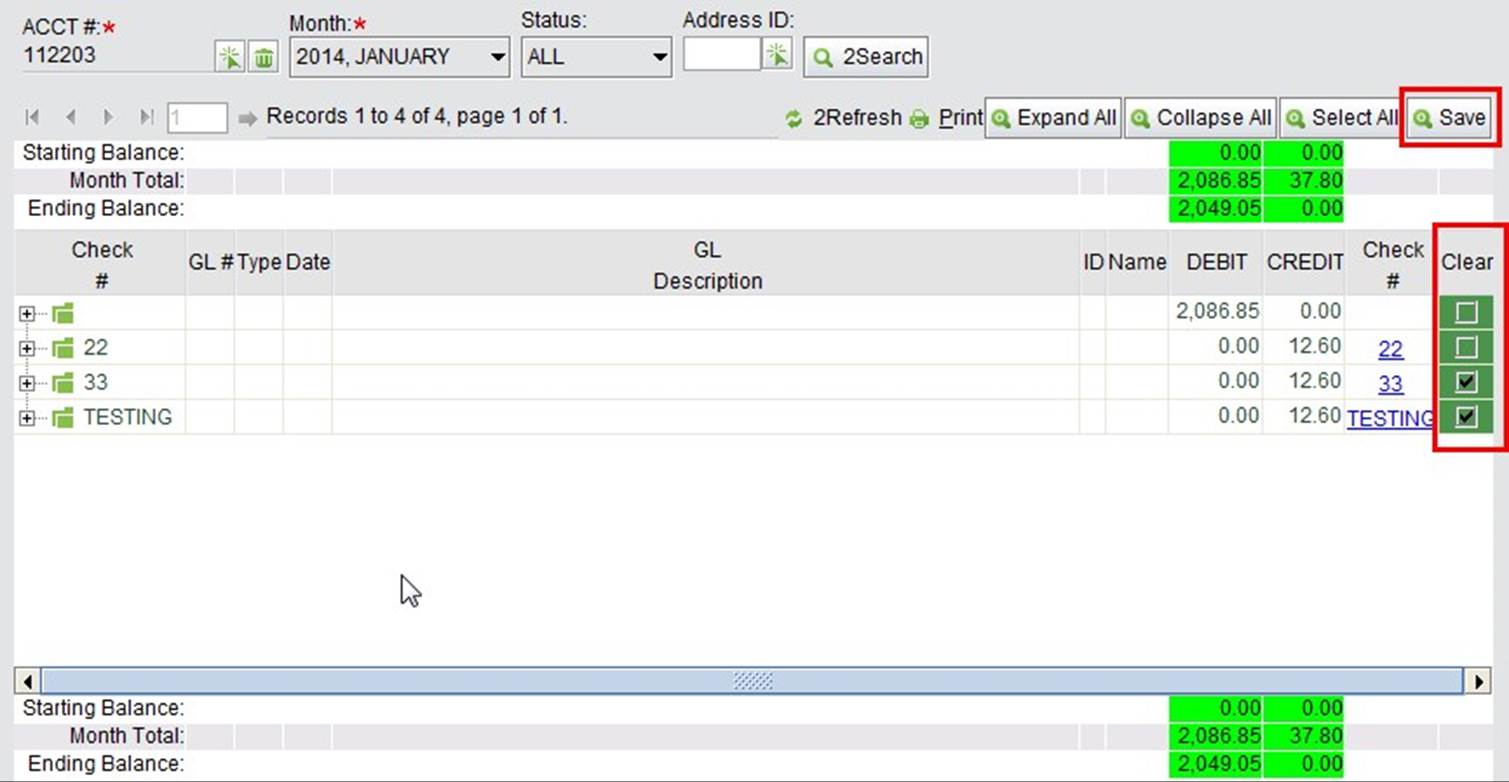 |
When all the checks in this account are marked as “cleared,” the account status will become “closed” in the bank reconciliation report.
The bank reconciliation report will tell you the bank reconciliation status of each account for each accounting period.
 |
Double click a line item to view the detail of the account balance and check status.
 |