2BizBox® Manual |
Go back to 13.0 Main |
Accrual Accounting is a method that recognizes economic events by matching revenues to expenses at the time the transaction occurs, rather than when payment is made (or received). In 2BizBox, "AP Accrual" enables users to create the accrued Accounts Payable when a PO is received. Later, you can offset AP Accrual after the payment is transferred to the vendor.
For 2BizBox LLC, when performing month-end closing, it sometimes happens that materials arrive, but invoices do not, so the payment cannot be made. By making AP Accrual, the Raw Material is increased, as well as the Accounts Payable. When the real invoice arrives with variance, you can write off AP Accrual and make a new AP.
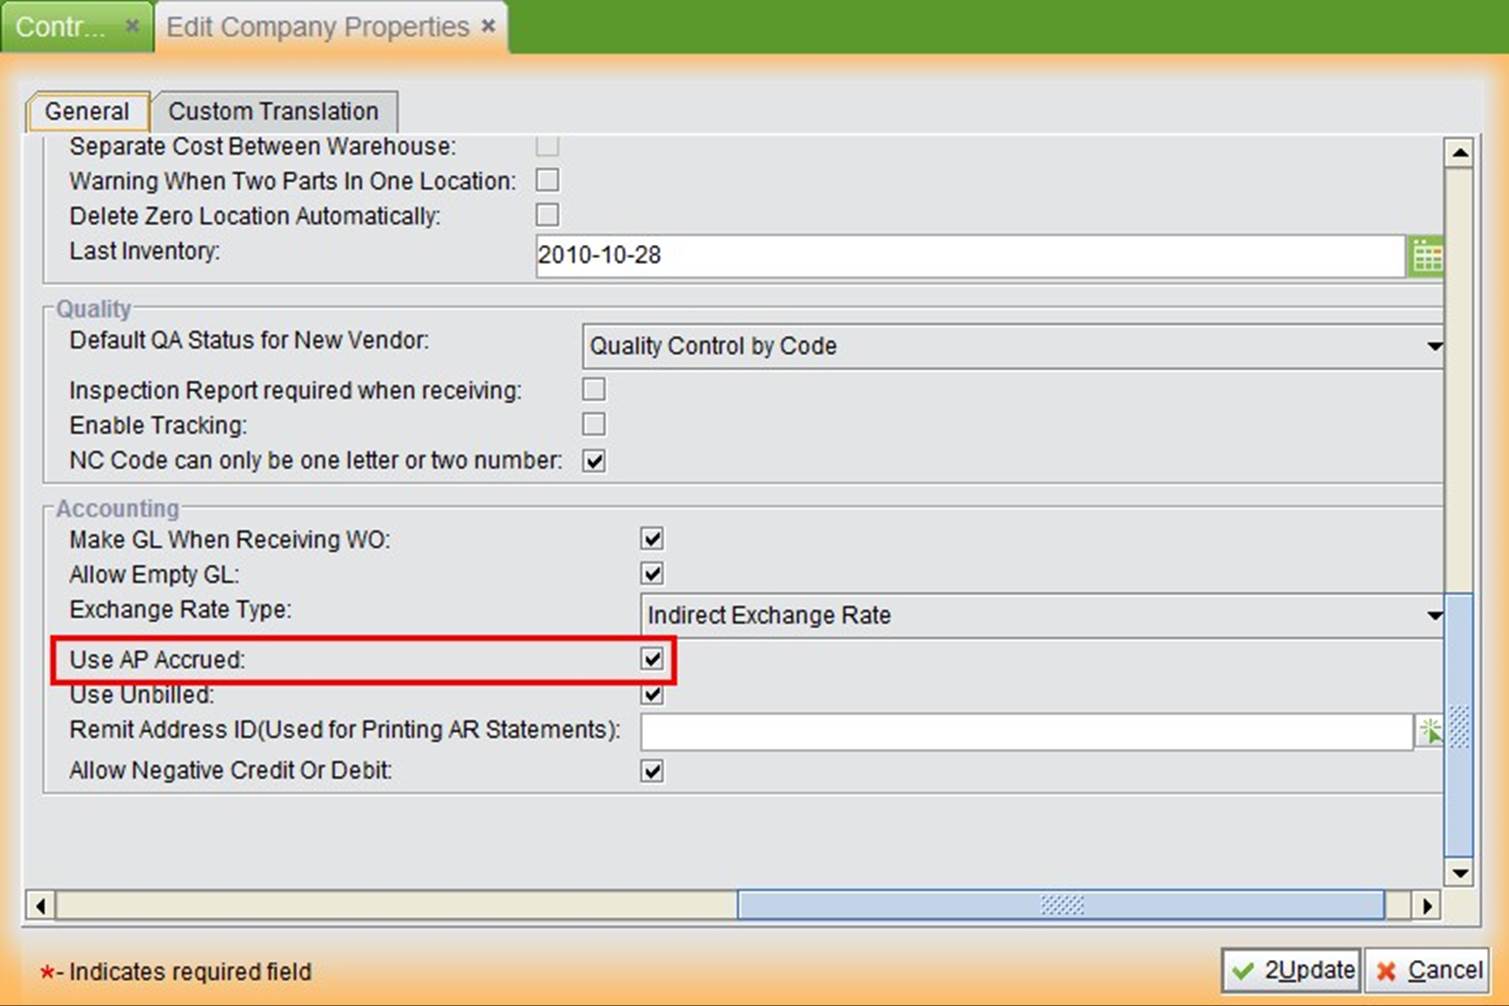
The default settings of 2BizBox closes AP Accrual. To enable it, open the company settings under the Control Panel and check "Use AP Accrued" in Accounting settings.
|
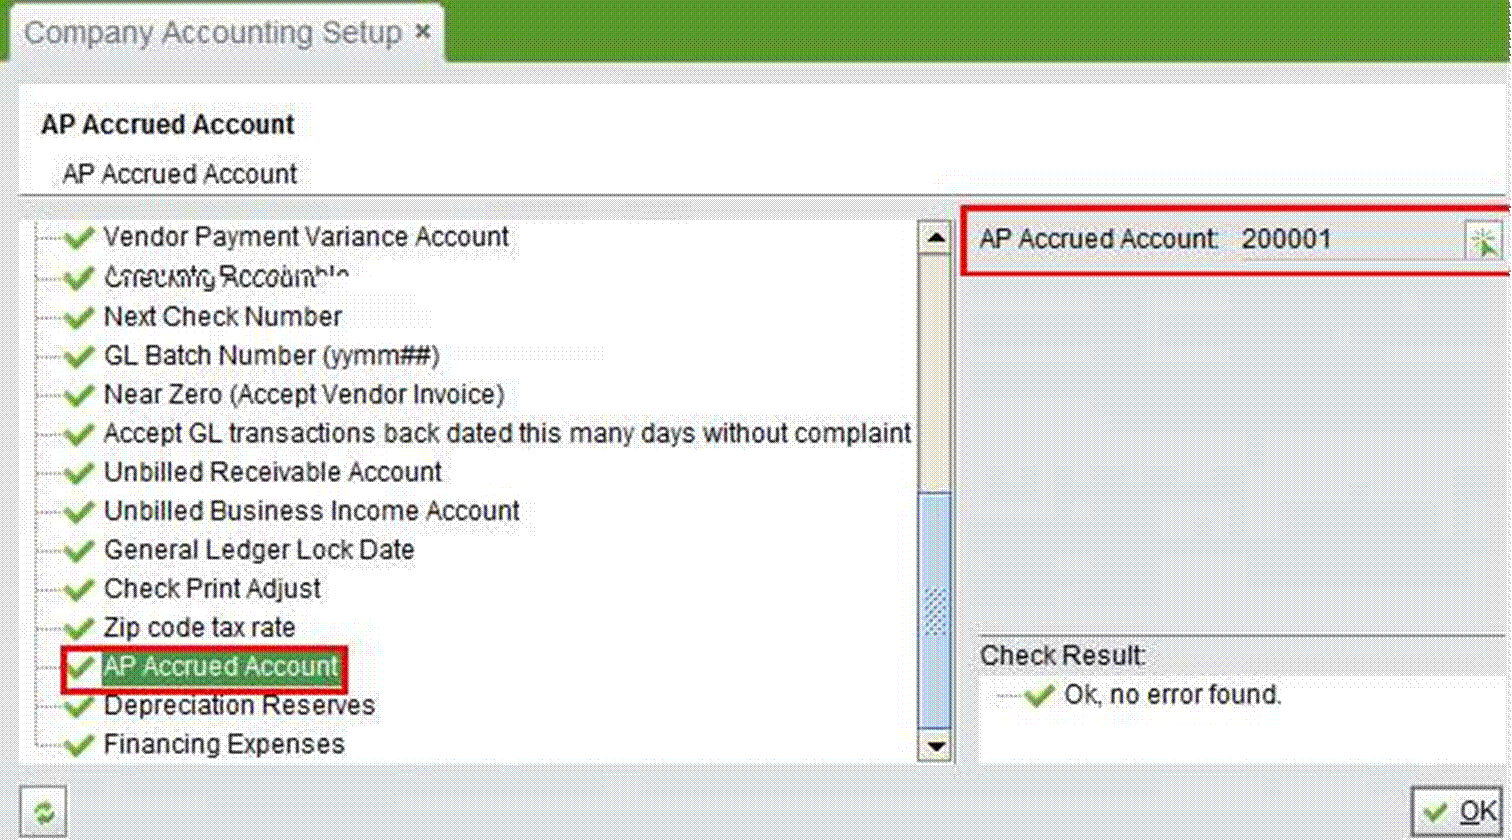
After enabling the AP Accrued function, go to “Company Accounting Settings” to see if the AP Accrued Account is properly set up.
 |
AP Accrual (hereafter mentioned as "PA") can be created through a Receiver or added with Receiver Items in “Accounting Box – AP Accrual.”
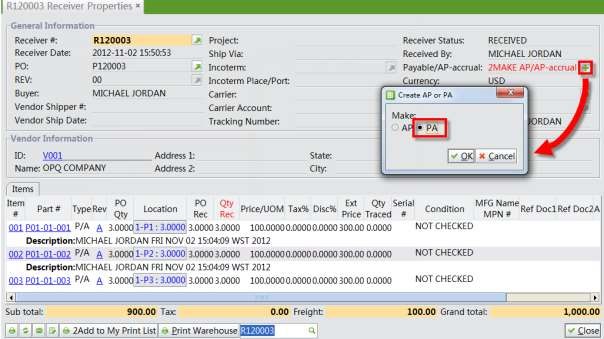
When AP Accrual is enabled, the "2Make AP" option on the Receiver Property interface changes to "2Make
AP/AP-Accrual". Click the "+" button to create PA. In the pop-up window, you can choose to make "AP" or "PA:"
 |
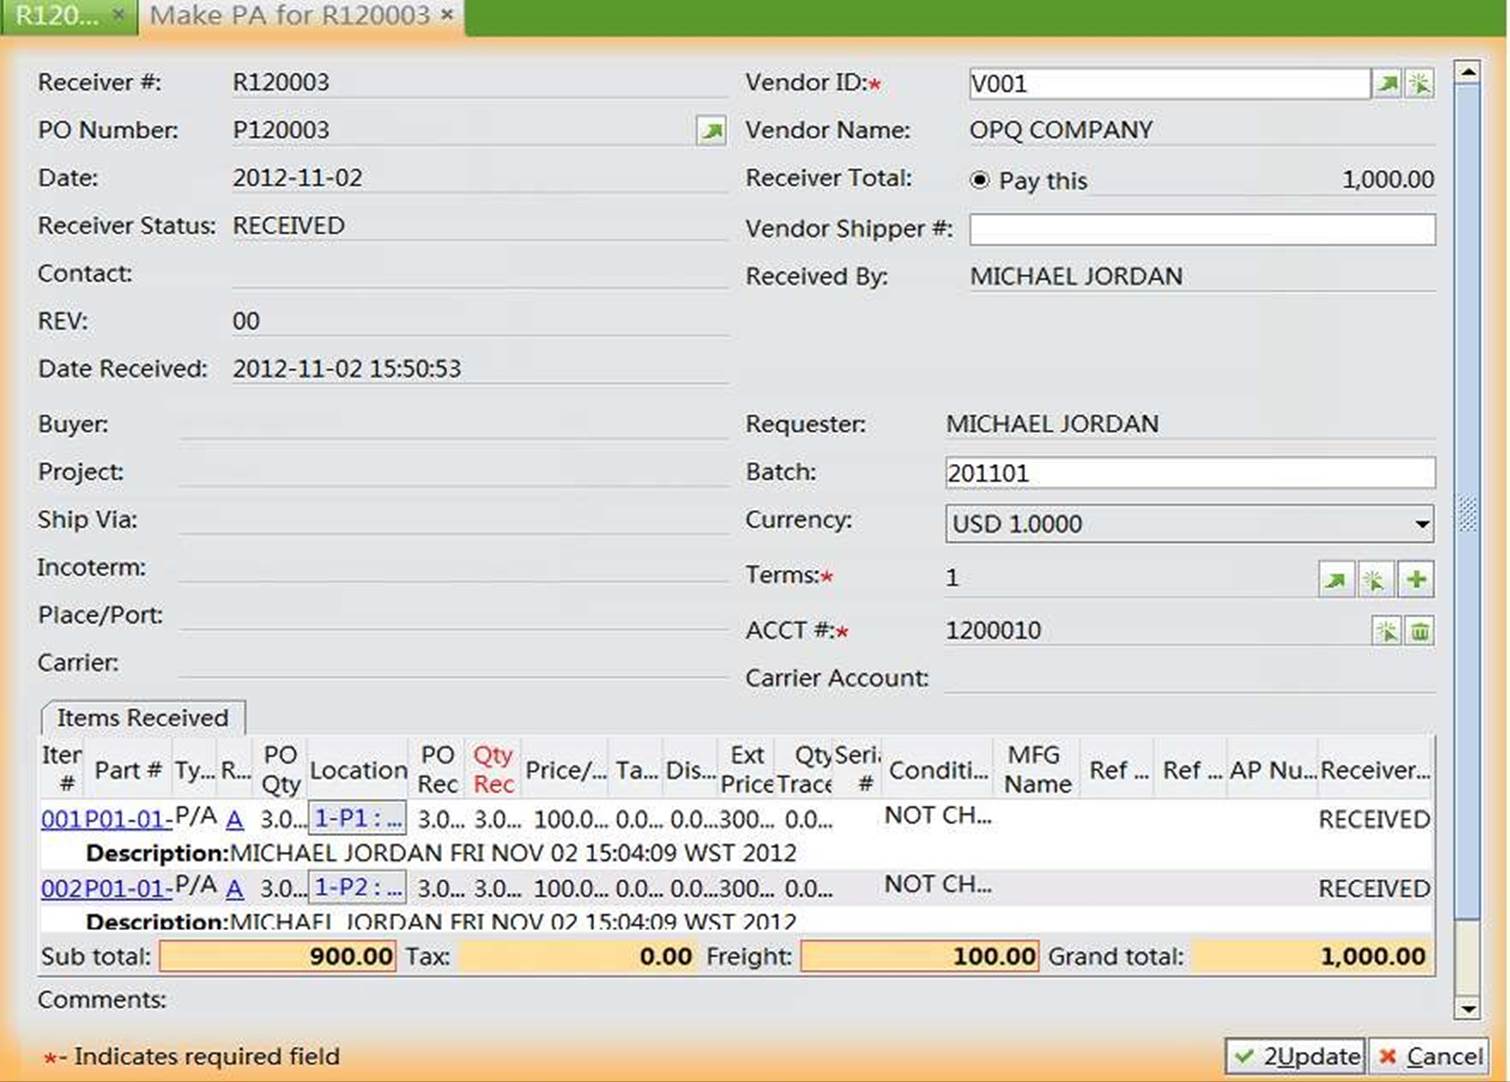
Choose "PA" and click "OK" to open the "Make PA for Receiver" interface, where you should fill in the correct payment terms and accounting entry. Click "2Update" to finish updating the PA.
 |
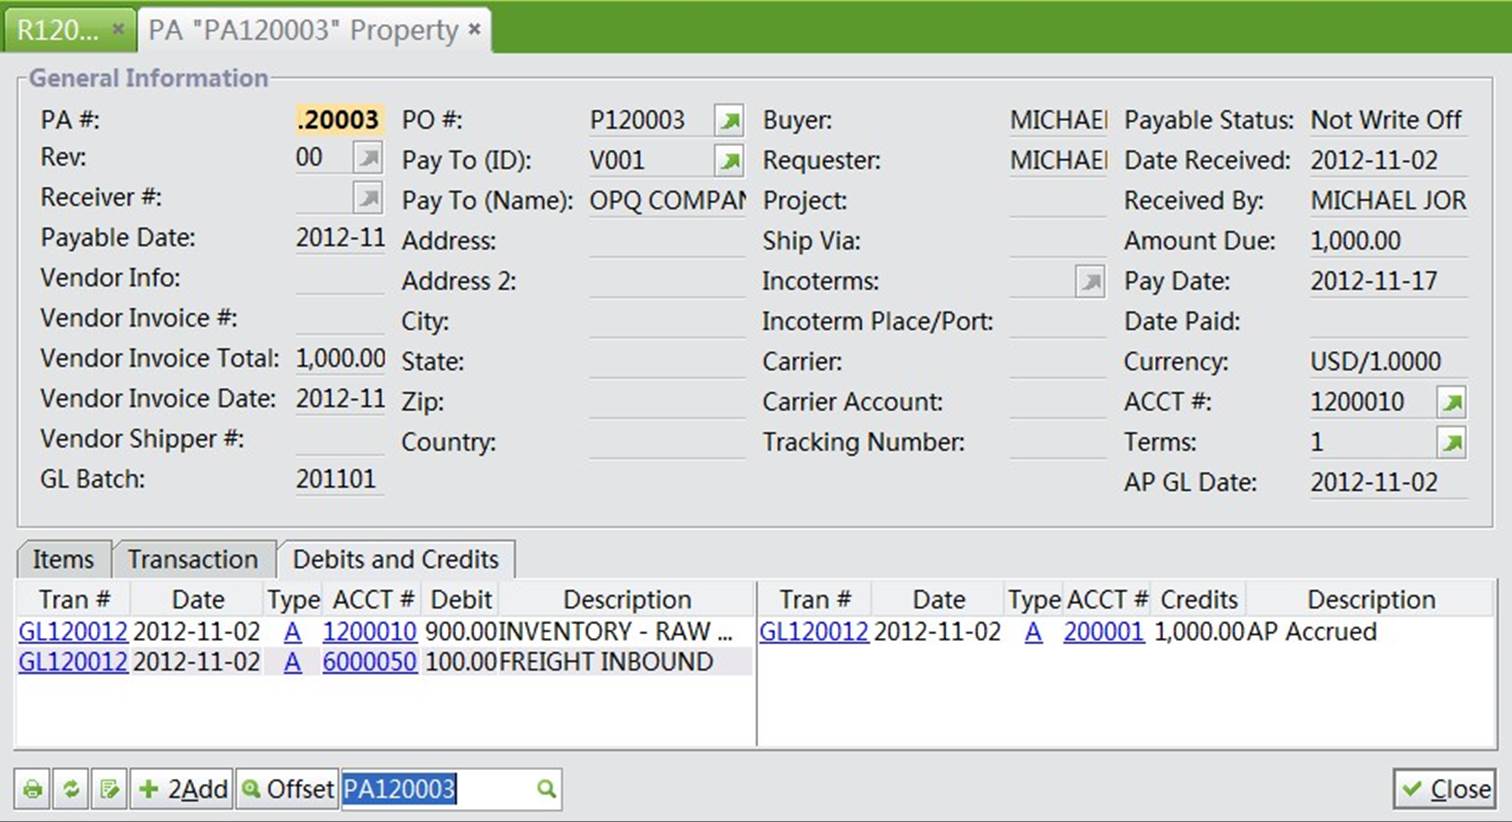
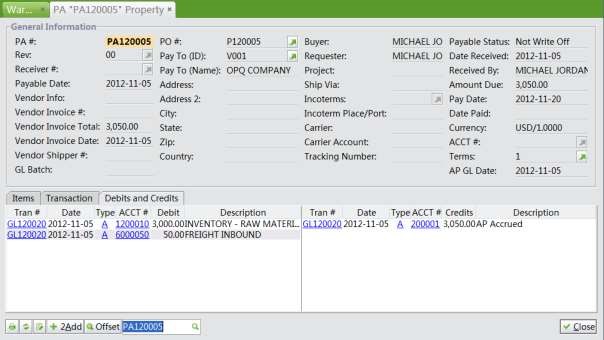
When a PA is created, the status is "Not Write Off." In the "Debits and Credits" tab, you can see the Debit entry including "Inventory - raw material" and "Freight" while the Credit entry is "AP Accrued."
 |
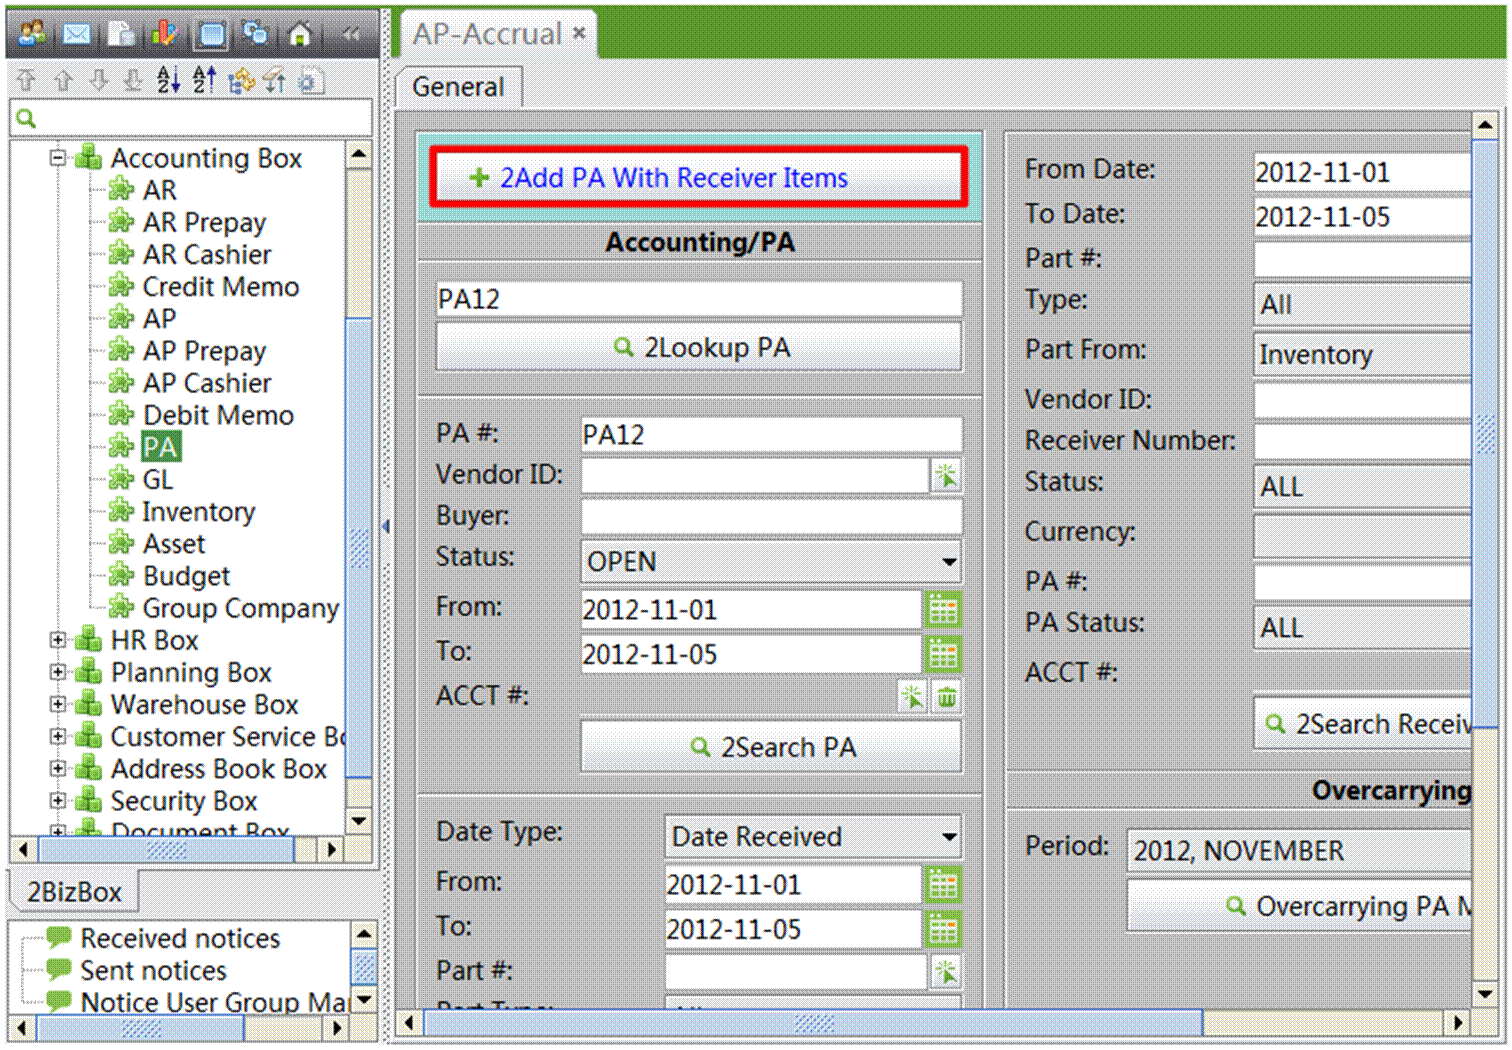
Another way to create a PA is to add the PA with Receiver Items in the "Accounting Box - PA - General" interface.
In this way, you can create a PA with multiple Receivers from the same vendor. Click "2Add PA with Receiver Items:"
 |
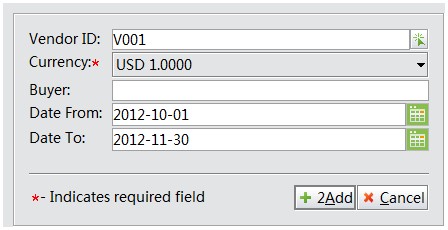
Enter the Vendor and date range, then click "2Add" to search for matched Receiver Items:
 |
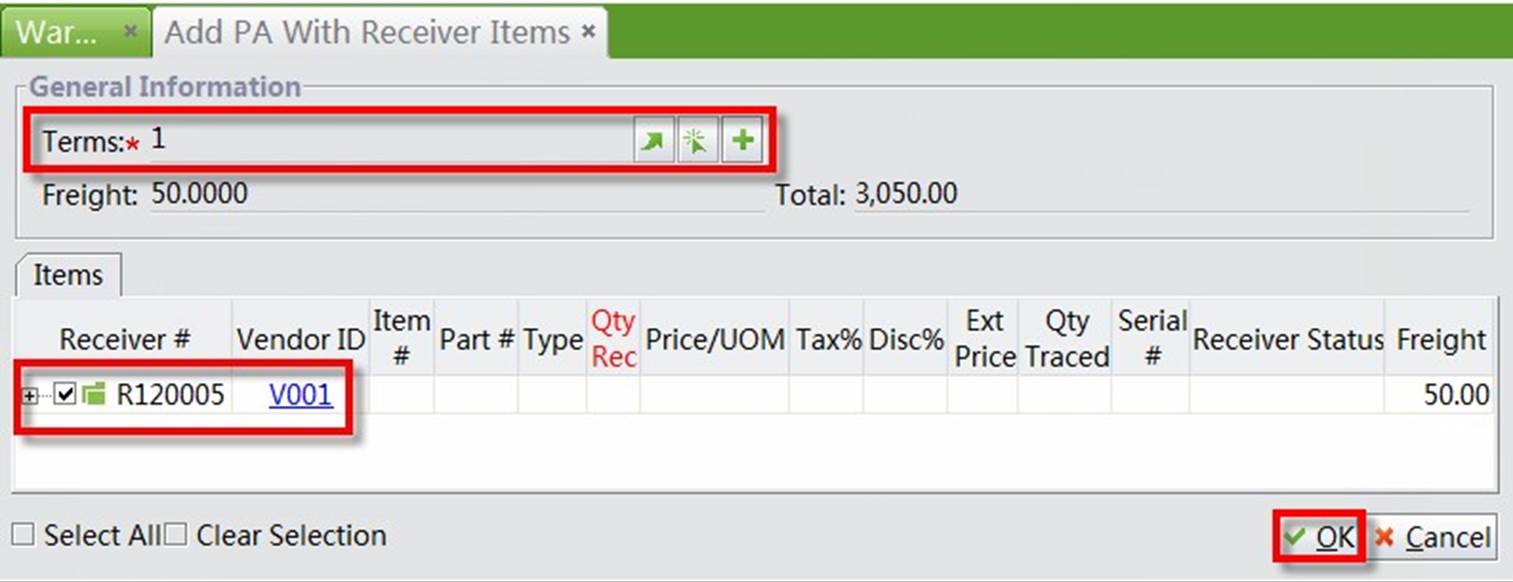
In the "Add PA with Receiver Items" interface, all of the eligible Receiver Items will be listed. Choose a payment term, check items and click "OK:"
 |
In this way, you also create a PA as follows:
 |
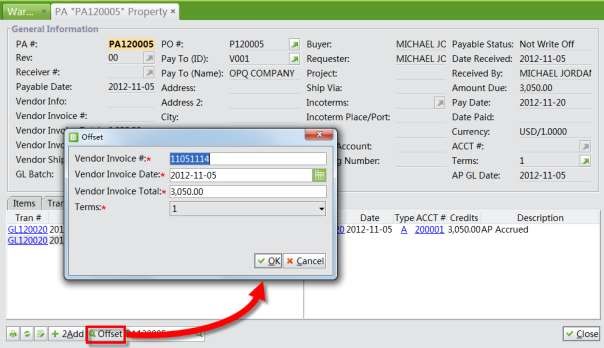
When the vendor's Invoices arrive, you can write off the PA and create an AP entry accordingly. On the bottom left of the PA Property interface, click "Offset" and enter the Vendor Invoice information in the pop-up window:
 |
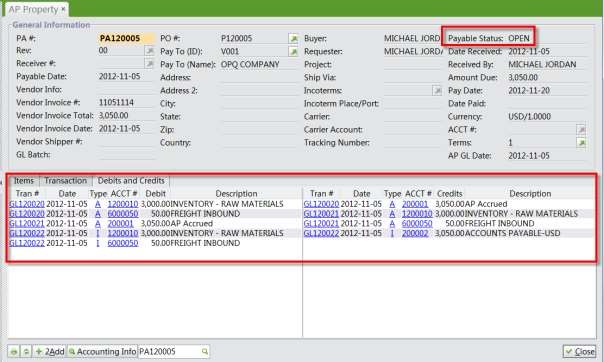
Click "OK" to write off the PA. After that, the PA status becomes "OPEN" and two GLs are created. In the GL entries, the AP Accrued is recorded as a Debit while the Accounts Payable is recorded as a Credit.
 |
Finally, you can make payment as usual. Click "Accounting Info" at the bottom left of the PA and click"2Add Payment:"
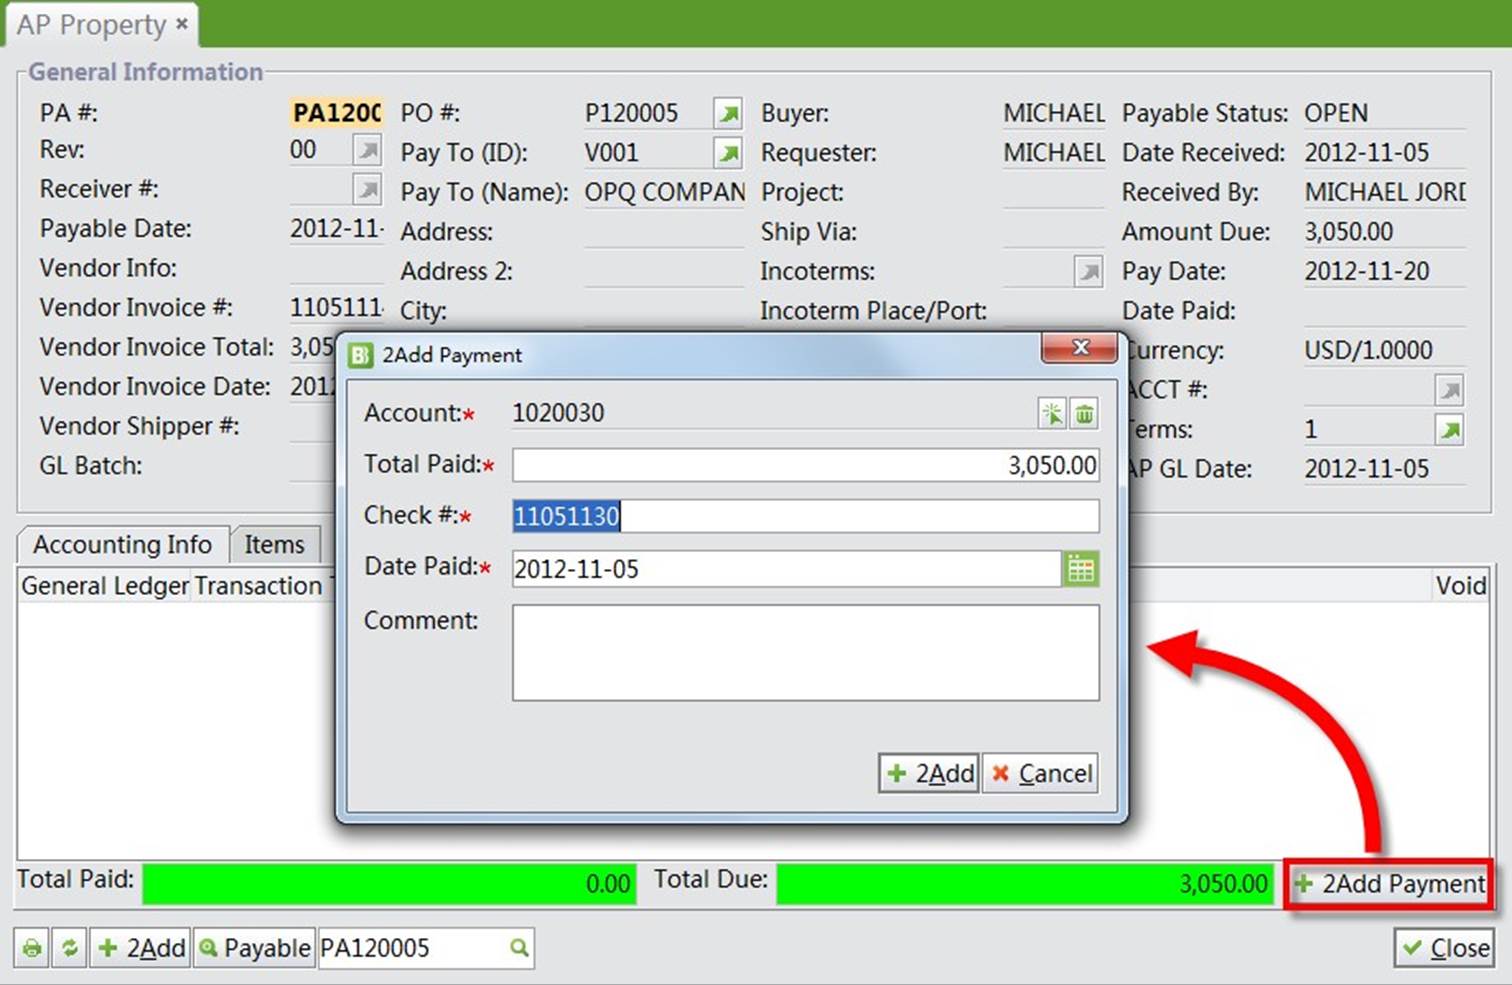 |
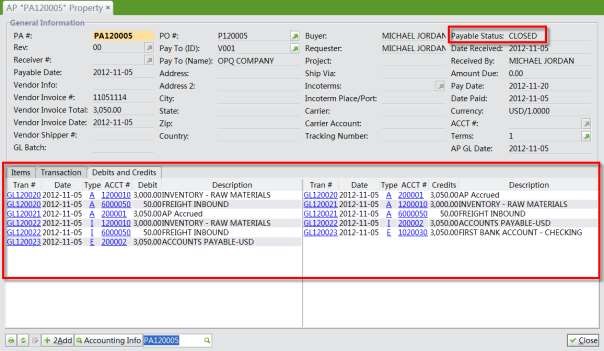
Enter the payment information and click "2Add" to complete the payment. Then, the PA Status becomes "CLOSED." Accounts Payable is recorded as a Debit while the payment is recorded as a Credit.
 |
This is the basic lookup function. Fill in the complete PA# and click the button to view the specified PA.
Search for PA by PA#, Vendor ID, Buyer Name, PA Status, PA created date range, and PA Account.
Search for PA by Date Type, Date Range, Part#, Part Type, Product Code, Vendor ID, Vendor Invoice#, PA Status, Account# and Receiver #.
Use this function to search for Receivers with PA Information. Search conditions include Receiver’s Date Range, Part#, Part Type, Part From, Vendor ID, Receiver#, Receiver Status, Currency, PA#, PA Status and Account#.