
2BizBox® Manual |
Go back to 12.0 Main |
NCR, short for Non Conformance Report or Non Compliance Report, allows users to disposition the failed or defective parts or assemblies. When a product does not comply with a quality specification, it is recorded in a
Non Conformance Report for further decisions: to rework, scrap, degrade or waiver. In addition, through the
Non Conformance Report, the cost of the failed product will be properly processed to ensure precise inventory.
Before introducing NCRs and their operation, we would like to bring up the concept of the NC Code. As the name suggests, the NC Code is a type of code that describes nonconformance statuses. Further, the NC Code can be a set of characters that represents a failure, defect, or repair code, indicating the unqualified parts in a Non Conformance Report.
In a standard inspection process in 2BizBox, the quality department carries out all aspects of inspection to parts that are purchased, semi-finished products from the previous sequence, and finished products. The inspection results are recorded in the Inspection Report, and when nonconforming parts are discovered, the quality department creates a Non Conformance Report and chooses the NC Code to indicate the appropriate quality issues. Periodically, the quality department should cumulate the NC Codes, analyze, and propose corrective actions.
In 2BizBox, the format of an NC Code is limited to letters or digits. For example, “Letters + Digits” is not an acceptable combination. In the Control Panel of 2BizBox, there is an option to control the length of an NC Code to One Letter or Two Digits.
|
Below is the selection interface for the NC Code when updating an NCR.
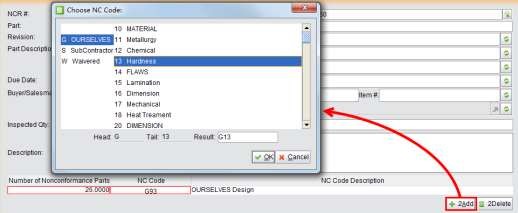 |
As you can see, an NC Code is composed of “Head” and “Tail.” In this scenario, “Head” represents the origin of non-conformance, while “Tail” represents the detailed performance. An NC Code in the format of “Head + Tail” defines what causes the defective part and what the defect is.
Since it is compulsory to choose both “Head” and “Tail” for an NC Code in the NCR, follow this rule when pre-defining the NC Codes.
Below is a set of NC Codes for your reference:
01 |
MATERIAL |
41 |
Dimension |
02 |
Metallurgy |
42 |
Profile |
03 |
Chemical |
43 |
Porosity |
04 |
Hardness |
44 |
Slag Inclusion |
05 |
FLAWS |
45 |
Undercut |
06 |
Lamination |
46 |
Cracks |
07 |
Dimension |
47 |
Incomplete Fusion |
08 |
Mechanical |
48 |
Lack Of Penetration |
09 |
Heat Treatment |
49 |
Start And Stop |
10 |
DIMENSION |
50 |
PERFORMANCE |
11 |
Diameter |
51 |
Less Than Specification |
12 |
Length |
52 |
Lack of Uniformity/Consistency |
13 |
Threads |
53 |
Missing Part for Assembly |
14 |
Keyways |
54 |
Damaged part for Assy |
15 |
Gears |
55 |
ELECTRICAL |
16 |
Angles |
56 |
Functional Control System |
17 |
Radius |
57 |
PC Board |
18 |
Shape |
58 |
Performance Of Part |
19 |
Mis-Located |
59 |
Damaged/Wrong/Missing Part |
20 |
FINISH & WORKMANSHIP |
60 |
Poor Assembly Workmanship |
21 |
Coating/Plating/Black oxide treat |
61 |
Not Clean |
22 |
Paint |
62 |
DOCUMENTATION |
23 |
Shipping/handling damage |
63 |
Incomplete |
24 |
Mechanical Damage |
64 |
No Traceability |
25 |
Burrs And Sharp Edges |
65 |
Not Within Specification |
26 |
Rougher than specification |
66 |
Unreadable |
27 |
Corrosion |
67 |
MISCELLANEOUS |
28 |
Assembly Quality |
68 |
Storage |
29 |
Identification of Part and Supplier |
69 |
Packaging Protection |
30 |
UBBER & PLASTICS |
70 |
Design |
31 |
Curing |
71 |
Handling |
32 |
Bonding |
72 |
Purchase |
33 |
Construction |
73 |
QTY of Delivery |
34 |
Dimension |
74 |
Delivery |
35 |
Deformation |
75 |
Delivery Wrong |
36 |
Strength/Pressure |
|
|
37 |
Surface Defects |
W |
Work Process |
38 |
Hardness |
S |
Supplier |
39 |
Internal Defects |
O |
Outsourcing |
40 |
WELDING |
|
|
To add an NC Code, click “2Add NC Code” under the “General” tab of “Quality Box – NC Code.”
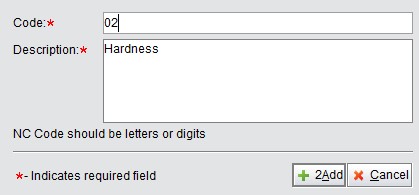 |
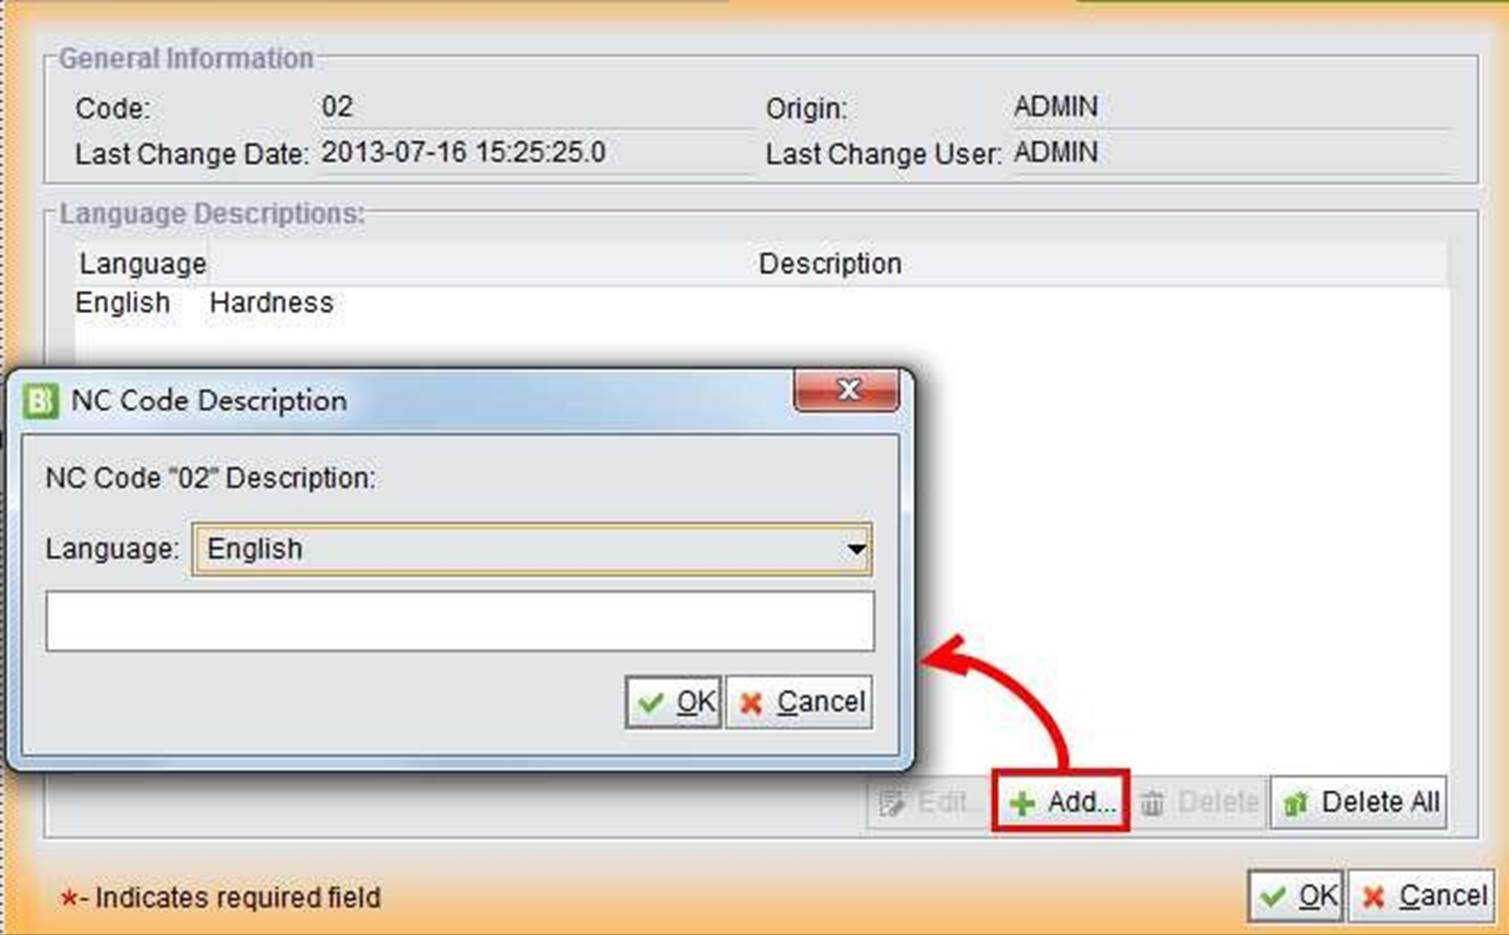
Fill in the Code# and description, then click “2Add” to open the Updating interface. When updating the NC Code, you are allowed to add other language descriptions. When you are finished, click “OK” to submit.
 |
Under the “General” tab of the NC Code sub module, the basic look up and search functions are provided.
Fill in an NC Code to view the NC Code properties.
Click this button to view all NC Codes in the system.
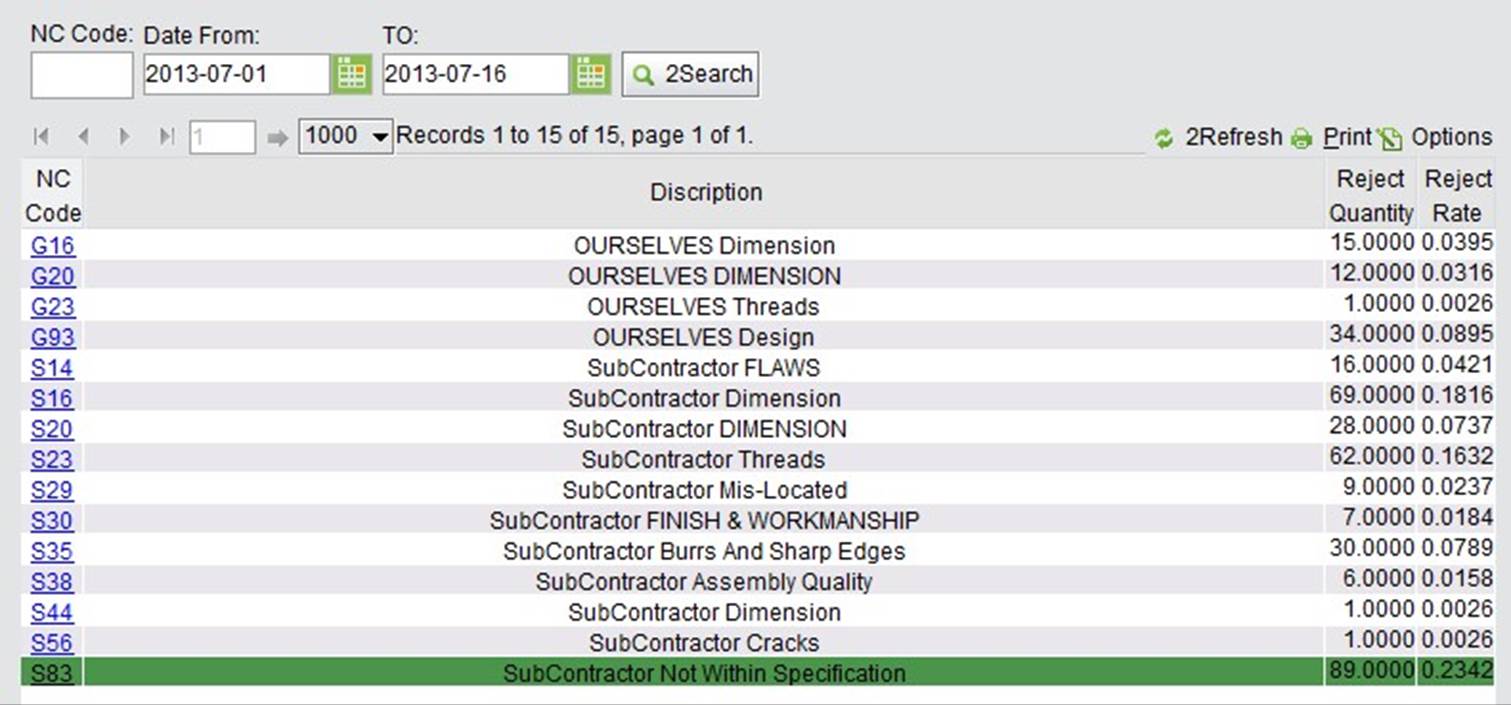
NC Code Reject Rate identifies the percentage that an NC Code occurs amongst all NC Codes during a specific time range. Under the “Reports” tab of “Quality Box – NC Code,” you can fill in an NC Code and set a time range, then click “2Search NC Code Reject Rate” to view the results.
From the image below, you can see that from 2013-07-01 to 2013-07-16, NC Code S83 has the highest rejected quantity of 89, and the reject rate is 23.42% of all the rejected quantities.
 |
A more flexible chart of NC Code Reject Rate can be viewed in “2BizBox Dashboard – More Charts – Manufacturing – NC Code Reject Rate.” You can select NC Codes from the dropdown menu, and then click “Refresh.” The pie chart will display the rate of each NC Code that you selected.
 |
Depending on the origin of a nonconforming part, there are multiple ways to make a Non Conformance Report. We will begin with creating an NCR for Parts from the warehouse.
When unqualified parts are discovered in the warehouse, you can make a Non Conformance Report directly. Under the “General” tab of “Quality Box – NCR,” click “2Add NCR” to open the adding interface:
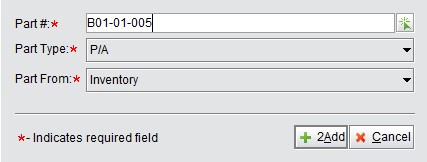 |
Fill in the Part# and click “2Add” to open the Update NCR interface.
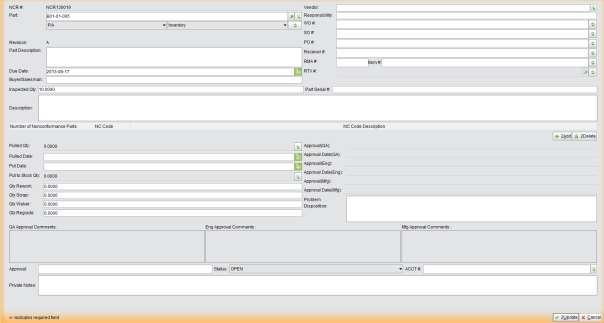 |
At the top left of the interface, fill in the basic information of this NCR. At the top right of the interface fill in the related orders of the Part if it is traceable.
Fill in “10” here. If you want to process ONE specific defective part, fill in “1” here.
Under the “Description” frame, you can choose an NC Code for the defective part. Please refer to the “NC Code” Chapter for a detailed explanation.
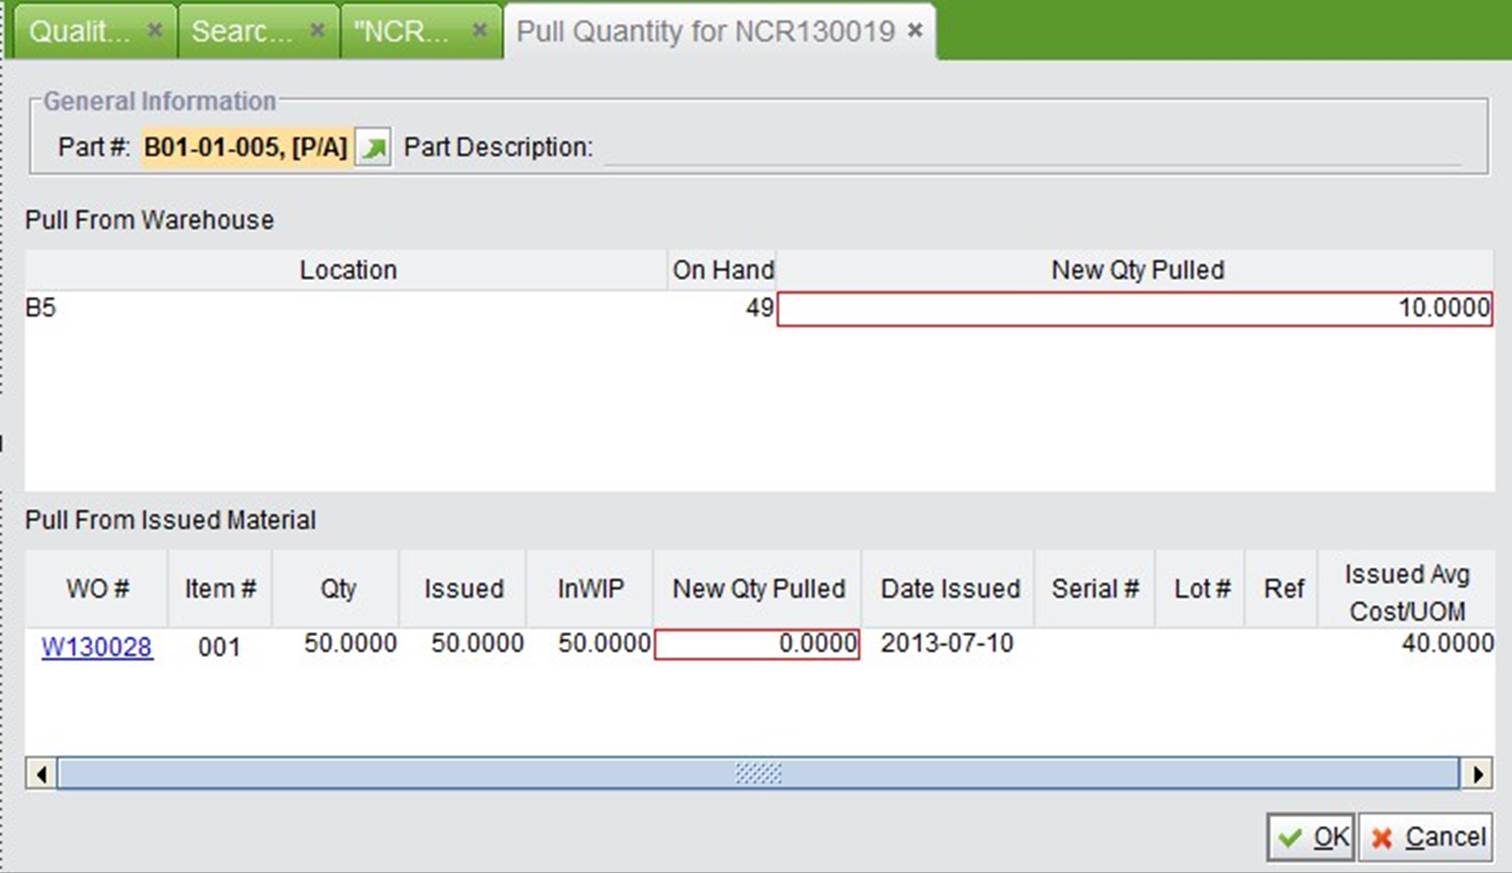
Pulled Qty: Click “![]() ” to pull the inspected quantity of parts from inventory. The pulled-out quantity will be deducted from the part inventory and sent to an “In QA” location.
” to pull the inspected quantity of parts from inventory. The pulled-out quantity will be deducted from the part inventory and sent to an “In QA” location.
Take Part “B01-01-005.” Let’s say we pull out 10 of part “B01-01-001” from inventory. Click “![]() ” to open the interface below, and fill in “10” in “New Qty Pulled” at the top of the screen. Then click “OK” to return to the Update NCR interface. We will discuss “Pull From Issued Material” later.
” to open the interface below, and fill in “10” in “New Qty Pulled” at the top of the screen. Then click “OK” to return to the Update NCR interface. We will discuss “Pull From Issued Material” later.
 |
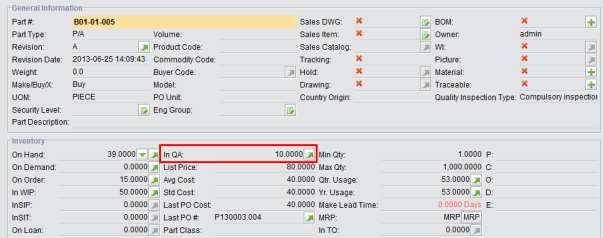
Let’s update the NCR first, and see what happened to the inventory of “B01-01-005.” In the Properties of “B01-01-005,” the QA quantity changed to “10.”
 |
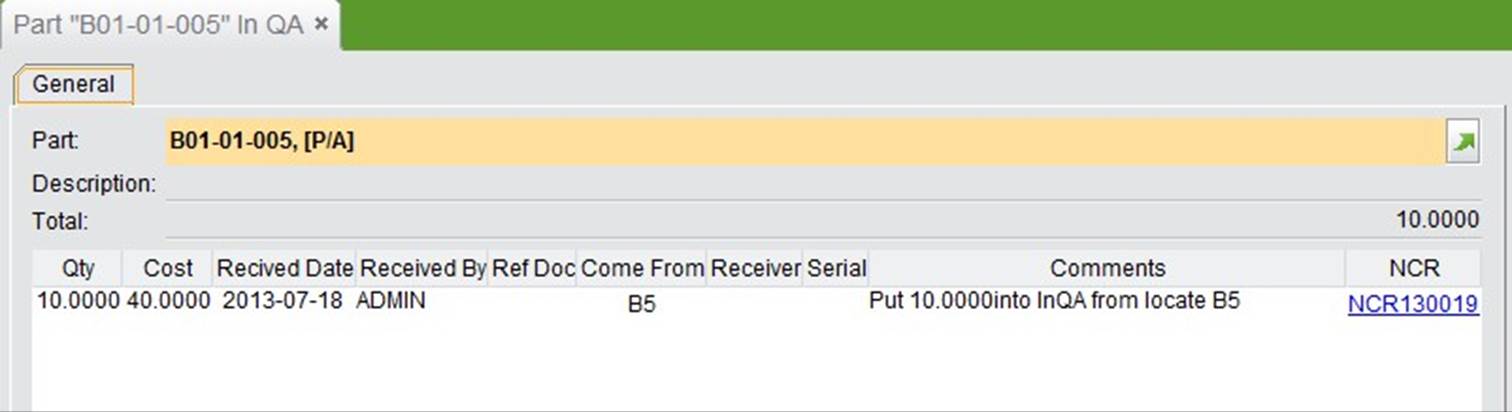
Click the “![]() ” button to see a detailed description of the In QA quantity, the related NCR, and where the part comes from:
” button to see a detailed description of the In QA quantity, the related NCR, and where the part comes from:
 |
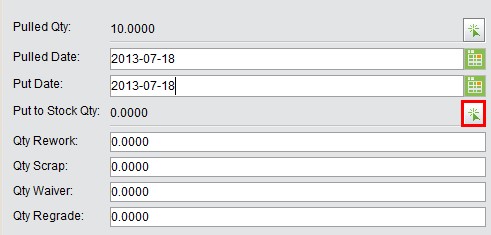
Assume that from 10 “B01-01-001,” two defective parts are detected, of which one needs to be scrapped and the other need to be reworked. Open the “Update NCR” interface again to put back 8 qualified “B01-01-001.”
 |
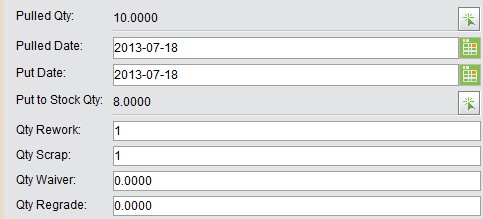
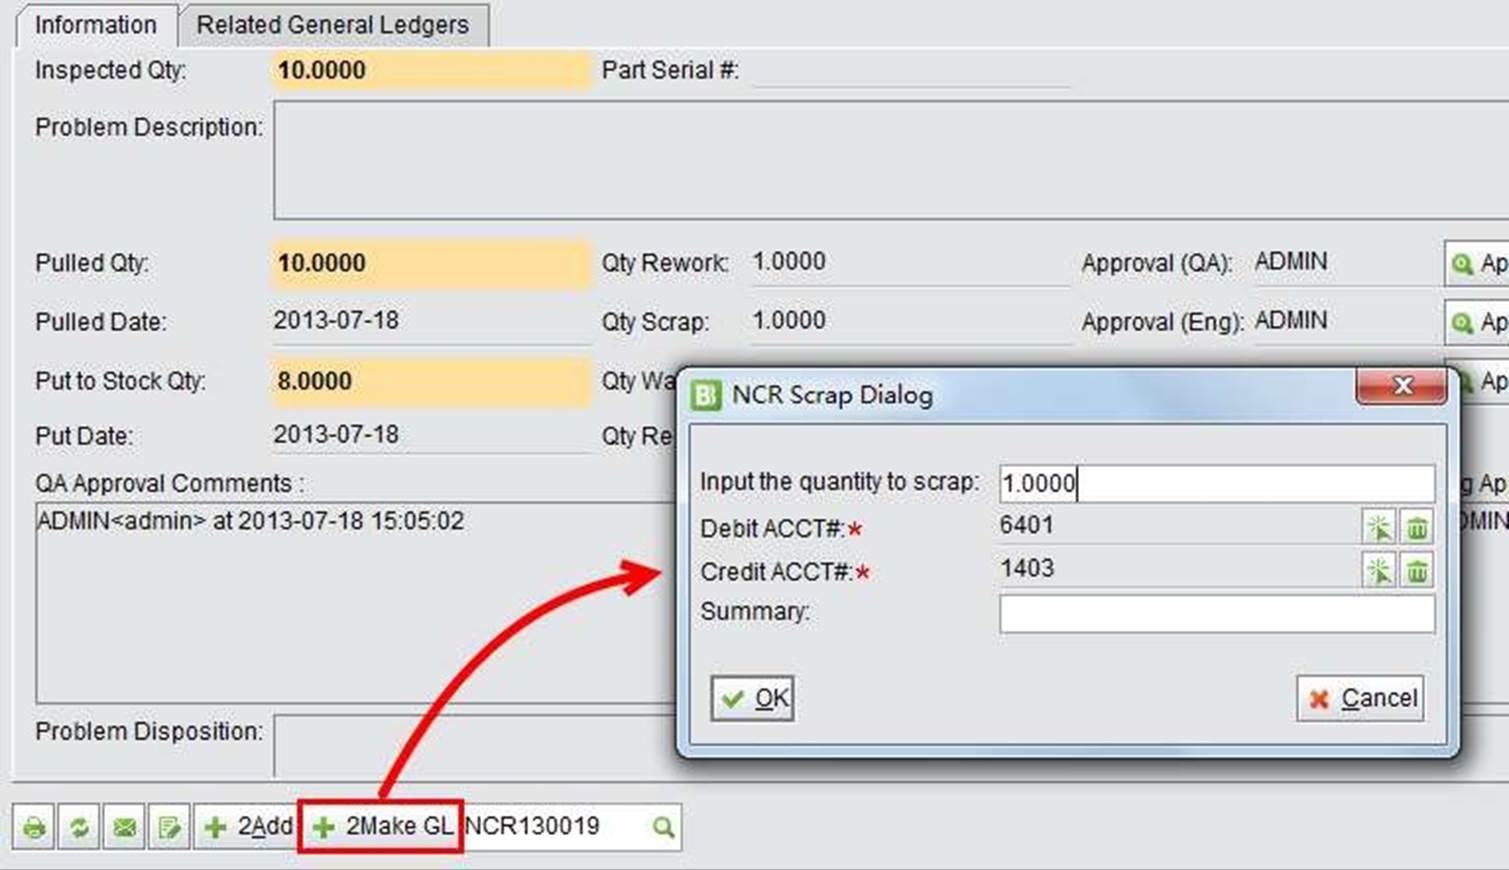
Return to the Update NCR interface to fill in the Scrap and Rework quantities as follows, then submit the NCR.
 |
Multiple approvals are required to approve this NCR. You can add NCR Approvals under the “Control” tab.
 |
After we sent back 8 “B01-01-001” to the warehouse, the In QA quantity becomes “2.”
To scrap a part, click “2Make GL” at the bottom of the screen. 2BizBox will make a General Ledger to credit the Raw Materials Account and debit the Cost of Goods Sold Account.
 |
After the part is scrapped, the “2Make GL” button disappears from the NCR, and the In QA Qty is reduced by one. Now, we have one “B01-01-001” to rework.
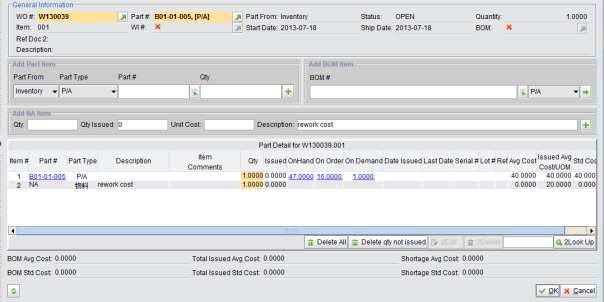
Make and approve a Work Order for “B01-01-001,” but do not set it up. Go to the “Update Part Detail” interface to add “B01-01-001” and any other materials required to rework the part. Refer to the “Maintenance Work Order” Chapter for detailed operations.
 |
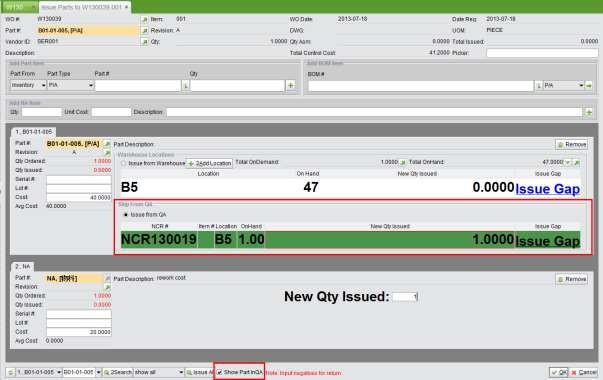
Go to the issuing part interface for the Work Order, check “Show Part InQA” at the bottom and you will see the In QA location and NCR of “B01-01-001.” In this way, you can issue the reworked part from the InQA location.
 |
Finally, when the Rework Work Order is finished, go to the Update NCR interface to change its status to “Closed.”
If the defective part needs to be waivered or degraded and returned to the warehouse, fill in the quantity “Waiver” or “Degrade,” then put it back to stock quantity.
In the previous chapter, we mentioned that when you pull out a part for inspection, you can pull out a part that is InWIP. InWIP means that the part has been issued to an open Work Order. When issued materials are found to be defective or damaged, use NCR to pull them out from InWIP for further processing.
Follow the steps as before to create an NCR. When you are pulling out the part, select the part from “Pull from Issued Material” where all the Work Orders the part was issued to will be listed.
The next steps are the same as previous ones. You can choose to scrap, rework, waiver or degrade the part. Scrapping a part involves cost accounts. When you scrap an InWIP part and make a GL from an NCR, the cost comes down to the Raw Material Account. If you want to accumulate the scrapped part to the Work Order, instead of making a GL, you need to revise the part quantity in Work Order Part Detail and issue one more part to the Work Order. In this situation, you also need to put the part back to the InWIP location when updating the NCR.
From the previous chapters, we learned that part goes to the InQA location when it is pulled out in an NCR. InQA locations keep parts that have quality issues. You can receive parts with quality issues to an InQA location or issue parts from an InQA location under various circumstances.
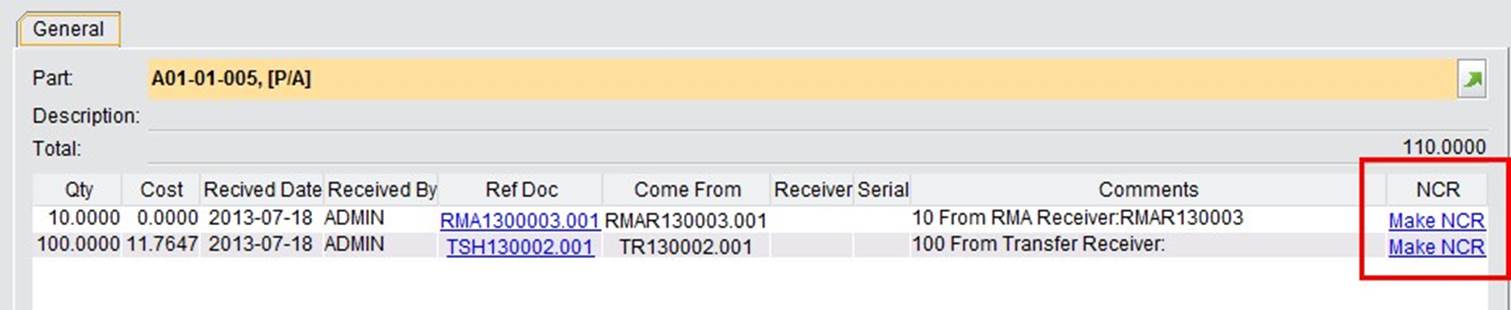
When you are receiving a RMA or Transfer Order (outer), you can receive the part to an InQA location. Then, on the properties of Part InQA location, make an NCR for these parts directly by clicking “Make NCR.”
 |
Under the “General” tab of the NCR module, you can search for NCRs in many different ways.
This is the basic lookup function. Fill in the complete NCR# and click the button to view an NCR.
This is the basic search function. Fill in the keywords of an NCR# and click the button to search for an NCR.
Fill in the keywords of a Part# to search for NCRs that contain these parts.
Fill in the keywords of a Part# to search for Parts InQA without an NCR. At the search results, you can click “MakeNCR” to quickly create an NCR for the part.
This is a comprehensive search for NCRs by various conditions.
Under the “Reports” tab of the NCR module, you can look up and make NCR Reports as needed.
Click this button to view all past due NCRs in the system.
Click this button to view all open NCRs in the system.
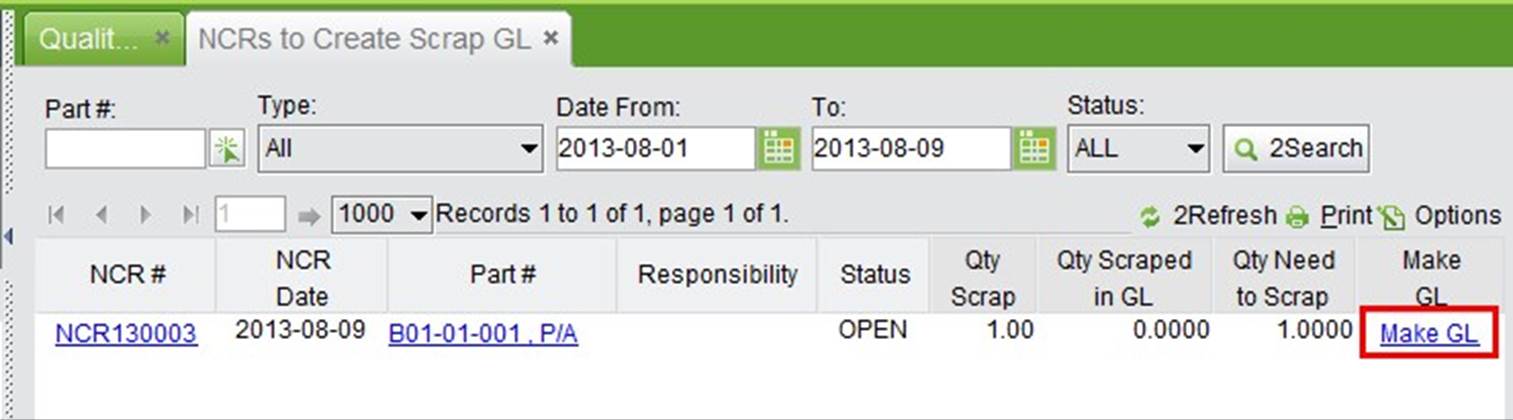
Use Part#, Type, Date Range and Status to search for NCRs with a scrap number, but for which a GL has not been made. At the search results, click “Make GL” to make a GL for the scrap parts.
 |
NCR statuses are controlled manually, so when parts with quality issues are processed properly, you need to change the NCR status to “CLOSED.” Use Part#, Type, Date Range and Status to search Open NCRs that need to be closed. Two additional conditions are optional here:
Pulled > 0 and Put > 0 only: Check this option to search for NCRs with Pulled Qty & Put Qty larger than 0. ![]() Pulled = Put Only: Check this option to search NCRs whose Pulled Qty equals the Put Qty.
Pulled = Put Only: Check this option to search NCRs whose Pulled Qty equals the Put Qty.
Approvals can be added by three department functions: quality approval, engineering approval and manufacturing approval. Under the “Control” tab of the NCR sub module, you can add NCR Approval, look up, and search for Approvals.
Click “Add NCR Approval” to open the adding interface, in which you can fill in the Employee ID and select an approval type. Then, click “2Add” to open the Update NCR Approval interface.
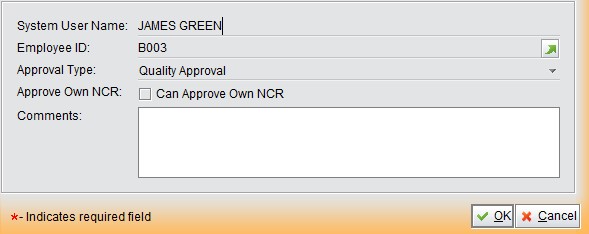 |
Indicate whether to allow a user to approve their own NCR, then click “OK” to submit.
This is the basic look up function. Fill in a complete Approval ID and select the type, then click the button to view the NCR.
Click this button to view all NCR Approvals in the system.