2BizBox® Manual |
Go back to 11.0 Main |
Cutters, fixtures, measuring implements, die and moulds are all properties of the enterprise. They can be purchased from outside vendors, or self manufactured and assembled. These tools are called manufacturing “Tools” and they are managed in the “Tool Master” sub module.
You can consider a “Tool” as a special type of “Part,” so managing Tools is quite similar to managing Parts. In “Tool Master,” you can create Tool profiles, set up inventory and then trace from acquisition to return. You can also purchase, sell, and manufacture Tools. Proper management of the “Tool Master” and assuring its regular function will improve the manufacturing activity of your enterprise, and help to avoid monetary losses due to losing or random placement of tools.
In this Chapter, you will learn how to add Tools and search for Tools by various conditions.
|
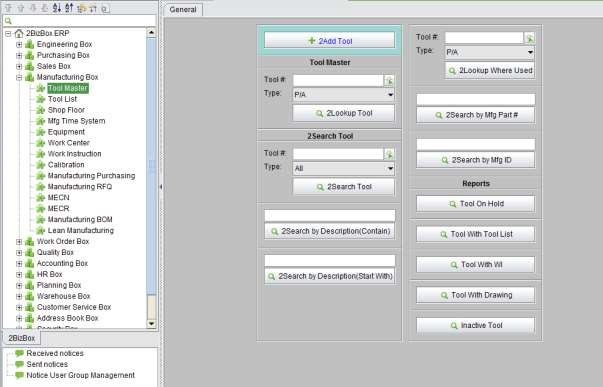
Open the “General” tab under “Manufacturing Box – Tool Master.” Here you can add a Tool. Click “2Add Tool” to enter the adding interface. You need to fill the following information:
Tool Number: Self-defined tool number; required
Revision: the Revision of the Tool; default revision is “A”
Tool Type: the same as Part Type, which can be added in the Control Panel
Tool UOM: the same as Part UOM, which can be added in the Control Panel; required
Tool Description: Description includes the keywords for searching
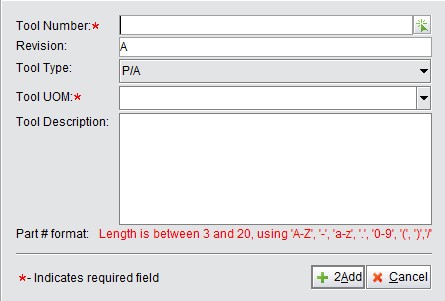 |
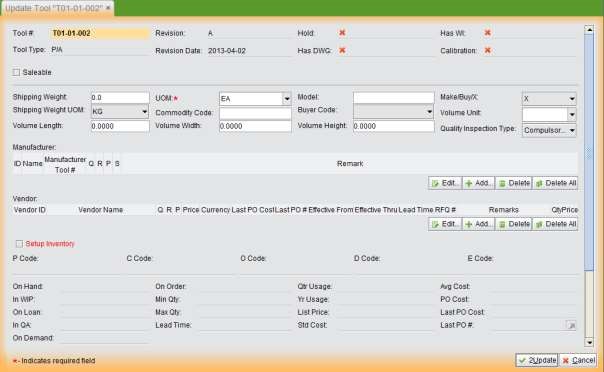
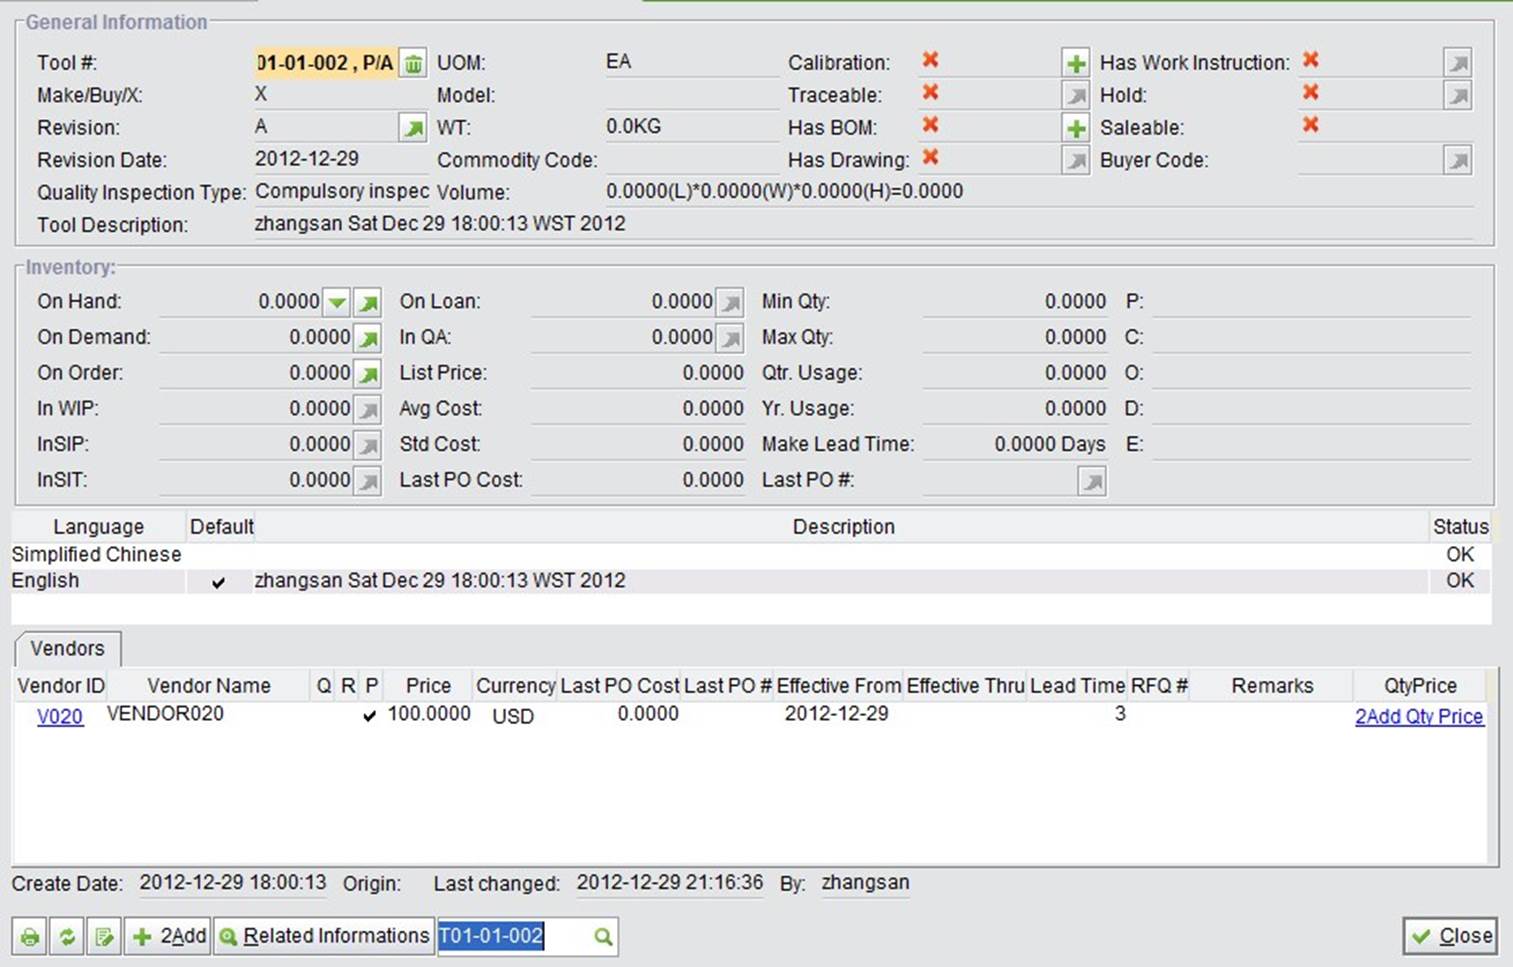
After filling in the required information, click “2Add” to open the “Update Tool” interface. Similar to “Update Part,” the Tool’s profile also includes 5 criteria: Basic information, Manufacturer, Vendor, Inventory, and Language Descriptions.
 |
 |
Property |
Note |
Tool # |
Shows the Tool Number; Tool number cannot be revised once created. |
Tool Type |
Shows Tool’s Type; Type can be added in the Control Panel. |
Revision |
Tool’s default revision is A. Revision can be updated by ECN. |
Revision Date |
Shows the created date of a Tool’s current revision. |
Hold |
Shows the Tool’s Hold status. You can hold a Tool when changing its revision by Manufacturing ECN. |
Has DWG |
Indicates whether the Tool has MFG Drawings. |
Has WI |
Indicates whether the Tool has Work Instructions. |
Calibration |
Indicates whether the Tool has Calibration records. |
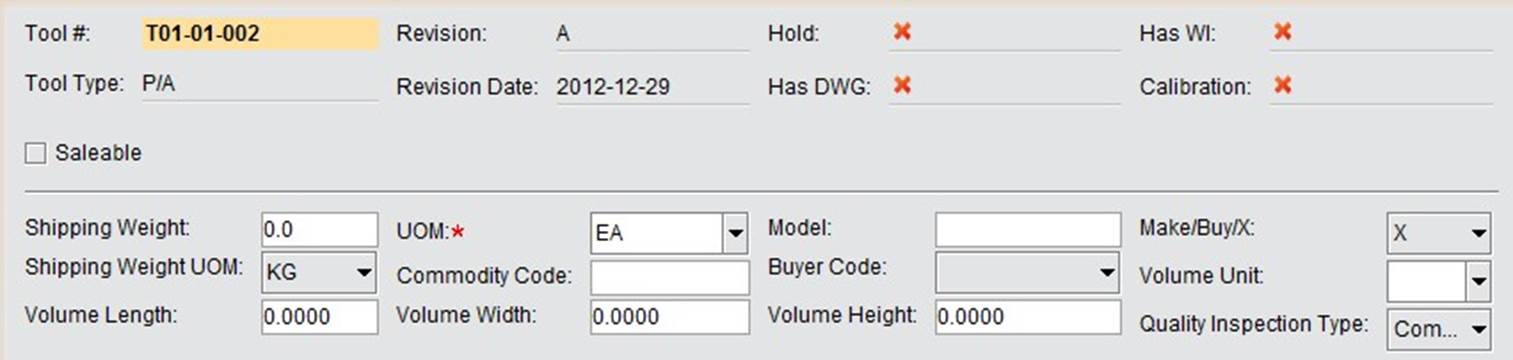
Salable |
Check to mark this Tool as “Saleable.” A “Saleable” Tool can be added to the “Sales Category” and sold in the “CG Box.” |
Shipping Weight |
The Tool’s shipping weight per unit. |
UOM |
The Unit of Measurement of this Tool. |
Model |
The model of this Tool. |
Make/Buy/X |
The source of this Tool. |
Shipping Weight UOM |
Weight UOM when shipping. |
Commodity Code |
Fill in the Tool’s commodity code. |
Buyer Code |
Buyer Code is used for distributing buyer’s purchasing tasks. You can set this in the “Purchasing Box.” |
Volume Unit |
Select the Volume Unit of the Tool. Volume Unit can be added in the “Control Panel.” |
Volume Length |
The Length of the Tool. |
Volume Width |
The Width of the Tool. |
Volume Height |
The Height of the Tool. |
Quality Inspection Type |
The three inspection types in the system are “Compulsory,” “Sampling,” and “Exemption.” Select the Tool’s inspection type in the drop down menu. You need to enable inspection when receiving in the “Control Panel.” |
The Tool’s Manufacturer is the party that manufactured the Tool. Usually, a Tool has an original number from the Manufacturer that can be recorded in the Tool’s Manufacturer information.
 |
Click “Add” to add a new Manufacturer of a Tool. In the pop up window, complete the following information:
MFG ID: Click the arrow to choose a MFG ID; MFG ID should be added in the Address Box.
MFG Name: MFG Name is related to MFG ID
MPN: Fill in the Tool’s original part number
Q: Fill in the Manufacturer’s quality certification
R: Fill in the Manufacturer’s quality level
P: Indicate whether this manufacturer has priority in purchasing this Tool
S: Indicate whether this manufacturer has priority in sales of this Tool
Click “OK” to submit a Manufacturer.
 |
Edit: Select a Manufacturer and click “Edit” to update a Manufacturer’s information
Delete: Select a Manufacturer and click “Delete” to delete a Manufacturer
Delete All: Multi-select Manufacturers and click “Delete All” to delete all Manufacturers
A Tool’s vendor can also be its manufacturer, or solely a vendor. You can add a Tool’s vendor information by clicking the “Add” button:
 |
Select a Vendor ID to enter the updating interface. Vendor ID should first be added in the Address Box.
 |
Q: Fill in the Vendor’s quality certification.
R: Fill in the Vendor’s quality level.
P: Indicate whether to give priority to purchasing from this Vendor.
Price: Fill in the price of this Tool purchased from this Vendor.
Currency: Fill in the currency of the above price.
Effective Date: Fill in the effective date of the above price.
Lead Time: Enter a vendor’s lead time to this Tool.
RFQ#: Enter our RFQ# when purchasing this Tool from this Vendor.
Click the “OK” button to add this Vendor.
 |
Edit: Select a Vendor and click “Edit” to update a Vendor’s information.
Delete: Select a Vendor and click “Delete” to delete a Vendor.
Delete All: Multi-select Vendors and click “Delete All” to delete all vendors.
Check the “Setup Inventory” box to establish inventory for this Tool:
 |
P/C/O/E Code: This field is reserved; it is not used in the system yet.
D Code: Tool’s discount code
Onhand: Tool’s actual inventory in the warehouse. The system will update the quantity automatically. Generally, users don’t need to change it. If needed, you can go to “Accounting module->Inventory->Update Inventory by Tool #” to adjust it.
In WIP: The Tool’s quantity put into production.
On Loan: The Tool quantity borrowed on a loan order.
InQA: The Tool quantity in the quality inspection area, created by NCR. Click the button to see all QA Tool’s location information.
On Demand: The Tool’s quantity demanded, which is calculated from sales order(s) and work order(s). If
100 of Tool A are sold, then Tool A’s demand quantity will increase by 100; when a work order is created for 100 Tool A, then the demand of Tools which are used to assemble or produce Tool A will also increase.
On Order: The Tool’s order quantity. This is the Tool quantity in PO or quantity in WO, but not received by the warehouse yet.
Min Qty: The Tool’s minimum inventory quantity, or safety stock. This can be defined according to the company’s situation.
Max Qty: The Tool’s maximum inventory quantity. This can be defined according to the company’s situation.
Lead Time: Periods the Tool needs to be delivered to customer. The unit is days and can be self-defined.
Quarter Usage: The average Tool usage in the last quarter, calculated by the system.
Year Usage: The Tool usage in the last year, calculated by the system.
List Price: The Tool’s list price; the original price without any discount.
Std Cost: The Tool’s standard cost; it is standard reference cost or planned cost set by the user.
Avg Cost: The Tool’s average cost, calculated and maintained based on purchasing or manufacturing cost by the system automatically.
Last PO Cost: The Tool’s purchasing price in the last purchasing order in the system.
Last PO#: The last PO# the Tool is related to in the system.
Tool Class: Used for physical inventory. Use ABC classification method to set a Tool’s counting cycle. Tool class can be added in the “Warehouse - Physical Inventory - Cycle Count” Module.
You can add both English and Chinese Descriptions for a Tool. Click “2Add” to select a new language:
 |
Select a language and then fill in the description in the blank area:
 |
Click “OK” to finish:
 |
 |
Calibration: CLICK “+”to add a calibration record for this Tool.
Traceable: this function is not available for Tools.
Has BOM: Select if this Tool has a BOM. If it does not, click “+” to create one.
Has Drawing: Select if this Tool has a drawing.
Has Work Instruction: Select if this Tool has Work Instructions.
Hold: Select if this Tool has a hold.
Saleable: This function is not available for Tools.
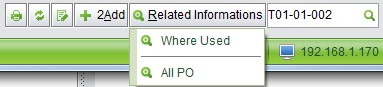 |
Where Used: Click to see all BOMS where the tools is used.
All PO: Click to see all Purchase Orders that contain this Tool Item.
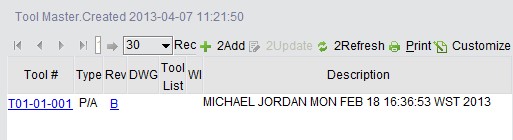
This is the basic lookup function. Input a complete Tool# and click this button to view the Tool’s properties.
This is the basic search function by Tool#. Input keywords of the Tool# to search for related Tools.
This is the function to search for Tools by keywords that are contained in the Tool Description. Input keywords and click this button to search for related Tools.
This is the function to search for Tools by keywords that the Tool Description starts with. Input keywords and click this button to search for related Tools.
This is the function to lookup BOMs that contain this Tool. Input an accurate Tool#, select the correct tool type, and click this button to view results.
Mfg Part# can be added in Tool Properties. You can search for Tools by inputting keywords of the Tool’s Mfg Part# here.
A tool’s Mfg ID can be added in Tool Properties. You can search for Tools by inputting keywords of the Tool’s Mfg ID here.
Click this button to view all Tools that are on hold. You should hold the Tool in the Manufacturing ECN. In the search results, you can click “Rev” to open the MECN.
 |
Click this button to view all Tools in the system that have Tool Lists. At the search results, click “√” to view related information.
Click this button to view all Tools in the system that have WIs. At the search results, click “√” to view related information.
Click this button to view all Tools in the system that have Drawings. At the search results, click “√” to view related information.
Click this button to view all Tools that are on hold.
Similar to Parts, Tools that are not for current use can be locked to avoid mis-operation.
To lock a Tool, click the Recycle Bin button beside the Tool Number in the Tool Properties:
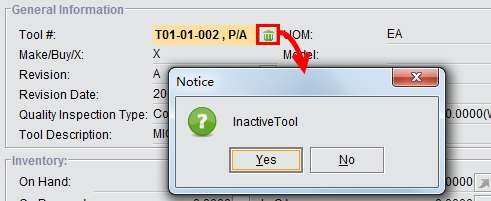 |
An inactive Tool cannot have inventory, Tool Lists, or Orders. To reactivate a Tool, click the lock button next to the Tool Number:
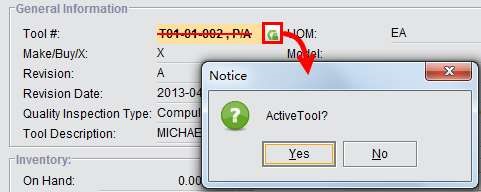 |