
2BizBox® Manual |
Go back to 11.0 Main |
The Manufacturing Time System is designed for calculation of the labor and machine cost by recording the worker and machine’s working time details. If Serva Software LLC is planning to precisely monitor and calculate the labor and machine cost in the manufacturing process, implementing a Manufacturing Time System will be helpful.
The second generation of 2BizBox ERP Mfg Time System has recently been developed. The 1st generation system was based on web login. The brand new 2nd generation system has been combined with the 2BizBox M2, a manufacturing execution system with easy operation and better aesthetics.
The 1st Generation Mfg Time System used the web to connect to the 2BizBox server. You could input your server’s IP Address in the browser to find the Mfg Time System.
 |
Select a Time Card, to arrive at the login window that is shown below. It requires the ID of the Employee who is working on the Work Order:
 |
Click “2Login” to open the main screen of the Mfg Time System as below:
 |
The bottom part of the screen is used to add a WO Item and time type. Added Items will appear in the upper part of the screen.
As set up in the Work Instruction, there are two time types in a Sequence: Setup Time for preparation and
Running Time for manufacturing. Accordingly, the Mfg Time System will allow you record these two time types.
In principle, a worker is required to record all his working time in the Mfg Time System. That is to say, when he starts to work, he logs in and when he takes a rest or finishes the work, he logs out. The login time is recorded as “Time On” and the logout time is recorded as “Time Off” in the system. Each time he logs out, he needs to fill in the quantity of finished or rejected parts during this period. We name these Time Details “Time On” and
“Time Off.” You can view these Time Details by clicking the “Time Detail” button in the Work Order Item in
2BizBox. By collecting all of this information, we know the total working time and work amount of a worker.
Before we look into the Mfg Time System workflow, we will introduce several important buttons:
2Login: Fill in an existing Employee ID and click “2Login” to open the Mfg Time System of this Employee. All time details recorded here will be credited to this Employee. A simple “login” operation does not mean the start of a task. Workers can login to view their tasks in progress, which will not change any data in the time system.
2Refresh: Click this button to update the current page to the most recent status. No data will be changed by refreshing, simply updated.
2Update: Clicking this button accepts all data changes and logs the user out of the system. Whenever a task is suspended or completed, the worker needs to fill in the “finished” or “rejected” quantity and refresh the page. When the user next logs in, the updated data will be available for viewing.
A typical workflow of the Manufacturing Time System from Setup to Finish is described below.
To add a SetUp time, fill in the appropriate task at the bottom, including “Work Order Number,” “Work Order Item” and “Work Instruction Sequence.” Select “SetUp” and then click “2Update.” By clicking “2Update,” the user will be logged out of the system and the SetUp Time will begin.
 |
If a worker needs to take a rest in the middle of the SetUp period, he must to suspend the SetUp Time. Log into the system and find the task in the upper part of the screen, then fill in the “Qty” (finished parts during the period) and “Reject” (rejected parts during the period). Keep “SetUp” selected and check “LogOFF”, then click “2Update,”
 |
By clicking “2Update,” the “Time Off” is recorded and the task line in the Time System will disappear. Next time, when the worker returns to continue the task, he need to login and add the WO Item again.
 |
When the preparation work is complete, fill in the finished and rejected quantities, keep “SetUp” selected and check “LogOFF.” Then click “2Update.”
Notice: You should not check “Finish” at this point. Finish here means to finish both the “SetUp” and “Run” functions of the WO Item. By checking “Finish,” you cannot revise this task in the Time System anymore.
 |
The operations of Start and Finish Run Time are quite similar to SetUp Time. The Running Time starts up after the preparation work is complete. After filling in an Employee ID and logging into the system, you will find the WO Item SetUp line disappeared. Instead, you’ll find the SetUp “Time On” and “Time Off” details in “Time Detail “of the WO Item.
 |
To start the Running Time, fill in “Work Order Number,” “Work Order Item,” and “Work Instruction Seq” of the task you are undertaking as you do in SetUp Time. Then select “Run” and click “2Update.” By clicking “2Update,” you will log out of the system and the “Run Time On” will be recorded in the system.
Suppose a worker has finished one part and wants to take a rest. He won’t want to record his rest time as running time, because that will lower his working efficiency. Instead, he needs to record the actually time it takes to finish the part. Therefore, the worker needs to login into the system, and on the WO Item line, fill in the quantity he just finished (fill in Reject quantity if there is one), select “Run” and “Log OFF.” Then click “2Update.” When the worker comes back to continue the task, he will need to login and fill in the WO Item again at the bottom part of the screen.
When the entire task is finished, fill in finished and rejected quantities, keep “Run” selected and check both “Finished” and “LogOFF.” Then click “2Update.” If you check “Finish,” you cannot revise the task in the Time System any more.
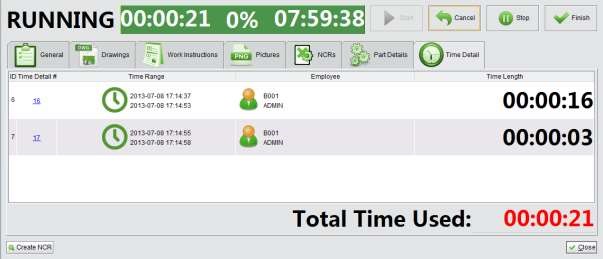
A brand new “Time Card” has been launched to replace the 1st Generation Manufacturing Time System. With operational improvements and a better appearance, the 2nd Generation Time Card is integrated into 2BizBox M2, the MES solution.
Read the Chapter labeled “2BizBox M2” for a detailed manual on how to operate the new Time Card. Below is a screen shot of the 2BizBox M2 Time Card.
 |
In earlier chapters, we learned how to use the time card to calculate machine and labor time for Work Orders. Both of the Time Card Systems are extended software of 2BizBox ERP. Now, we will take another look at the software to see how to look up or manually add/revise the Time Detail.
If you are not using the Mfg Time System, you can also add Time Details manually in the Mfg Time System sub-module in 2BizBox ERP.
Click “2Add Mfg Time” in the “General” tab, fill in the Employee ID and click “2Add:”
 |
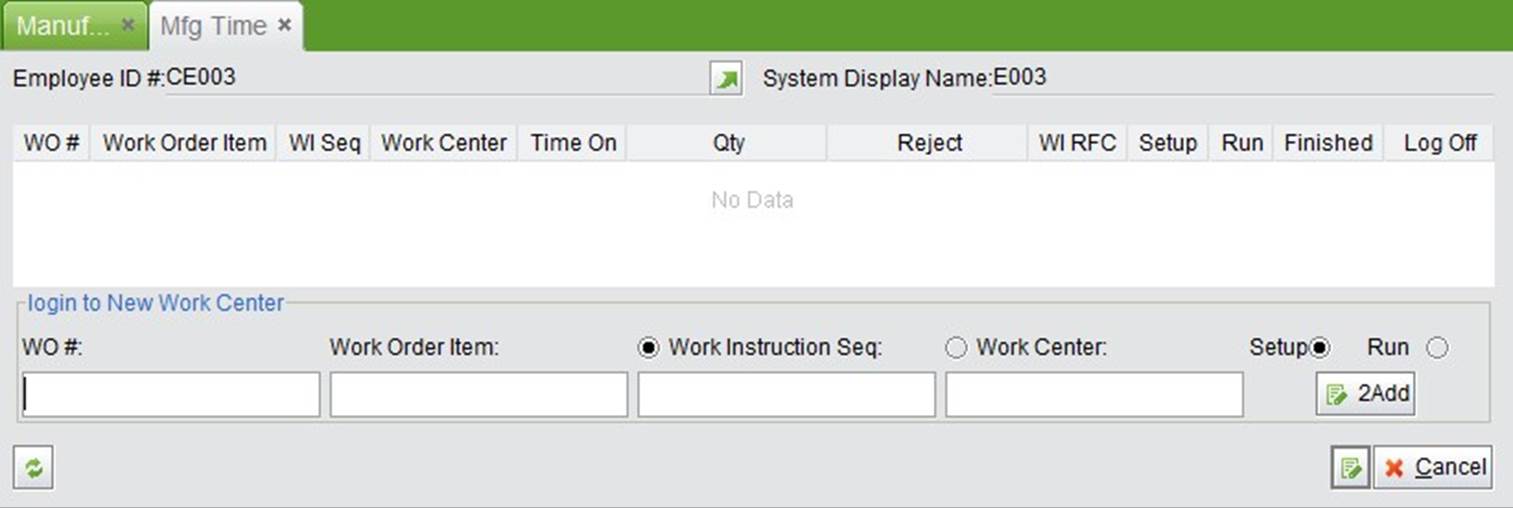
The “Mfg Time” interface will open as shown below. Similarly, workers can fill in their task information at the bottom of the screen.
 |
To add a “Setup Time On,” you need to fill in “WO#,” “WO Item,” and “WI Seq” at the bottom, select “Setup” and click “2Add.” A Time On detail will be added to the system as shown below:
 |
When the Setup task is partially or completely finished, you can add the “Setup Time Off.” Fill in the “Qty” and “Reject,” keep “Setup” selected and check “Log Off.” Then click the “Update” button at the bottom of the screen:
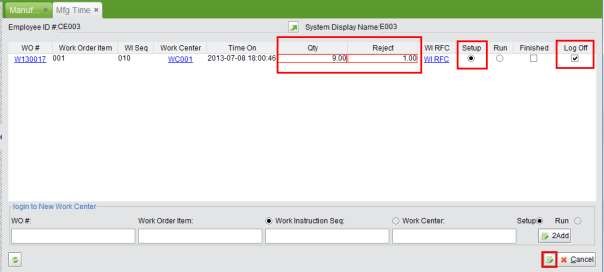 |
By clicking the “Update” button, the “Setup Time Off” will be added and the time detail disappears from the screen. You can find this Time On & Off in the WO Item’s “Time Detail:”
 |
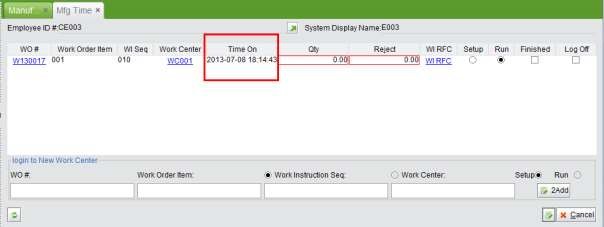
To add a “Run Time On,” fill in “WO#,” “WO Item,” and “WI Seq” at the bottom as before, select “Run” and click “2Add.” A “Time On” detail will be added to the system as shown below:
 |
When the task is partially completed, the “Rum Time Off” can be added by the same method as in Setup Time Off. Fill in the “Qty” and “Reject,” keep “Run” selected and check “Log Off.” Then click the “Update” button at the bottom of the screen.
 |
When you do this, the screen will be cleared again and the Time On & Off will move to the WO Item Time Detail:
 |
If you are going to finish the task at hand, check “Finished” when you are adding “Run Time Off.”
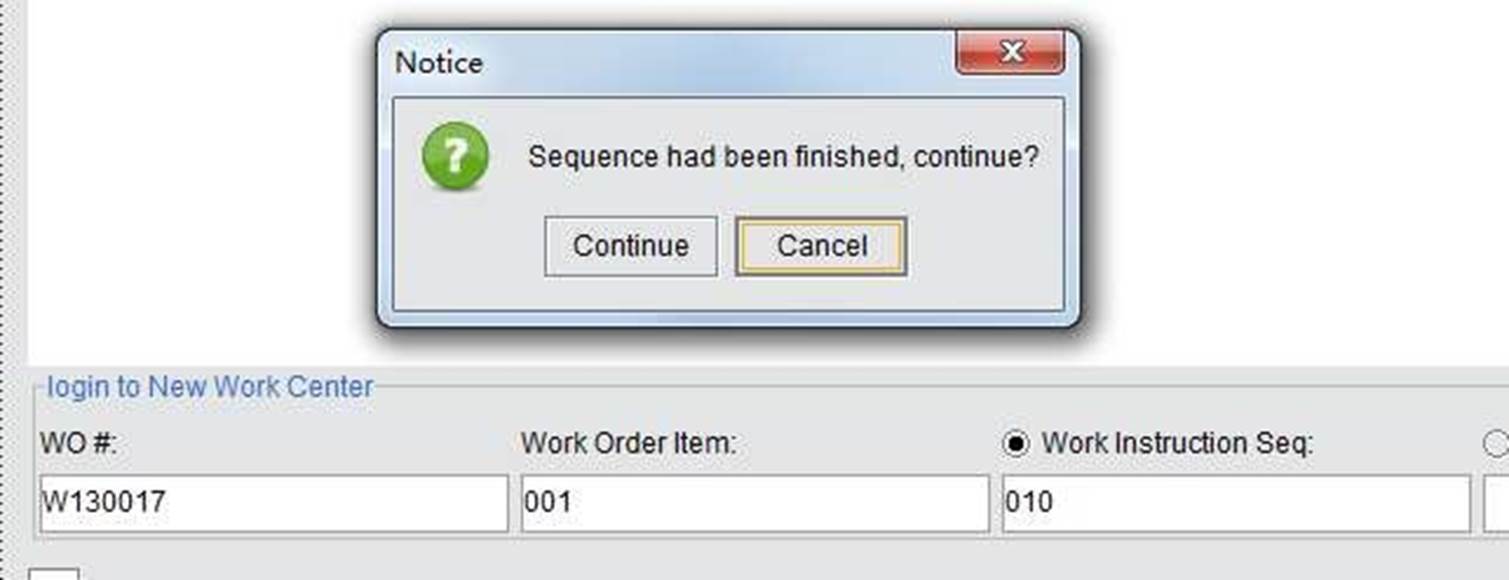
You will not be able to add time details for this WO item after it is finished unless you have the proper permission: “UPDATE_WORK_ORDER_TIME_DETAIL.”
 |
With a Work Instruction added, Work Center set and Time Detail collected during the manufacturing process, the machine and labor cost will be calculated automatically for all the tasks done by workers logged into the MFG Time System.
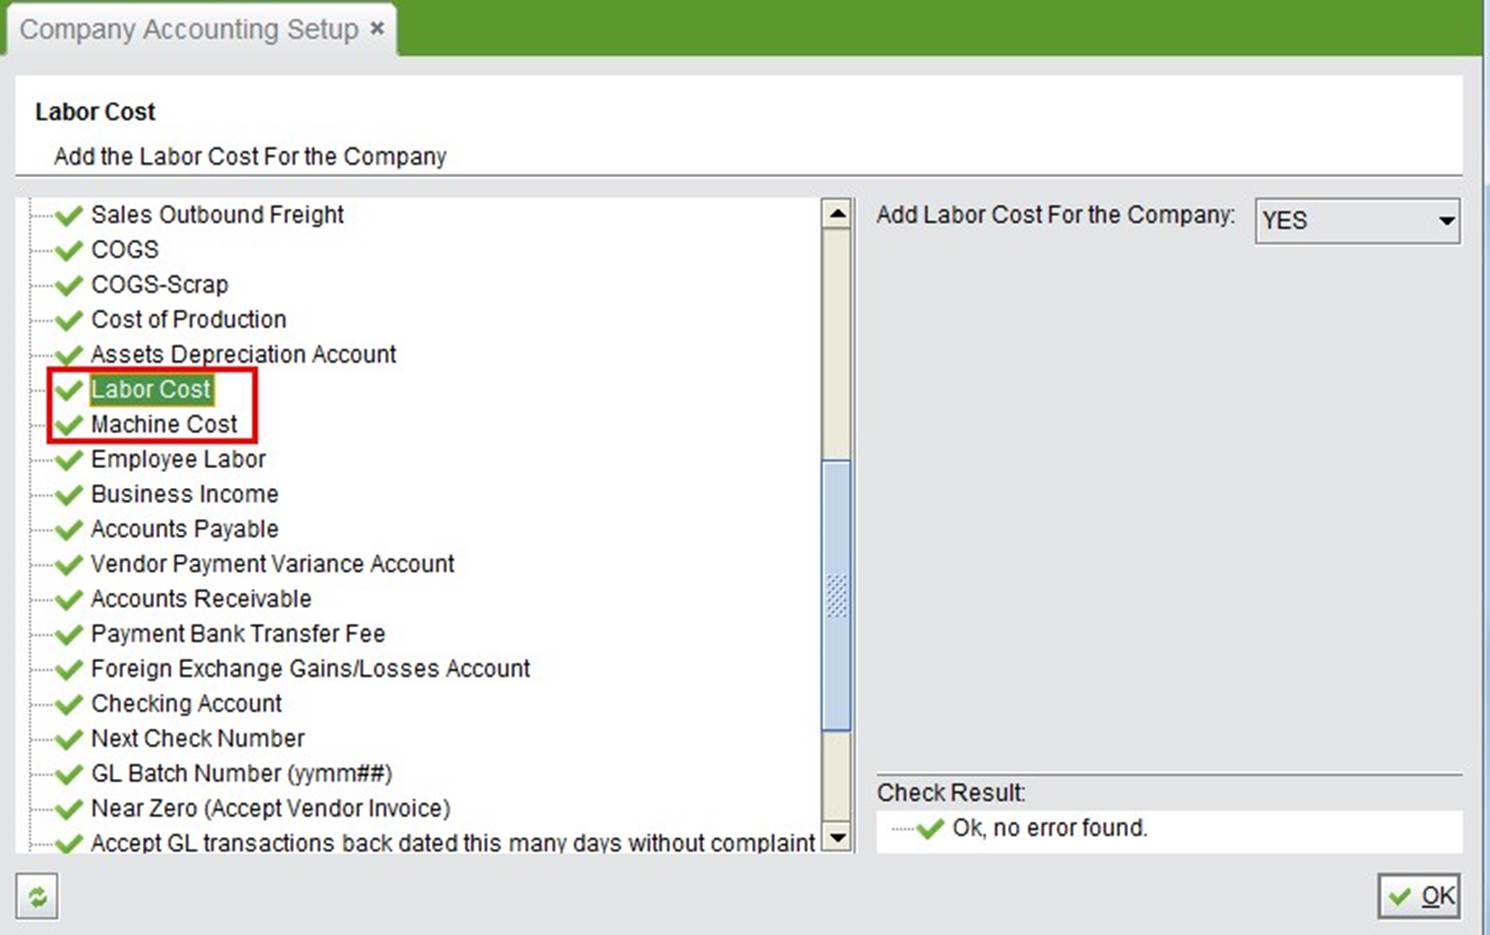
First, in the company accounting settings, make sure the “Labor Cost” and “Machine Cost” settings are set to “YES.”
 |
When a worker has finished his task for a sequence in a Work Order, you can find these time details by clicking “Time Detail” in the Work Order Item.
As mentioned before, the Mfg Time Detail goes to the WO Item Time Detail after the worker logs off. You can also find these time details in the Mfg Time System sub module using various search functions. Searching is divided into two types: search login employee’s “Time On” and search logoff employee’s “Time On & Off.”
The following search functions are used for searching “Time On” details. All search results are classified by Employee ID. You can click “Detail” in each line to view the item details.
This is a “Look Up” function. Fill in a complete Employee ID to view this Employee’s “Time On” records.
Fill in the keywords of the Employee ID to search for “Time On” records. At the search results, click “Detail” to view the employee’s time details.
Fill in the keywords of the WO# to search for “Time On” records. At the search results, click “Detail” to view the employee’s time details.
Fill in the keywords of the Vendor ID to search for “Time On” records. At the search results, click “Detail” to view the employee’s time details.
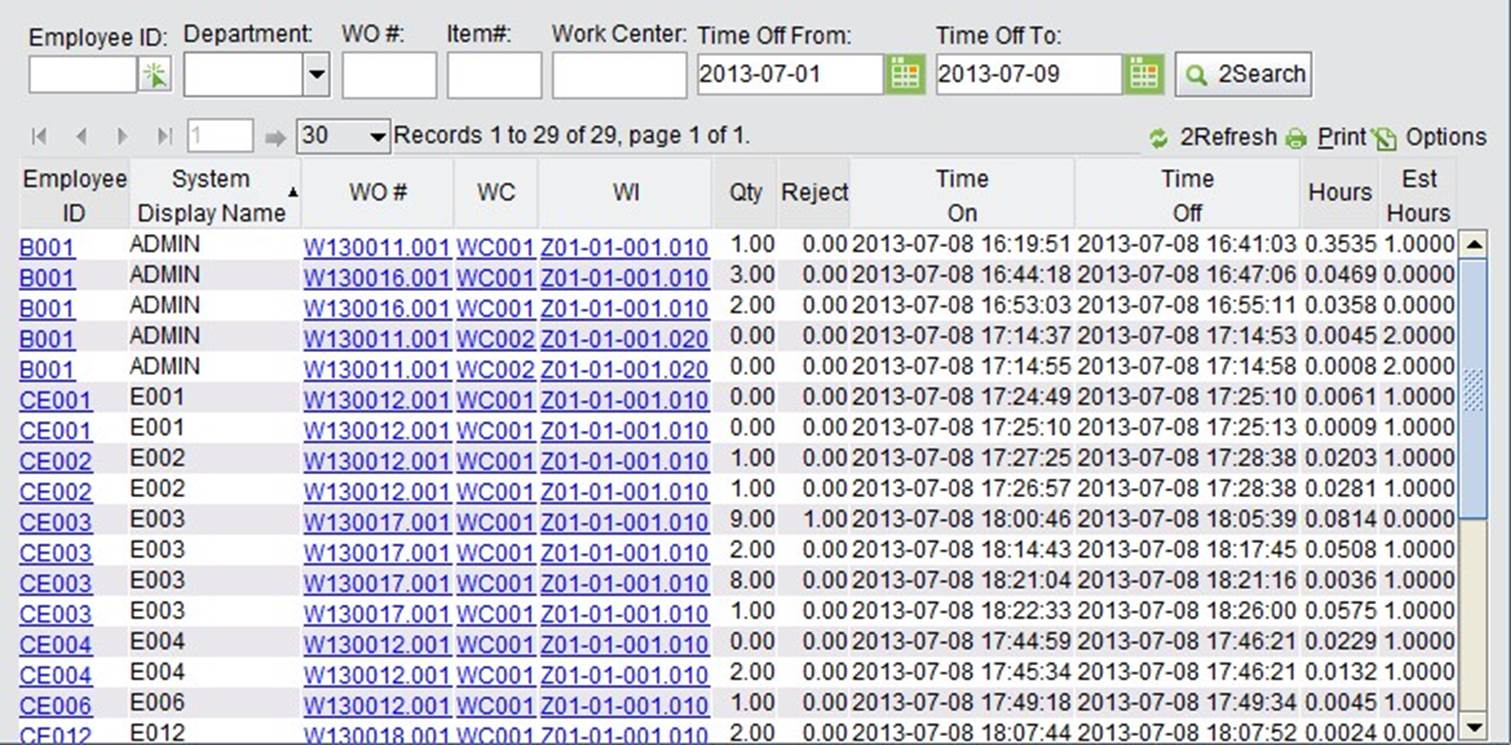
This is a comprehensive search function to search for “Time On & Off” details. Search conditions include
“Employee ID,” “Department No.,” “WO#,” “Item#,” “Work Centre#” and the range of “Time Off.”
Search results show the WO/WC/WI, the finished quantity and rejected quantity from every time on to time off, and the duration.
 |
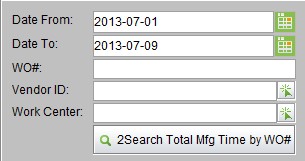
This search function will add up the total Mfg time in a Work Order Item by Work Centers. Search conditions include Date From, Date To, WO#, Vendor ID and Work Centre#.
 |
You will find the search results listed by WO # and Work Centers. The “Total Mfg Time” refers to the total time that the employees spend on this Work Center. Click ‘Detail” to view the time details.
 |