2BizBox® Manual |
Go back to 9.0 Main |
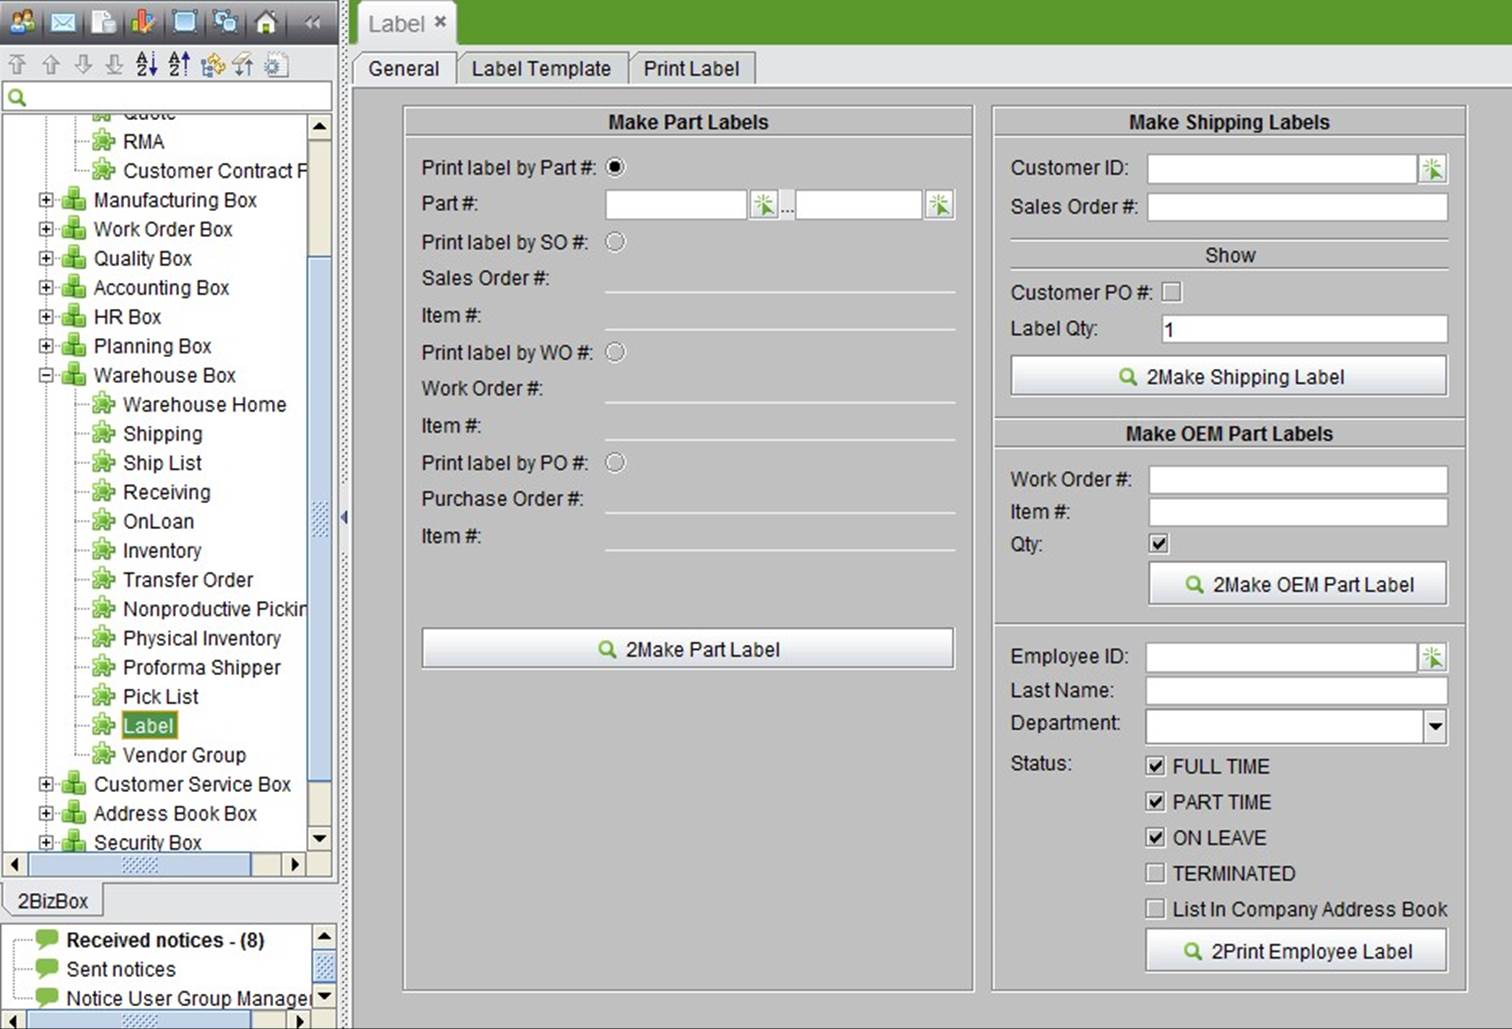
In the “Label” sub module, there are several ways to print a parts label; you can self-define the number of labels, the language, size, etc. Meanwhile, the function can be used to generate part# bar codes to integrate mobile warehouse management with a bar code scanner. Shipping labels and OEM part labels can be made here as well.
|
Here, you can print part#, description, location, onhand, country of origin and related SO information. You can also self-define part# range to print, desired quantity and language.
In addition, you can print a part label with SO# and item # included. You can self-define MFG part#, customer PO#, qty and label size.
Print a part label with PO# and item# included.
You can self-define PO quantity to print, MFG part# and vendor SO#.
As explained above, you can print part labels by part#, SO#, WO# and PO#. To do this, go to the print part label setting interface, where you can self-define quantity, size and language to generate a label of your choice.
Printing labels by part# is one of most common ways to print labels. Input the part# range in the general interface of “Warehouse Module->Label,” then click “Make Part Label” to enter the print setting interface. Part range will start with the first letter of a part#. If you only need print one part label, just enter that part# in the left cell.
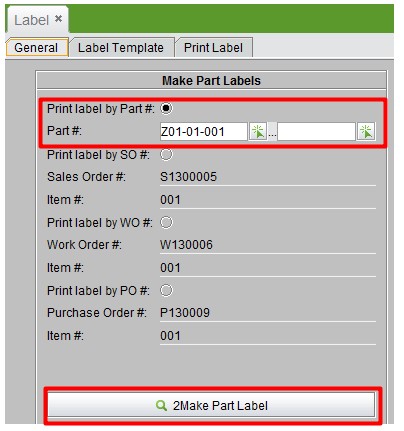 |
You will find a detailed customizable interface in the print part label setting interface. You can input how many labels you want to print in the first box.
 |
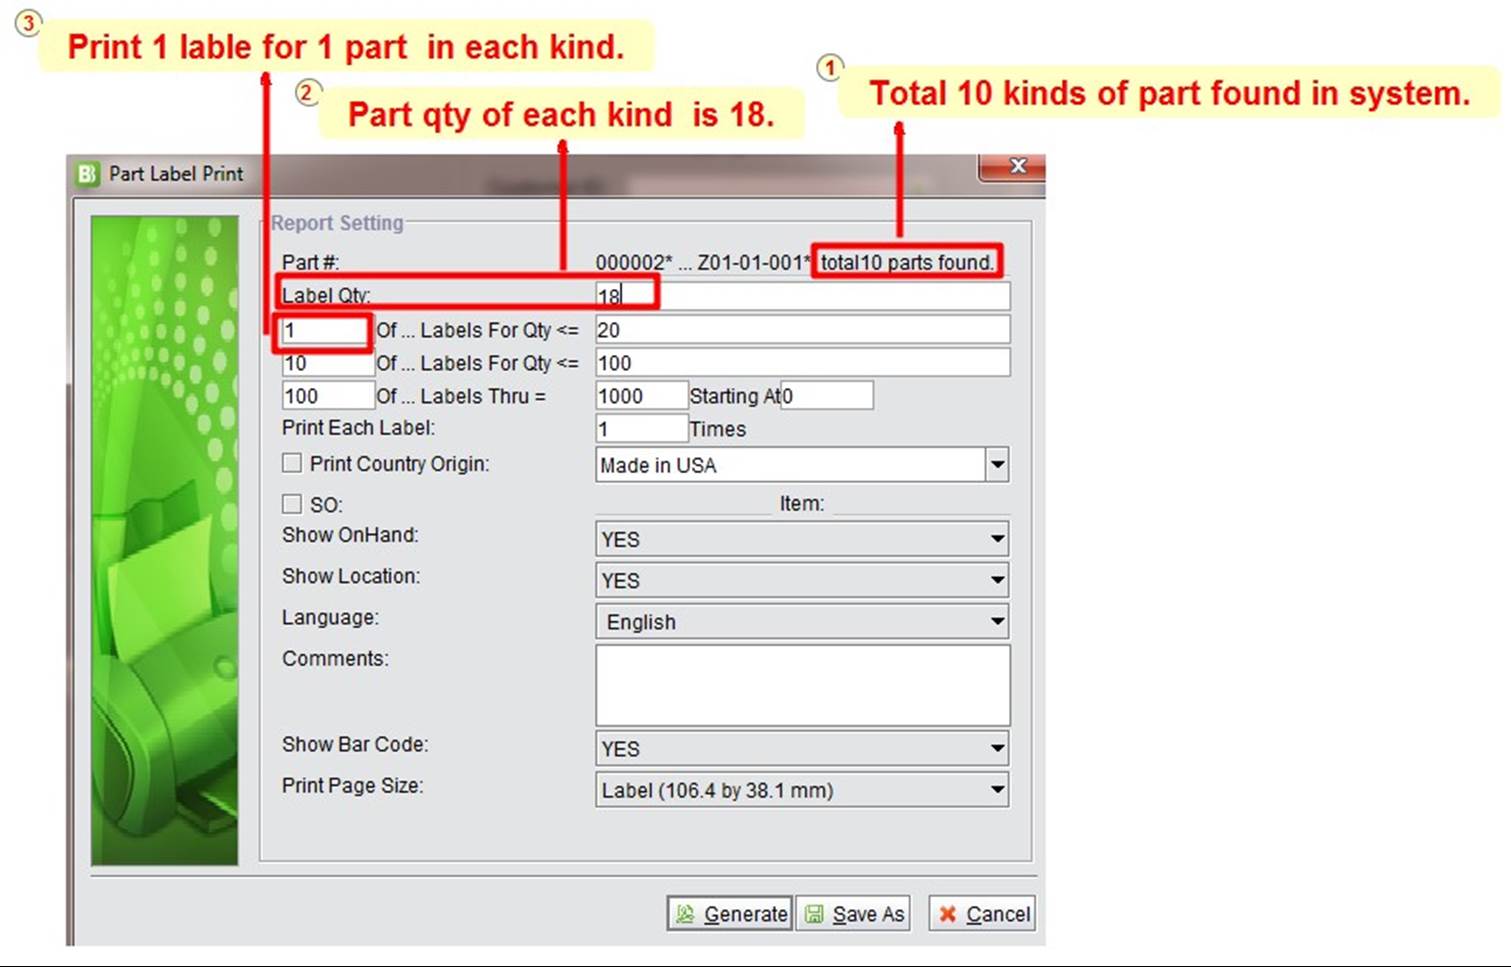
Part#: Show all part#s and total part quantity.
Label Qty: The total quantity of each kind of part, not the actual quantity of labels to be printed.
(1) Of …Labels For Qty<= (20): This means that when the quantity of each part (Label Qty) is less than 20, print one label for each part of that kind. Therefore, to be printed label qty (equals label qty/1) * total kinds of part qty. The data value can be self-defined.
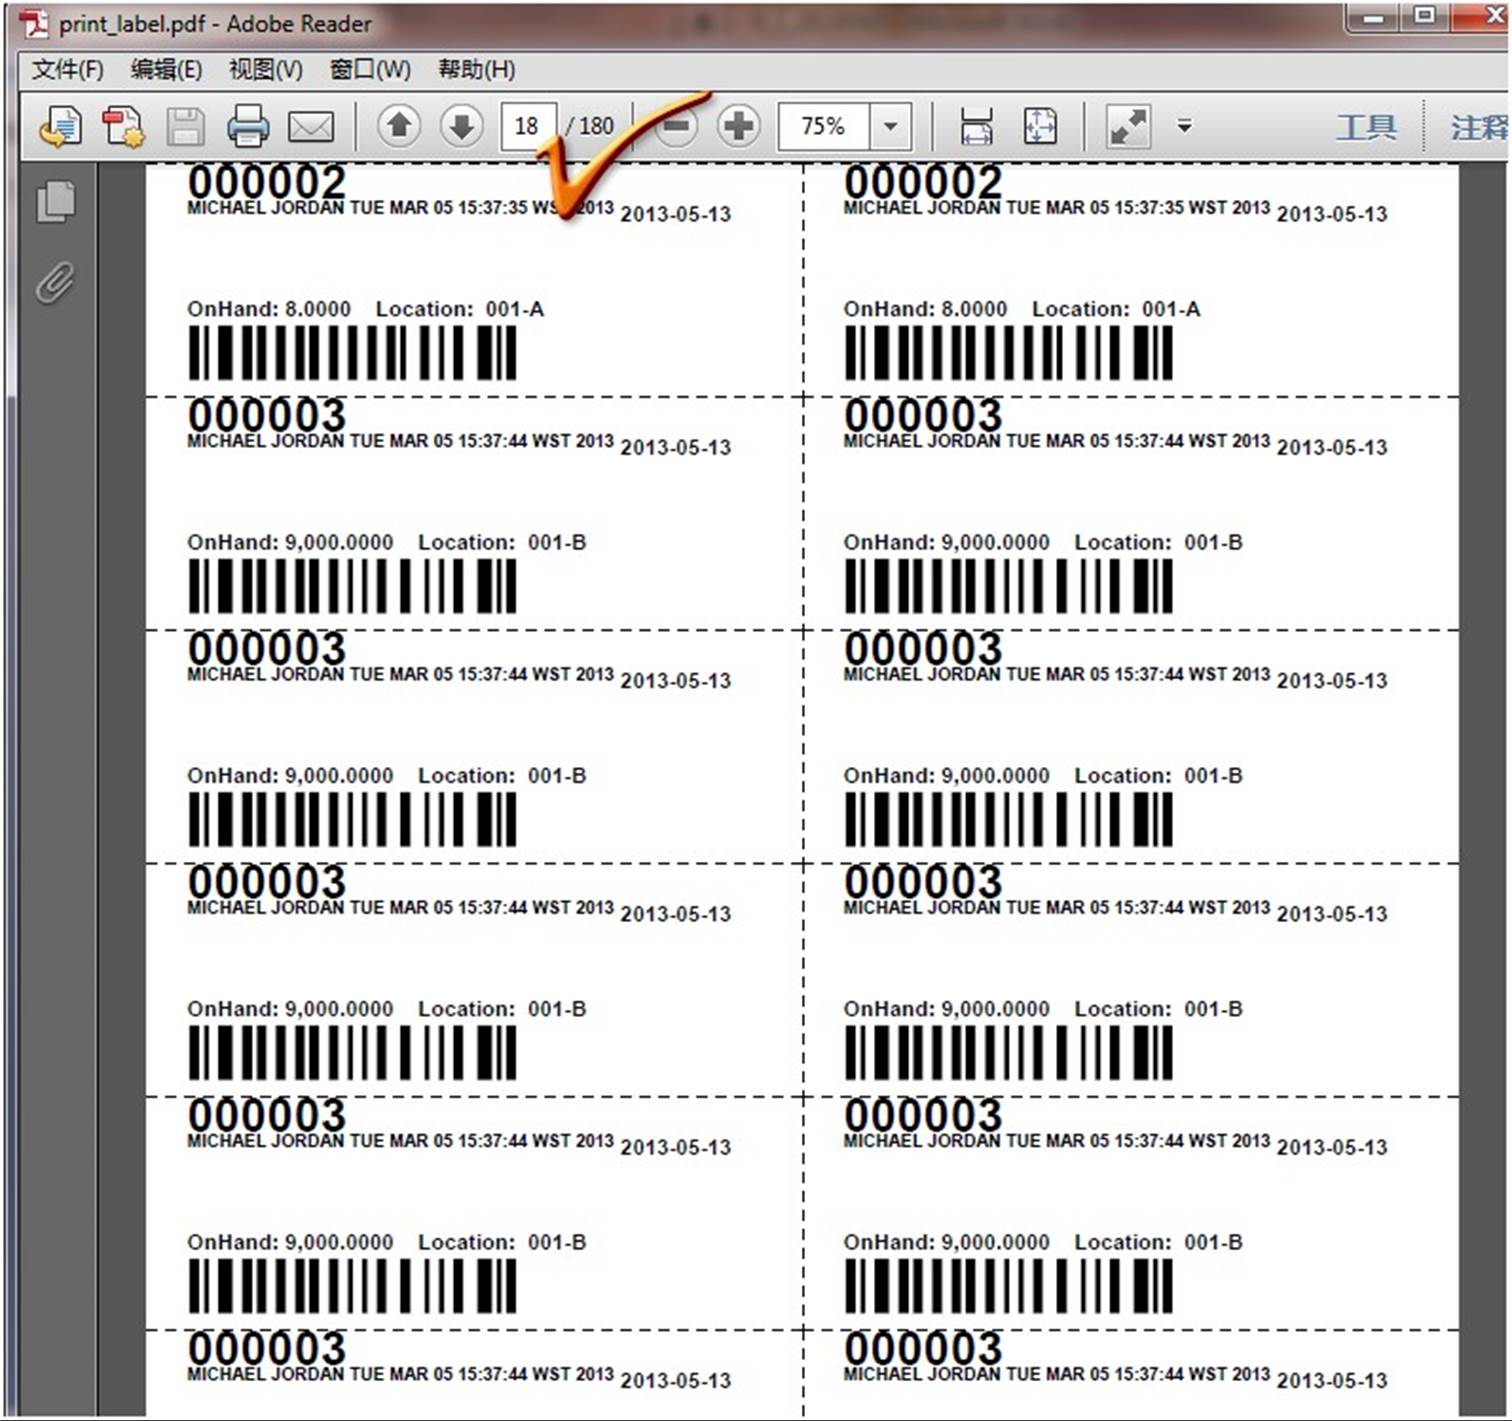
Example: we have 10 kinds of parts found in the system, and the part quantity of each kind is 18(<20), and there is “(1) of….” (one label will be printed for 1 part in each kind), so the printed label quantity= (18/1)*10=180. See the image below:
 |
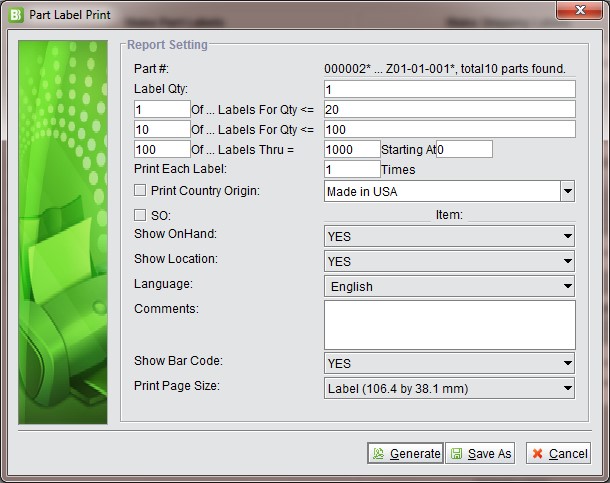
The print result is shown below:
 |
(10) Of…Labels For Qty <= (100): When the quantity of each kind of part is less than 100, one label should be printed per 10 parts of each kind. Therefore, the to be printed label qty equals label qty/10
* total kinds of part qty. If label qty/10 is not integral, it must be rounded up to the next whole number. The data value also can be self-defined.
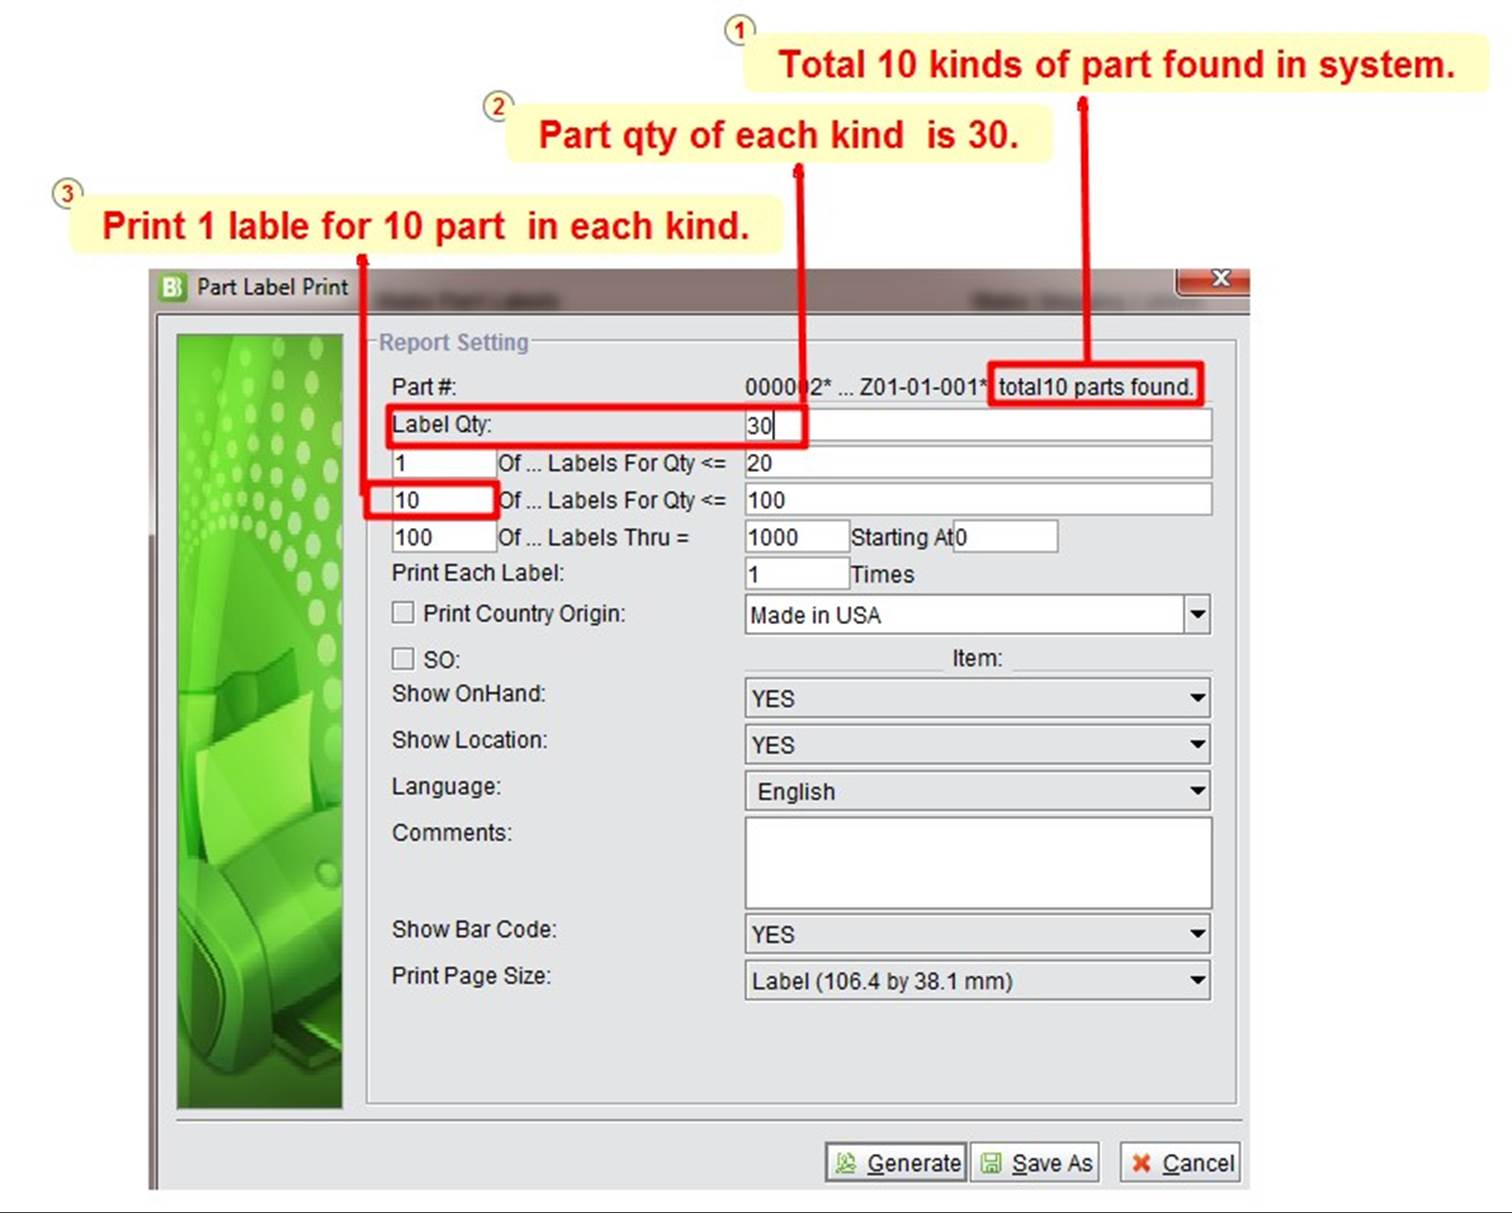
If qty/10 is integral, we have 10 kinds of parts in system, part qty of each kind is 30 (it is<= 100), and here is “(10) of….” (one label will be printed per 10 parts of each kind), so the printed label qty= 30/10*10=30. Show as below:
 |
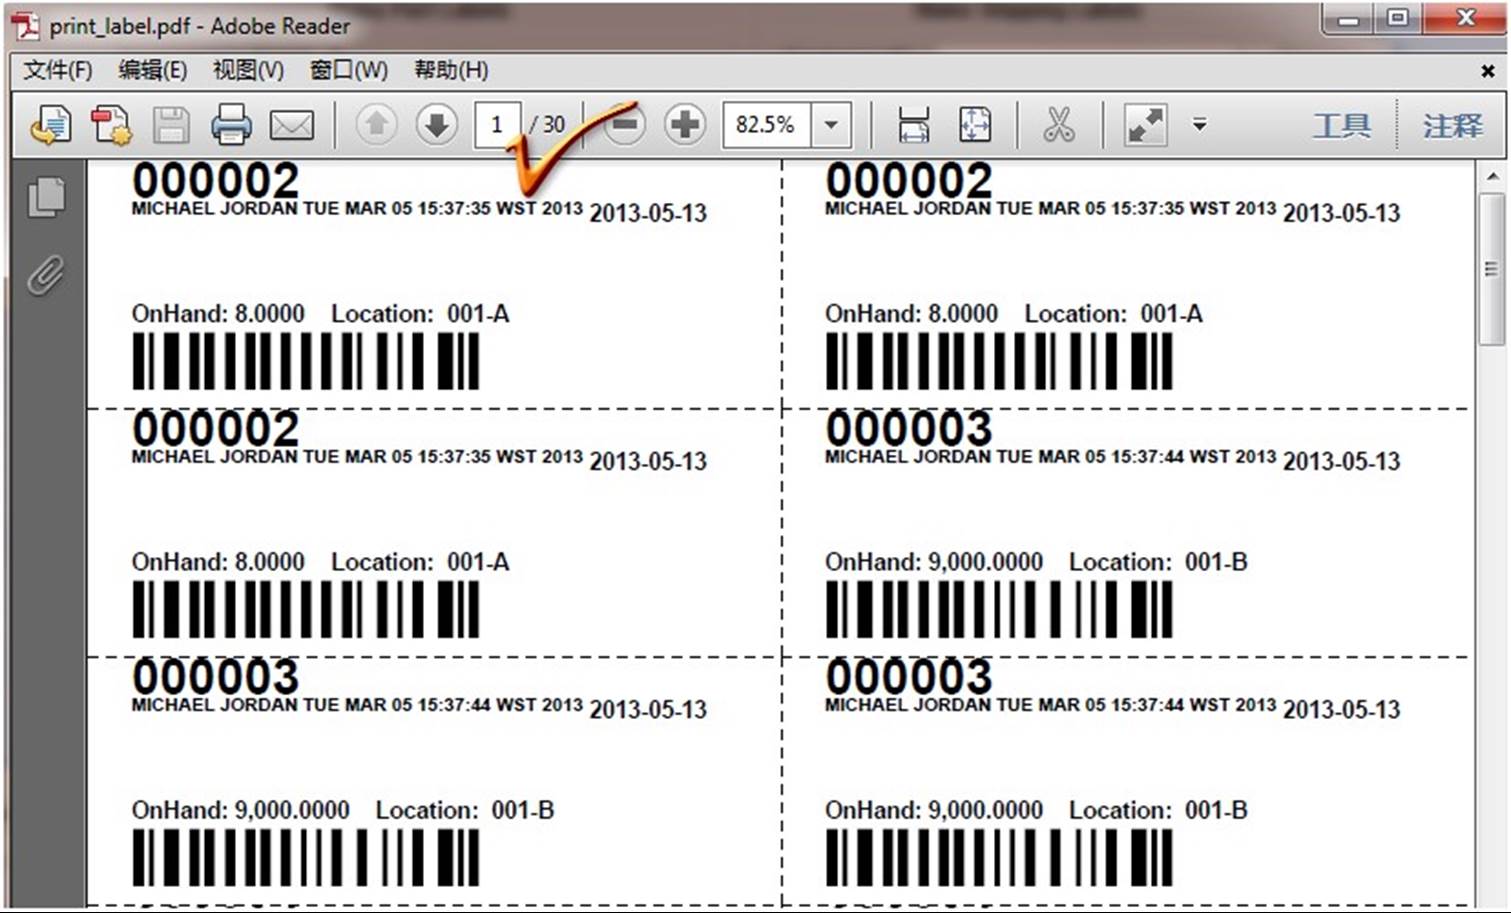
The label print preview is shown below, with a total of 30 labels:
 |
You can self-define a label template here. Label template are mainly used in the mobile warehouse module to paint part labels by scanning them with a portable scanner to exercize high efficiency management for the warehouse.
Click the "Add Label Template" button in the "Label-> Label Template" interface to go to the adding interface.
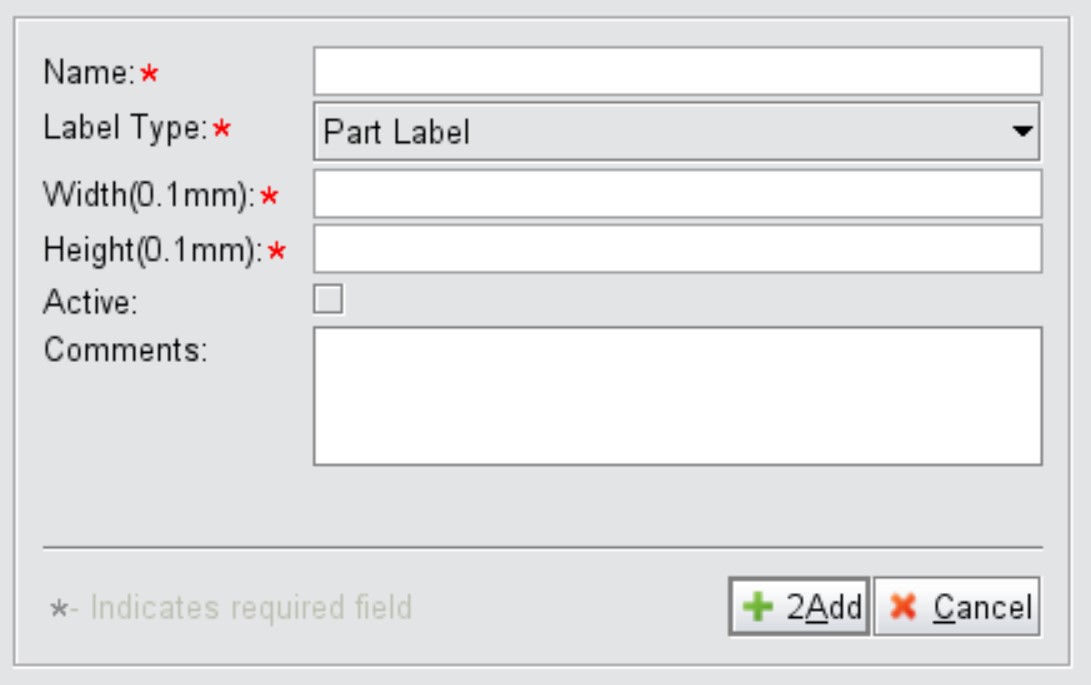 |
| Parameter | Description |
| Name | The label's name |
| Label Type | Choose the label type from the drop-down list |
| Width(0.1mm) | Self-define the label width here; its unit is 0.1mm |
| Height(0.1mm) | Self-define the label height here; its unit is 0.1mm |
| Active | Indicates whether the label is active |
| Comments | Fill in comments for the label template |
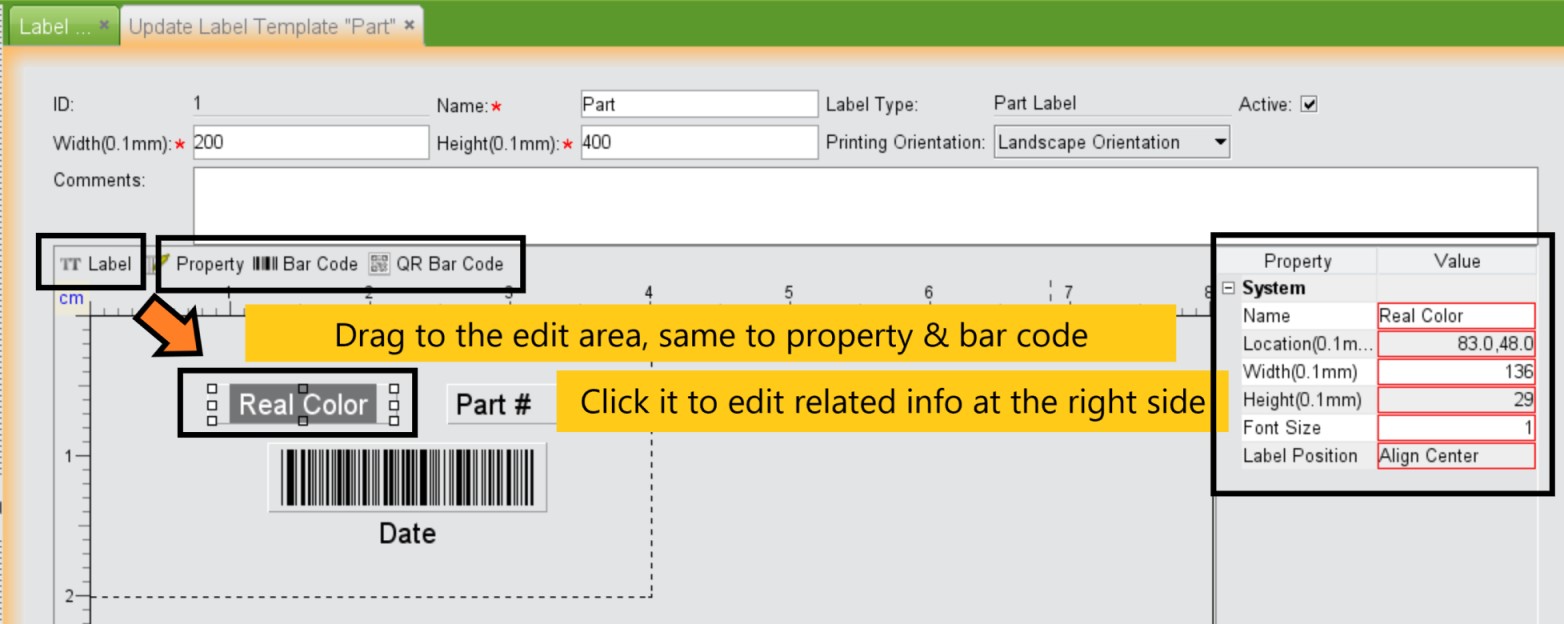
When the settings are complete, click "Add" to go to the editing interface. Above it, you can modify the basic information of the label, including name, size, and printing orientation. The dotted line indicates the label's size; the content to be edited must be inside of it.
Drag "TT Label," "Property," and "Bar Code" to the edited area.Then set the name, location, width, height, label position, property, and bar code respectively.
After that, click “Update” to finish creating the label template.
 |
Click “Search Label Template” to see all label templates in the system. At the search results. Select one to do edit or delete operation.
After the label templates is created, you can use the 2BizBox mobile warehouse module to complete “Receive to Warehouse,” “Out Warehouse,” “Part Transfer among Warehouse and Location” and “Physical Inventory Count” to collect data automatically in different process.
For instance, a purchased part can be received to the warehouse by its PO# in system.
Issuing material can be done in the warehouse by WO#. Mobile Warehouse Module is one of the 2BizBox Mobile Apps.
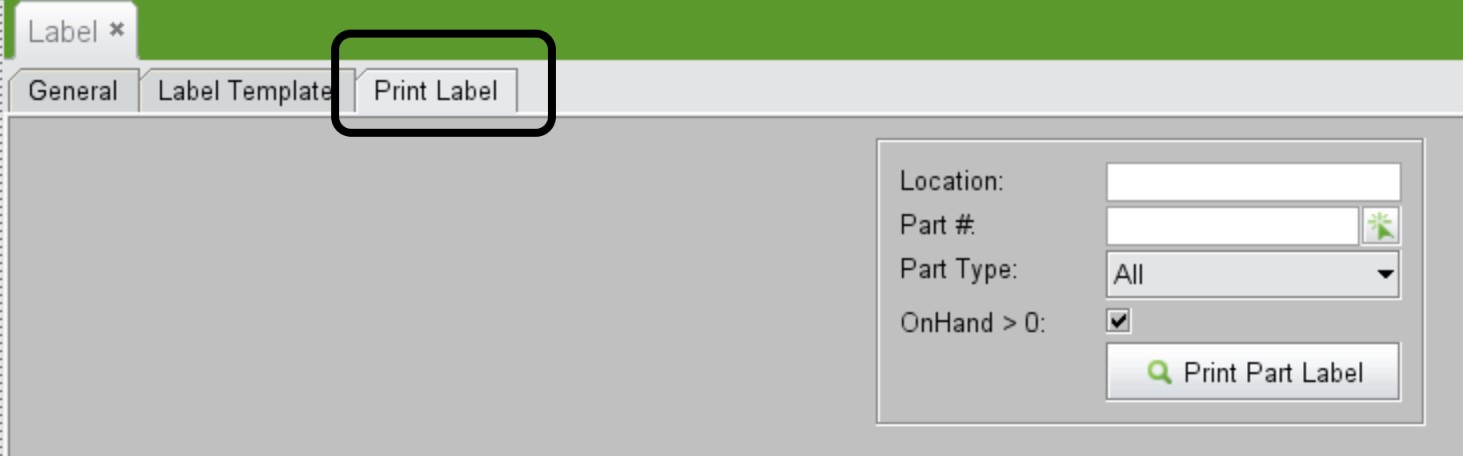
You can set a printer's IP Address in the "Print Part Label" interface.
 |
 |