2BizBox® Manual |
Go back to 8.0 Main |
If a quote is accepted by a customer, you can convert the quote into a sales order by clicking the “Copy” >“Copy to Sales Order” button; this will take you to the sales order updating interface. You can also directly create a new SO at the “SO Module->SO->General” interface.
|
Click the “Add SO” button at the “SO Module->SO->General” interface to go to the sales order interface. Here there is also a button “Add Sales Order by Customer PO.” It is used to add SOs by VG’s data; please refer to this in more detail in the “CG&DG management” chapter.
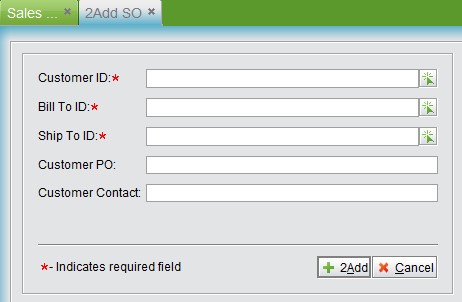 |
Input or pick one customer ID, Bill to ID, and Ship to ID. By default, the three IDs are the same in the system once you choose a customer ID, while you can also edit bill to ID and ship to ID. You can also input a customer PO# and customer contact if the information exists. Click the “Add” button, then a sales order # starting with S will be generated in the system and you will be taken to its updating interface.
Here, you can see that the created SO# cannot be changed, but customer ID can be modified. You also need fill out the SO’s general information, part information, adding part comments, and BP.
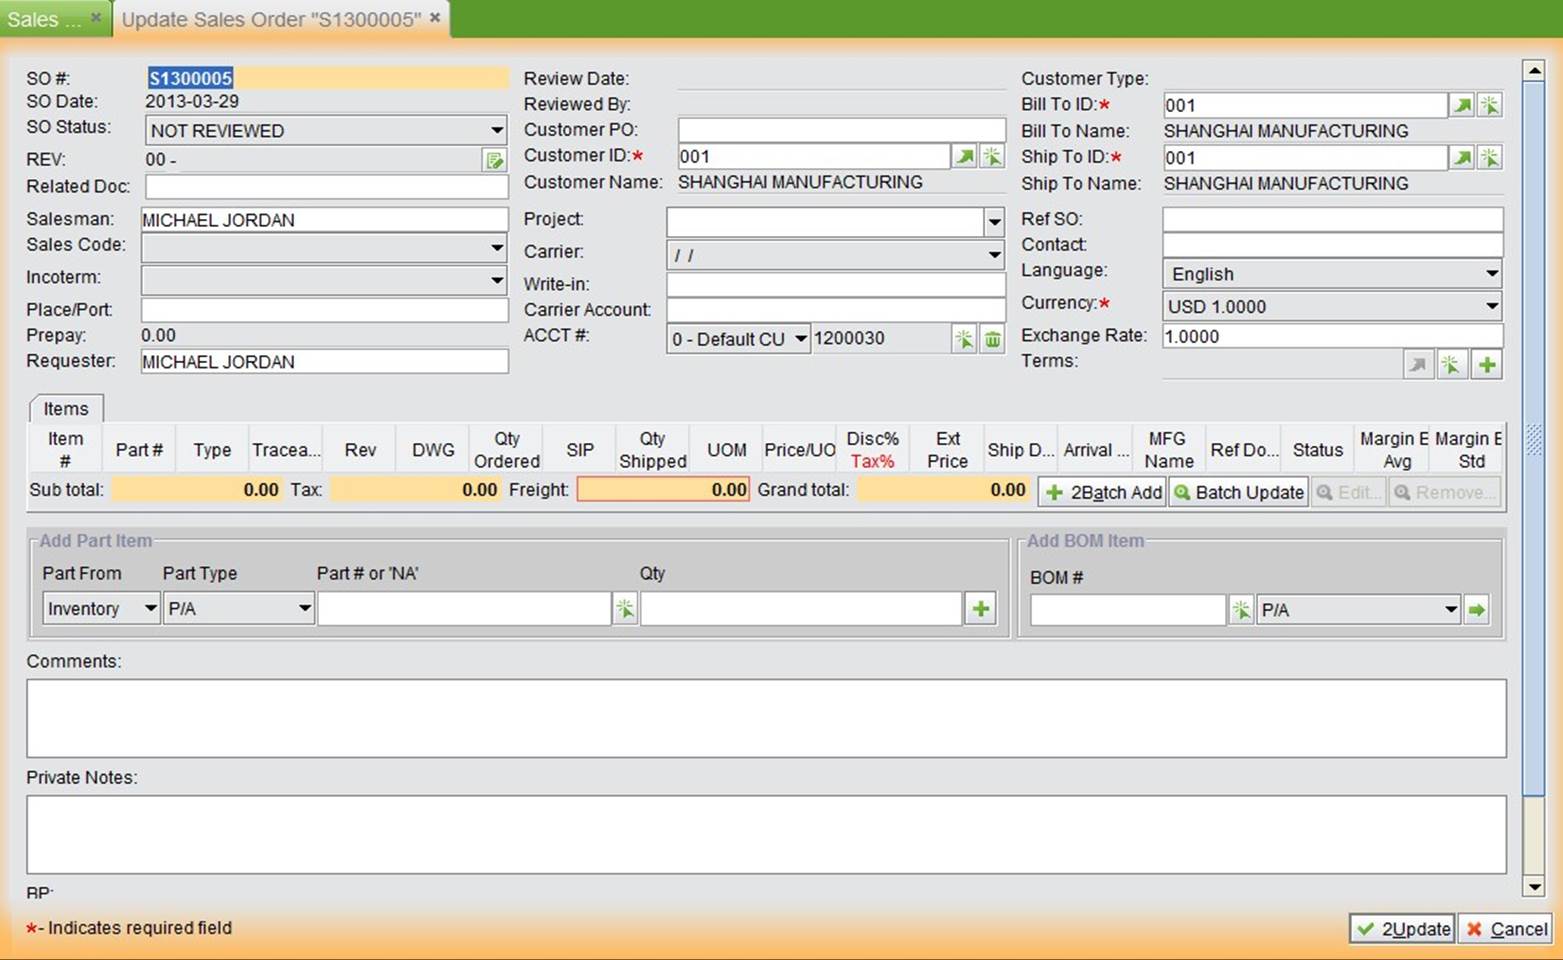 |
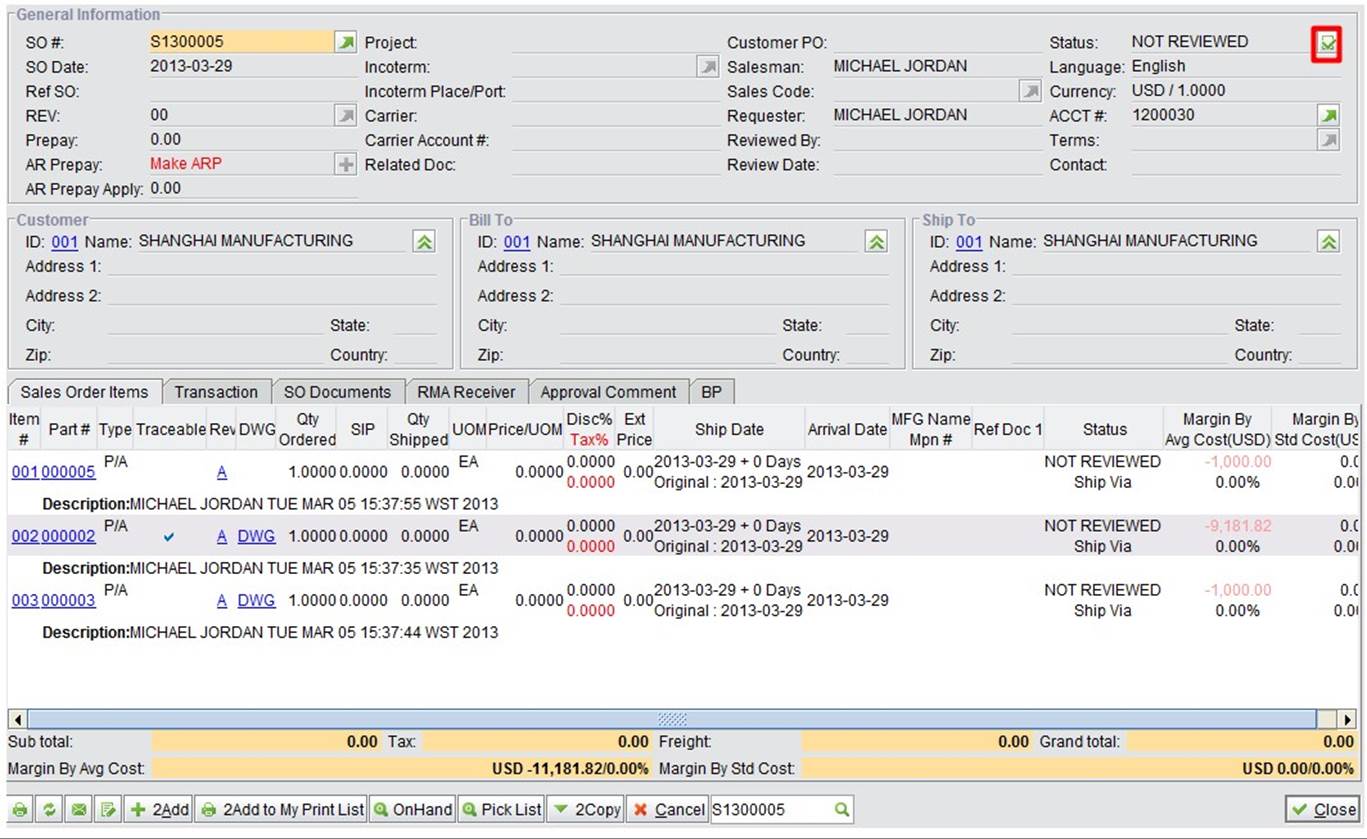
SO general information is located at the upper part of the interface. It is shown in the image below.
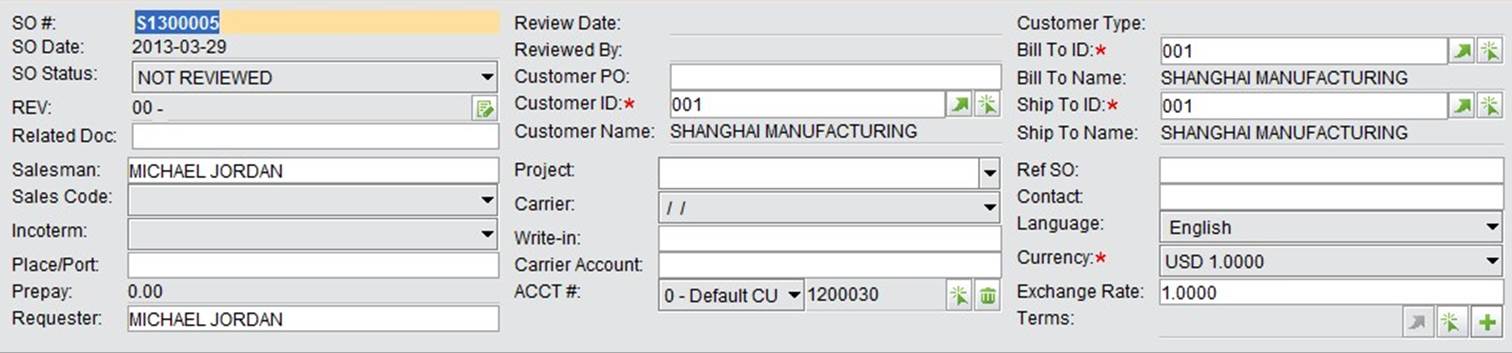 |
The related parameters’ descriptions are as follows:
Parameters |
Description |
SO# |
The SO number is generated automatically while creating a SO. |
SO Date |
The date of creating a SO is generated by the system automatically. |
SO Status |
SO status can be “Not Reviewed,” “ Open,” “ Cancelled,” or “Closed;” the newly created quote is “Not Reviewed” by default. |
REV |
The SO’s revision is used for recording information like revised time, who revised it, etc. Click “Edit” beside it to modify. |
Review Date |
The system will automatically record the reviewed date of the SO. |
Reviewed By |
The system will automatically record the user who reviews the SO. |
Customer PO |
Fill out the customer’s purchasing order# if it exists. |
Customer ID |
The customer address ID in the system. |
Customer Name |
The customer name in the system. |
Customer Type |
The customer type needs to be preset in the address module. |
Bill to ID |
The payer ID (Bill to ID) in the system. Sometimes bill to ID is different from customers. |
Bill to Name |
The payer’s name, it is obtained from the system based on the Bill to ID. |
Ship to ID |
Ship to ID in the system, sometimes it is different from Customer ID. |
Ship to Name |
Ship to name, it is obtained from the system based on Bill to ID. |
Salesman |
The salesman who is responsible for the SO. |
Sales Code |
Sales Code is used for specific salesmen or distribution companies for commission management. |
Incoterm |
The trading ways the used by quotes. |
Place/Port |
The shipping place or port. |
Project |
If the SO’s equipment belongs to some project, enter it here. You can also add a new project at the “Sales Module->Sales Order-Control” interface. |
Ship Via |
The ways to ship via |
Requester |
The SO’s requester, by default it is the SO creator. |
Carrier |
The third party carrier is used for customer’s choosing. Refer to this further at the address module. |
Write-in |
Input a carrier directly. |
Carrier Account |
The carrier’s account is used for accounting calculation. |
Acct# |
The SO’s account# |
Contact |
The contact person with a customer. |
Language |
The language used while trading with a customer. |
Currency |
The currency used while trading with a customer. |
Exchange Rate |
The exchange rate while creating the sales order. |
Terms |
The payment term of a customer. |
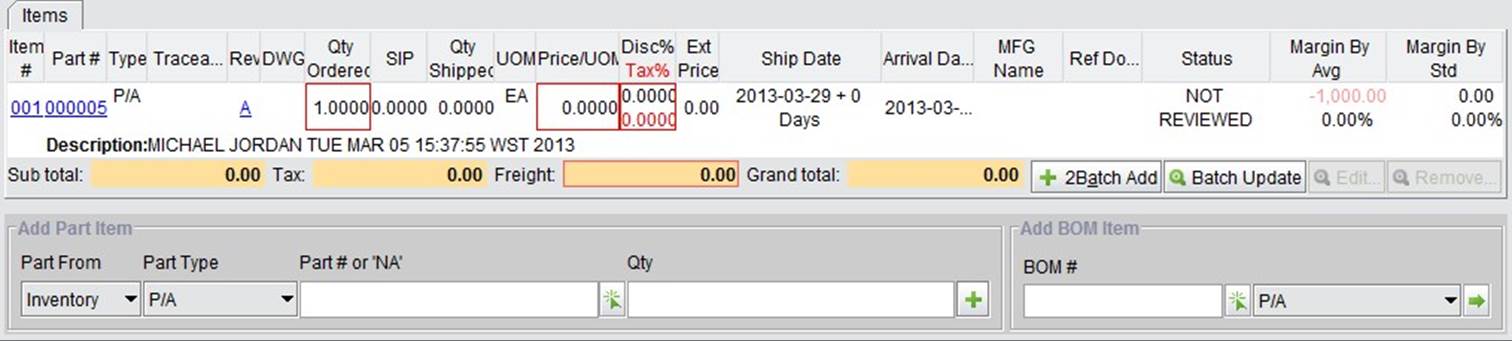
At the “Item Information” page of updating the SO interface, add the part to be sold.
At the “Add Part Item” window, input part# and quantity, then click “+”to enter the “Update SO Item” interface. Here, fill out all needed information, and click “OK.” You can also add parts with the “Add BOM Item” or “Batch Add” button. It will appear at the “Item” window.
 |
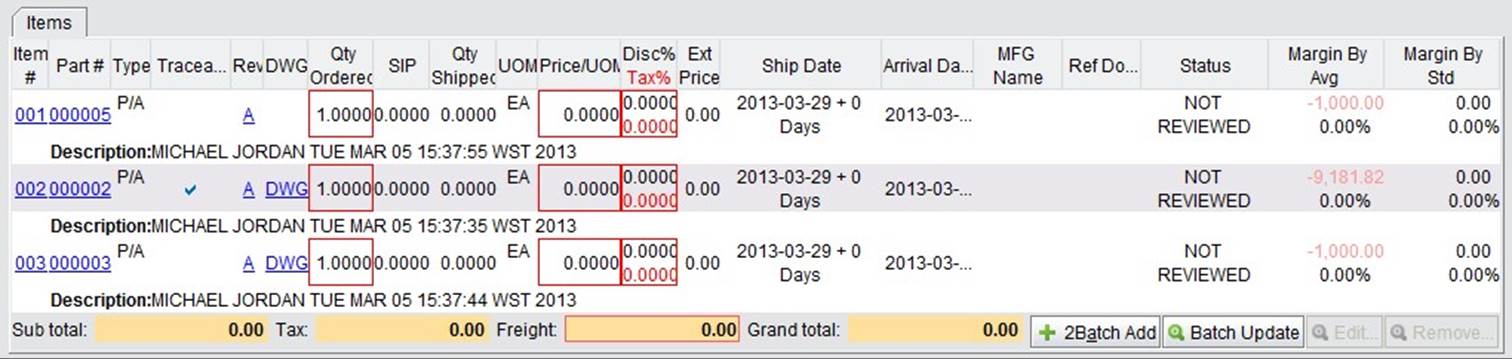
Parts added via BOM or batch add will be added to the part item directly. You can choose these parts and click “Edit” to enter the update part item interface to update its details.
 |
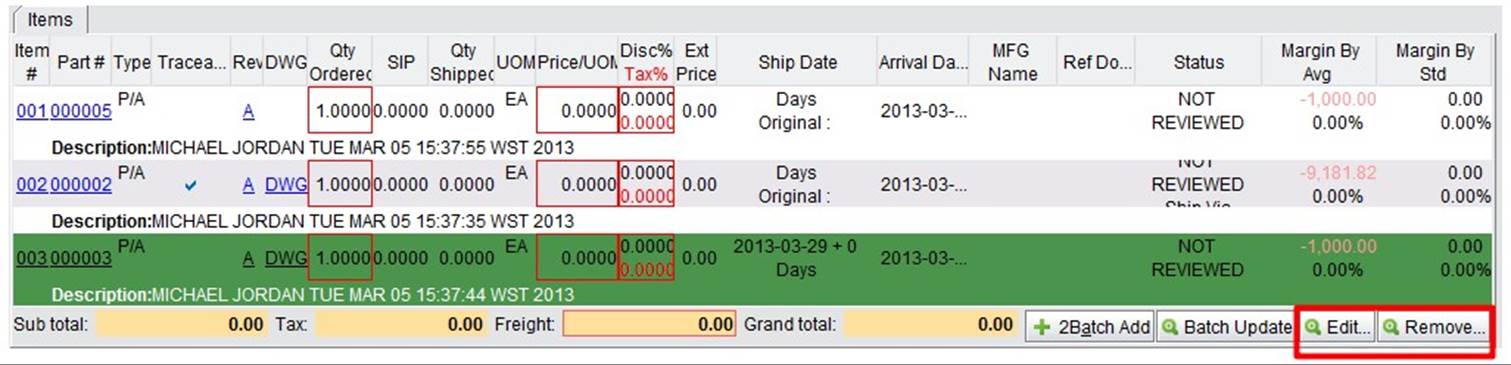
A part’s “qty,” “ price,” “ tax” and “discount” can all be edited directly; select a part item to remove or edit; at the “Sub Total” row, you can fill out “Freight,” the sub-total row automatically calculates part item amount, tax amount and grand total.
 |
At the bottom of the updating SO interface, choose a BP for the SO. The BP can be added at the “SO->Control” interface; you can refer to this more in the following chapter. Click the “Add” button, on a new template row, see more in the drop-down list.
 |
Choose a suitable BP to complete the adding. Click “Add” to add a new BP row; you can select one row and click the “Delete” button to delete it.
 |
Lastly, you can add “Comments” and “Private Notes” for the sales order. “Comments” can be seen by both sides, white “Private Notes” are for private communication. When printing a SO, you can choose not to print “Private Notes”.
While adding a part item, input the part# and quantity, then click “+” to go to the “Update SO Item” interface. Or, you can select one part item and click the“Edit” button to enter the “Update SO Item” interface, as shown in the image below:
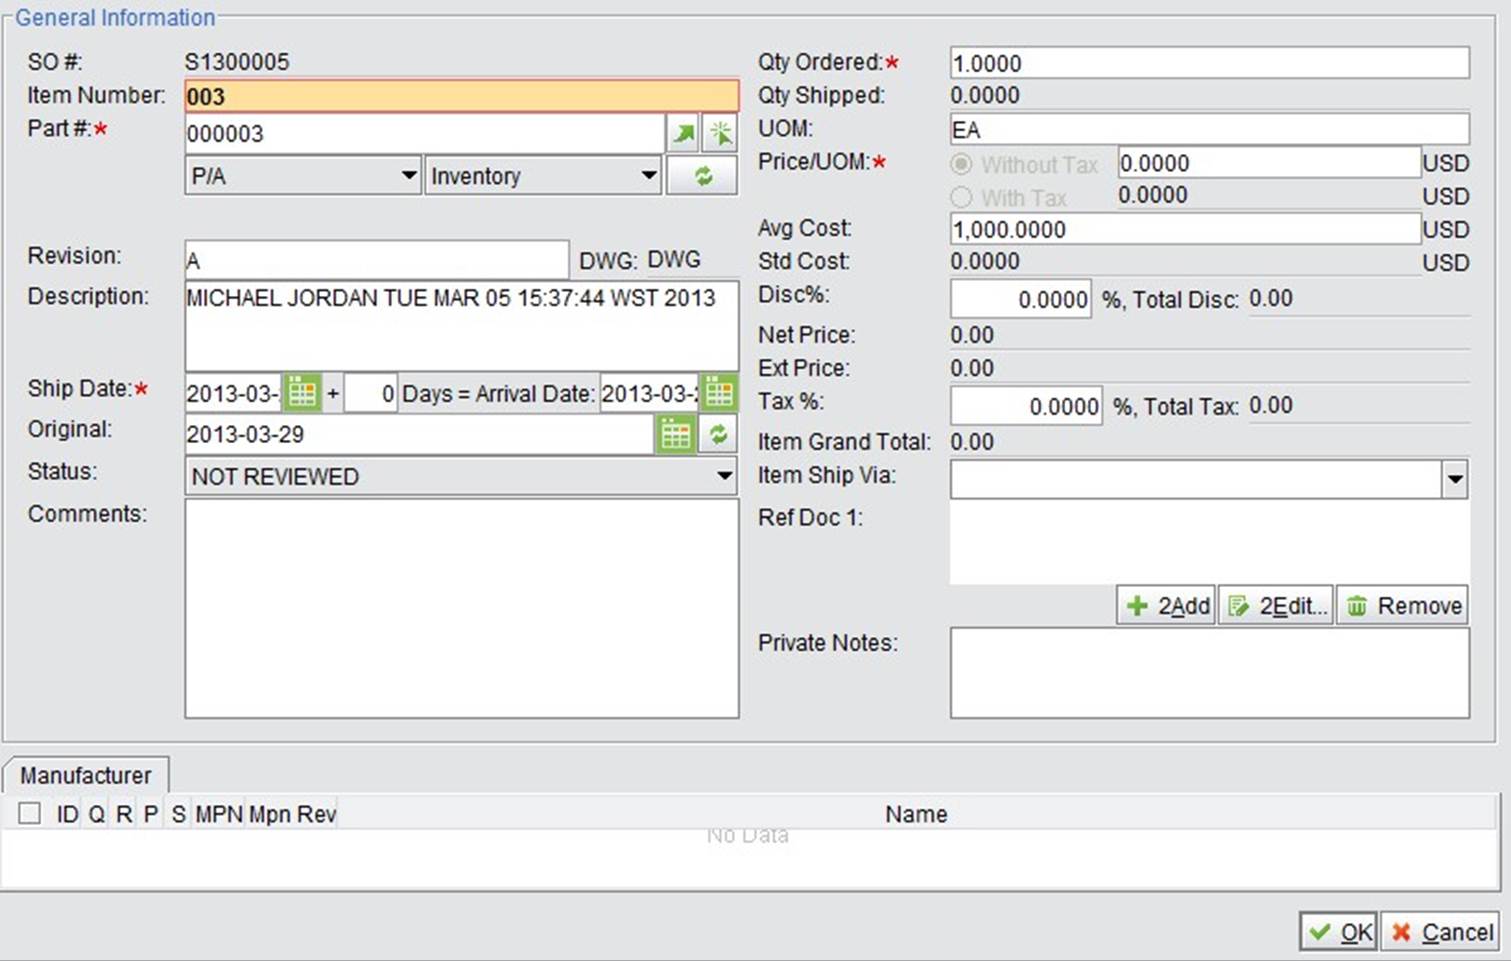 |
Explanations of the parameters in the updating item interface ared below:
Parameters |
Descriptions |
SO # |
The SO #, with one item# to confirm a SO item. |
Item# |
Item# |
Part# |
If the item’s part# is changed, you need to click refresh. |
Revision |
The part’s revision. |
Drawing |
Indicates whether the part has a drawing. |
Ship Date |
The item’s part’s shipping date, which includes the shipping time needed |
Original |
The shipping date required in the original contract. |
Status |
The item’s status can be “Not Approved,” “Open,” “Cancelled,” or “Closed.” |
Comments |
Part’s comments. |
Qty Ordered |
The ordered part’s quantity. |
Qty Shipped |
The part quantity has been shipped. |
UOM |
The part’s unit. |
Price/UOM |
The price of the part in the SO. |
Avg Cost |
The part’s average cost. |
Std Cost |
The part’s standard cost. |
Discount |
The discount percentage for the part. |
Total Disc |
The discount amount for the part. |
Net Price |
The part price after discount |
Ext Price |
The total amount after discount. |
Tax% |
Tax rate |
Tax Total |
Total tax |
Item Grand Total |
The part item’s total amount with tax. |
Ship via |
The part item’s shipping method. |
Ref Doc 1 |
The item’s up level’s related doc, e.g., purchasing order, work order and quote |
Private Notes |
The part item’s private notes. |
After updating the SO item, click “OK” to go back to the “Update SO” interface.
After filling out all information in the updating SO interface, click “Update” to finish adding the SO.
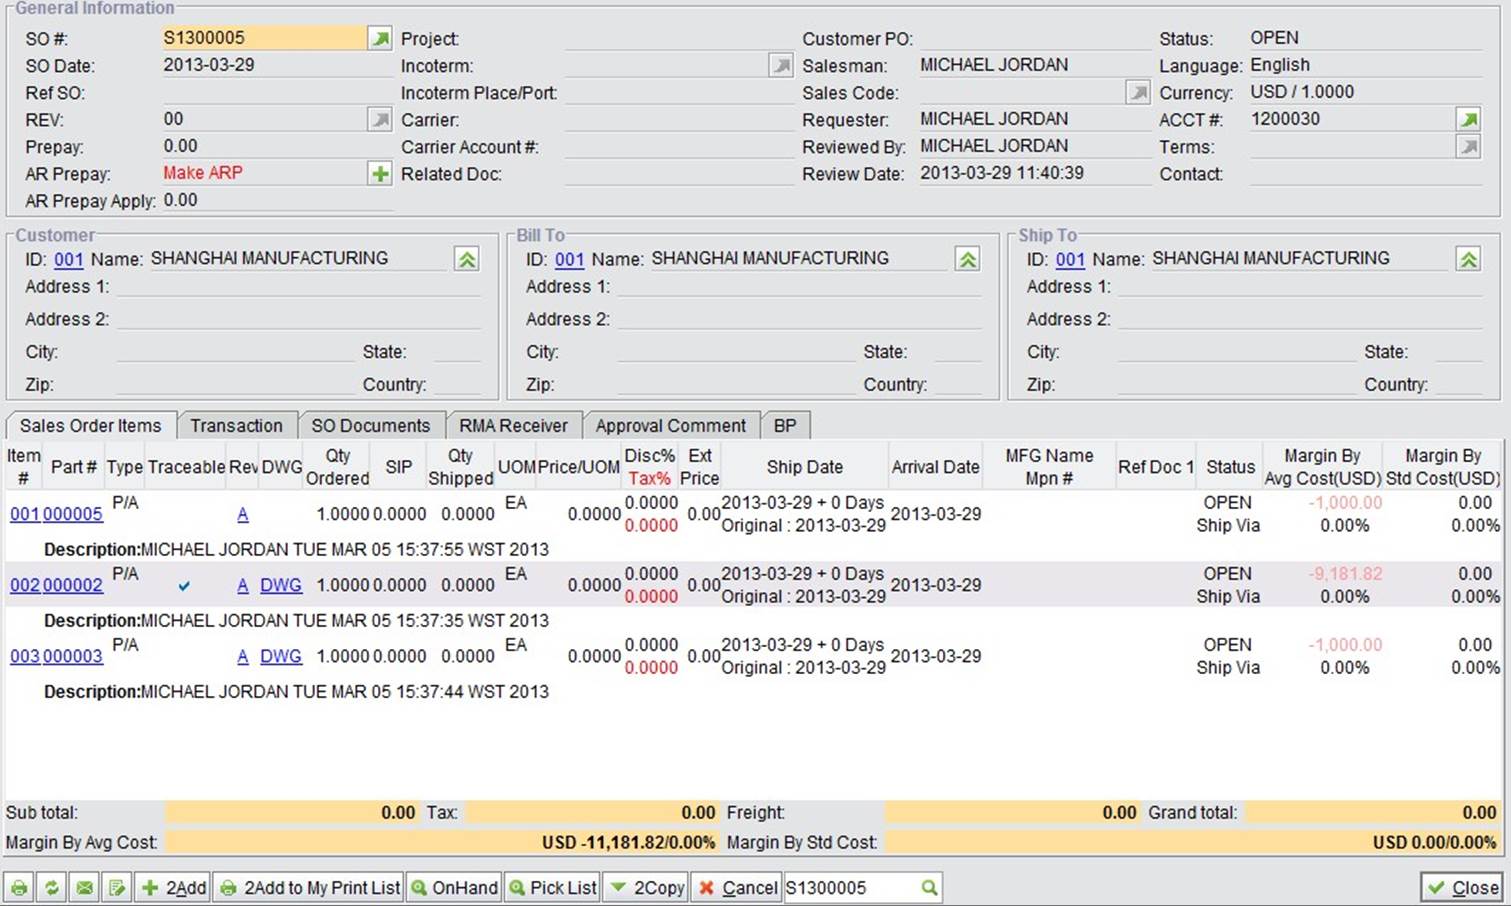
Back at the SO property interface, the SO’s status is not reviewed. Related users can click the “Approve” button to approve the quote. Its status will be changed to “Open.” Only users with permission can approve the quote. The SO approval can be added at the “SO Module-> SO->Control” interface.
 |
 |
At the SO property interface, you can complete the actions below:
updating ARP interface. Refer to this more in the chapters “Accounting Module” and “ARP.”
 |
 |
2BizBox provides a variety of ways to look up a SO.
Input a SO# and click the button to look up SO detail.
Input a SO# key word and click the button to search all related open SOs.
 |
Input a part# key word and party type and click the button to search all related SOs of the part.
 |
Input a customer PO key word and click the button to search all related SOs of the customer PO.
 |
Input a customer ID and click the button to search all related open SOs of the customer ID.
 |
Input a customer ID key word and click the button to search all past due SOs of the customer.
 |
Click the button to search all cancelled SO items.
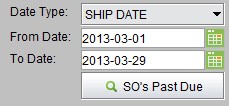
Look up a related SO by date and other conditions.
Ship Date: the date when SO shipping is done from the warehouse; SO Date: the date a SO is created; arrival date: the planned arrival date of the SO; original ship date: the ship date planned for the sales order.
 |
To be fast, a 2BizBox user can search for customers at the sales order general interface, by selecting “Look up customer,” “Search customer by ID” and “Search Customer by Name.”
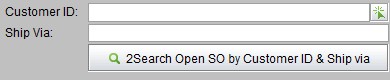
Search for a related open SO by customer ID and ship via.
 |
Input a salesman’s name to search all related SO.
 |
Reports allow Serva Software LLC to see sales reports, statistics directly and clearly. You can look up related reports at the “Sales Module->SO->Reports” interface.
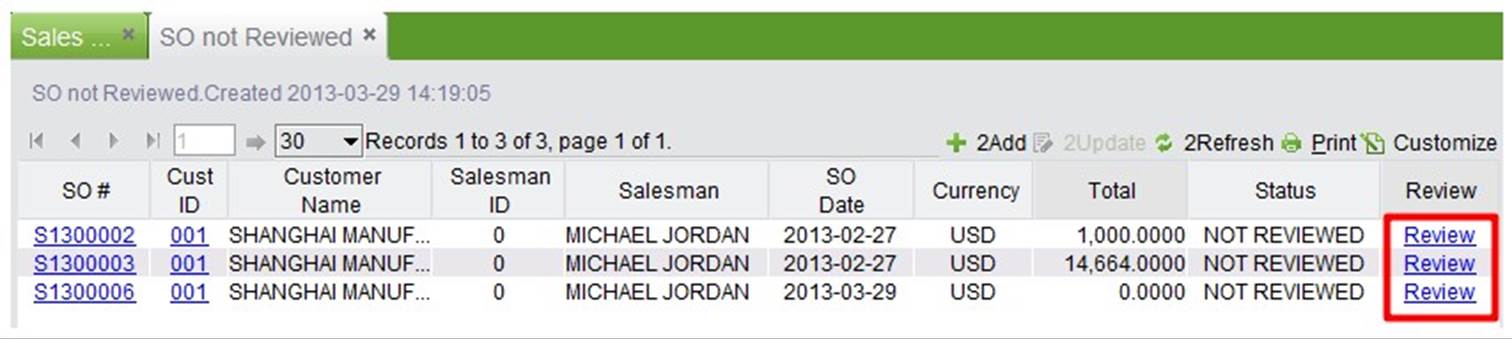
Click the button to see all SO not reviewed.
At the search results interface, there is a “Review” button for each unreviewed SO. For SO approval, click the button to approve the SO, and improve efficiency.
 |
Users can search past due SOs from certain time ranges. Search results will list related SO’s parts on demand, on order, quantity ordered, quantity shipped, etc. which allows the manager to deal with urgent sales orders and check related past due reasons.
 |
At the search results interface, you can look up past due SOs, or shortage of past due SOs by customer.
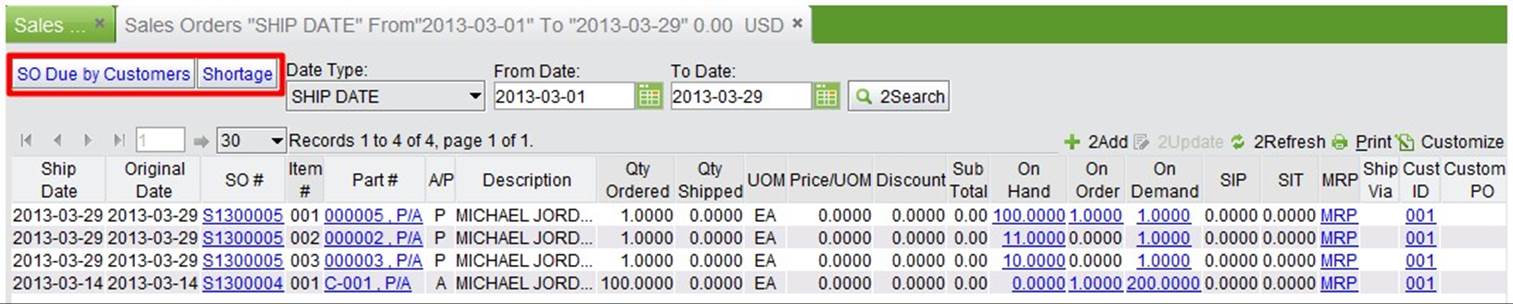 |
Click the “SO Due by Customers” button to see total numbers of items and total amount of past due SOs. By clicking the number of items, you can see all past due item information.
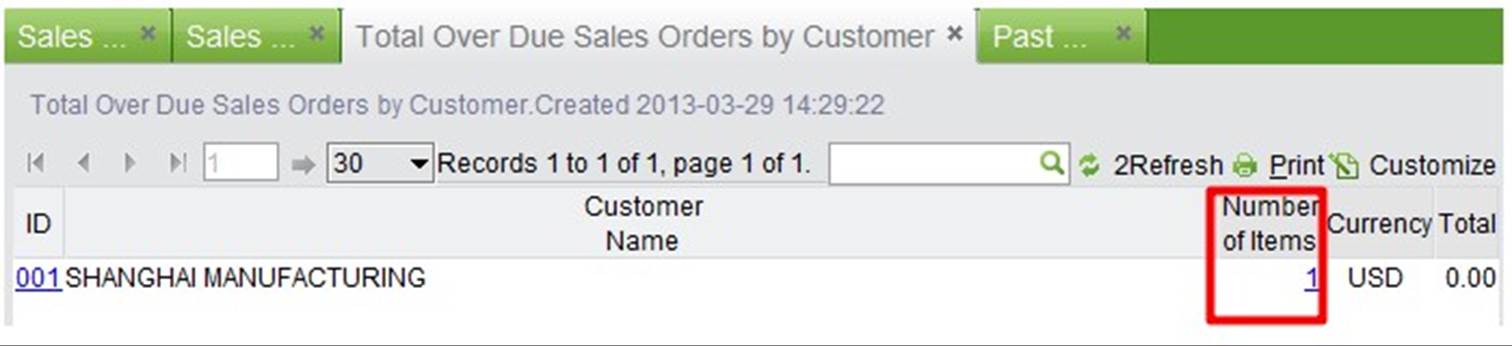 |
Click the “Shortage” button to see all past due SO’s items with part shortages.
 |
Click the button to see all open SOs.
The search results will be shown as below. It lists all open SO items by date and each part’s on hand information.
 |
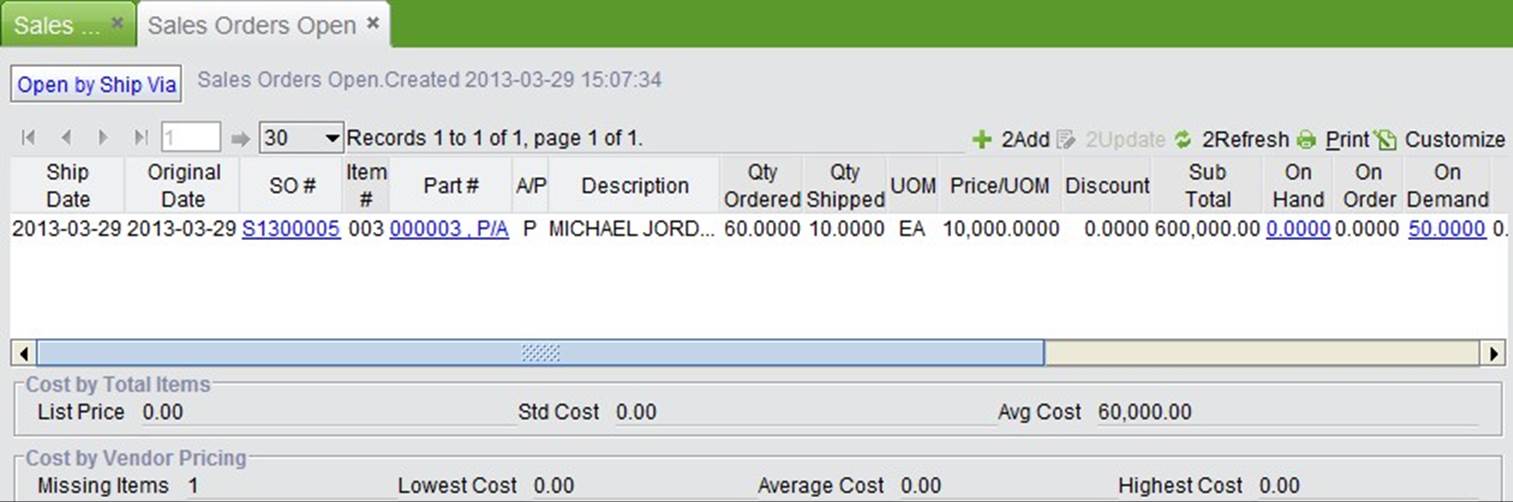
Click “Open by Ship Via” to see all open SOs by ship via.
 |
Click “Open by Customers” to see all the customer’s open SOs total numbers of item and total amount.
 |
Click “Shortage” to see all open SOs of all part items with shortage.
 |
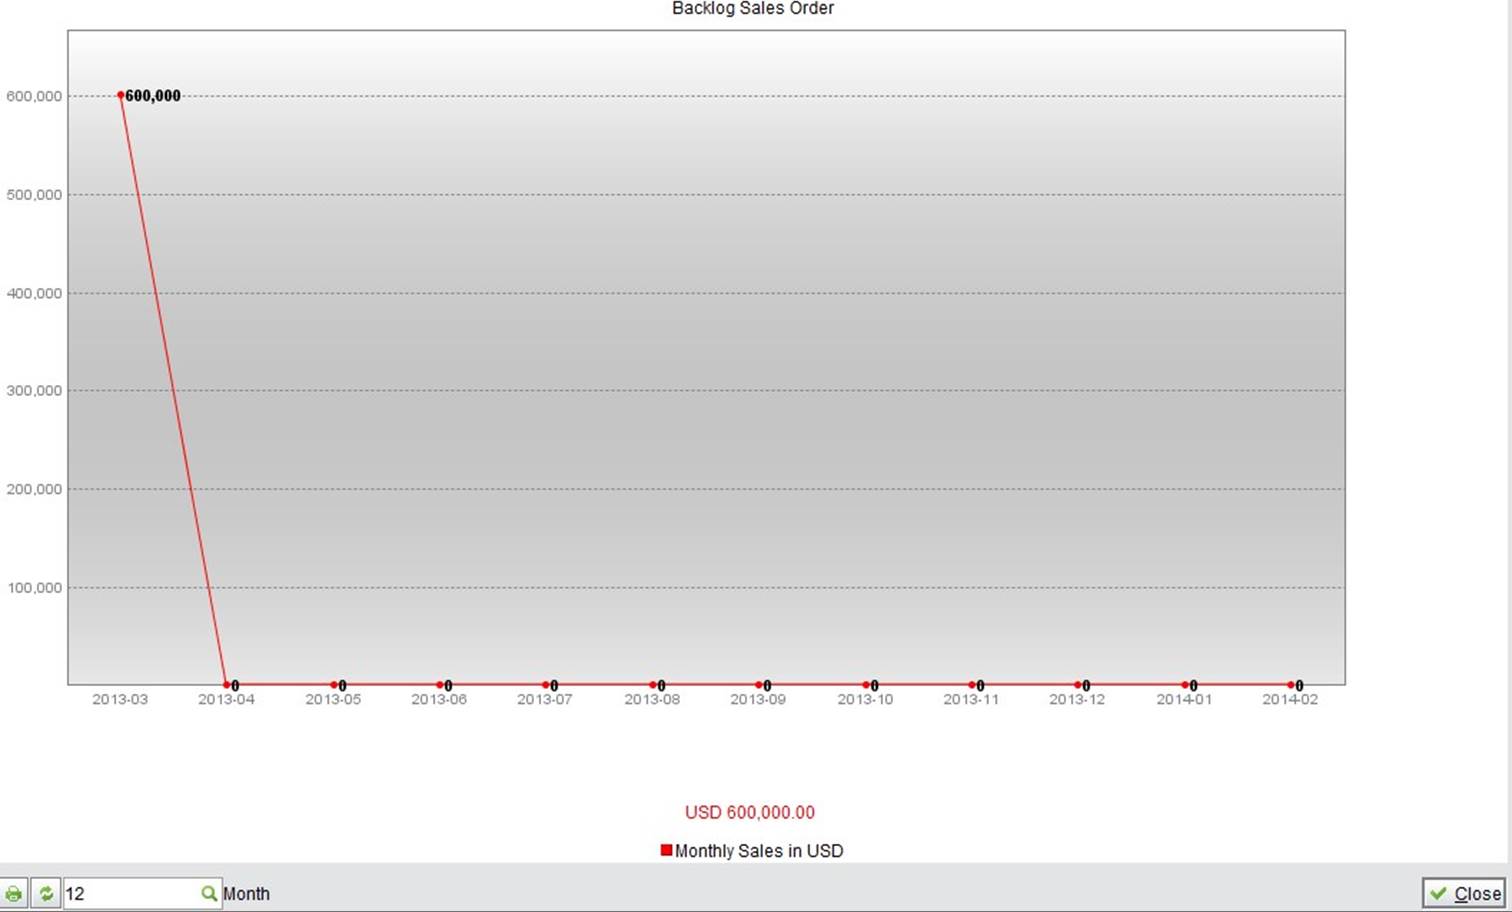
Click “Backlog by Month” to see unfinished sales order total amounts in the form of a chart. The backlog means that those SOs should be shipped in this month but have not been done yet.
 |
Click the button to see all SO’s cost information.
Search results will show item’s total list price, STD cost, average cost, cost by vendor pricing, missing items, lowest cost, average cost and highest cost.
 |
Click “Ship Via” to see all SOs by ship via.
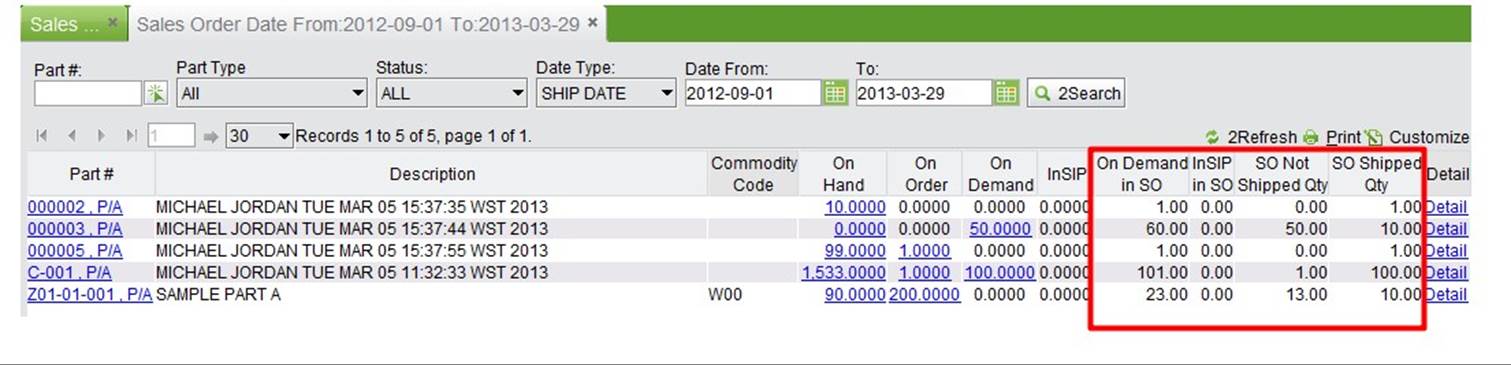
Search sales related records of specified parts within a certain time range.
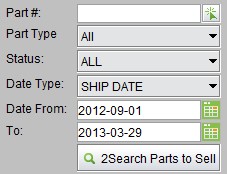 |
At the search results interface, parts on demand are listed in SO, In SIP in SO, SO not shipped quantity and SO shipped quantity. Click “Detail” to see related SO detailed information of the part.
 |
SO on time delivery rate is one of most important indicators of customer satisfaction. It is an efficient tool to evaluate production and delivery results.
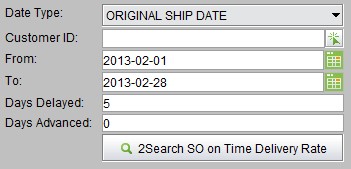 |
Days Delayed: if shipping days delayed is less than the days set here; is still considered on time delivery.
Days Advanced: if shipping days advanced is less than the days set here, it is still considered on time delivery.
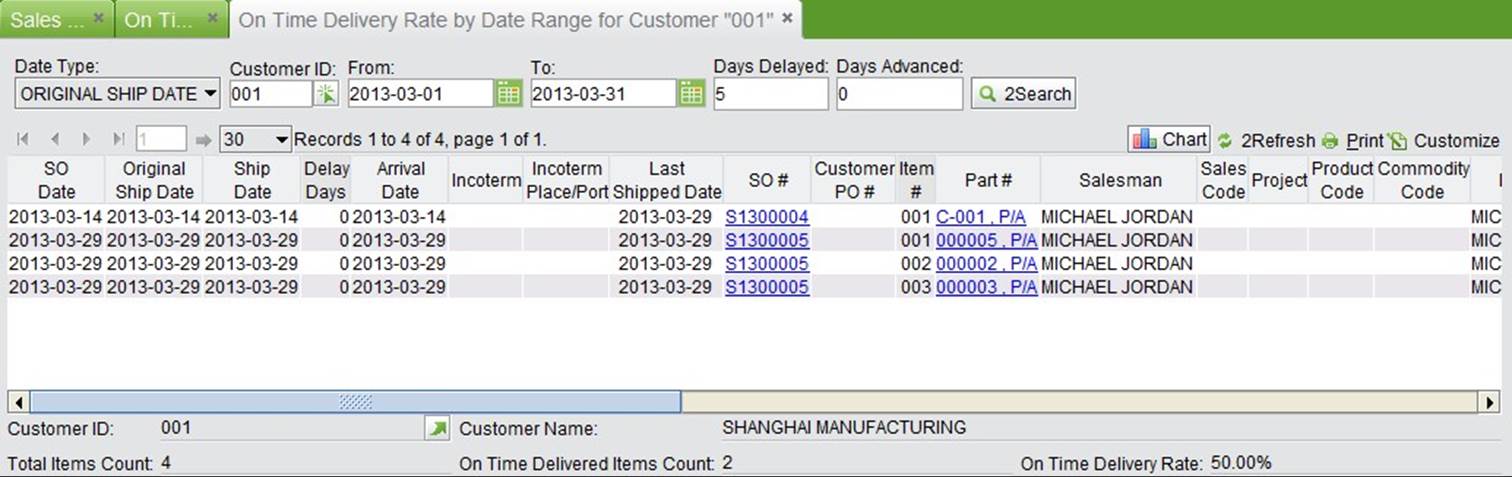
On time delivery rate list is based on the customer, click “Detail” to check all delivery information on the customer.
 |
At the bottom of the results list, you can see total item count, on time delivered items count, and on time delivery rate.
 |
Click the “Chart” button at the top right. The vendor’s on time delivery rate in last 12 months will be shown in chart form.
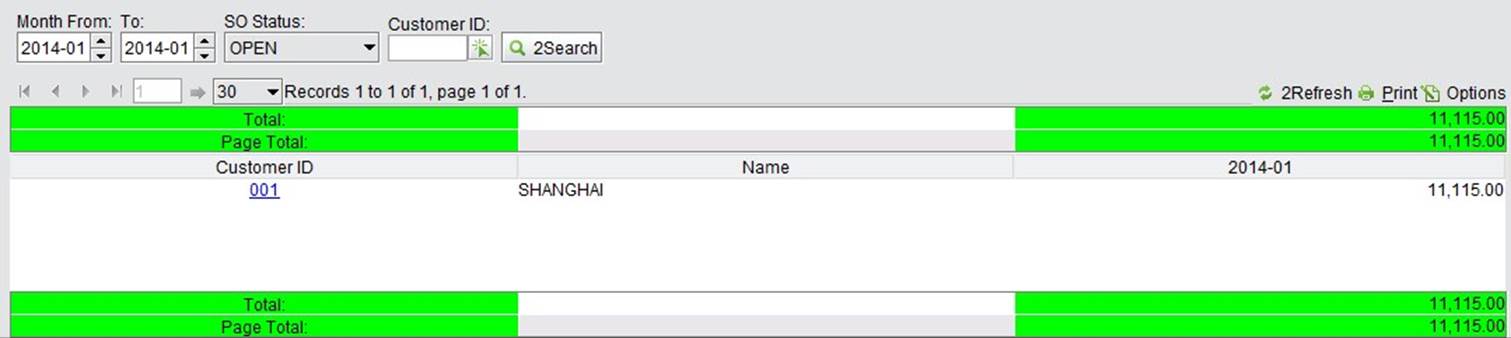
You can search customer SO’s monthly statement report by month, SO status and customer ID.
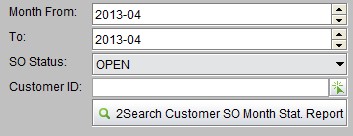 |
Month from: the start month of the statement report.
To: the end month of the statement report.
SO status: it includes open, not reviewed, closed, and cancelled.
Customer ID: input a customer ID key word, or pick a customer ID.
The search results will show each customer’s monthly SO amount report and all of theirs total SO amount monthly report.
 |
SO Print list allows you to print SOs in batch. Click “Search My SO Print List” at “SO->Reports” to check SO print lists.
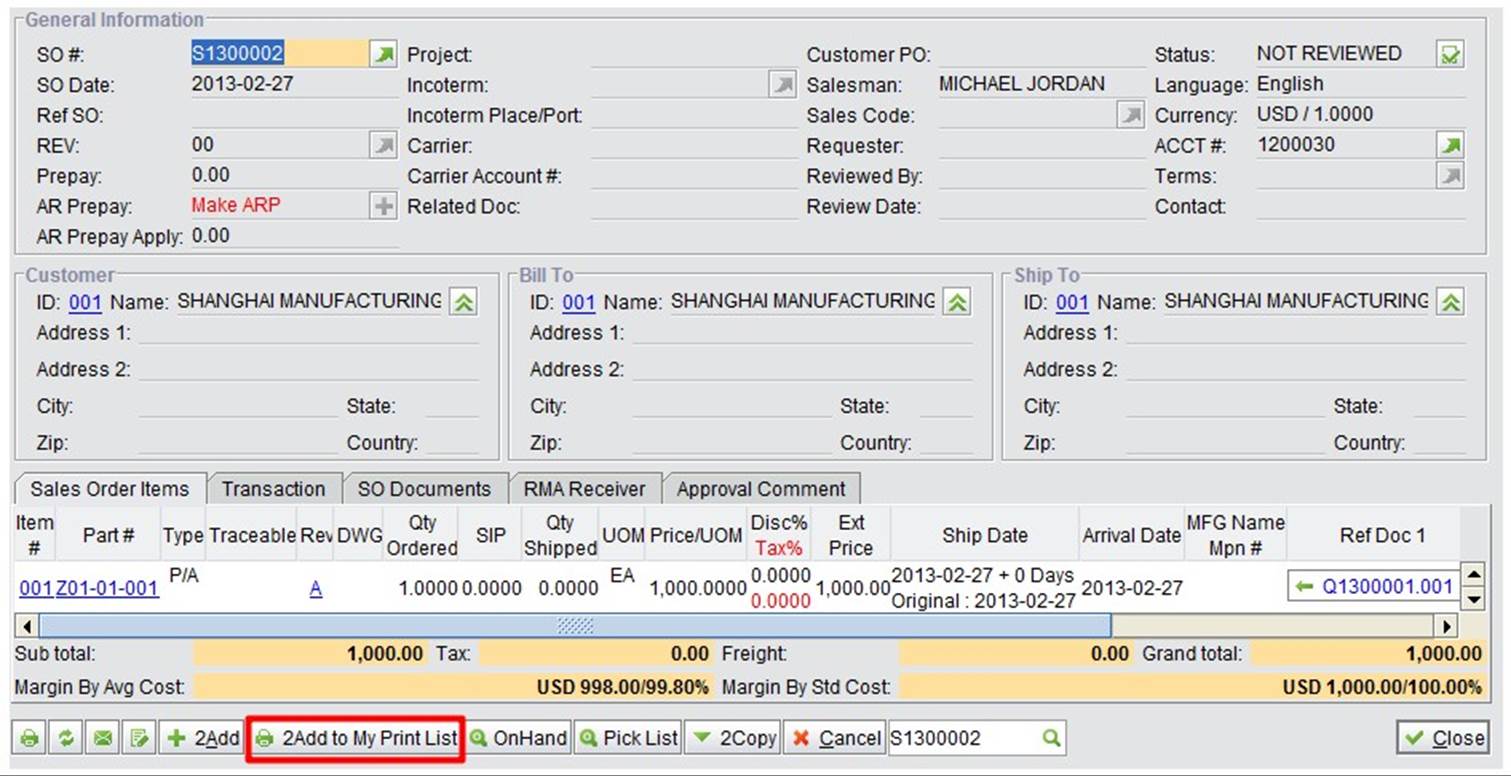
At the bottom of each SO property interface, click “Add to My Print List” to add the SO to the print list; then the button will disappear.
 |
Click the “Search My SO Print List” button at the “Sales Module->Reports” interface.
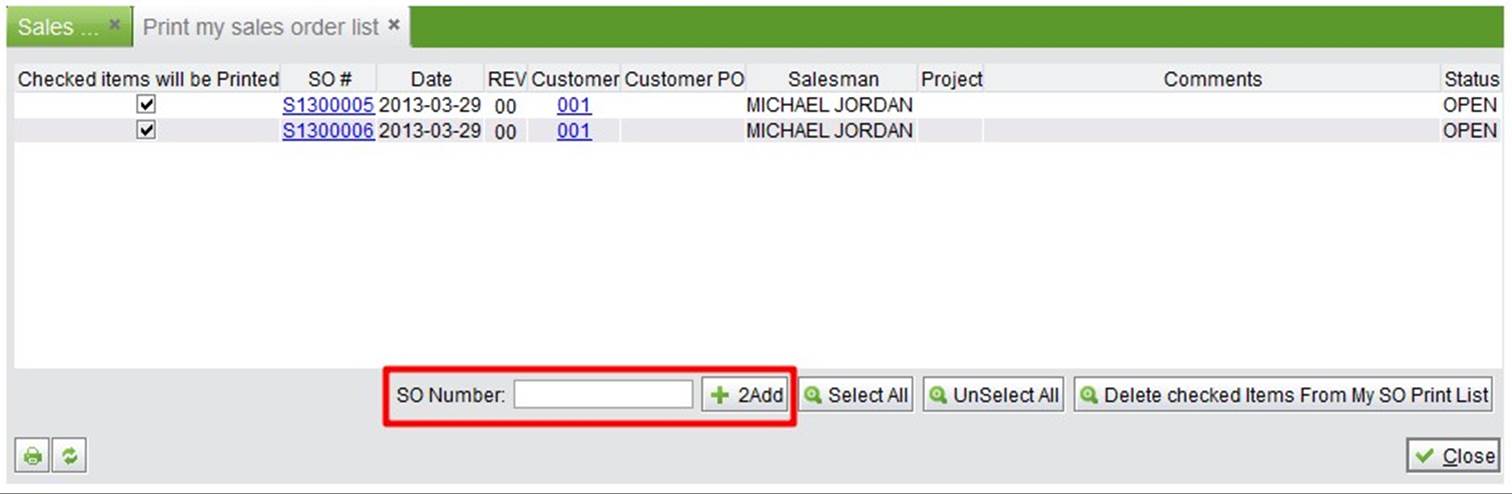 |
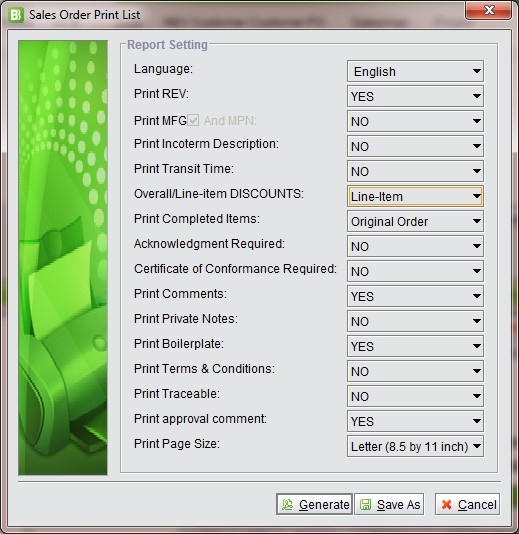
You can also input a SO# in the field at the bottom of the interface. Click “Add” to add the SO to a print list. After adding, check the items to be printed, and click “Print” to go to the print settings interface.
 |
In the chapter “Other actions in SO,” click “+” beside “Make ARP” at the SO interface to generate an AR Prepay for the SO. You can also create an ARP by inputting or searching SO# directly at the “SO Module->SO->AR Prepay” interface.
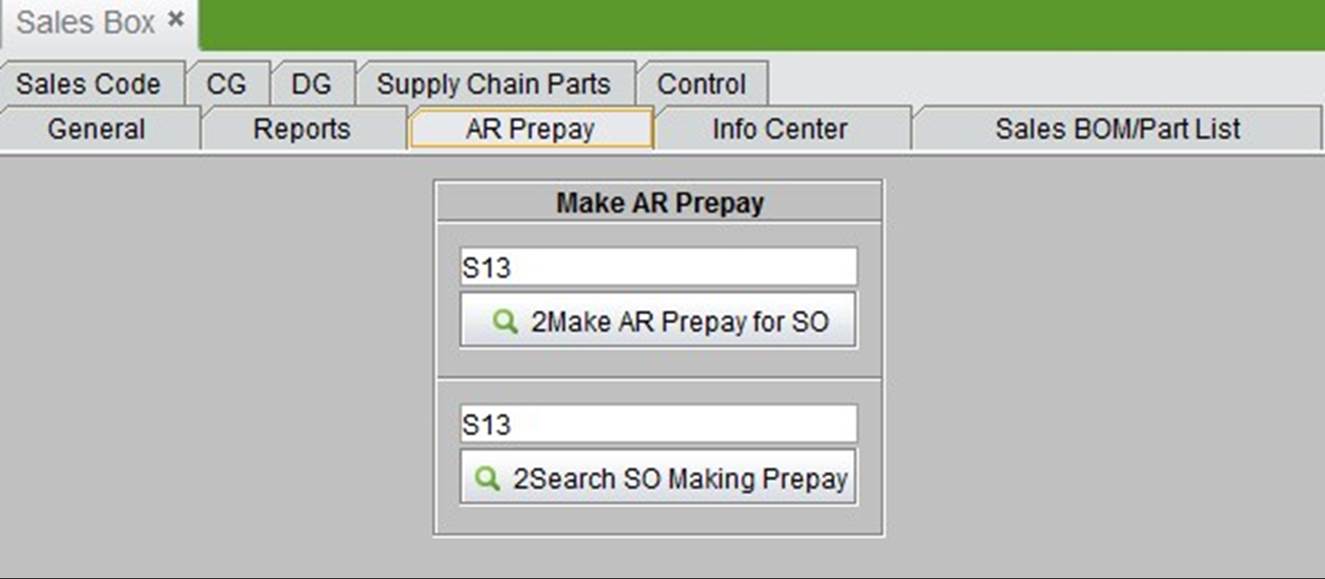 |
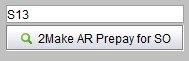
Input the SO# to generate an AP prepay; click the button to go to the creating interface.
 |
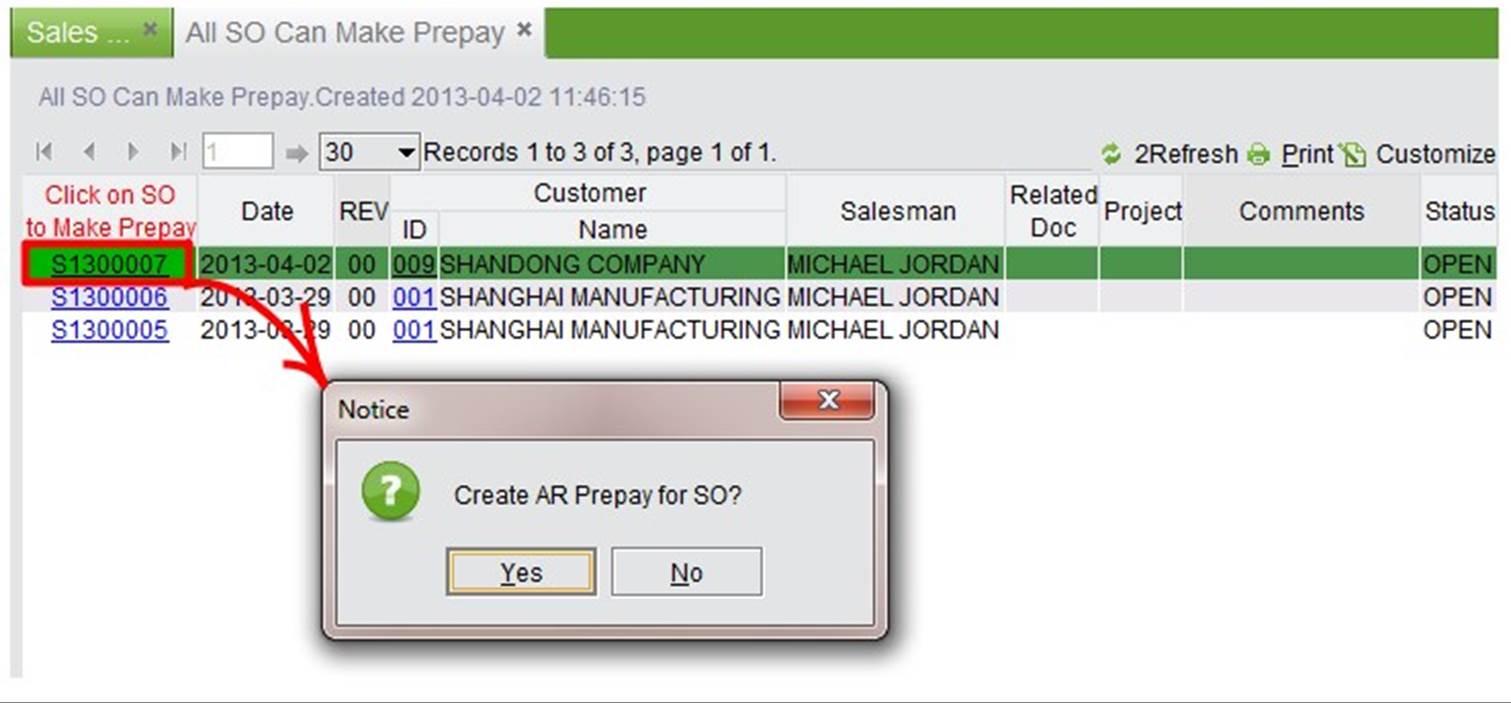
The system will ask to create an AR Prepay for the SO:
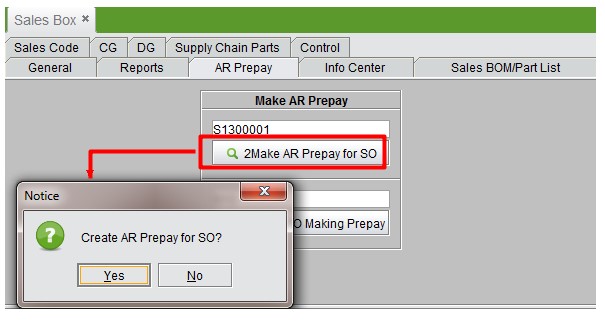 |
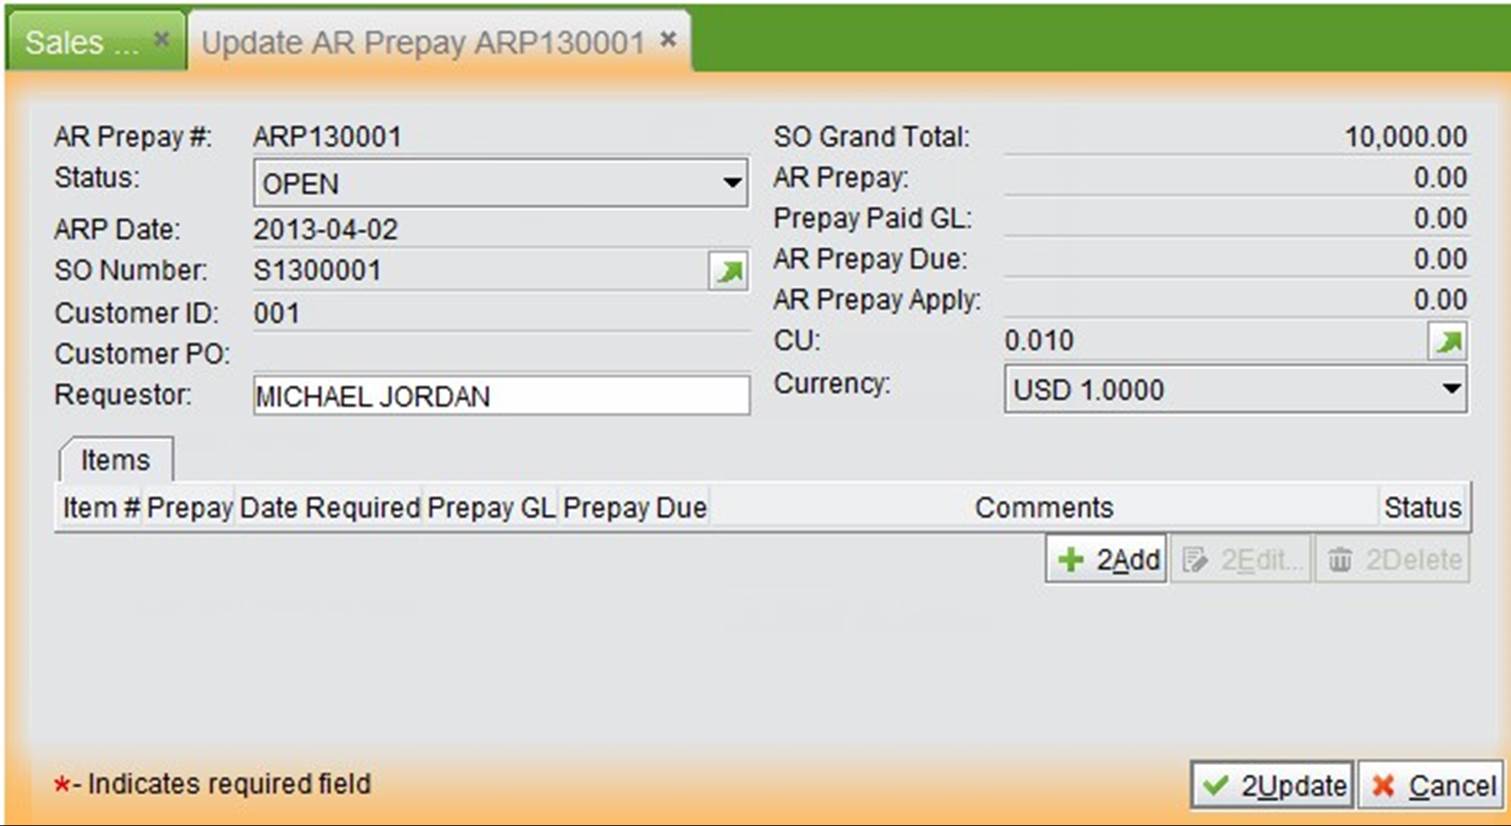
Click “Yes” to go to the ARP interface. Please refer to the “Accounting Module” for instructions on how to add prepayment at the ARP interface.
 |
Input the SO# keyword and click the button to search related SOs to create AR prepay.
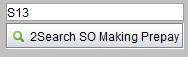 |
Click a SO# at the search results interface to go to the AR prepay interface.
 |
Here you can see an information center with related sales reports generated in the sales module.
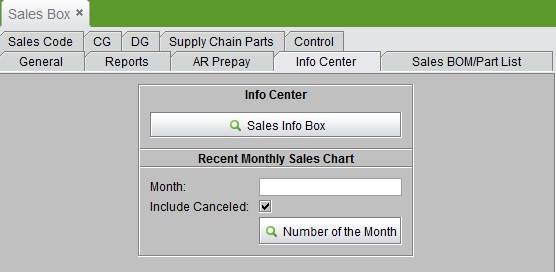 |
Click “Sales Info Box” to go to the sales info center.
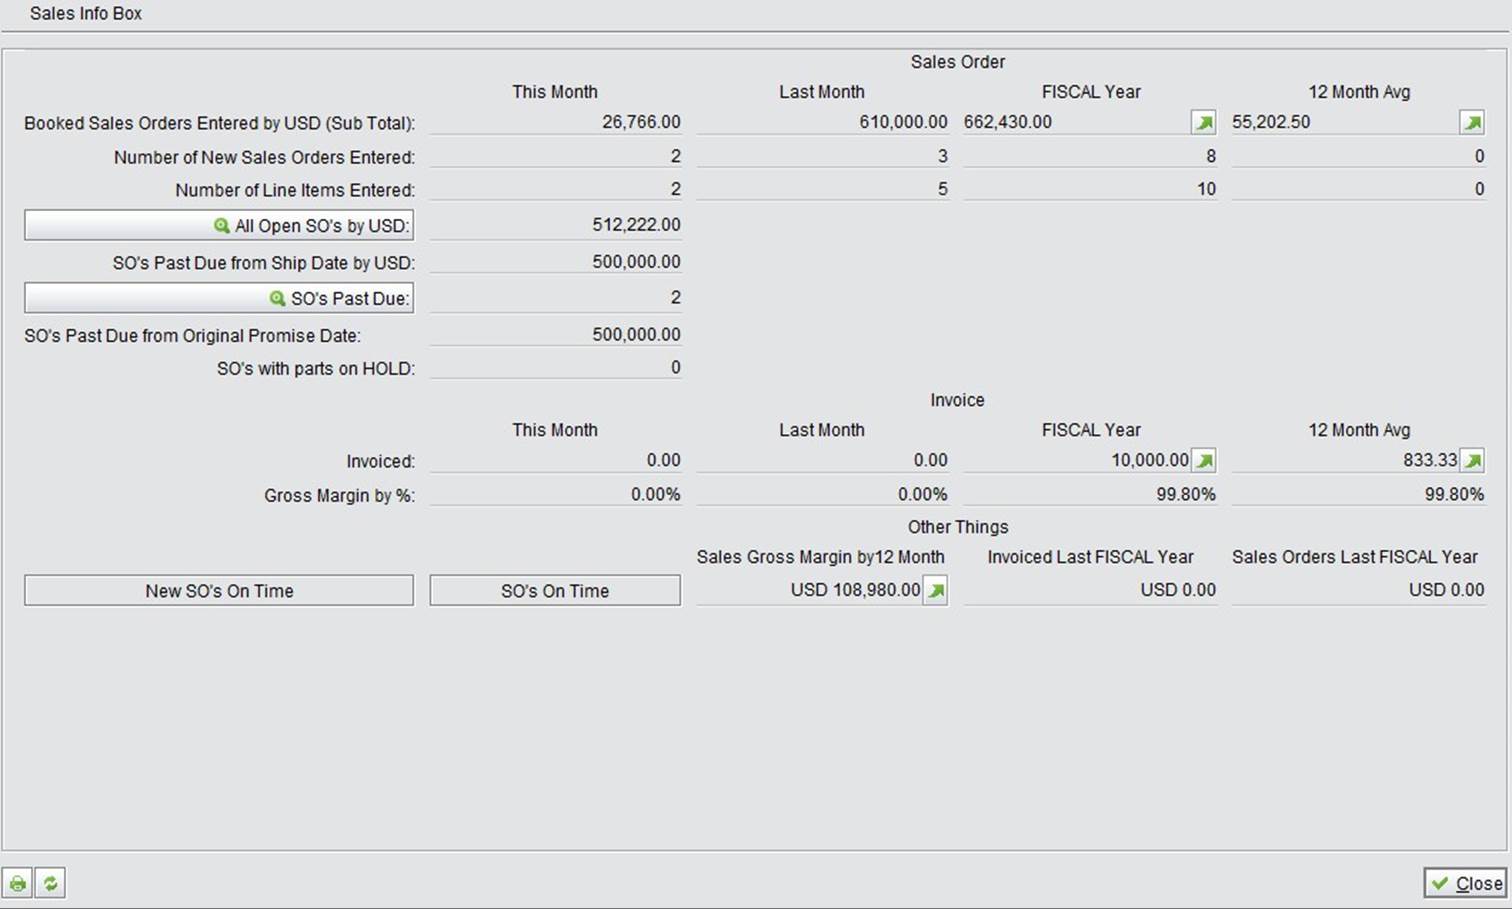 |
You can see information such as the monthly sales order quantity, amount, invoice, and gross margin. The parameters are explained below:
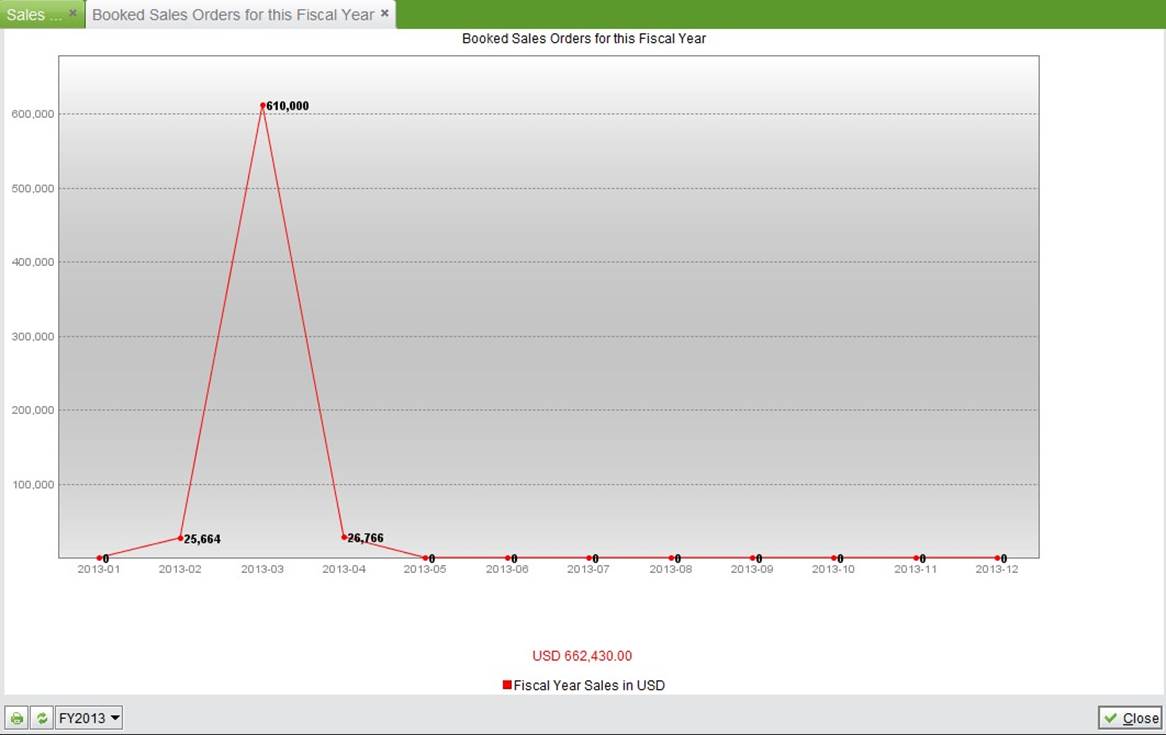
Booked Sales Orders Entered by USD (Sub Total): shows newly entered SO’s amounts within a certain period, such as this month, last month, fiscal year, 12 month average amount, SO entered including but not reviewed, or cancelled. Amount currency appears as the company currency, the SO amount traded by foreign currency will be converted to company currency. Click ![]() beside “Fiscal Year” and “12 Month Avg” to see the corresponding chart.
beside “Fiscal Year” and “12 Month Avg” to see the corresponding chart.
 |
 |
Number of New Sales Orders Entered: total numbers of SO created within a certain period.
Number of Line Items entered: total quantity of new SO items created within a certain period.
All Open SO’s by USD: total amount of all open SOs. Click the button to see all open SO’s information, which is the same as the information showed at “SO->Reports->All Open SOs”
SO’s past Due from Ship Date by USD: total SO amount which have not yet been shipped by the shipping due date.
SO’s Past Due: the number of total past due SOs; click the button to see more information.
SO’s Past Due from Original Promise Date: the total SO amount when the original date is past due.
SO’s with Parts on HOLD: total number of SOs with parts on hold.
Invoiced: total SO amount of invoiced SOs within a certain period, including this month, last month, fiscal year and 12 month avg.
Gross Margin by %: gross margin percentage of invoiced SOs within a certain period.
New SO’s On Time:
 |
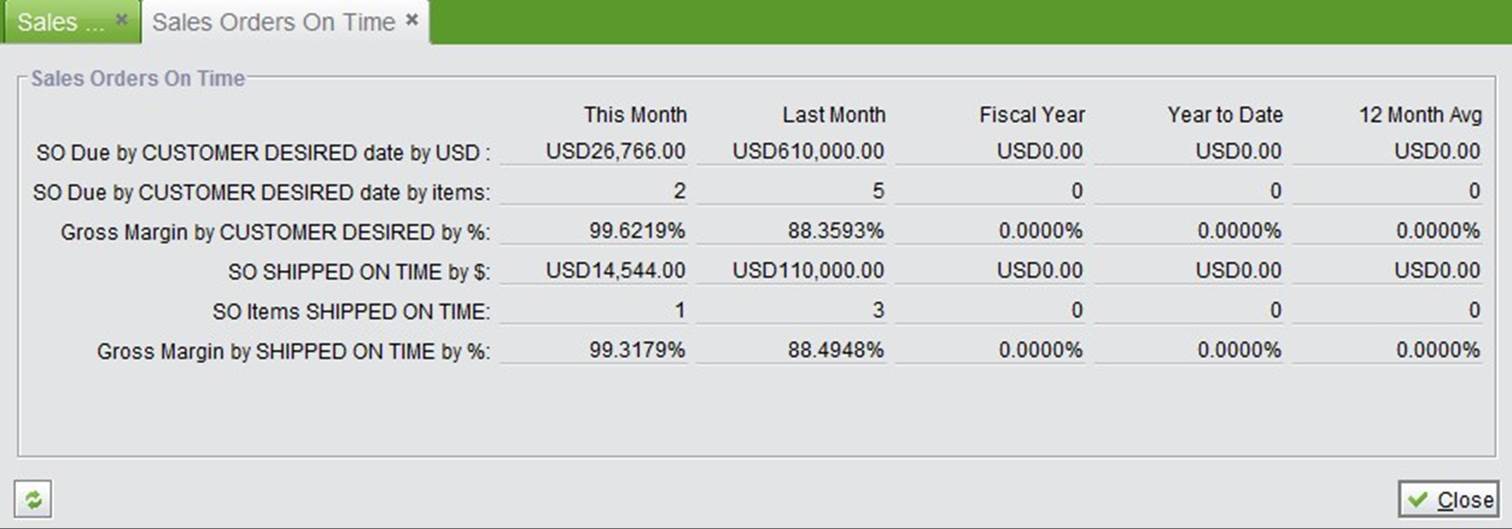
SO’s On Time
 |
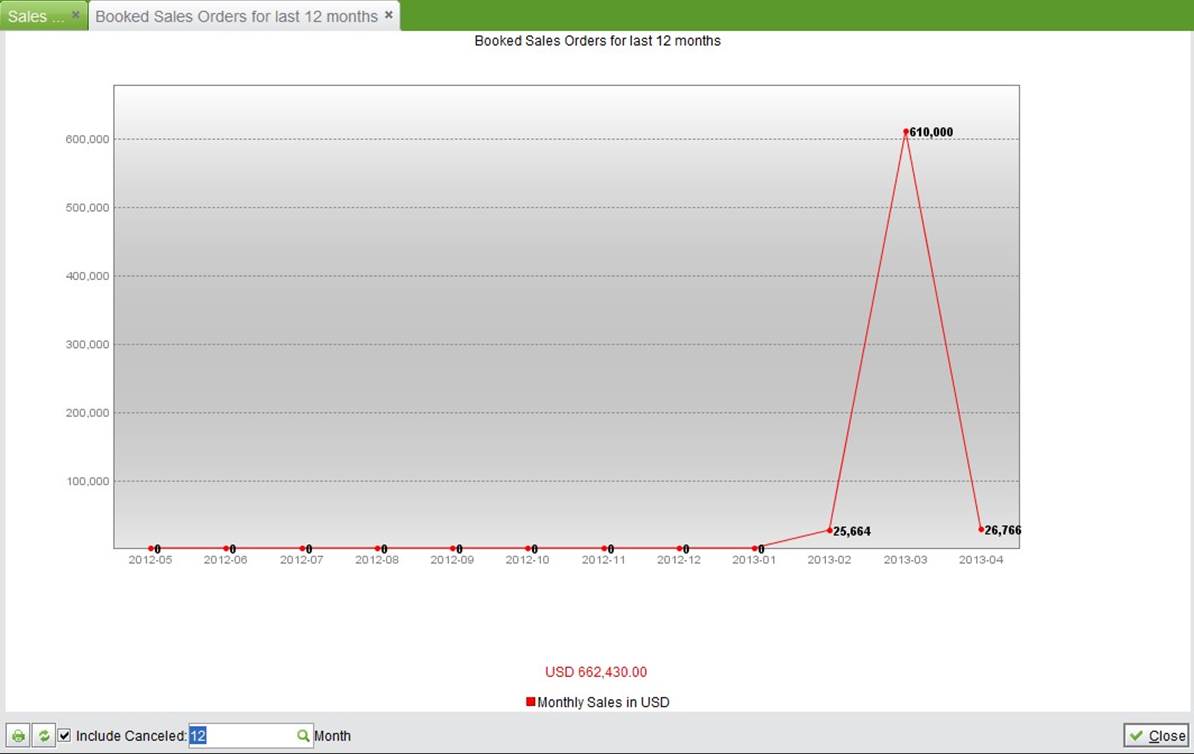
Input the recent month’s quantity to see a related sales chart, click the button to see it. If you check “Include Canceled,” the search results will include cancelled SOs.
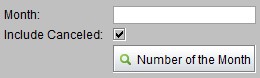 |
For instance, input “6” in the month field, and click “Number of the Month” to check the recent 6 month’s sales chart.
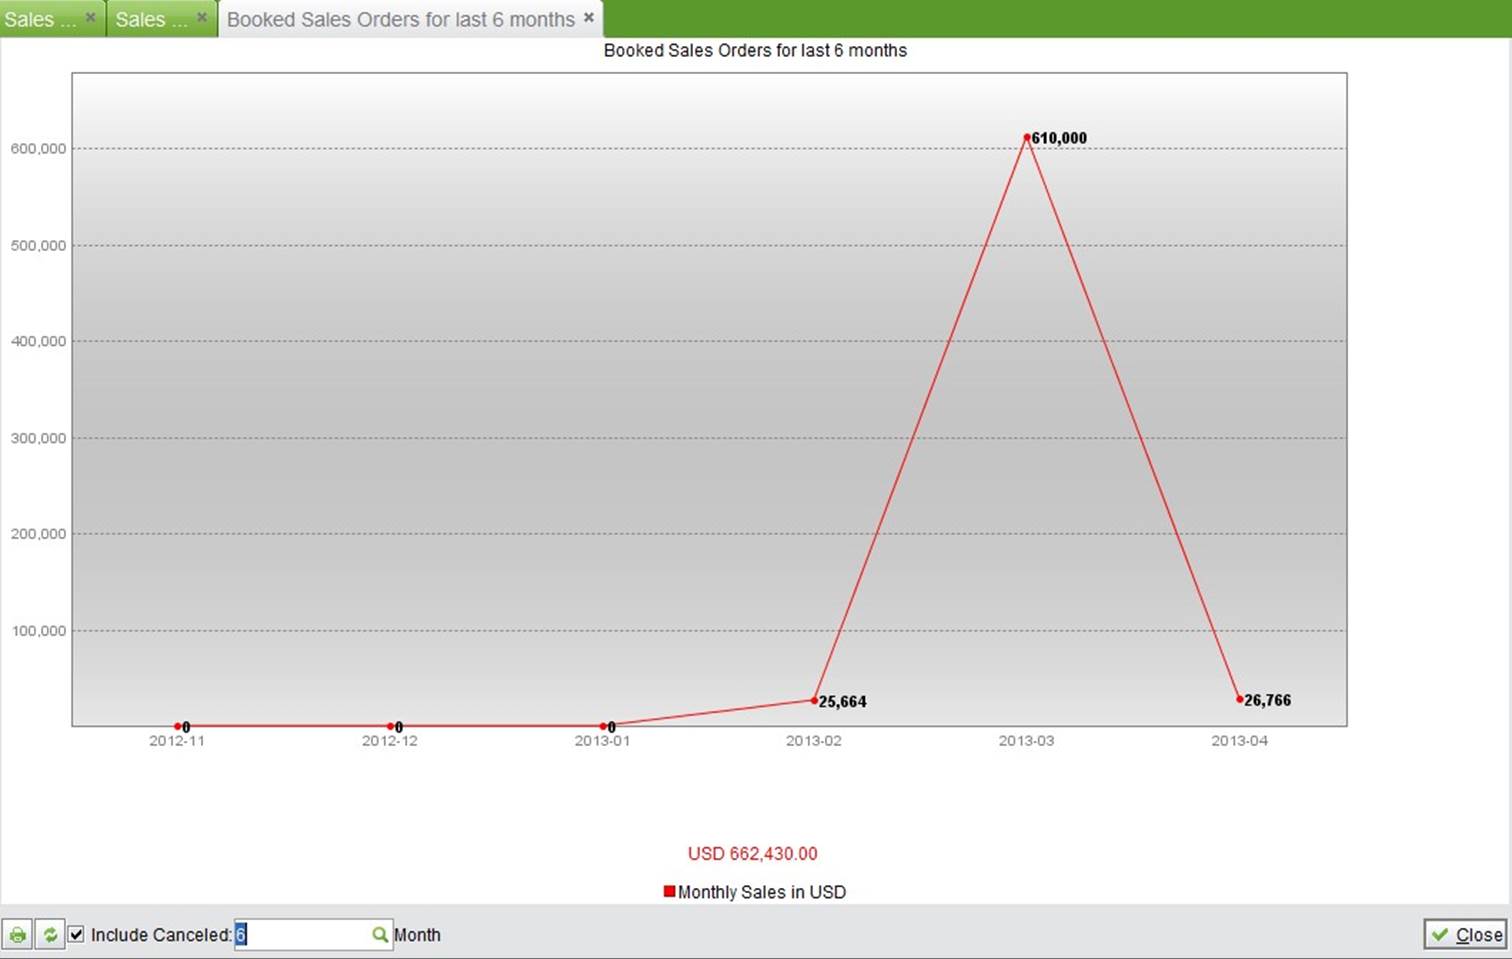 |
The sales chart can be printed in PDF format.
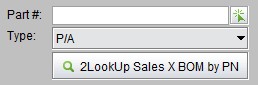
Input BOM# and click the button to see the part list of the BOM.
 |
It will show a part’s saleable information in the part list of the BOM.
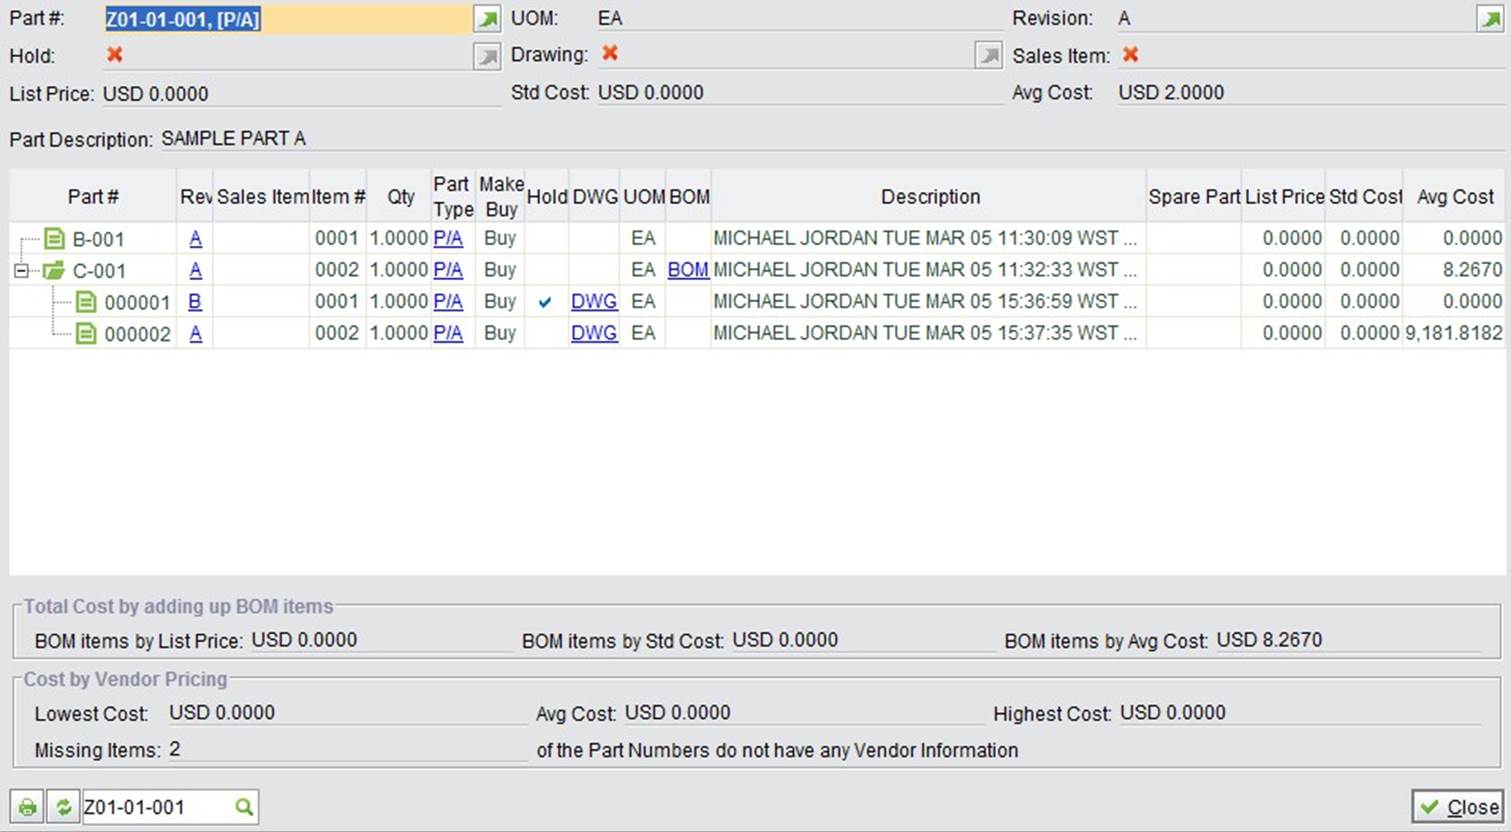 |
Input the BOM# and click the button to see all saleable part lists under the BOM.
 |
Sales code is assigned to staff or distributors. Each of them is related to a proportion of commission, used for salesman or distributor‘s commission management. After you have finished adding a sales code in the system, you can select one for SO at the updating interface, indicating the SO’s s commission allocation. To manage sales commissions, you can look up related and statistics at “Accounting Module->AP->Sales Commission.” It is a payment process for commission in the system.
Click “Add Sales Code” at “Sales Order->Sales Code” interface to go to the adding interface.
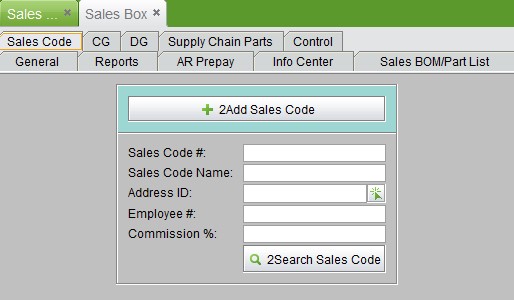 |
Here, input a sales code#, it can be Chinese characters, English characters, or numbers, but the number is limited to 6 characters.
 |
If you add a sales code for outside distributors, input the distributor’s address# and click “Add” to go to the updating interface.
If you add a sales code for internal employees of the company, input the employee # and click “Add” to go to the updating interface.
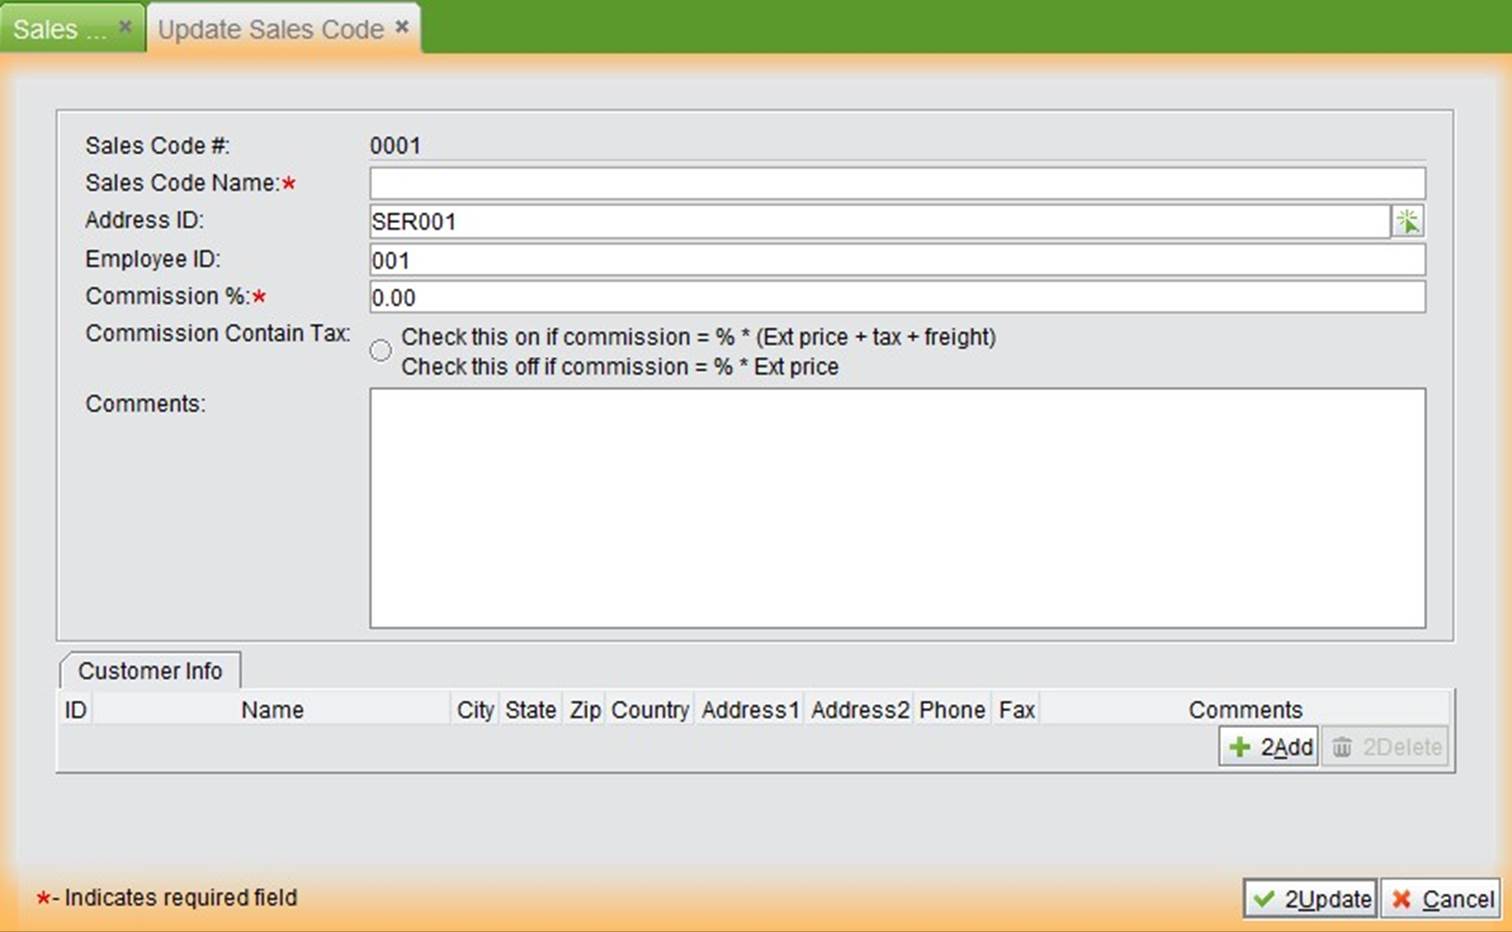 |
At the sales code updating interface, fill out the content as described below:
Sales Code Name |
Make a summary for a sales type or commission percent. |
Address ID |
If you are adding a sales code for a distributor, its address ID will be shown; if you are adding one for an internal employee of the company, it will show the company’s address ID. |
Employee ID |
This field will be empty if you are adding a sales code for a distributor; otherwise it will show an employee ID. |
Commission% |
Commission percentage is allocated to a distributor or an employee, the percent will be determined based on a sales order’s total amount. |
Commission Contain Tax |
If checked, the commission contains tax; otherwise, it does not. If the code includes tax, “Commission=(SO ext price+tax+freight)* commission%” ; IF after tax, “Commission=SO ext price* commission%” ; |
Comments |
Fill out comments for the sales code. |
Customer Info |
Click “Add” to choose a customer for employee or distributor. |
After filling out all the information, click “Update” to finish adding the sales code.
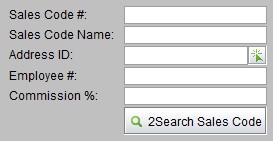
Search sales code by sales code#, sales code name, address ID, employee#, and/or commission%.
 |
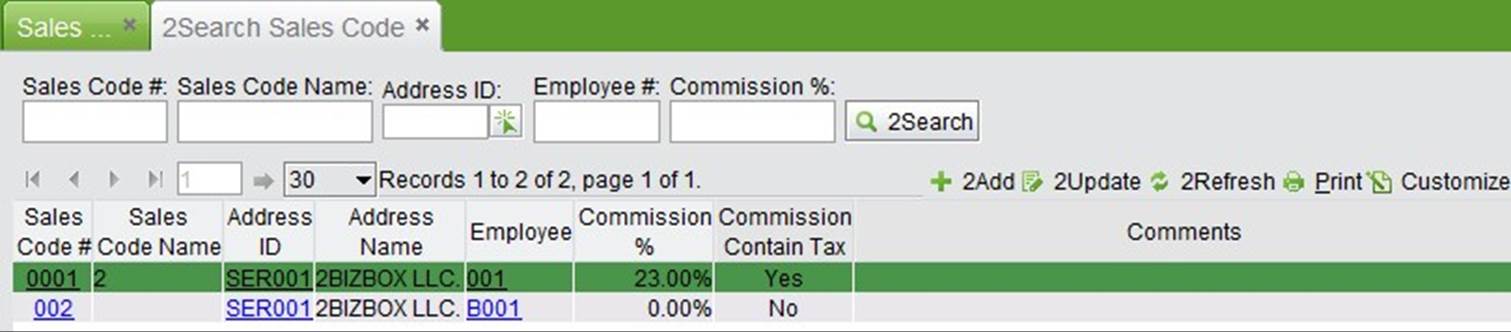
Search results will be shown as below. You can edit them by selecting one.
 |
At “Accounting Module->AP->Sales Commission,” you can complete sales commission management. Click the “Search Commission” button to search commissions by date type, status, and sales code. The system will run statistics on employees or distributors under the sales code.
 |
You can also lookup sales code commission reports by date and sales code.
The CG Box is a web branch of 2BizBox, with which customers can connect to a Vendor’s 2BizBox server and exchange business data. Basically, CG Box is carried out in this way: vendors create an account for customers.
With this account, customers can view vendor’s part information, request for quote, RMA and customer service. In all, CG Box serves as an information bridge between 2BizBox users and their customers.
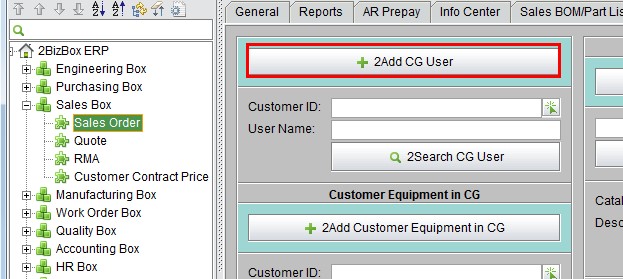
In the Sales Box, the basic information for Customer Groups can be managed, such as adding CG Users, Sales Catalog and search Customer Service Requests.
A CG User Account is required to connect to your 2BizBox Server. Click “2Add CG User” under “Sales Box – Sales Order - CG” to add a new account:
 |
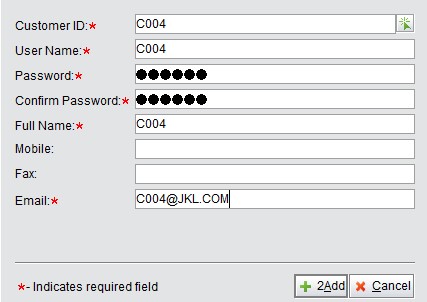
In the following interface, input a CG User’s information as follows. A Username and Password is required to login the CG Box, so you should keep it safe. Customer email is a mandatory field here, used as the reply address for requests.
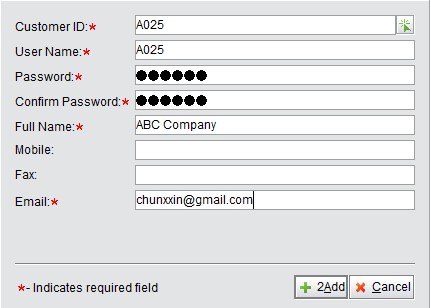 |
Click “2Add” to add a CG User.
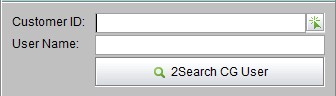
You may use Customer ID and User Name to search for CG Users in the search box below.
 |
When the sales order is shipped, you can add the sold parts as the customer’s equipment. After that, the Customer can look up the equipment in the CG Box online.
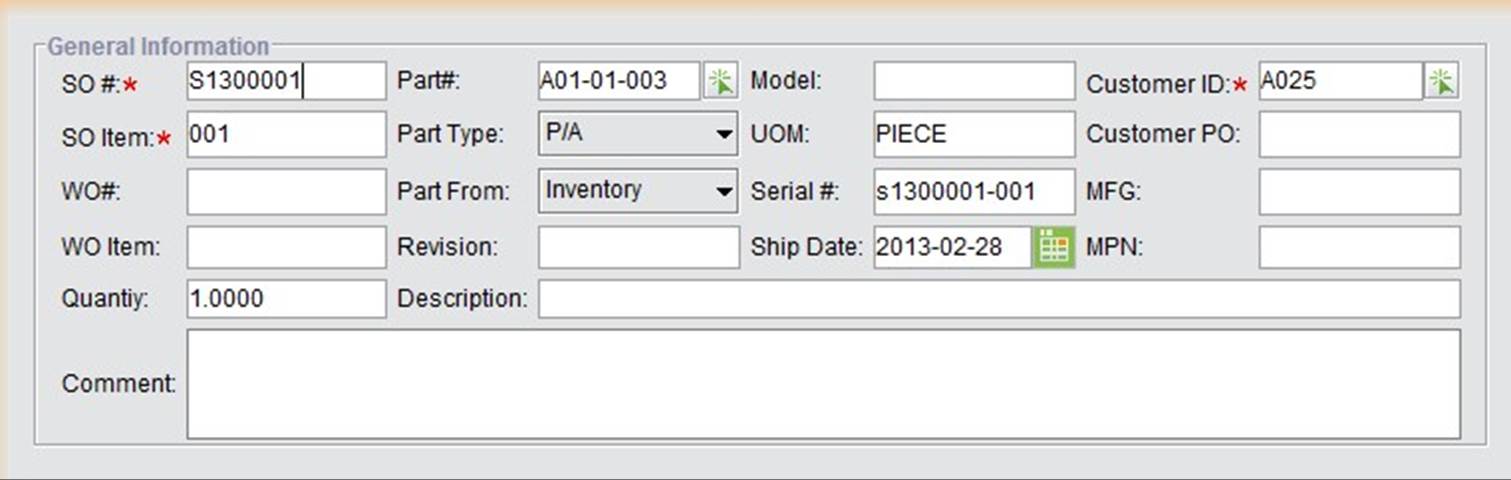
Click “2Add Customer Equipment in CG” and in the adding interface, input SO #, Item Number and quantity. The quantity must be less than the shipped quantity.
 |
In the update interface, the Customer ID is automatically matched to the SO:
 |
After the equipment is added, you may search the equipment in the following search box by Customer ID, SO#, PO#, Part#, Part Type and Serial#.
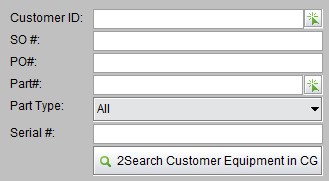 |
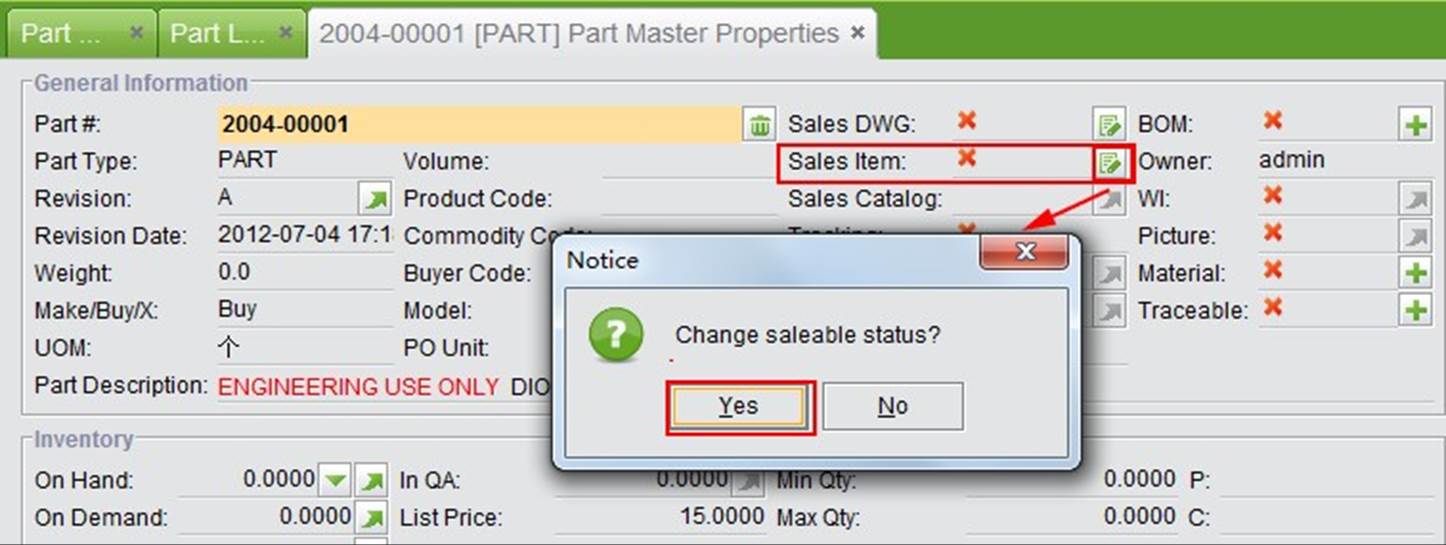
The parts for sale in the Customer Group are added to the Sales Catalog first. Parts should be set as “Saleable,” then add them to the Sales Catalog, and finally assign parts to the specific customer.
Before you create a sales catalog, you should mark the part as “saleable.” Only “saleable” parts can be added into the sales catalog. Click the “![]() ” button to change a part’s saleable status as follows:
” button to change a part’s saleable status as follows:
 |
The Sales Catalog is a list of salable parts. Click “2Add Sales Catalog” under “Sales Box – Sales Order – CG” to create a sales catalog and add your saleable parts to the catalog.
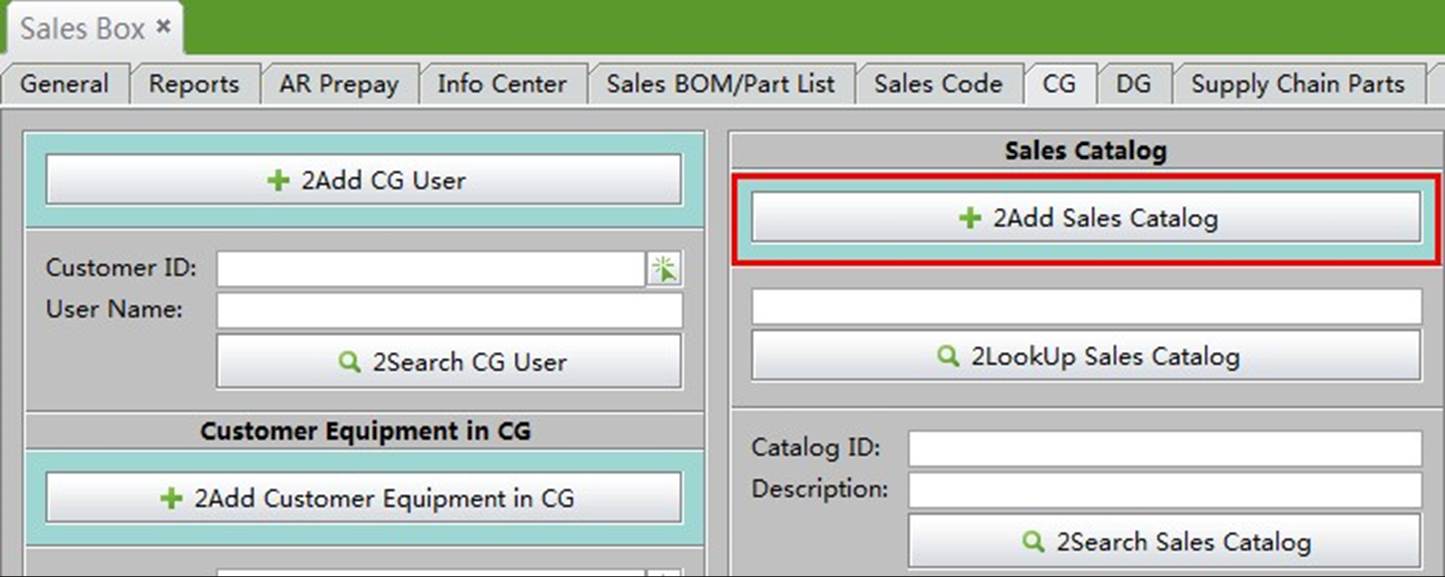 |
You need to input a Catalog ID and description for this catalog, then click “2Add” to open the “Update Sales Catalog” interface:
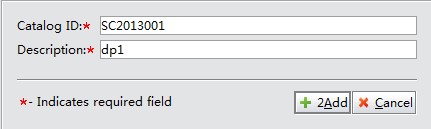 |
In the following interface, you need to add saleable parts to the sales catalog. Click “2Add” to add one part, and click “Batch Add” to add multiple parts by part number sequence.
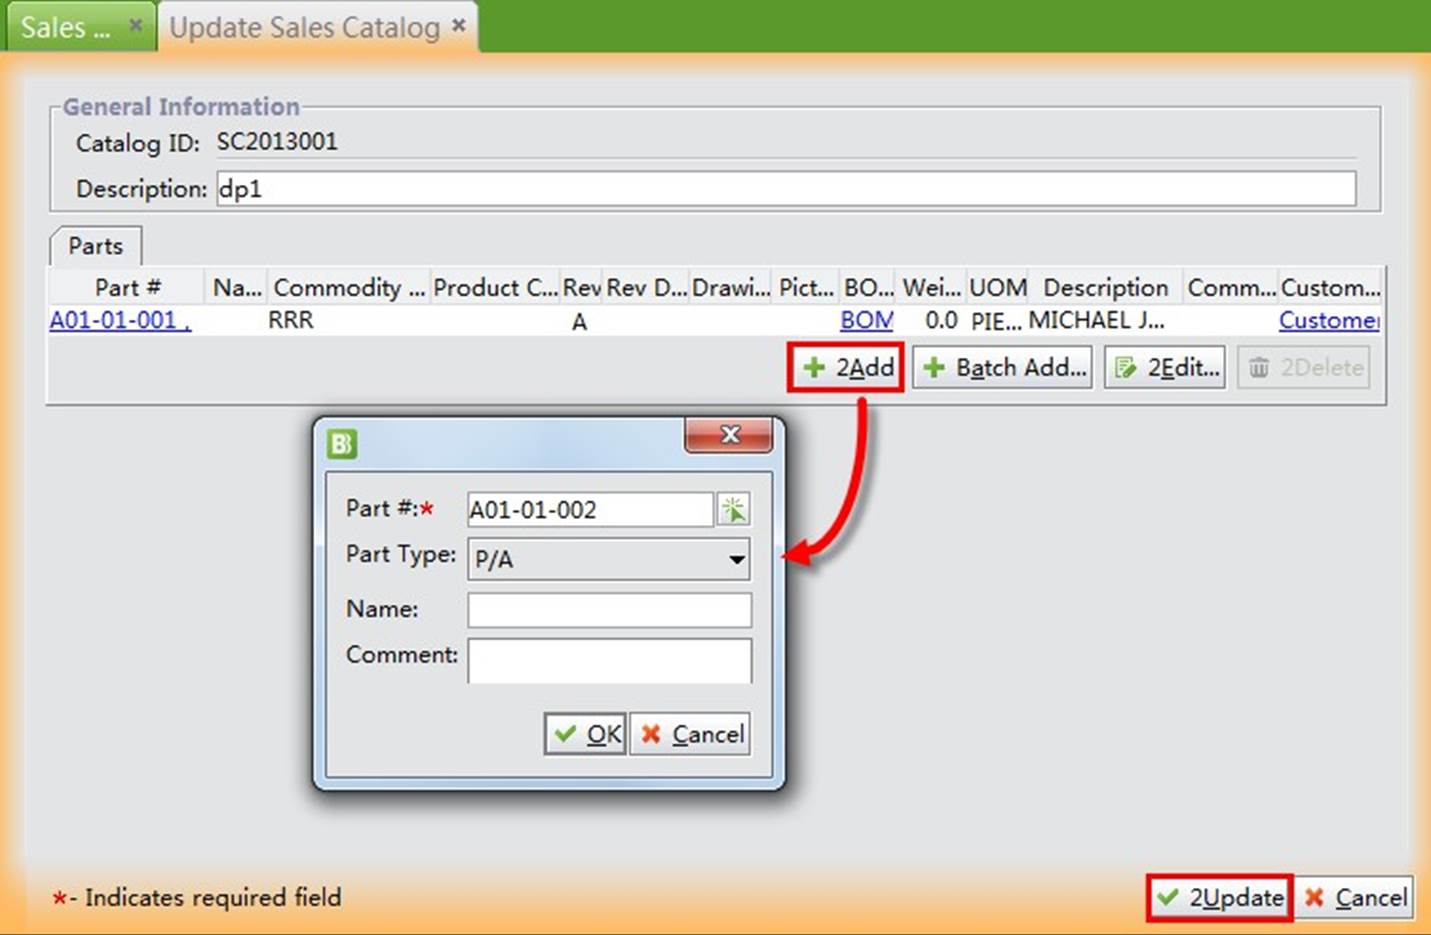 |
Click “2Update” after you finish adding the saleable parts. Now you have a sales catalog, and you need to distribute this catalog to your CG customers so that they can view the parts in the CG Box.
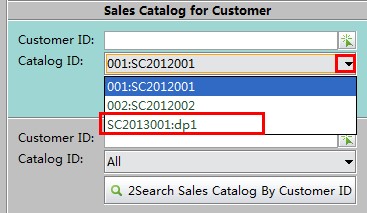
You can establish different sales catalogs for different customers, and then assign sales catalogs to the customers. Find “Sales Catalog for Customer” in the middle of the CG UI. The drop-down menu shows all sales catalogs in your system, including the “SC2013001” added before.
 |
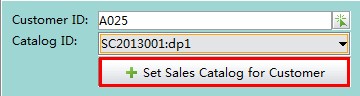
Select the sales catalog and input CG Customer ID, then click “set sales catalog for customer.”
 |
In the next interface, you’ll see the saleable parts in the catalog appear at the bottom. Check parts and click “2Add” to add the checked parts to the upper window.
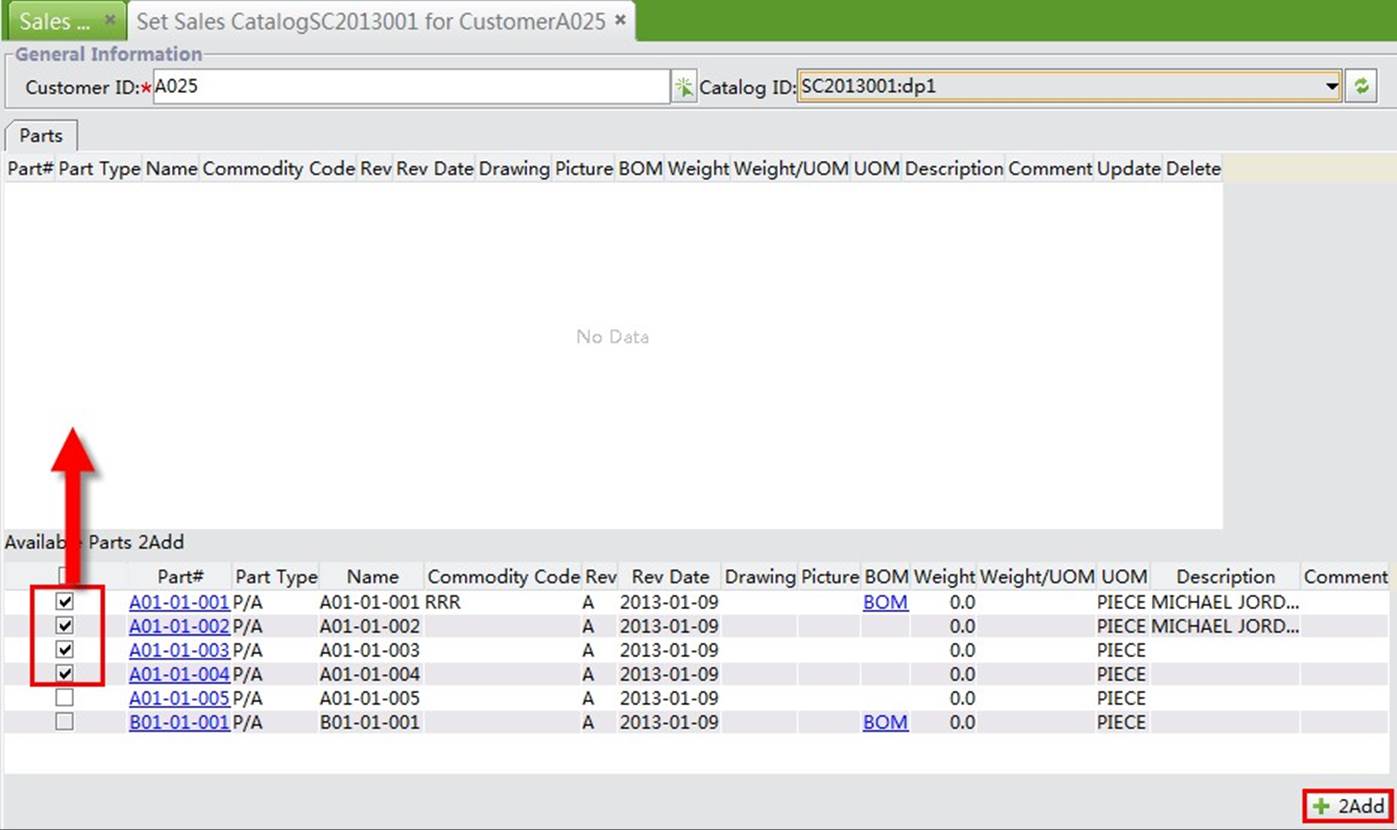 |
In this way, you’ve enabled customer A025 to view the parts in the upper window from Catalog “SC2013001.”
 |
The following is the CG main interface. Customers can click “My Parts” to view the added saleable parts at the right side.
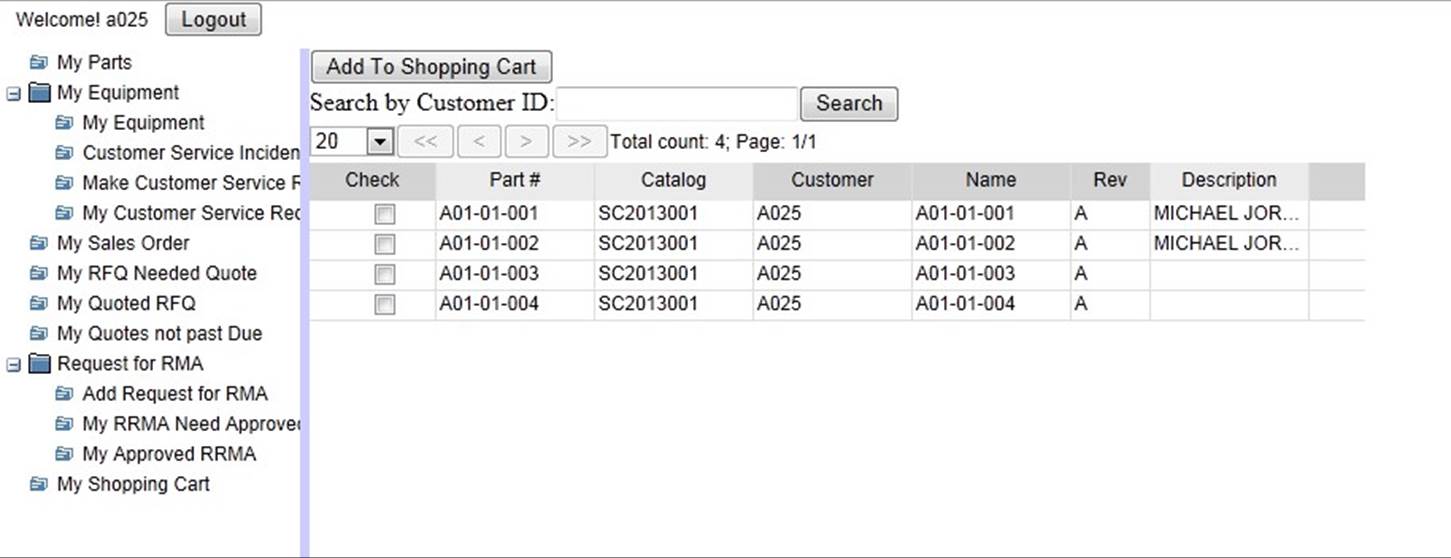 |
You may search for a Sales Catalog through the following fuctions.
Fill in the complete Catalog ID and click the button to view the Sales Catalog.
Use a Catalog ID and description to search for Sales Catalogs.
Use a Catalog ID and Part# to search for Sales Catalogs.
Use Customer ID and Catalog ID to view the Customer’s Sales Catalog.
A Customer Service Request is a form sent by a CG User through the online CG Box to 2BizBox to request customer service. When customer’s CSR is sent in the CG Box, the vendor will receive an email as a notification. Then the vendor can go to “Sales Order - CG” and click “2Search Pending Customer Service Request” to search for all pending CSRs.
Click this button to view all open Customer Service Requests sent by customers from the CG Box. “Open” means the CSR is approved, but not closed yet.
Click this button to view all pending Customer Service Requests. “Pending” means that the CSR has not been viewed or approved.
This is a comprehensive search for CSR by multiple conditions including CSR#, Customer ID, Part#, SO#, Serial #, status, CSI# and date range.
Fill in the CSR# to open the Update CSR interface.
The DG Box, short for Distributor Group, is designed for Distributors to use the online module to look up parts, request quotes and make RMAs to return materials.
Under the “DG” tab of the Sales Box, you can add DG Users and mange RFQs and RMAs sent from the DG Box, so that prompt feedbacks can be made to distributors. If Serva Software LLC has developed a distributing network, we recommend that you read this chapter with the DG Box Manual.
Adding a DG User is similar to adding a CG User. Click “2Add DG User” and fill in the required information for login as below, then click “2Add” to create a login ID for your distributor.
 |
You can search DG Users by Customer ID and Username.
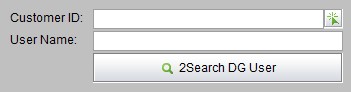 |
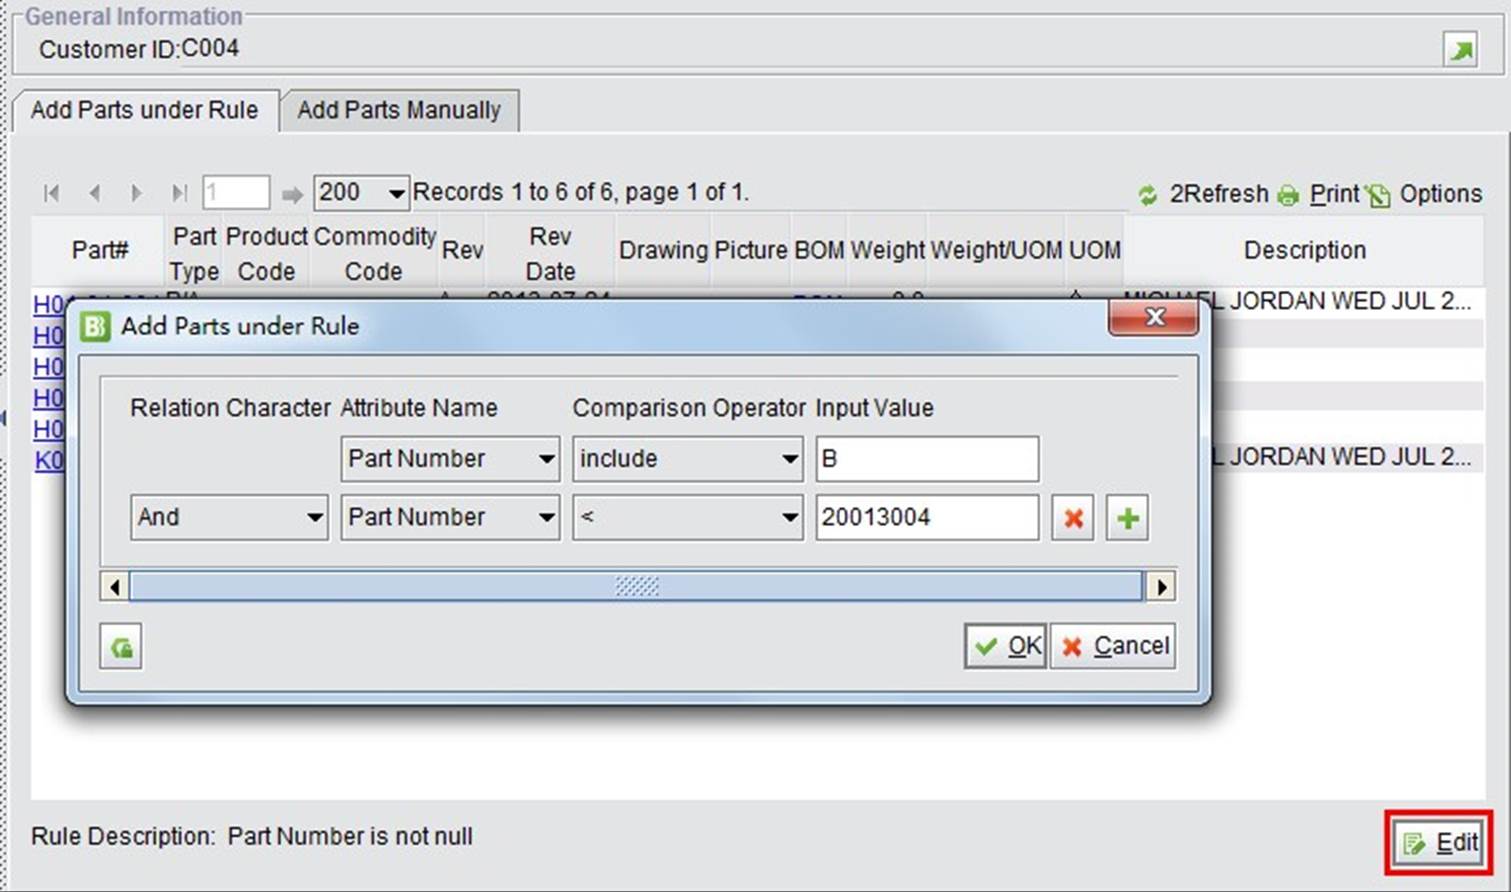
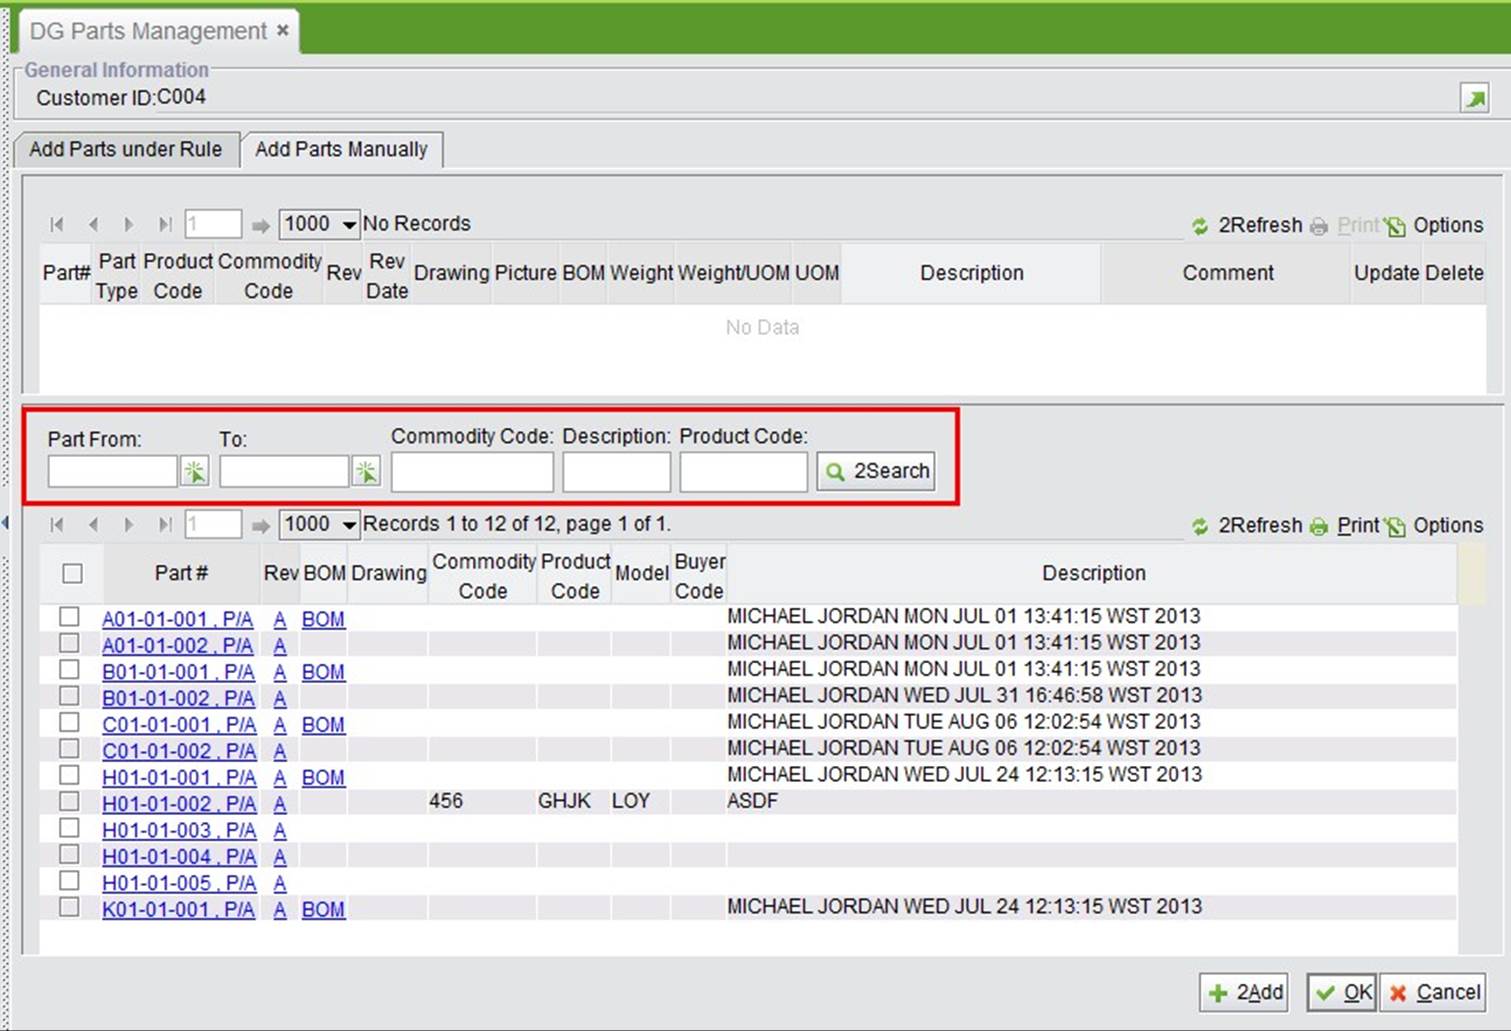
A Sales Catalog is also required for DG Users to browse and shop Parts. Selecting a Customer ID of the DG User and then clicking “DG Parts Management” will open the settings interface. Parts can be added by rules or manually. Under the tab “Add Parts under Rules,” click the “Edit” button at the bottom right corner to set rules.
We use “Attribute Name,” “Comparison Operator” and “Input Value” to define the adding rules. Attribute Name can be Part #, Commodity Code, or Weight. That can describe the part by values. Compassion Operator is used to define the Input Value, e.g. “Pat#” + “>“+ “B” means to search all Part Numbers ranked after B.
Click the “+” button to add a new rule. Relationship among the rules can be “And” or “Or” as needed. When you finish defining the rules, click “OK” to add all parts that meet the rules in the list.
 |
If rules are not easy to set, you may also add parts manually. Shift to the tab of “Add Parts Manually;” all saleable Parts not added will be shown at the bottom half of the screen. You may use the filter conditions to search for parts, and then check parts that need to be added and click “2Add” to add the parts to the upper half list. When you finish, click “OK” to save the changes.
 |
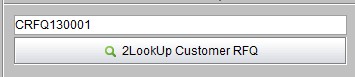
After DG Users put parts into the shopping cart in the DG Box, they may make an RFQ to request a quote for these parts.
Vendors will receive an email of this Customer RFQ and they can fill in the CRFQ# here to lookup the CRFQ.
 |
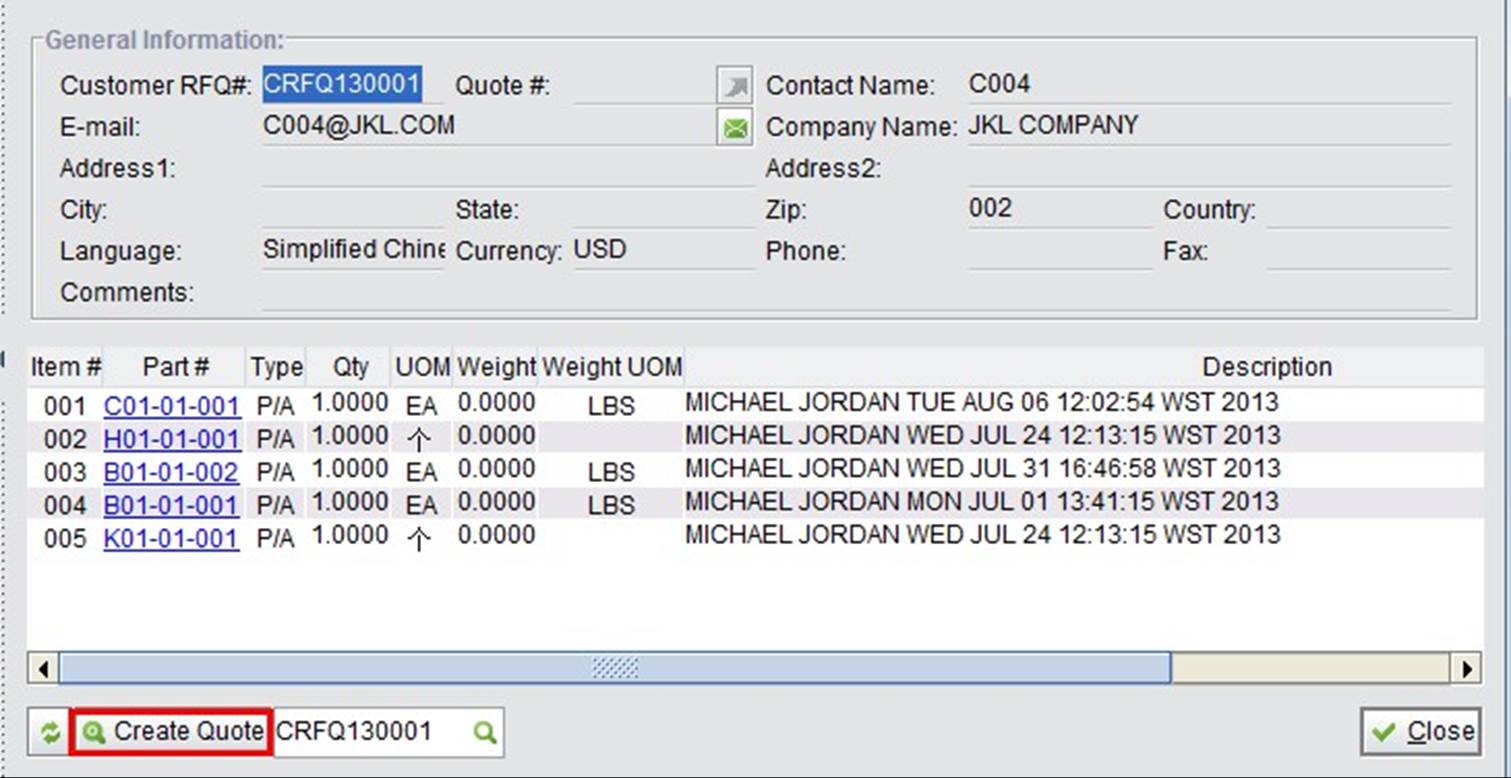
On the CRFQ Properties, click “Create Quote” directly to make a Quote for the customer.
 |
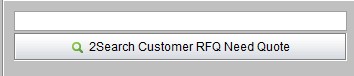
A CRFQ Need Quote is a CRFQ that has not been made into a Quote. Fill in the CRFQ# to search these.
 |
Another important function in the DG Box is processing RMAs. If parts should be returned to the vendor, customers can send requests for RMAs to the vendor through the DG Box. These Requests for RMAs can be viewed, approved and searched in 2BizBox.
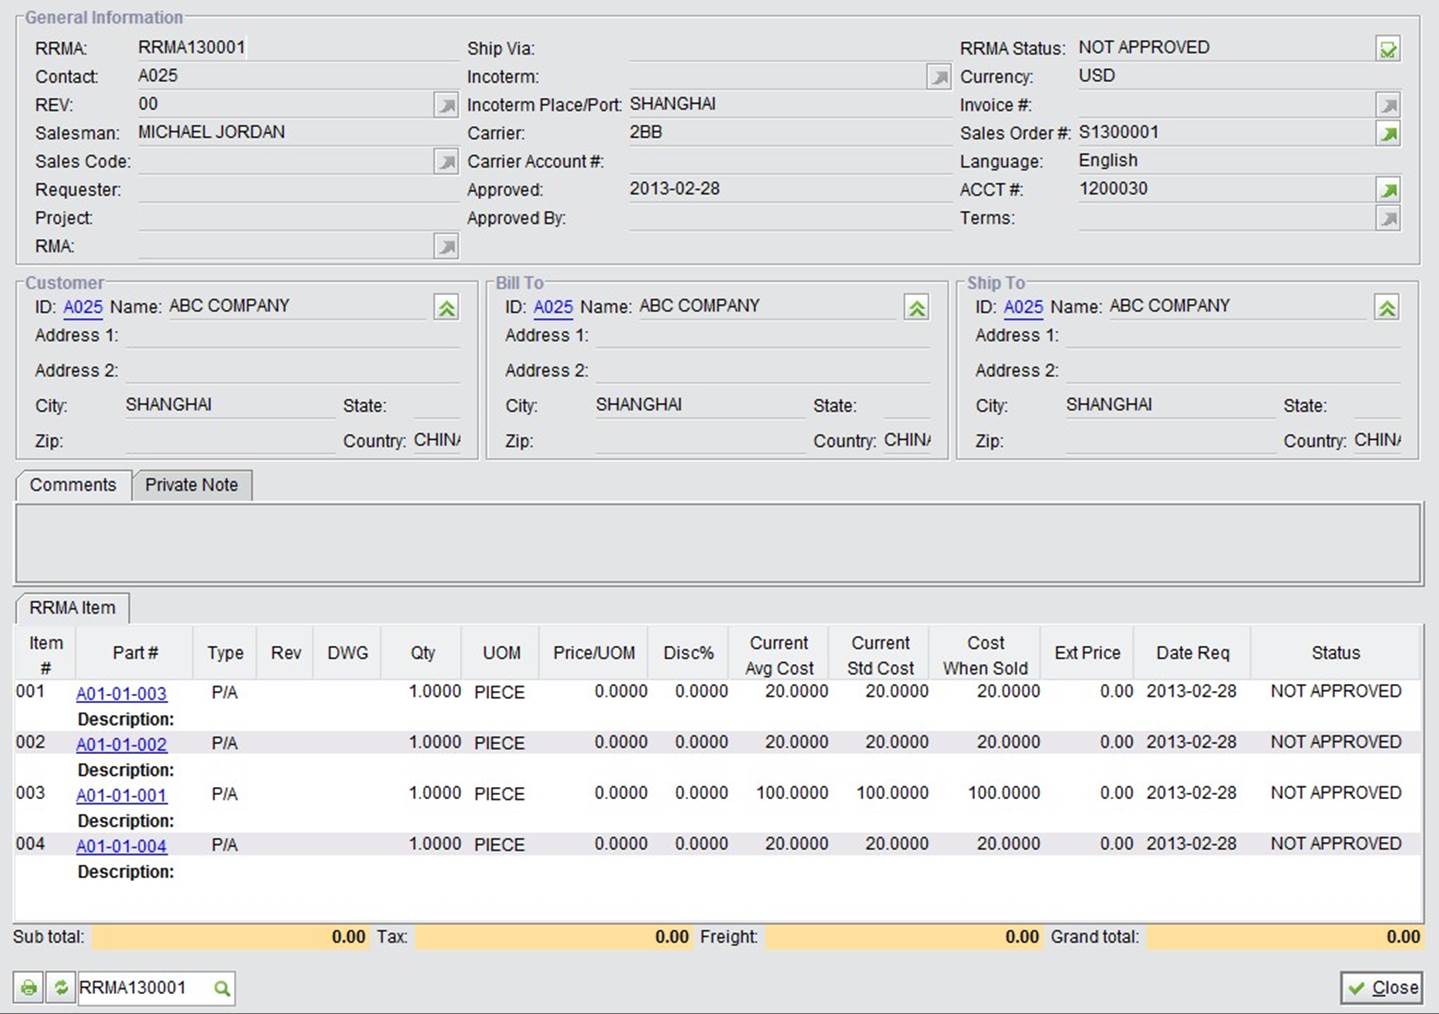
Fill in the complete RRMA# to view the RRMA.
When an RMA Request is made in the DG Box, its status is “NOT Approved” as shown below. A vendor can search for these “Not Approved RRMAs.”
 |
If a vendor approves this RRMA, the RRMA status changes to “Open” and at the same time, a “Create RMA” button will appear at the right side:
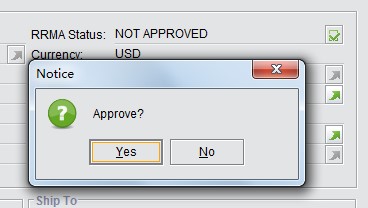 |
When the RRMA is approved, its status will change to “OPEN” and you can view all open RRMAs by clicking the “2Search Open RRMA” button.
This is a comprehensive search function to search RRMAs by RRMA#, Customer ID, Project, Status, Request, SO# and Invoice#.
It is a comprehensive search function to search RRMA items by Part#, Part Type, RRMA#, RRMA Item#, Customer ID, Salesman, Status, Date and Account#.
Each part has its own part number after it is produced, called the manufacturer part number. When these parts are purchased from the vendor, you will name these parts with your own coding rules. Similarly, when you produce a part and sell it to a customer, they will name it again with their coding rules. Thus, customers and vendors have a different name for same part, while only one part# can be filled out in PO and SO. How can you sure that make both sides know the exact parts purchased or sold? 2BizBox proposes the concept of supply chain parts, to convert each other’s part numbers.
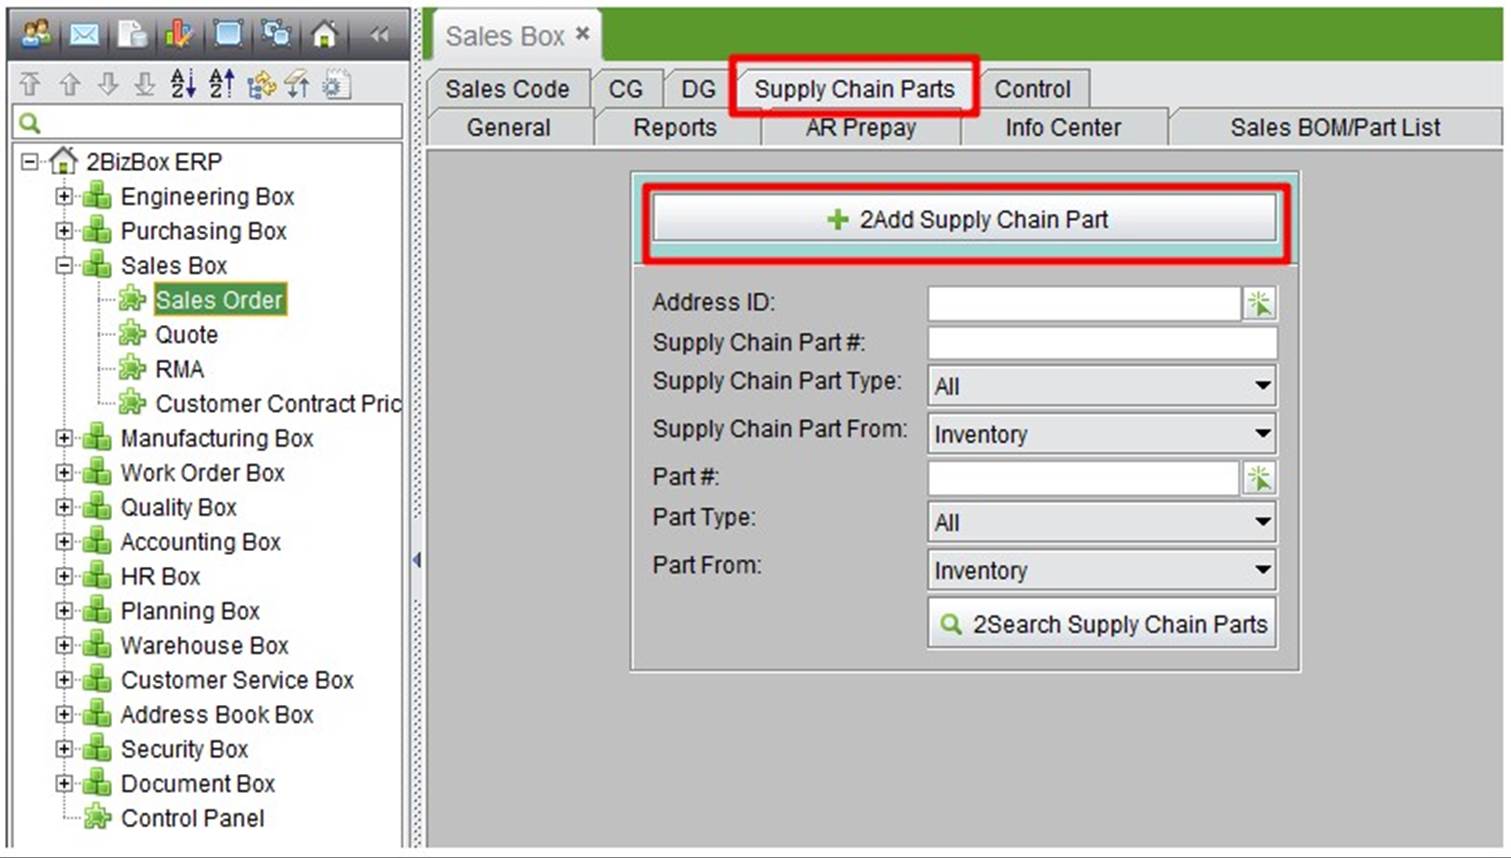 |
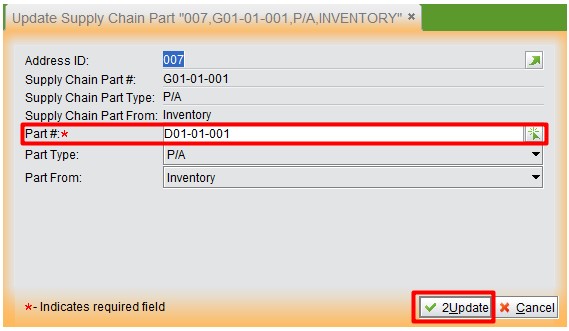
Click “Add Supply Chain Parts” at the “Sales Module->SO->Supply Chain Parts” interface to add supply chain parts. At the adding interface, input a customer address ID and part#; meanwhile, choose parts from your company. For example, a customer’s part# is G01-01-001, corresponding to your part number D01-01-001; click “Add.”
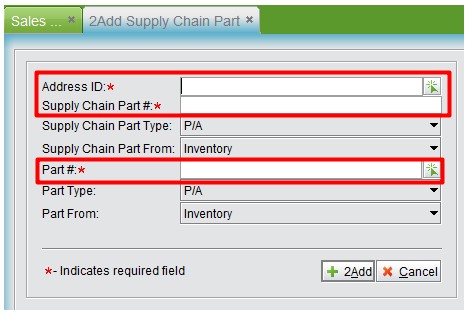 |
You can see that the customer or vendor’s part# is created already and cannot be changed. This confirms the corresponding part# in your company; click “Update” to finish adding the supply chain parts.
 |
After adding supply chain parts is finished, your company’s customer can create a PO for the supply chain parts G01-01-001. When the customer finished adding the PO, click the “Export” button at the bottom of the PO property interface. The exchange data window will open, click “Copy to Clipboard,” and the customer user will copy and email the content to your company.
 |
When your company receives the exchange data from the customer, go to the sales order interface and click “Add Sales Order by Customer PO;”
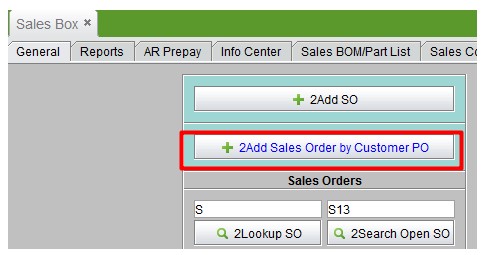 |
Paste the customer’s PO exchange data to the VG data form and click “Add” to create one SO for part “D01-01001.”
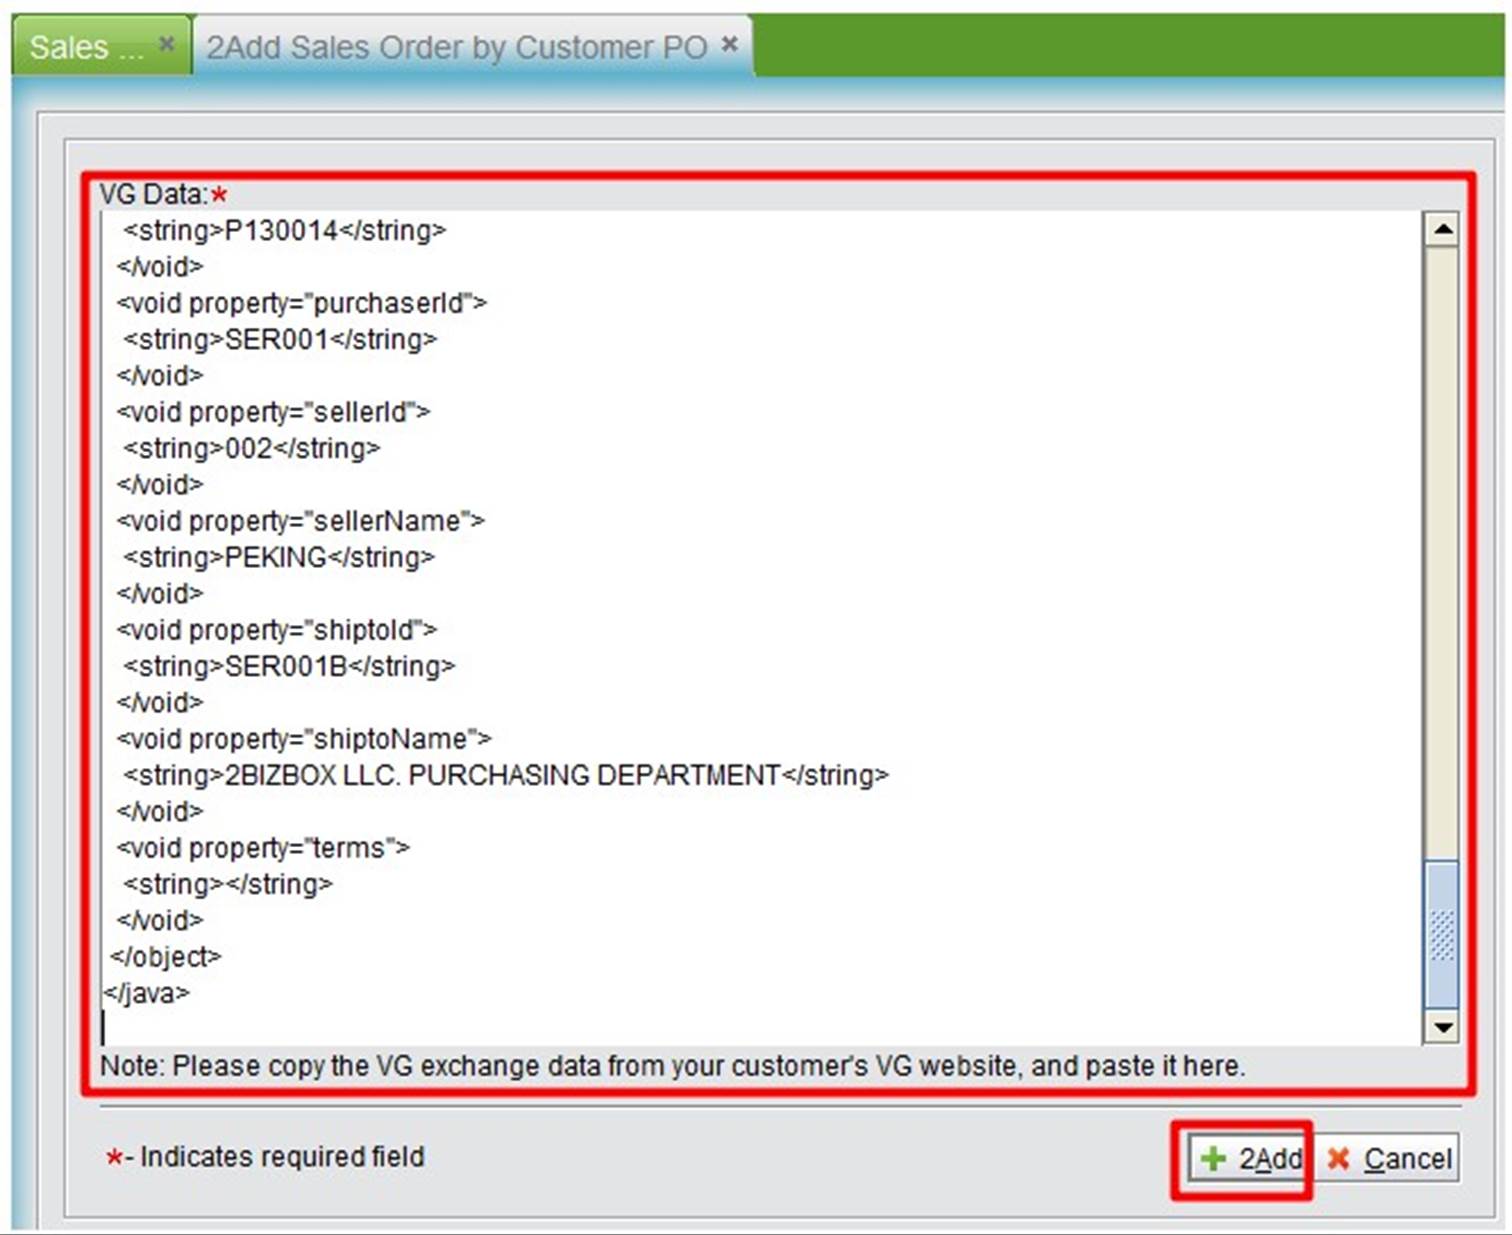 |
At the “SO->Control” interface, you can add SO BP, SO approval, project, salesman and discount code.
At “Sales module->SO->Control” interface, you can add SO boilerplate; after adding, you can choose a suitable boilerplate for the SO.
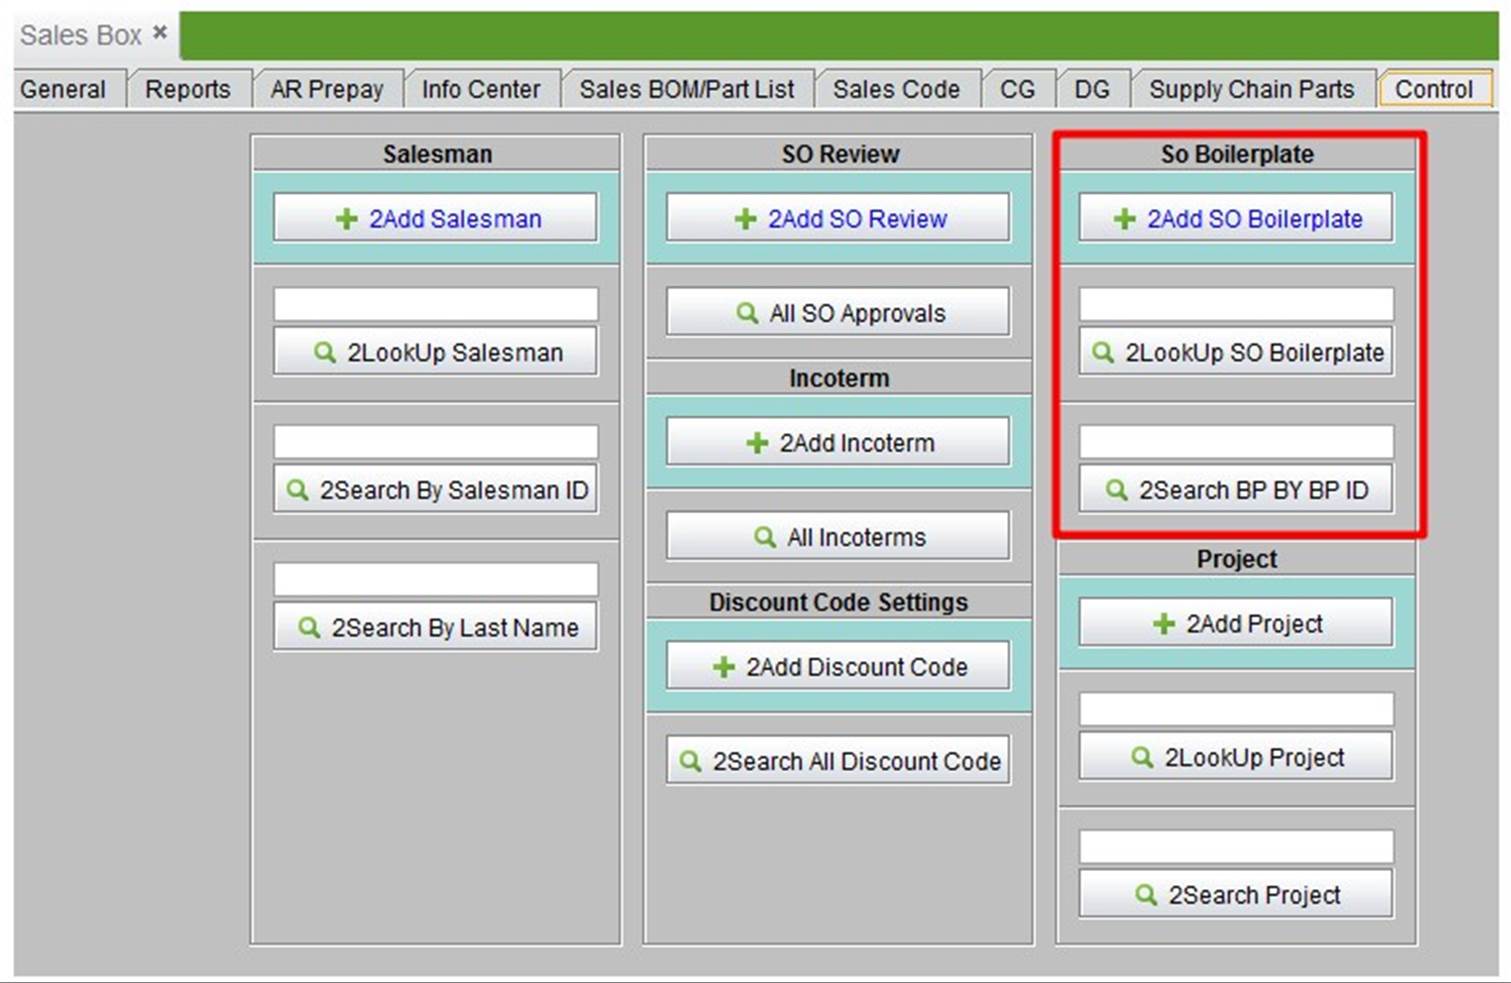 |
Click “Add SO Boilerplate” to go to the adding SO BP interface.
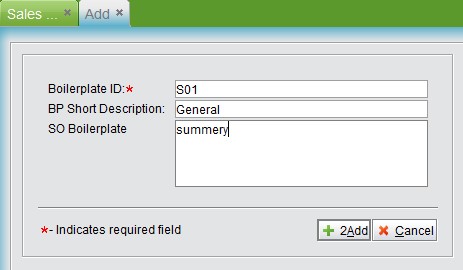 |
Boilerplate ID: this can be 1-3 digits of Chinese characters, letters or numbers.
Click “Add” to create a BP #; this will take you to the updating interface. Update the BP short description and SO BP content; BP ID cannot be changed.
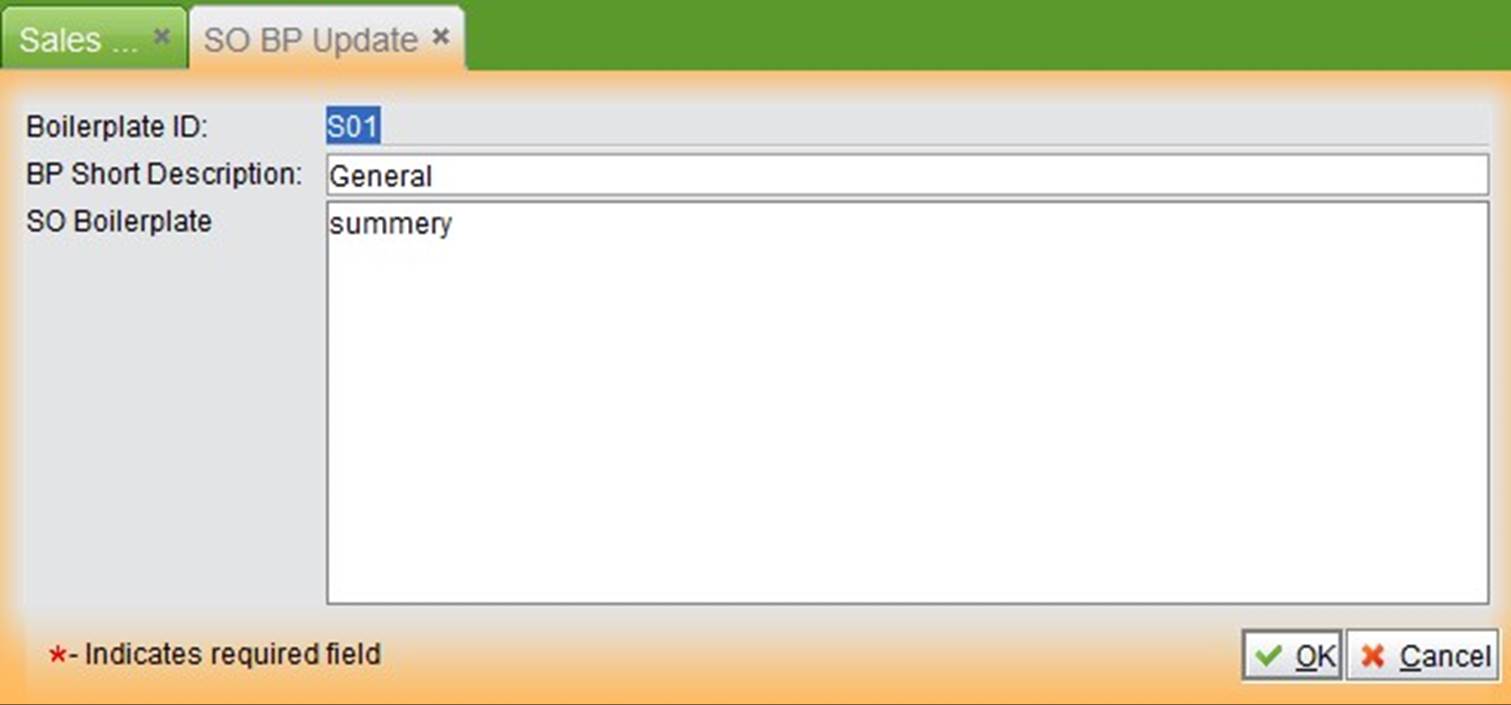 |
Click” OK” to finish adding, then go back to the SO BP interface.
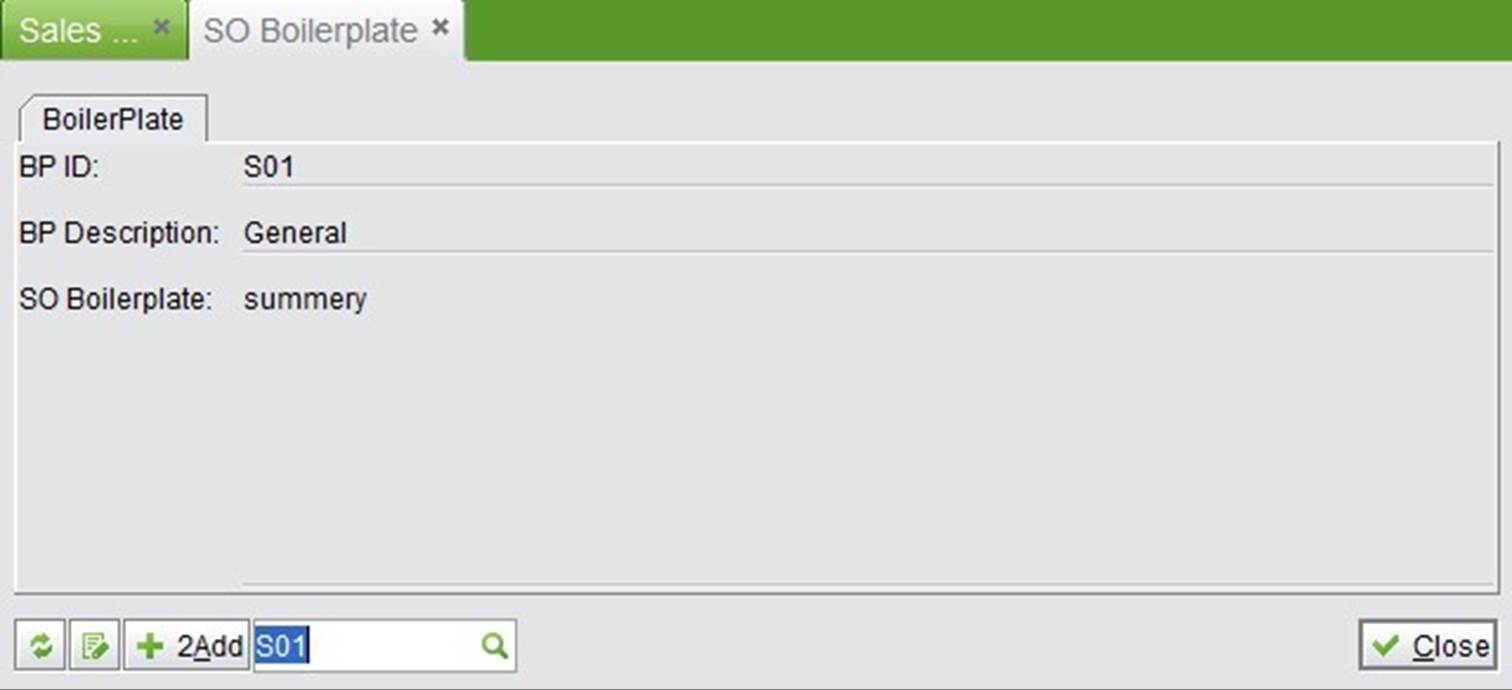 |
Here you can click “Update” to edit the BP, or click “Add” to add a new BP.
Input SO BP# and click the button to check the BP content.
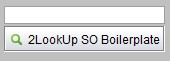 |
Input a SO BP ID key word and click the button to search related boilerplates.
 |
At the “Sales Module->Control” interface, you can add and look up salesmen. While updating a SO, choose one salesman, and then you can lookup related sales orders by salesman. Click “Add Salesman” to go to the adding interface. Here, a salesman is not related to the system user. At the adding interface, input the salesman’s last name, or pick an employee ID from system.
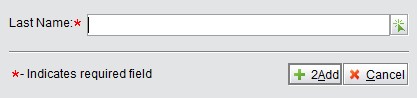 |
Click “Add” to go to the updating salesman interface.
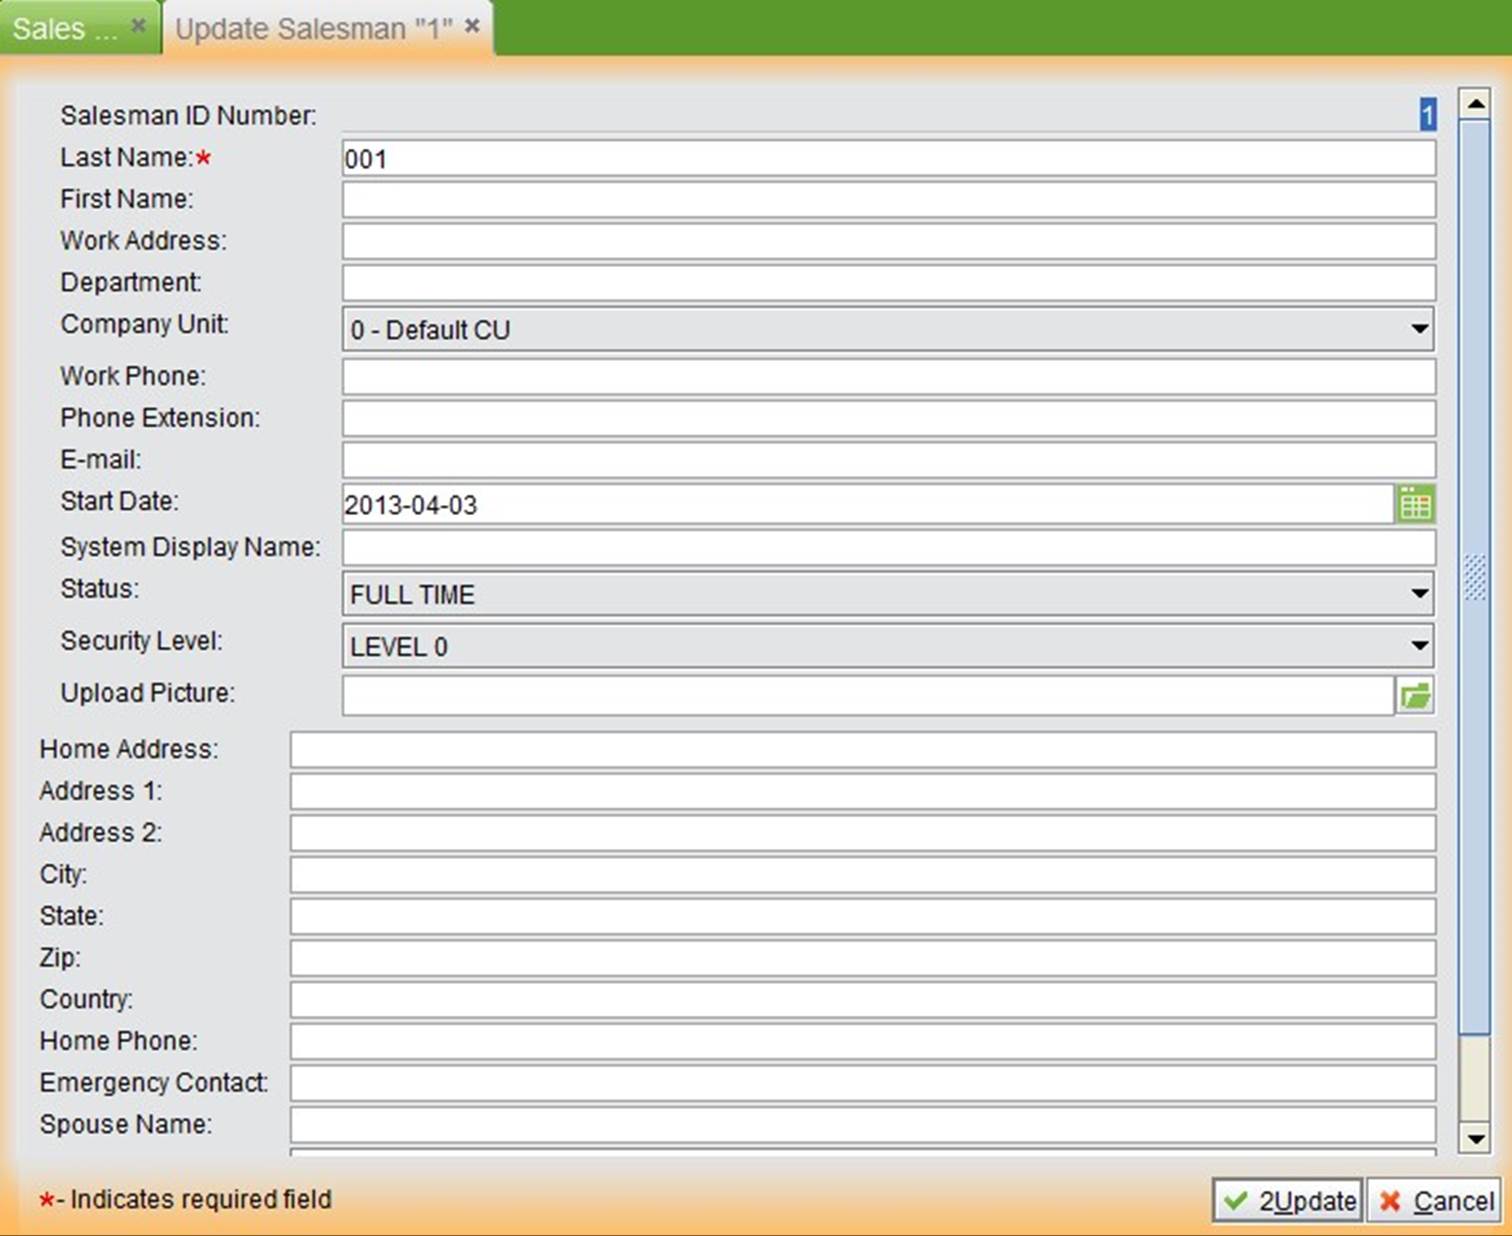 |
Input all of the salesman’s information, and click “Update” to finish adding.
Input a salesman ID to look up the salesman’s information.
 |
Input a salesman ID keyword and click the button to see all related salesmen.
 |
Input a last name and click the button to search all salesmen with the same last name.
 |
Incoterms are what you choose to trade with your customer. You can choose one for SOs from drop-down list. Also, you can set an incoterm for the customer. Thus, when creating a SO for the customer, the incoterms will be generated automatically for the SO.
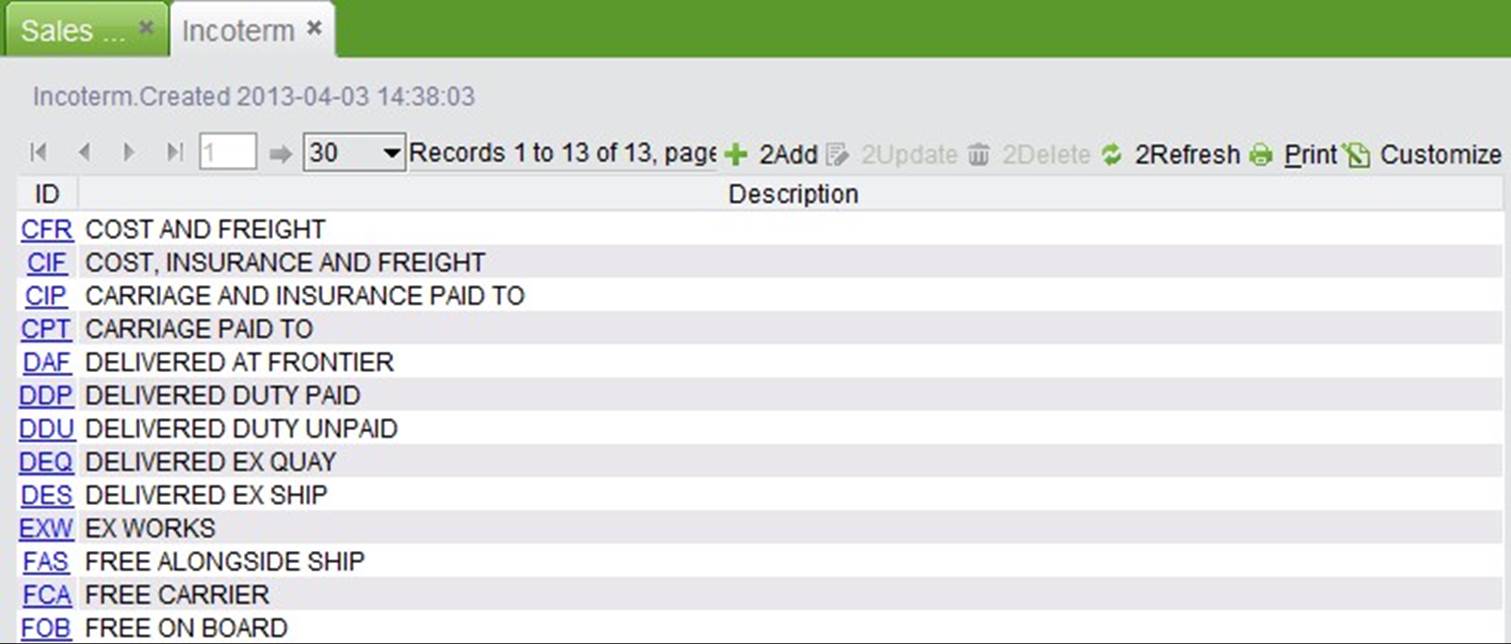
After initialization, you can find the general intcoterms in international trading that existed in the system already.
 |
Click “Add Incoterm,”
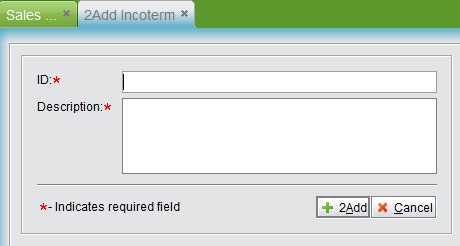 |
Input the incoterm ID and description; click “Add” to finish adding.
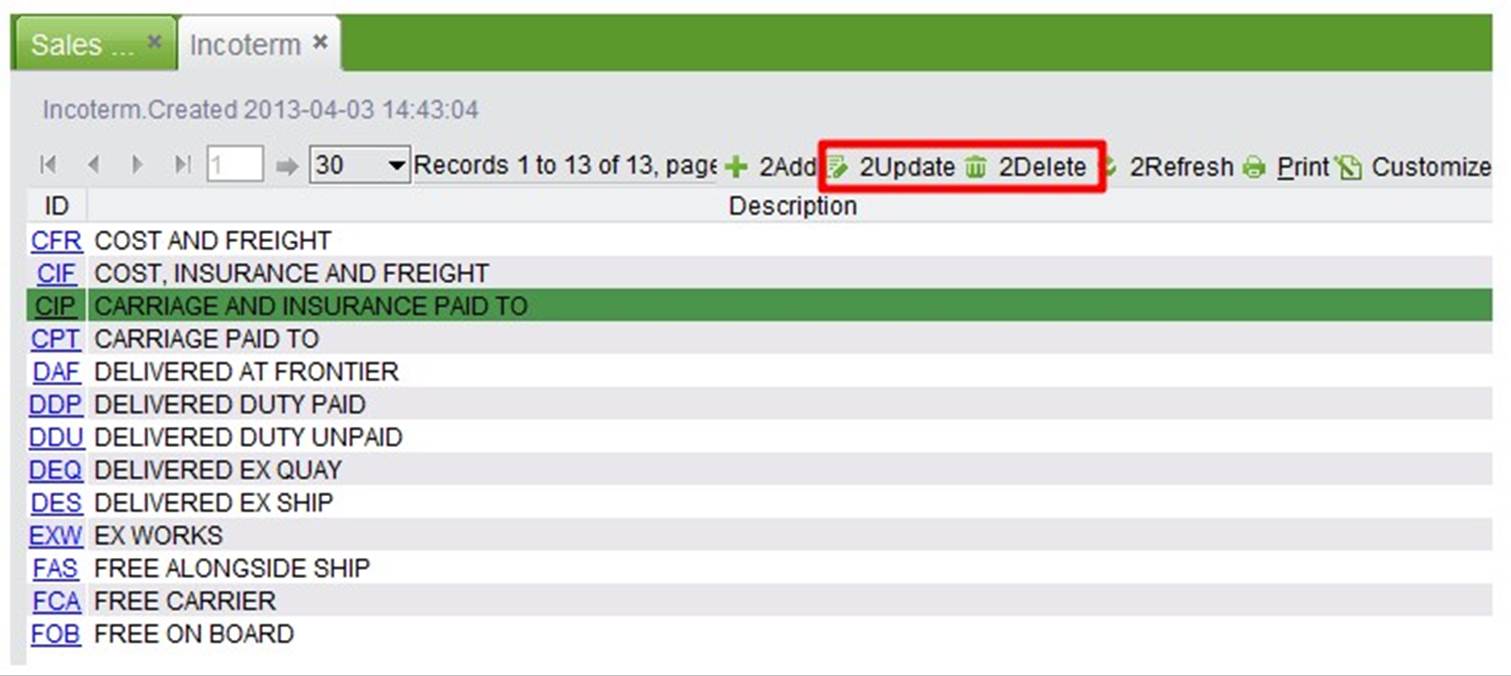
Click the button to see all incoterms in the system. You can select one to update or delete
 |
Discount Code is the D code in part property. For parts with discount code, their discount price will be taken firstly while selling (Creating a new SO). Add a discount code at “Sales Module->Control->Discount Code Setting.”
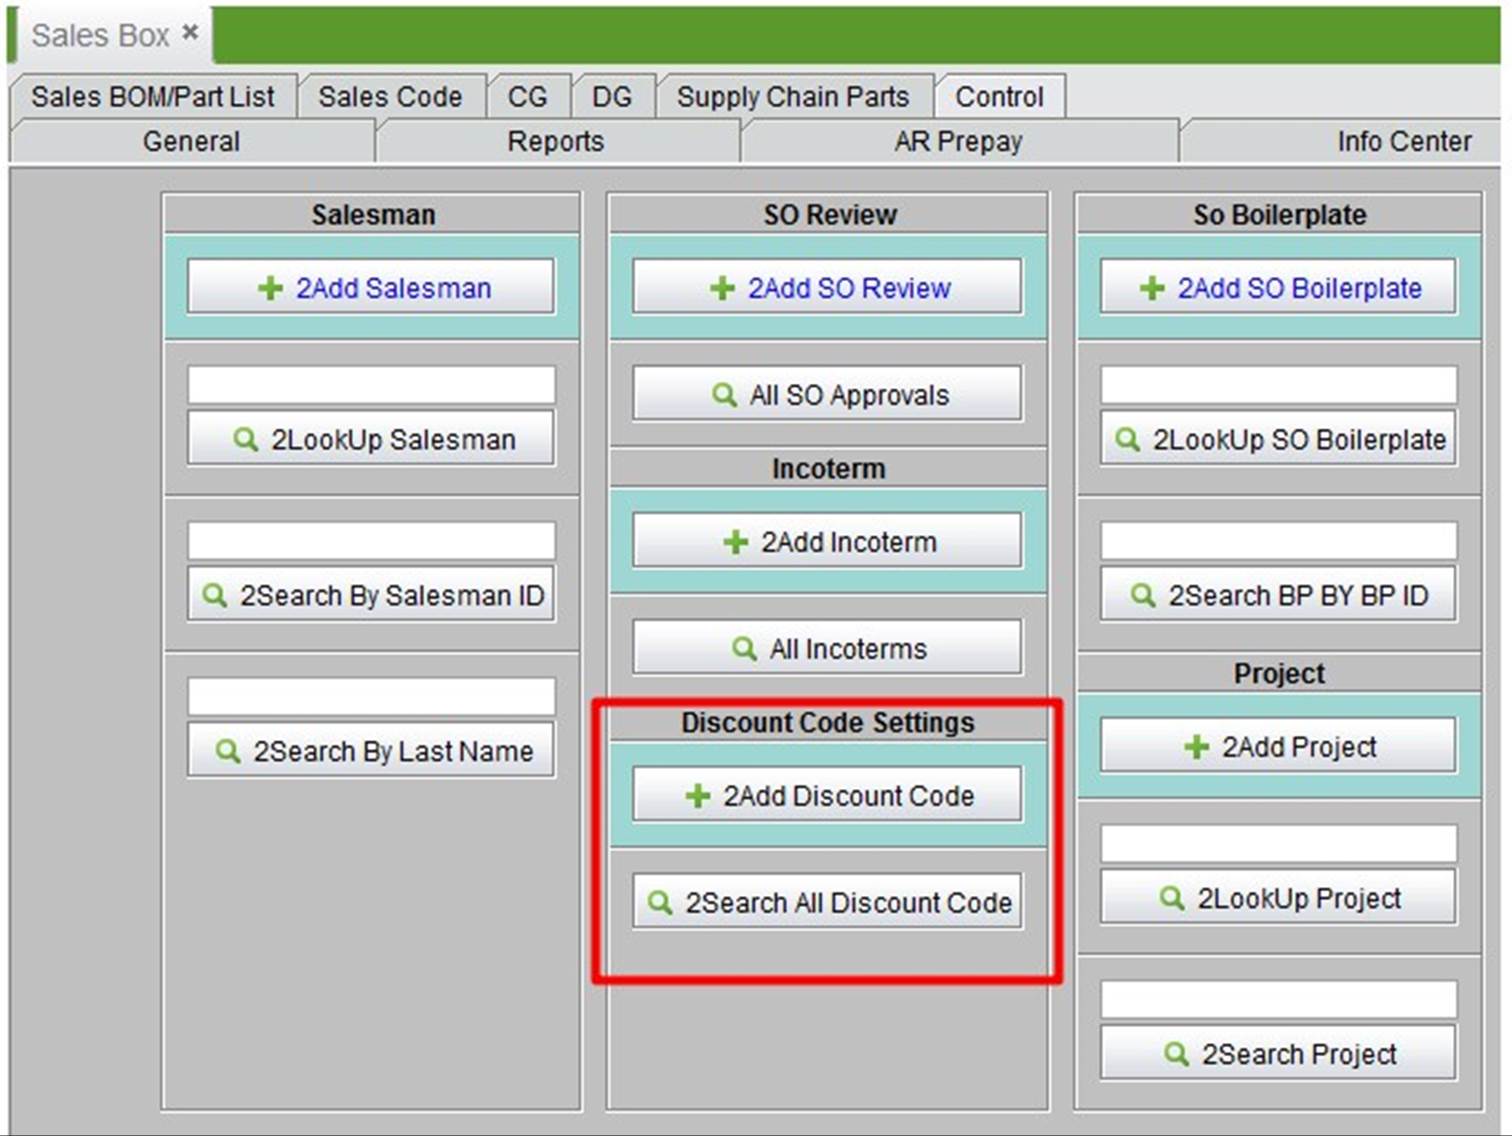 |
Click “Add Discount Code” to go to the adding interface where you can input a discount code name (only a 1 digit number or letter is required), discount%, comment and customer type. The discount code has to be related to the customer type, which only has one discount code and discount%. That is to say, only customers with the customer type with the discount code, the discount% can be effective. Customer types can be added at the “Address Module->Customer Vendor->Control” interface.
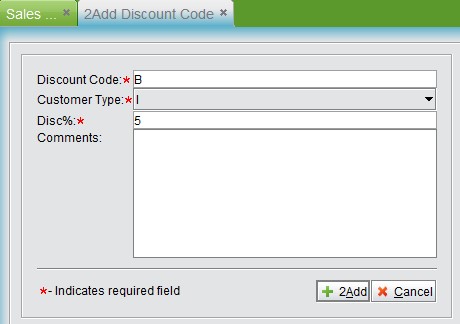 |
Click “Add” to create a new discount code and go to the updating interface.
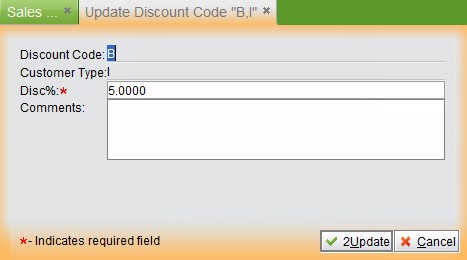 |
Confirm the discount% again, add needed comments, and click “Update” to finish adding the discount code.
Click “Search Discount Code” at the “Sales Order->Control” interface to look up all discount codes. You can select a discount code to update or delete.
Input a discount code at the part property updating interface by clicking “Update” to add a discount code for the part.
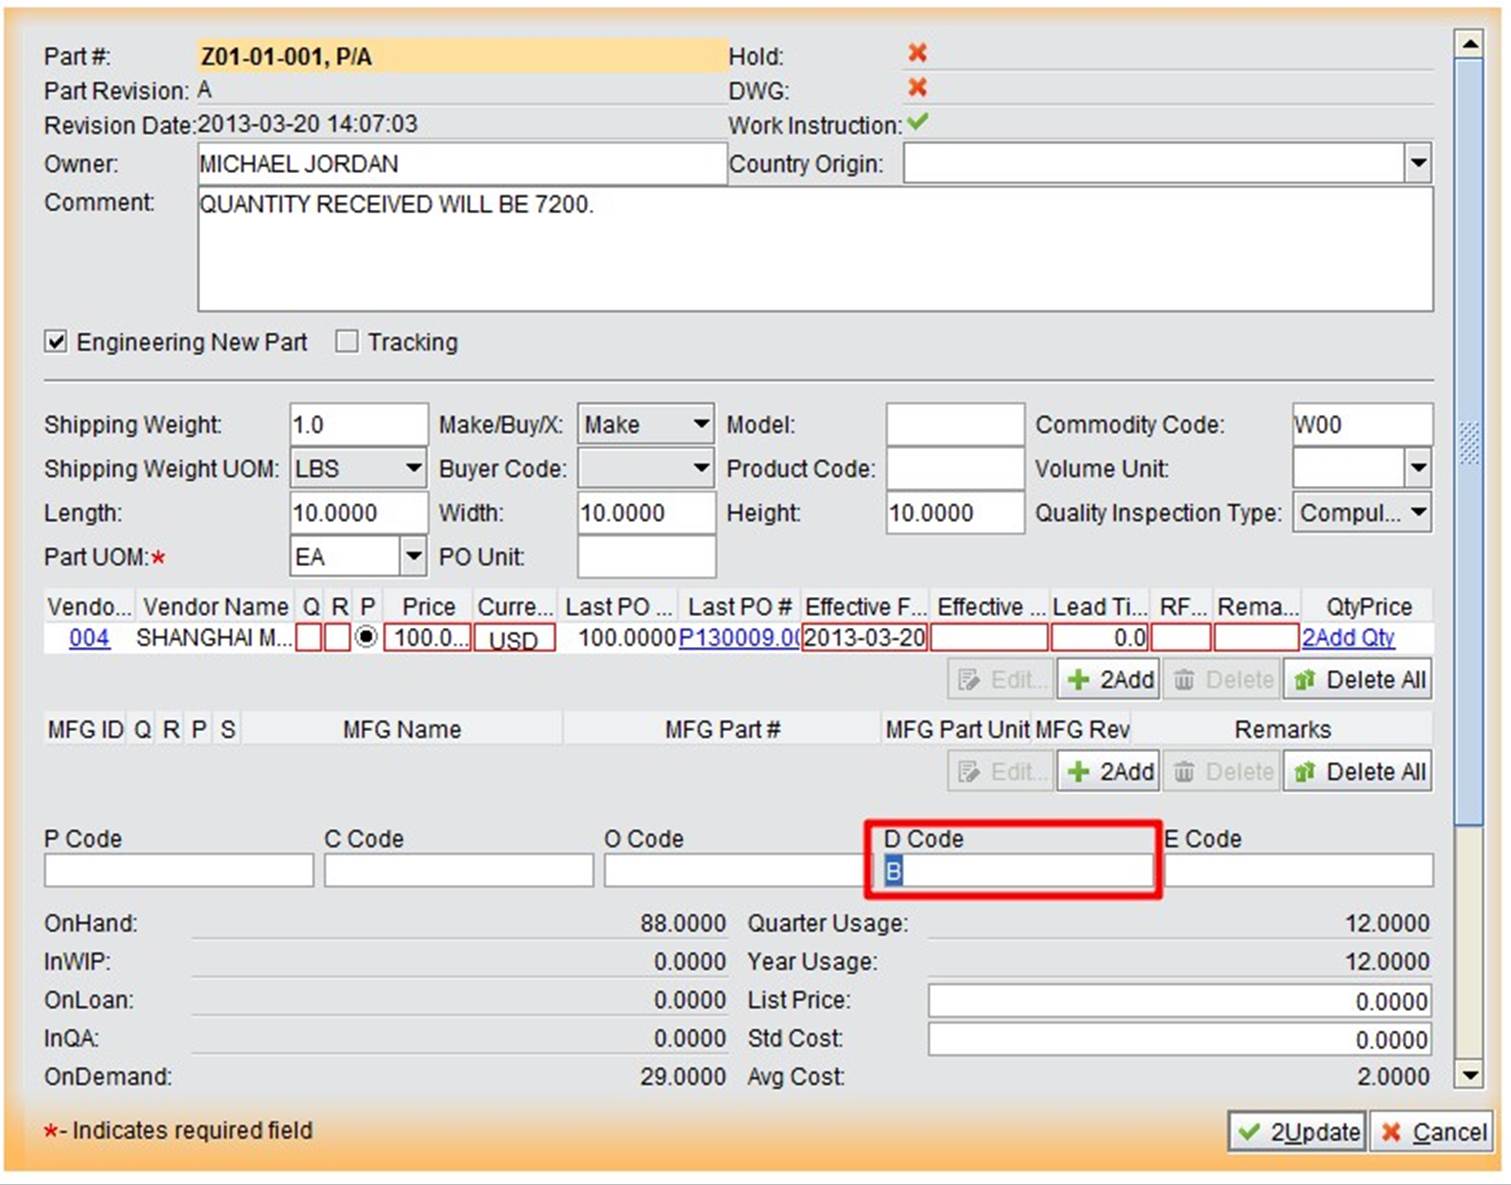 |
For some big projects that require purchasing a lot of materials, you can add a project. While updating a purchasing order, you can fill out the project to manage it efficiently.
Click “Add Project” ;
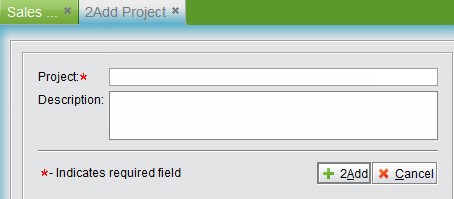 |
Input a project name and description, and then click “Add” to finish the project. Look up Project
Input the project name and click the button to look up a project.
 |
Input a project name key word and click the button to search all related projects.
 |