
2BizBox® Manual |
Go back to 7.0 Main |
The sub-module “Purchasing Order” is one of most important functions in the purchasing order module. There are many tags under purchasing order. We can add a PO, update a PO, lookup a PO and generate a report. Here we will learn a PO’s basic properties via the general process.
|
Go to the “PO module->PO->General” interface to add a new PO.
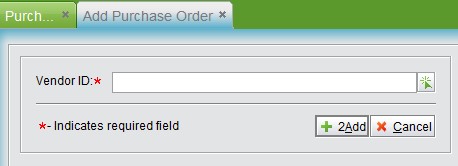 |
At the “Add PO” interface, you need to input a Vendor ID or pick one from the system. Then click “Add” to generate a PO with a PO number starting with P, and come to the update interface.
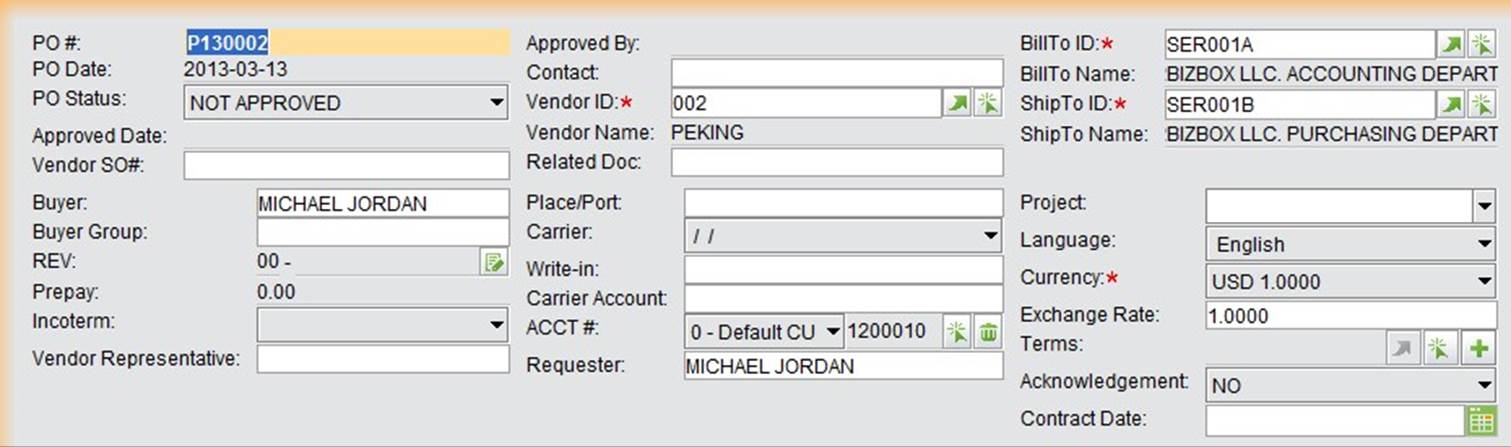
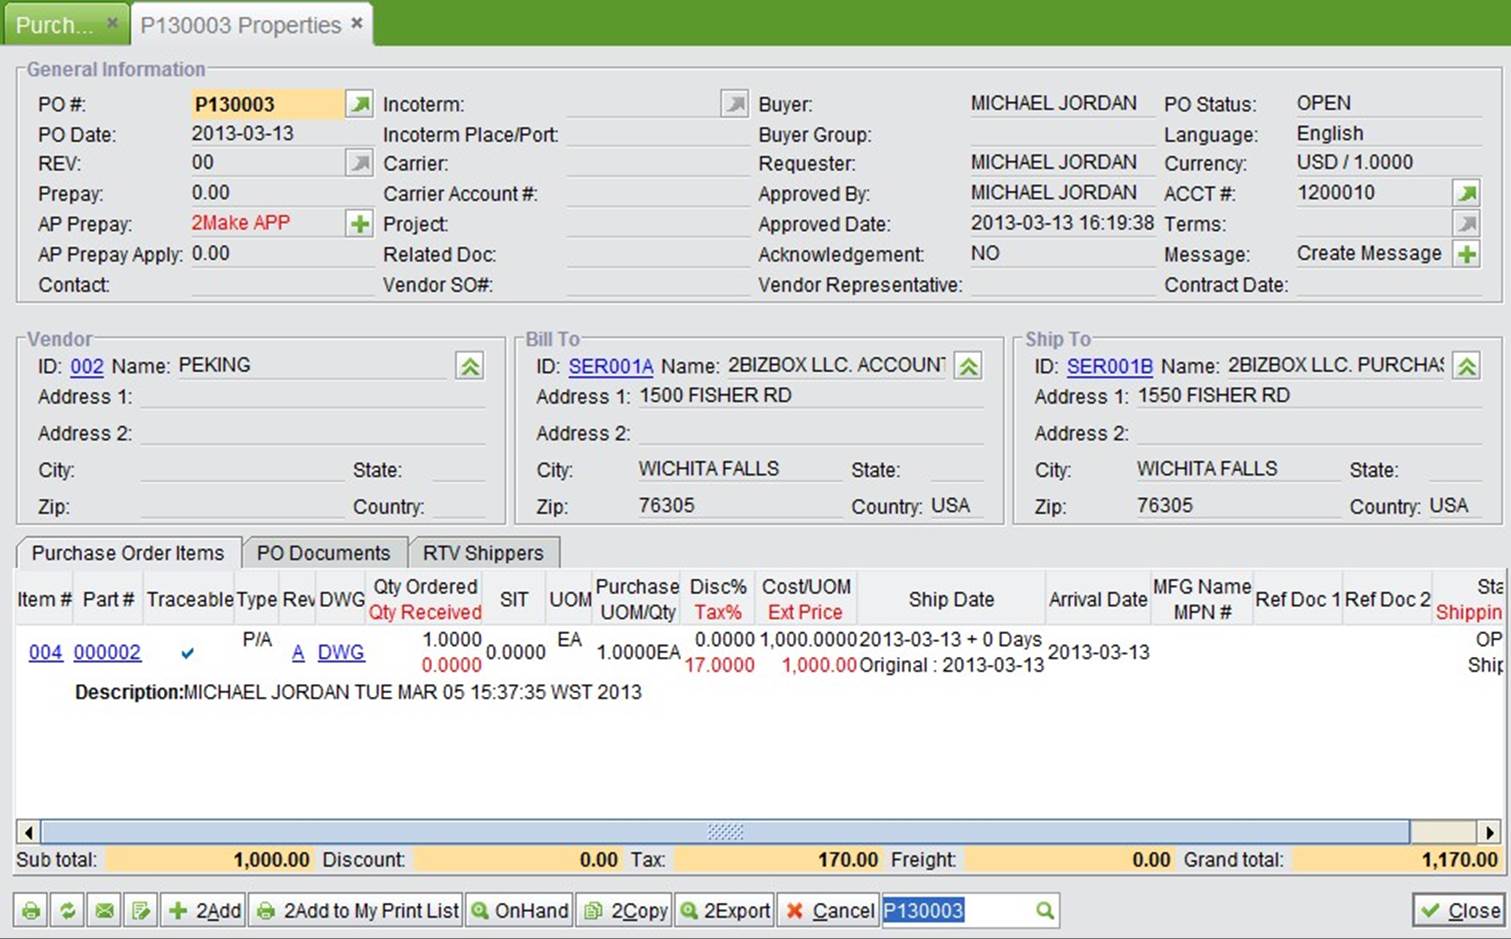
In the Update PO interface, you can see that the PO# cannot be changed, but the vendor ID can be changed. Here, you can fill out the PO’s general information, part information, add comments and boilerplate, among other settings.
 |
PO general information is located at the upper part of the interface.
 |
Its related parameters are described below:
Parameters |
Description |
PO# |
The PO number that is generated automatically while creating a PO. |
PO Date |
The PO date is automatically generated by the system when you create a PO. |
PO Status |
PO status can be “Not Approved”, “Open” or “Closed.” By default, a new PO is listed as “Not Approved” . |
Approved Date |
The approved date of a PO; the system will record it automatically. |
Approved By |
The user who approves the PO; the system will record it automatically. |
Contact |
The PO’s contact. |
Vendor SO# |
If the PO’s supplier has SPO #, fill it here. |
Vendor ID |
The PO’s supplier address ID. |
Vendor Name |
The name of the vendor in the system. |
Related Doc |
Any related documents of the PO. |
Bill to ID |
The payer ID (Bill to ID) in the system. Sometimes the bill to ID is different from the customer’s. |
Bill to Name |
The payer’s name (bill-to name) |
Ship to ID |
Ship-to ID in system; sometimes it is different from the customer’s. |
Ship to Name |
Ship-to name |
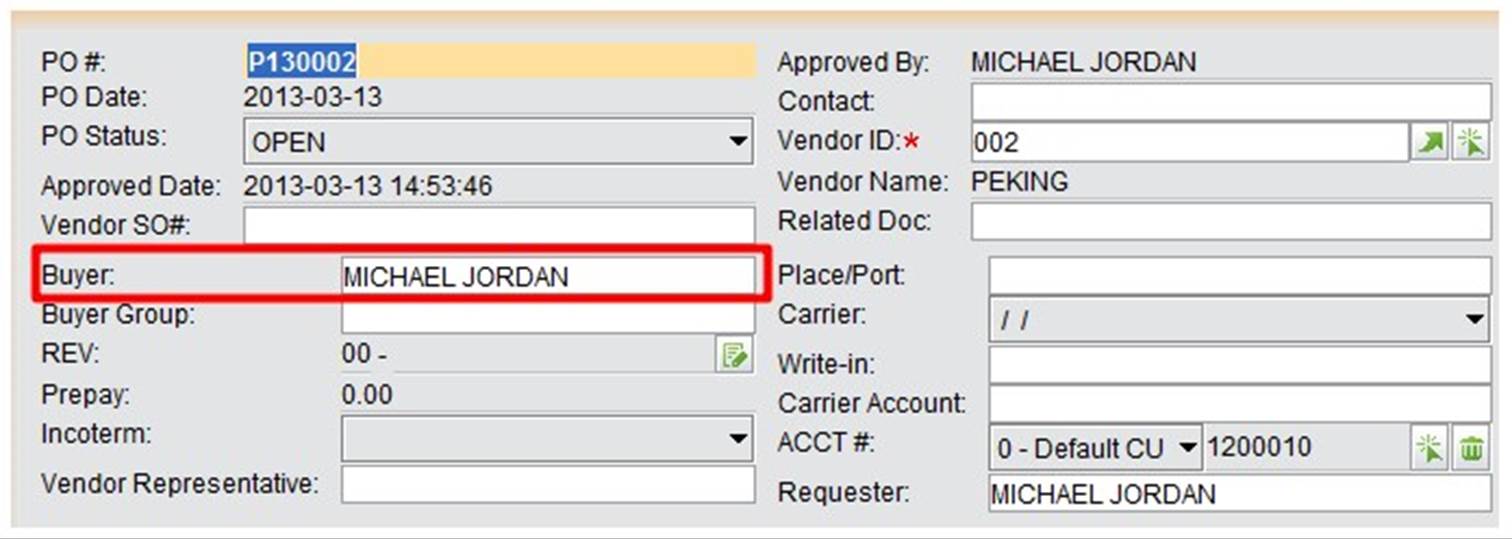
Buyer |
The buyer of the PO |
Buyer Group |
The buyer group that the buyer belongs to. |
REV |
The PO’s revision. |
Prepay |
If the PO has been prepaid, it will appear here. |
Incoterm |
The trading methods the PO uses. |
Vendor Representative |
The vendor representative |
Place/Port |
The shipping place or port. |
Carrier |
The third party carrier, it is determined by the customer’s choosing. Refer to this further at the address module. |
Write-in |
Input carrier directly. |
Carrier Account |
The carrier’s account, it is used for accounting calculations. |
Acct# |
The PO’s account# |
Requester |
The PO’s requester |
Project |
If the PO’s equipment belongs to some project, enter it here. |
Language |
The language used while trading with the vendor. |
Currency |
The currency used while trading with the vendor. |
Exchange Rate |
The exchange rate used while trading with the vendor. |
Terms |
The payment term the vendor requested. |
Acknowledgement |
The acknowledgement of PO status. |
Contract Date |
The signing date of a PO contract. |
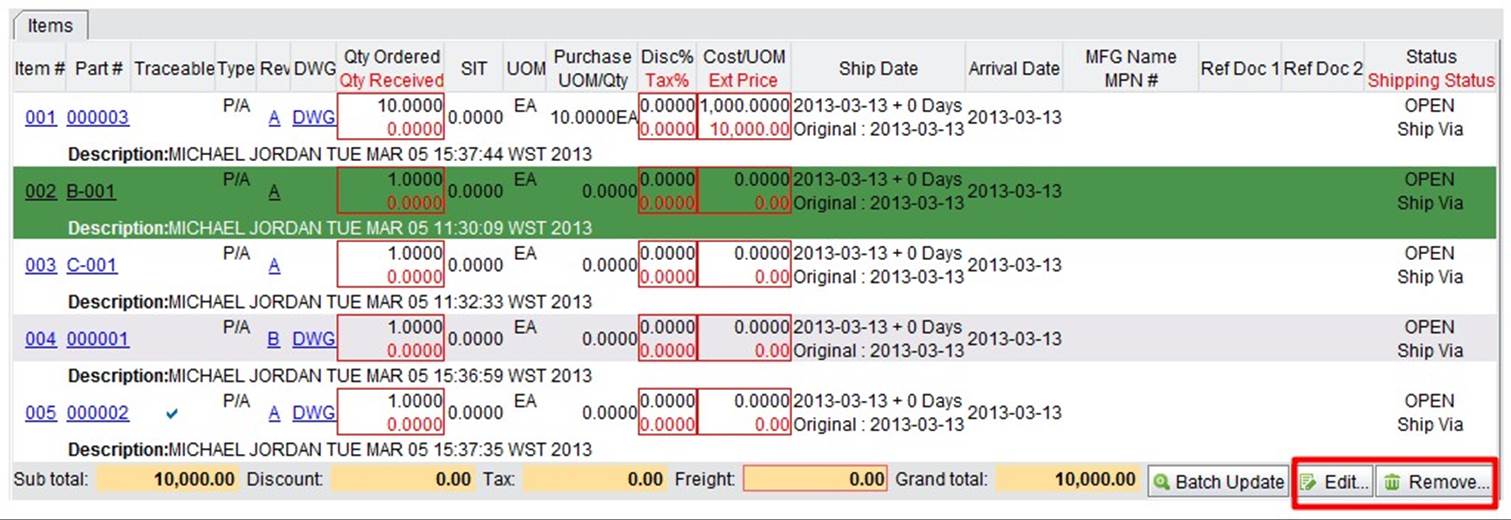
At the “Item Information” screen of the update PO interface, add the part to be purchased. In the “Add Part” window, input a part# and qty, then click “+”to add a part and enter the “Update Purchase Order item” interface. Fill out all needed information here, then click “OK.” You can also add part in the “Add BOM Item” interface; it will also appear in the “Item” window.
 |
The part added via BOM will be added to the part item list. You can choose these parts and click “Edit” to enter the update part item interface. Part’s quantity, price, tax and discount can be edited here. Simply select one part item to delete or edit it. On the “Sub Total” row, you can fill out “Freight”, the sub-total row automatically calculates the part item amount, tax amount and grand total.
 |
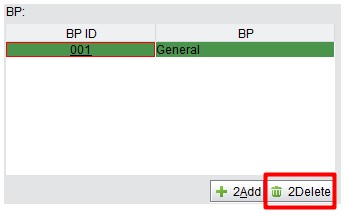
At the bottom right of a PO, you can choose a BP for a PO. A BP can be added at “PO->Control,” refer to it in the following chapter. Click “Add”, then “BP ID,” and you can see the PO BP in the drop-down list:
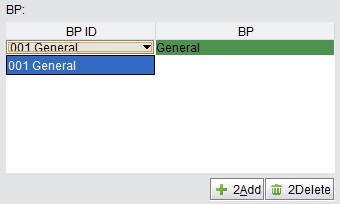 |
Click “Add” to add more BP; you can also select one and click the :Delete” button to delete it.
 |
Lastly, you can add “Comments” and “Private Notes” for the PO. “Comments” can be seen by both sides, while
“Private Notes” are for private communication only. When printing a PO, you can choose not to print” Private Notes.”
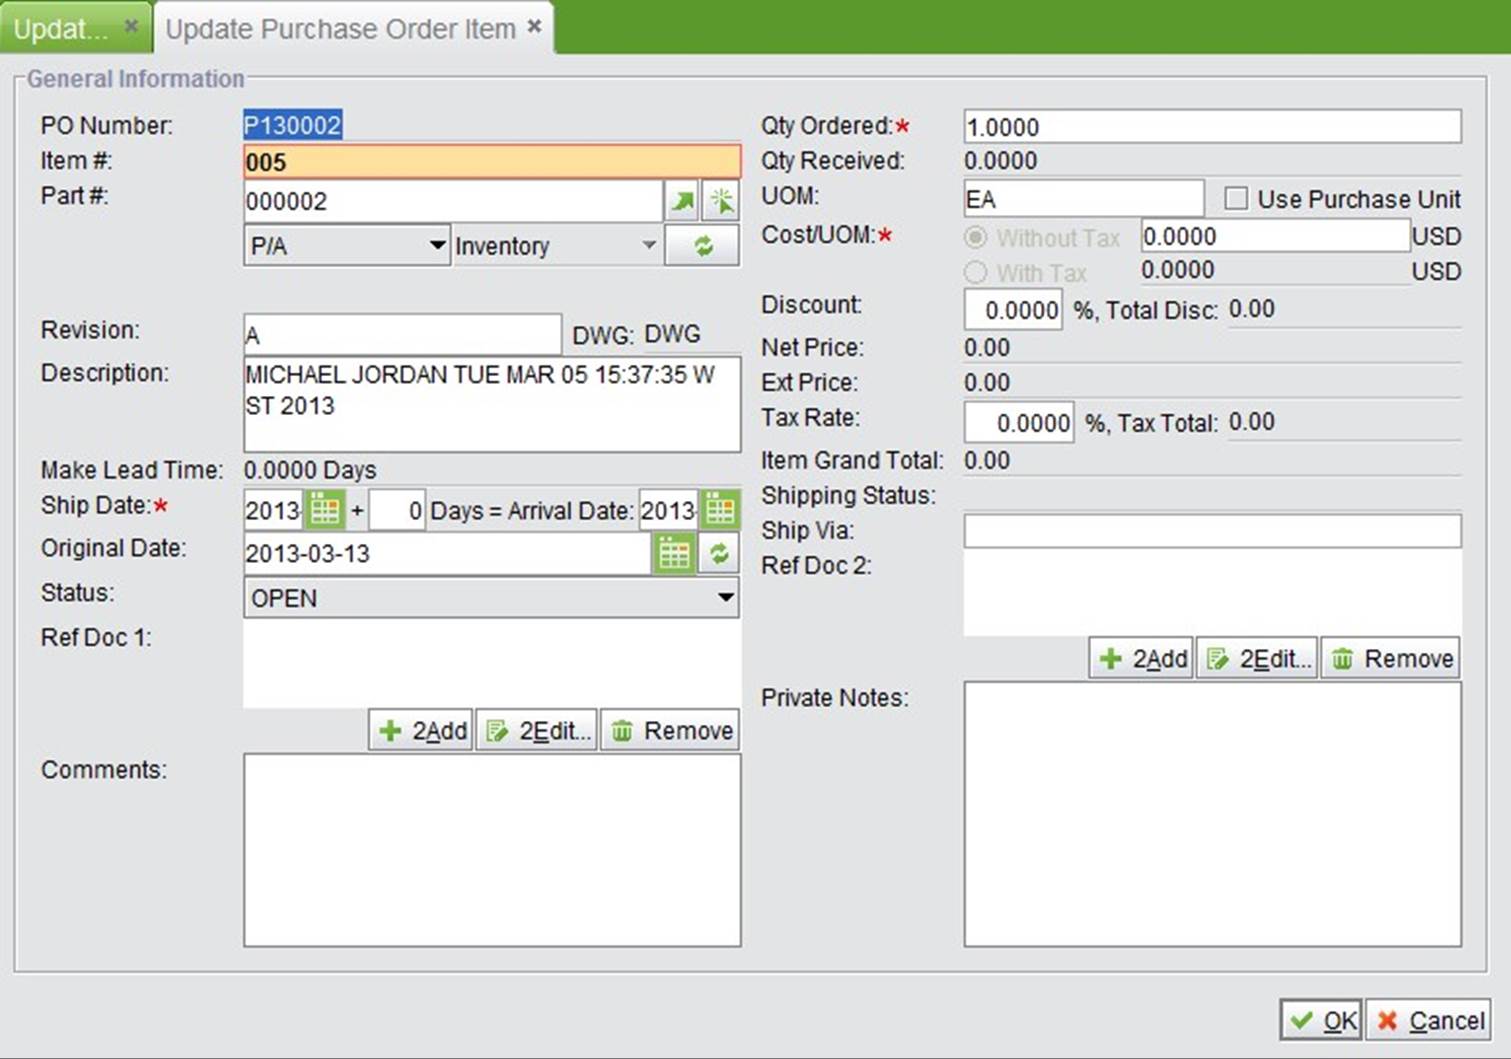
While adding a part item, input part# and qty, then click “+” to go to the “Update Purchase Order item” interface. Or you can select one part item, and click the “Edit” button to enter the “Update Purchase Order item” interface.
“Update Purchase Order Item” interface will appear as below:
 |
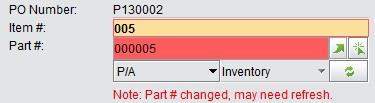
Once you choose a new part here, the system will display a reminder that the part# has been changed. You need to click “Refresh” to confirm the new part.
 |
Descriptions of the parameters in the updating purchase order item interface are below:
Parameters |
Descriptions |
PO # |
The PO#, with one item# to confirm one PO item. |
Item# |
Item# |
Part# |
The item’s part# |
Revision |
The part’s revision. |
DWG |
If the part has a drawing. |
Description |
Part’s description |
Ship Date |
The part’s shipping date, which includes shipping time needed |
Original Date |
The original date confirmed at the original contract. |
Status |
The item’s status includes “Not Approved,” “Open,” “Cancelled” and “Closed.” |
Ref Doc 1 |
The item’s up level related document, e.g., RFQ. |
Comments |
The item’s comments |
Qty Ordered |
The ordered part’s quantity. |
Qty Received |
The part quantity that has been received. |
UOM |
The part’s unit. |
Cost/UOM |
The purchasing price of the part. |
With Tax |
The part’s purchasing price with tax |
Discount |
The discount percent for the part. |
Total Disc |
The discount amount for the part. |
Net Price |
The part price after discount. |
Ext Price |
The total amount after discount. |
Tax Rate |
Tax rate |
Tax Total |
Total tax |
Item Grand Total |
The part item’s total amount with tax. |
Shipping Status |
The shipping status of the part item. |
Ship via |
The part item’s shipping method, if nothing is entered, the PO shipping method will be used. |
Ref Doc 2 |
The item’s down level’s related doc, e.g., sales order, work order. |
Private Notes |
The part item’s private notes. |
Once you have completely filled out this information, click “OK” to go back to the update purchase order interface.
After filling out all the information at the update purchase order interface, click “Update” to finish adding the PO.
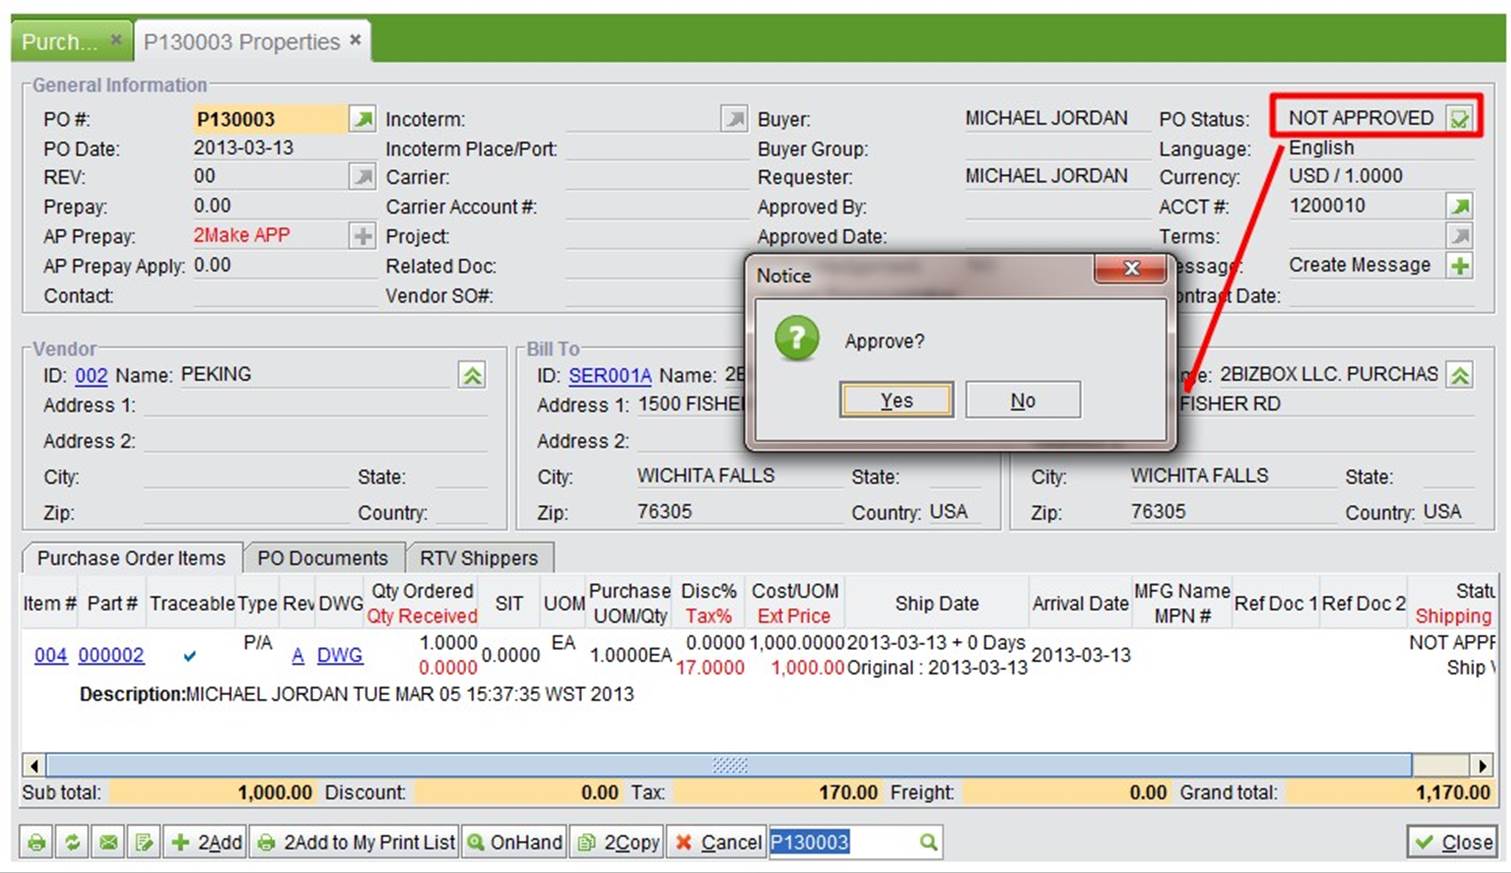
Back at the PO property interface, the PO’s status is still not approved. Click “Approve” to approve the PO. Its status will be changed to “Open.” Only users with permission can approve the PO. PO approval permissions can be added at “PO Module-> PO->Control”
 |
 |
At the interface, you can perform other related operations.
“PO module->PO->Print” interface.
 |
“Supply Chain Parts.”
2BizBox provides many ways to lookup or search for a PO.
Input PO# to lookup a PO.
 |
Input PO key words, and click the button to search for a related PO.
 |
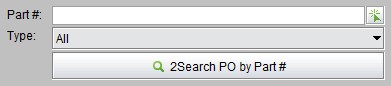
Input the part# key words and click the button to search for all POs of related parts.
 |
Input a requester key word and click the button to search for all POs with related requesters.
 |
Input a project key word and click the button to search for all related POs of a specific project.
 |
Input a vendor ID key word and click the button to search for all related POs of a vendor.
 |
Input a vendor ID key word and click the button to search for all related POs of a vendor.
 |
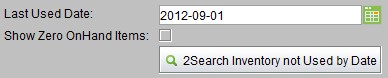
Set an inventory last used date and click the button to check for part inventory not used after the listed date.
 |
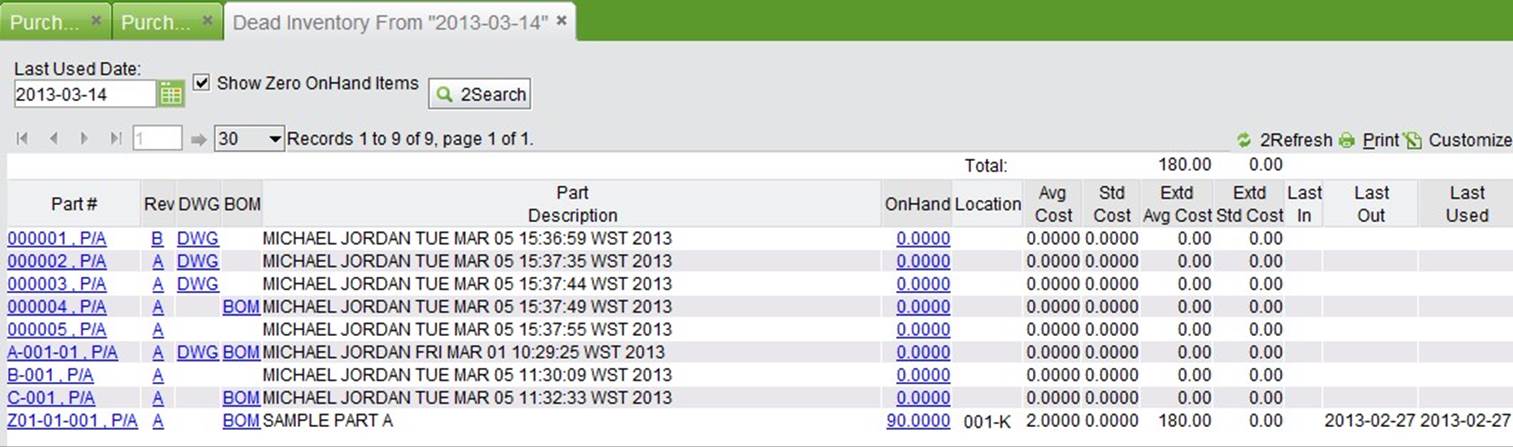
The search results will appear as below:
 |
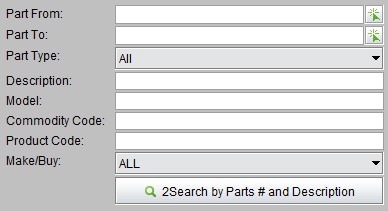
Search for related POs of parts by part# and descriptions.
 |
Click the button to search for all cancelled PO items.
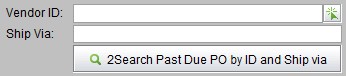
As a vendor ID is often used while searching for a PO, vendor search has been added here, including lookup vendor, search vendor by ID, search vendor by name, etc. Search Past Due POs by Vendor ID and Ship Via.
 |
 |
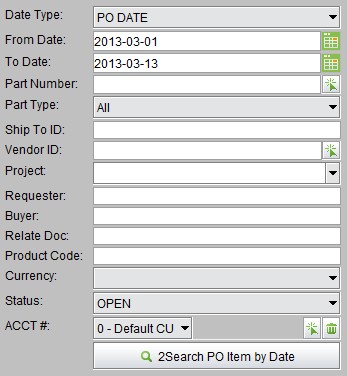
Search PO items by multiple conditions.
 |
On demand is generated by work order and sales order. Click the button to show parts with “On Demand” Status. Check “Exclude if Sufficient on Order” to show the insufficient parts on order.
 |
The search results will appear below. Part’s other inventory information will also appear except on demand. Click “MRP” to run the part’s requirement plan.
 |
Input RFQ# and click the button to convert the RFQ to a PO.
 |
Click the button to see all PO messages. PO messages are used in the VG module to facilitate communication between a supplier and 2BizBox users. Refer to it further in the “Supply Chain Module” chapter.
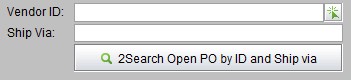
Click this button to see all open Pos’ detailed information. The search results will show by PO item.
Click this button to see all past due POs, which means PO goods that are still not received by their past “arrival date”.
Search POs checklist by PO#, click “Approve” button at the search results interface to approve the PO quickly.
 |
Click the button to see all POs with the status “Not approved”; click “Approve” at the search results interface to quickly approve the PO.
Click the button to see all unacknowledged (no received goods) POs.
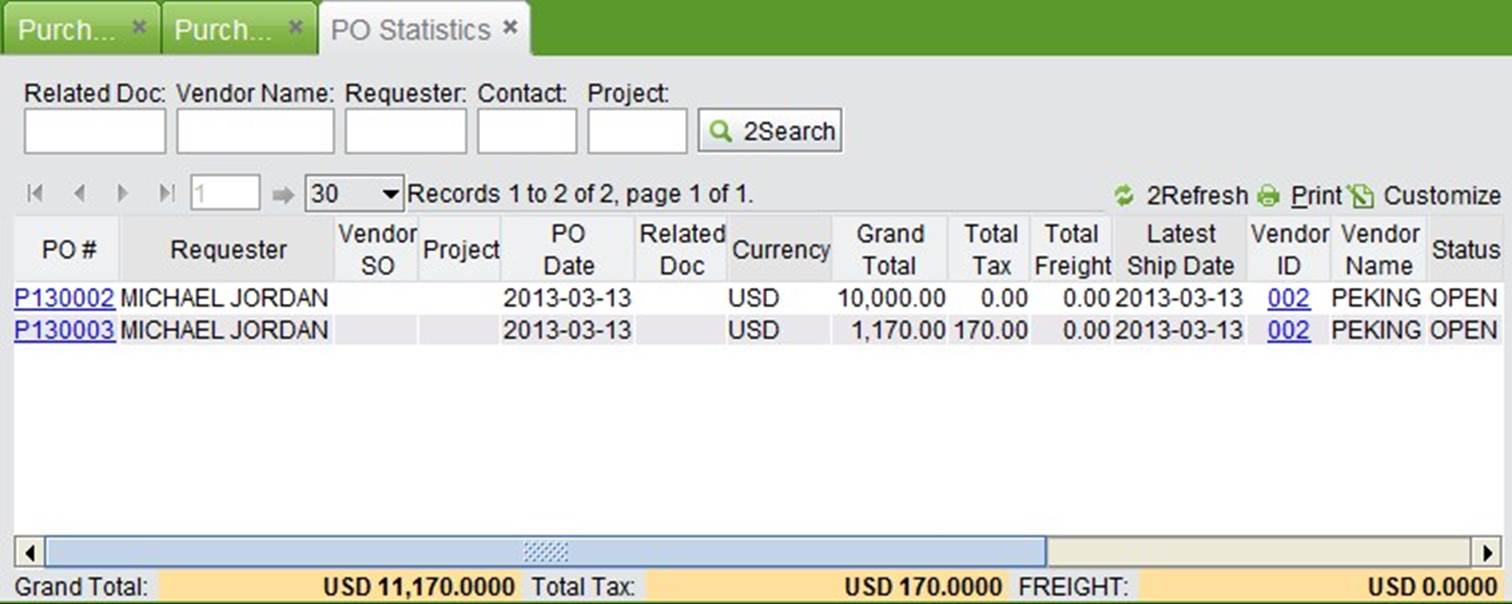
PO statistics are used for PO total amount statistics. Search for these by “Related Doc,” “Vendor Name,” “Requester,” “Contact” and “Project” conditions.
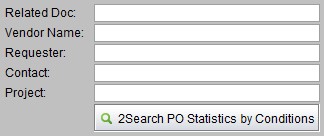 |
Search results include all closed, open, and not approved Pos. They will show PO grand total, total tax and total freight, and can also be shown respectively by different currencies.
 |
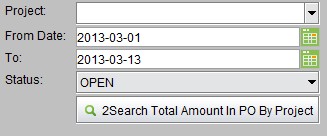
A project can be directly inputted when updating a PO, or added at “Sales Module->SO->Control.” Here you can search related POs by project and look up related PO amount.
 |
At the search results interface, show the project’s amount, and click” Detail” to see all PO information under the project.
 |
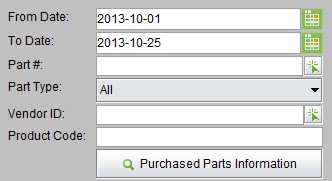
Search parts that are purchased during the certain period with conditions like Part#, Type, Vendor ID and Product Code.
 |
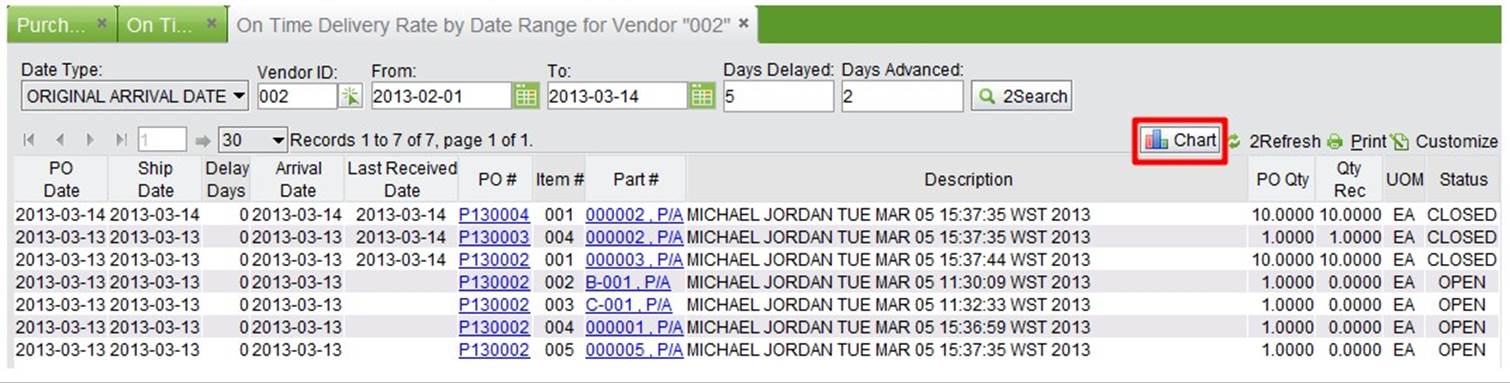
In addition to quality, the vendor’s on-time delivery rate is also an important factor to evaluate a vendor’s grade.
Arrival Date = shipping date + delayed days; original arrival date = original date + delayed days; Days Delayed: the days delayed less or equal to the days that are still considered ontime delivery.
Days Advanced: the days advanced less or equal to the days that are still considered ontime delivery.
 |
On time delivery rate is listed by vendor. Click “Detail” to see the delivery status of all of a vendor’s PO’s . At the bottom of the list, there is a total item count of a vendor’s POs, on time delivered item count, and on time delivery rate. Click “Chart” at the top right to see a chart of the vendor’s on time delivery rate in last 12 months.
 |
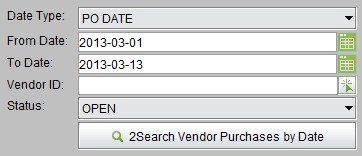
Date types include “PO date,” “Arrival Date” and “Ship date.” You can search for purchasing information by “From date” and “To date.” The search results will show purchasing sub-totals, received and not-received information for each vendor during a specified time period.
 |
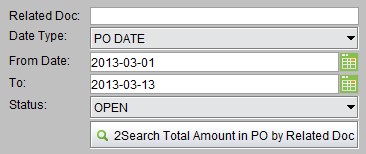
Input a related key word, date, etc. to check PO total amount.
 |
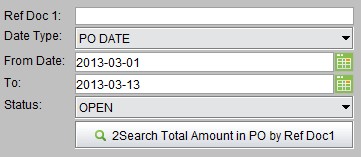
Input a reference Document # to check the reference document’s PO total amount.
 |
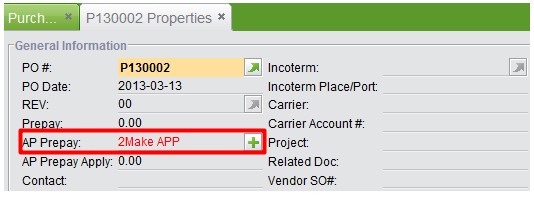
Generally, once a PO is confirmed, an AP Prepay should be made to the vendor. There are two ways to add an AP prepay in the system.
At the top left of the PO interface, click “Make APP” to generate:
 |
Or, at the “PO->AP Prepay” interface, input one PO# or search PO to make an AP Prepay.
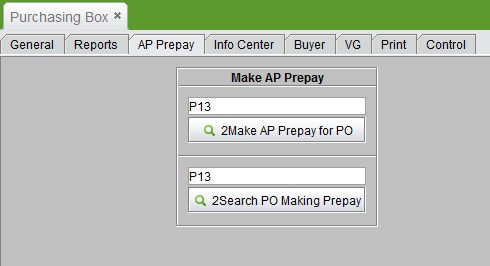 |
AP prepay is mainly operated by an accountant, so it also exists in the accounting module. Here is just a shortcut for convenience. After AP prepay is generated, the accountant needs to go the Bank to pay it. After that, enter the AP prepayment in system to generate a GL. It will appear in the Accounting Module.
In the PO info center, a PO’s statistics, like amount, received order’s amount, item, in-warehouse, etc. can be checked.
 |
Click the “Purchasing Info Box” button to check:
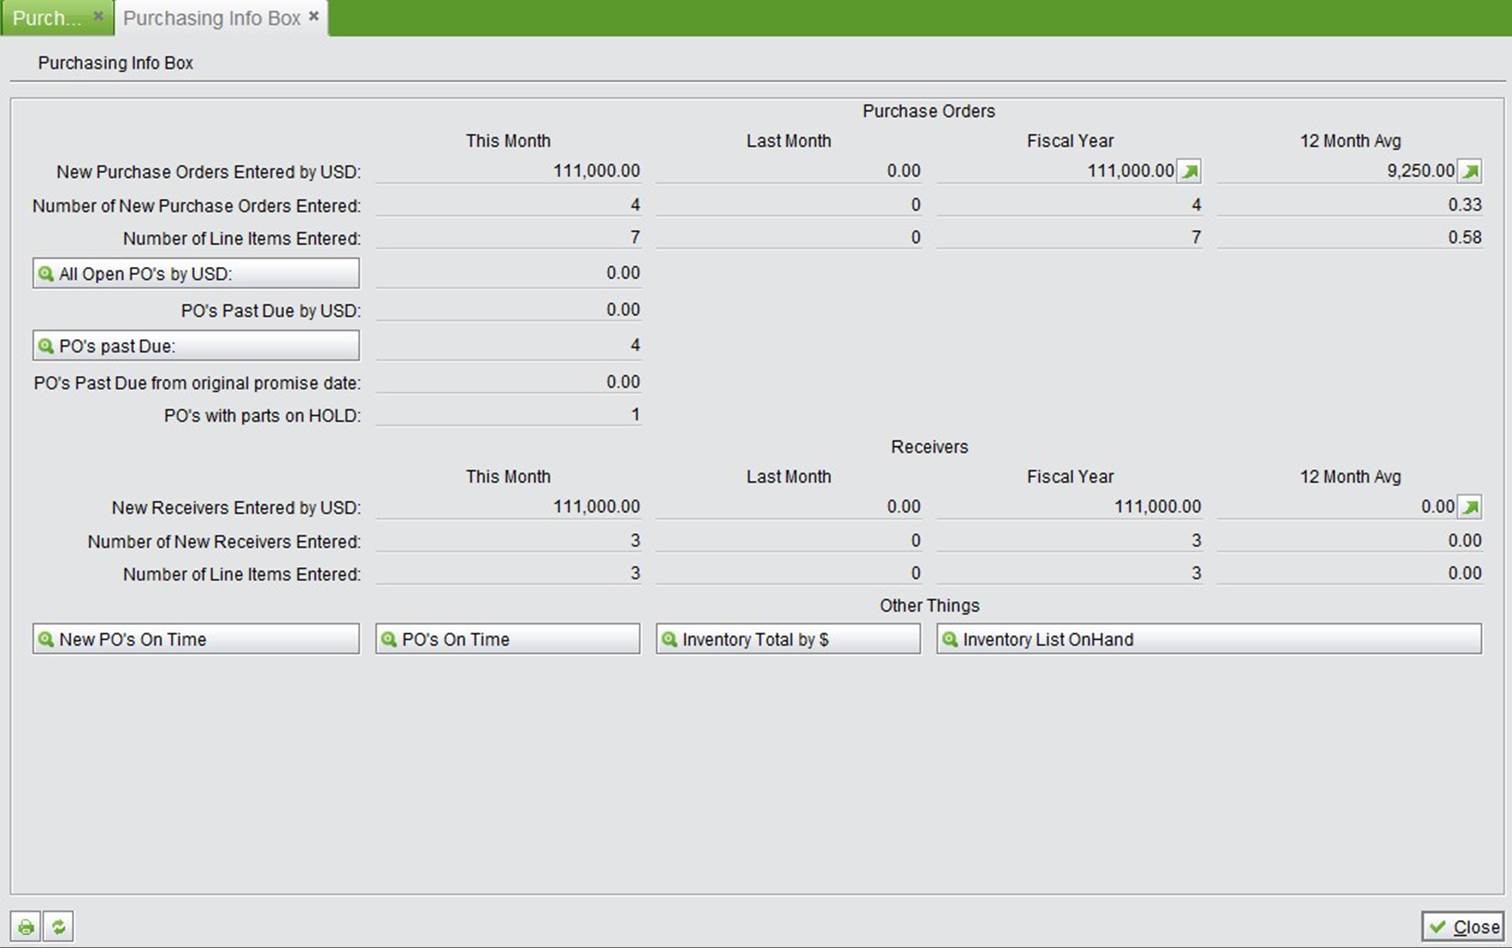 |
This report lists this month, last month, fiscal year, and 12 month average purchasing and receiving records and offers a fast look up option.
New Purchase Order Entered by USD: the new purchase order’s total amount.
Number of New Purchase Orders Entered: numbers of new purchase orders created during a specified period.
Number of Line Items Entered: the new PO items created during a specified period.
All Open PO’s by USD: all open POs total amount during a specified period; click to see more.
PO’s Past Due by USD: the past due POs total amount and quantity at a specified period; click to see more. PO’s Past Due from Original promised date: the past due original promised date’s PO’s total amount during a specified period.
PO’s with parts on HOLD: the quantity of parts on hold of all POs.
New Receivers Entered by USD: the total amount of receivers during a specified period.
Number of New Receivers Entered: the number of new receivers created during specified period. Number of Line items Entered: the number of receiver items during specified period.
New PO’s On Time: check in-warehouse POs by date; the parameters you can set are below:
In the recent month: the month you need to look up.
Days ( ) to ( ): on time delivery days range, e.g. (-5) to (5)
List Fiscal Year: check to show POs on time received in the fiscal year.
List Month Avg: check to show the year to date monthly average of received reports.
Once you have entered all information, click “Look up,” to arrive at the screen below:
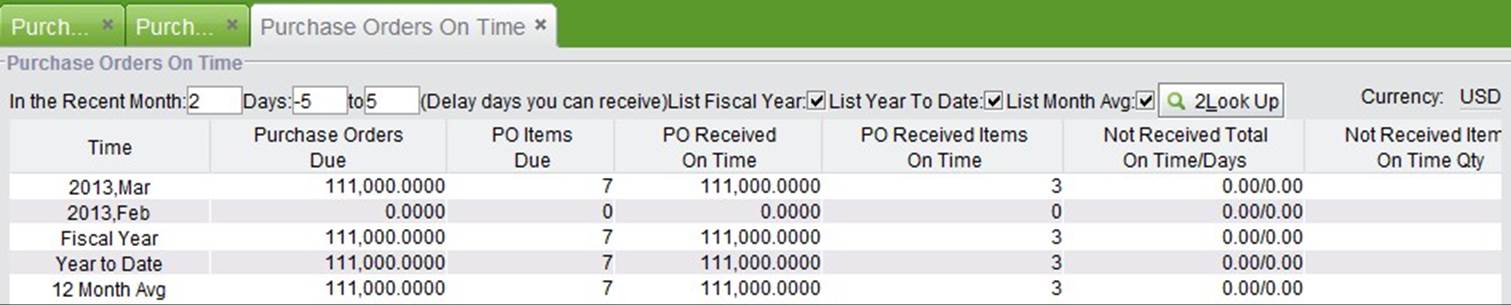 |
PO’s on time: click to see POs received to the warehouse on time. Statistics periods include this month, last month, fiscal year, year to date, and 12 month Avg. The items of statistics include: purchase orders Due by USD, purchase orders numbers of items due, purchase orders received on time by USD and purchase orders items received on time.
 |
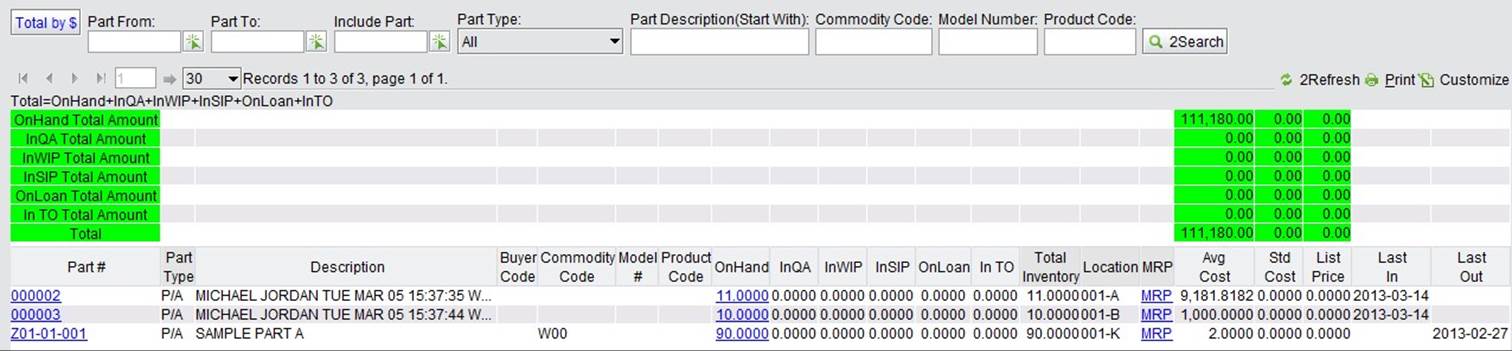
Inventory total by $: the report of inventory total amount, the total amount in the warehouse onhand by cost, total in WIP by cost, total in QA by cost, total onloan by cost by average cost and standard cost.
 |
Inventory List On Hand: the table of inventory amount and part inventory.
 |
In the “Purchasing Module->PO->Buyer” interface, you can search POs by buyers.
The buyer will show on a purchasing order as the PO’s creator by default. If the PO is created by other user, here you should input the actual buyer. After that, you can search related POs by buyer name on the “Buyer” page.
 |
Input a buyer’s name to search all related open POs.
 |
Input a buyer’s name to search all past due POs.
 |
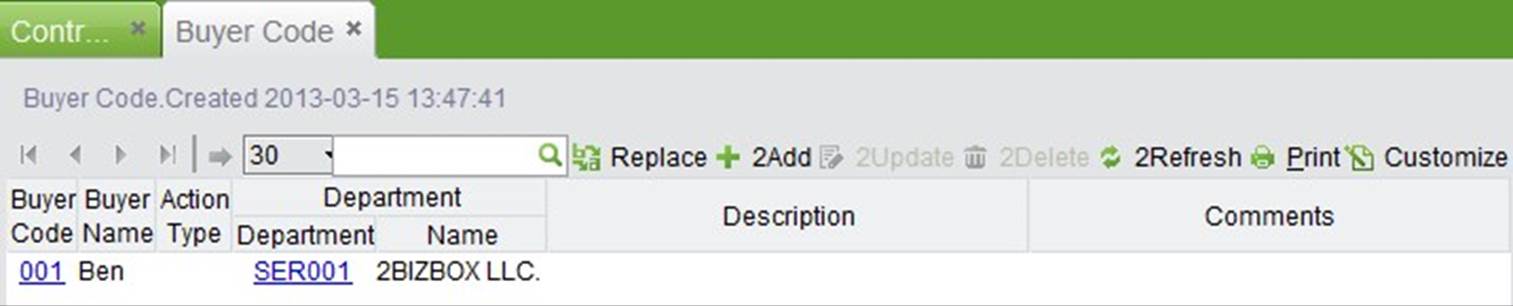
A buyer code is a part’s property. Each part has a specified buyer code. Once a part has a buyer code, you can assign the buyer code to a specified buyer, or buyer action, or some department, to manage the company’s purchasing efficiently.
At the “PO->Control->Search Buyer Codes” interface, click “Search Buyer Codes” to search buyer codes; or go to “Control Panel->General->Search Buyer Codes” to run the search.
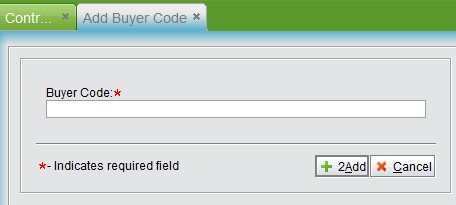
Add buyer codes at the search buyer codes interface by clicking the “Add” button.
 |
At the adding buyer code interface, input a buyer code number. The number must be 1 to 4 digits, letters or numbers.
 |
Click “Add” to enter the buyer code update interface. You have to assign a department for the buyer code and buyer, action type, and description.
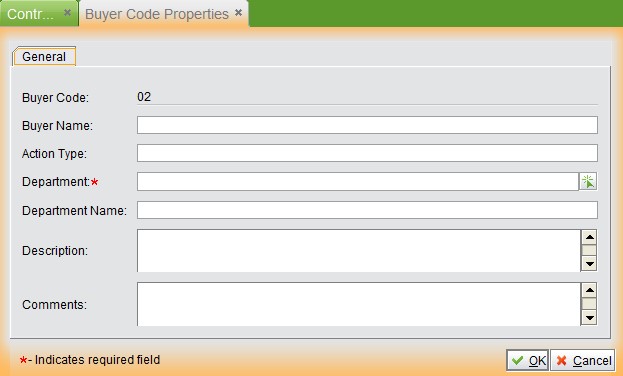 |
Click “OK” to finish and go back to the buyer code property interface.
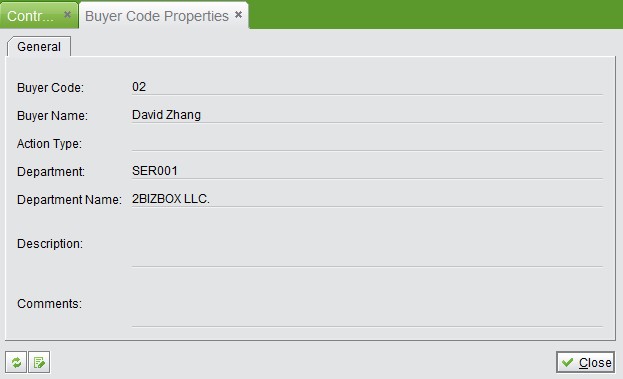 |
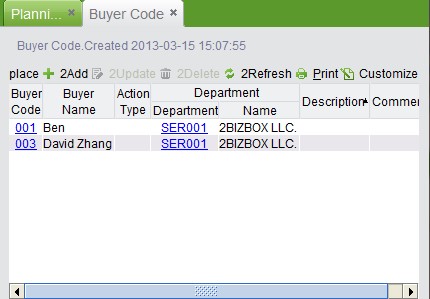
Click “Update” to edit the buyer codes.
At the buyer code search results interface, you can edit or delete existing buyer codes.
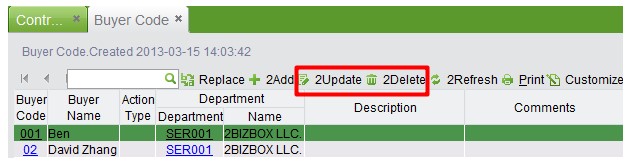 |
Most ID#s cannot be changed once they are generated. For a buyer code#, 2BizBox provides a “Replace” function to replace old buyer codes with new ones.
Click the “Replace” button at the buyer code search results interface;
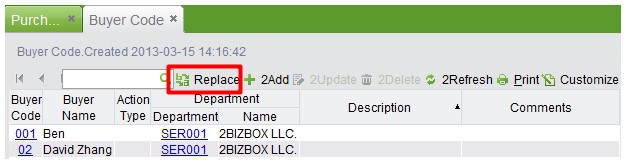 |
Input the old buyer code and new buyer code:
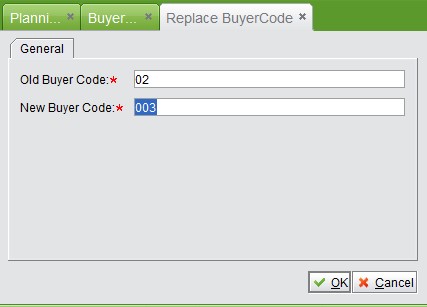 |
Click “OK” to finish.
 |
After adding a buyer code, you can choose one buyer code for a part at its property interface:
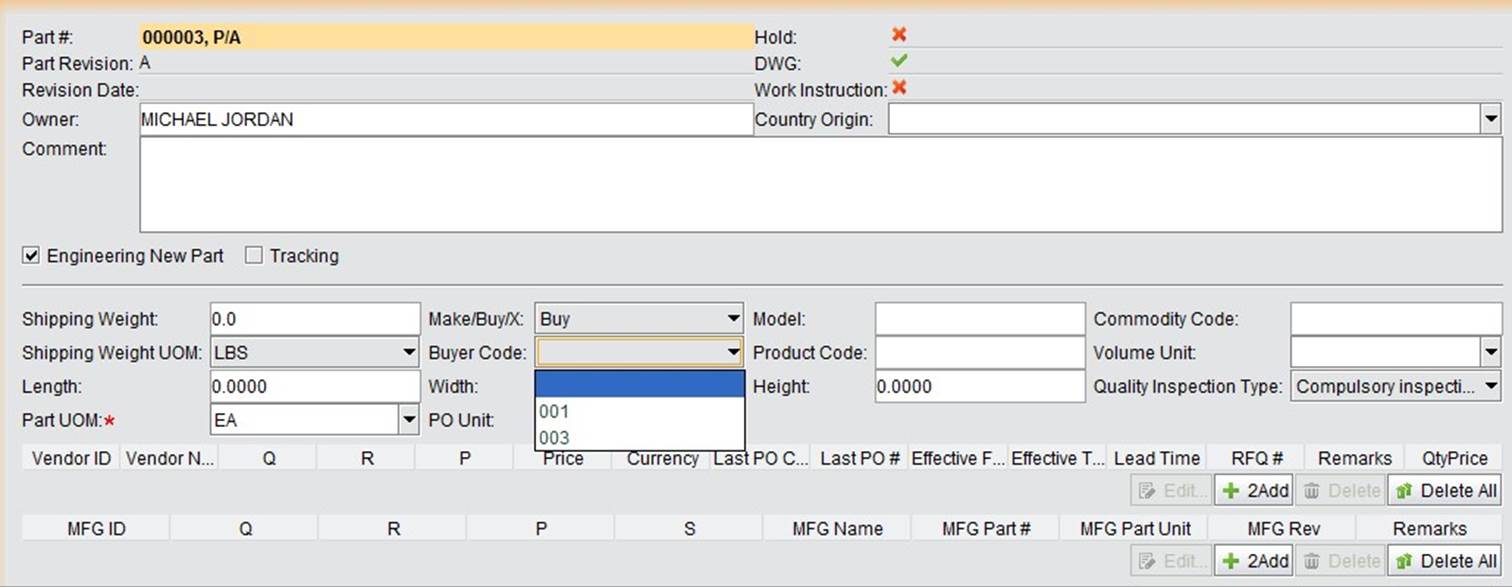 |
After updating, click to check a part’s buyer code at its property interface.
 |
At the “Purchasing Module->PO->Buyer” interface, search POs and parts by buyer code. To be exact, this function allows you to search PO parts with a buyer code.
Input a buyer code and language and click the button to search all parts with the buyer code.
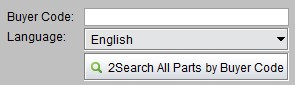 |
Input a buyer code to search all open PO with parts with the buyer code.
 |
Input a buyer cod to search all due POs with parts with the buyer code.
 |
Vendor group, also called VG, is a web branch separate from 2BizBox. After adding a VG user in the 2BizBox system, vendors can obtain access to customer’s requests for quote, Pos, etc by visiting the 2BizBox online VG module. The information vendors send from the VG module will form a message on a related order interface in the 2BizBox system. You can add VG users, check RFQ messages, and PO messages at the VG homepage.
At the “PO Module->PO->VG” interface, click “Add VG User:”
At the “Add VG user” interface, input the user’s information and pick a vendor ID# from those that already exist in the address module. While adding a vendor, fill out the contact’s related information; thus, when you choose a vendor here, the system will list them automatically. You can also add other emails.
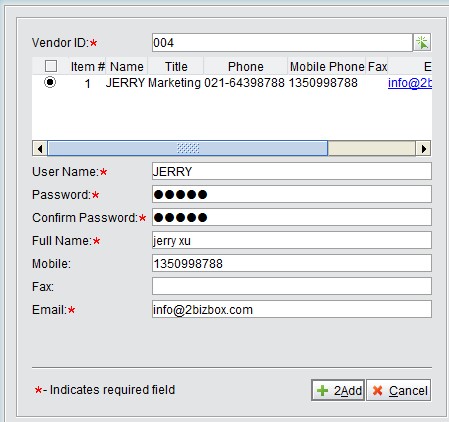 |
After inputting a user name and password, click add to finish. This will take you to the VG user detail information interface where you can reset the password and do update information.
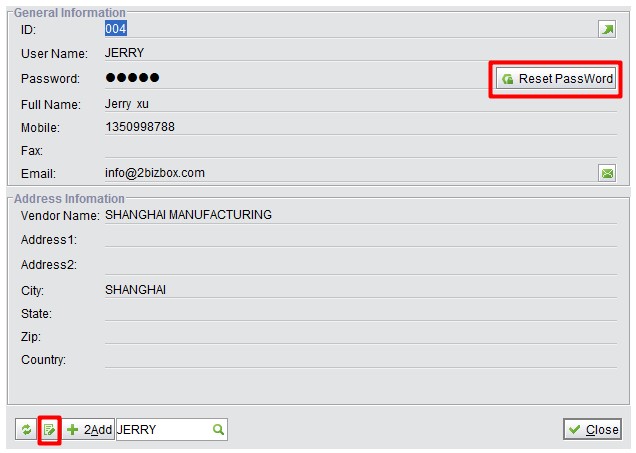 |
After you finish adding a VG user, the VG user can login to the VG online module using the username and password.
After adding a VG user, you can search VG users by vendor ID#.
 |
At the search results interface, select one vendor ID to update or delete.
 |
A RFQ message is a message from the RFQ interface. After create a VG user, you can click “+” to create a message and send a RFQ to the vendor. For instructions on sending messages, refer to the VG module.
 |
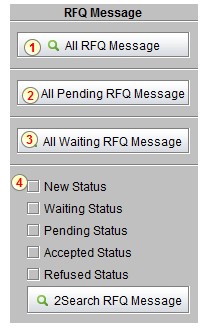 |
There are 4 statuses for a RFQ message: pending, waiting, accepted, and refused. Waiting means that there is no response from vendor yet after sending a RFQ message; pending means that a customer has not responded to a vendor’s message; accepted means that the customer has accepted the vendor’s quote; refused means that the customer refuse d the vendor’s quote. ① Click this button to list all RFQ messages. ② Click this button to list all pending RFQ messages. ③ Click this button to list all waiting RFQ messages. ④ Check related status, click the button to search all RFQ messages under the conditions. (Note: new status means there is an unread RFQ message.)
|
Similar to a RFQ message, a PO message it is a message from the property interface. If the PO vendor use VG module, customer user click “+” to create message, and send the PO to vendor. The PO message status change if have vendor’ response.
 |
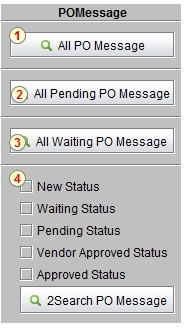 |
There are 4 statuses for a PO message: waiting, pending, vendor approved and approved. Waiting means there is no response from the vendor after sending a message; pending means the customer has not responded to a vendor’s message yet; vendor approved status means the vendor confirmed the PO and can do shipping; approved means the customer approved the PO.
① Click this button to list all PO messages. ② Click this button to list all pending PO messages. ③ Click this button to list all waiting PO messages. ④ Check related status, click this button to search all PO messages under these conditions. |
There is a print button in almost each interface in 2BizBox to print easily based on the user’s requirements. For POs, 2BizBox allows users to print POs in batch at some range.
Set a PO number from, to, vendor ID, PO status, and click “Print” to search and print.
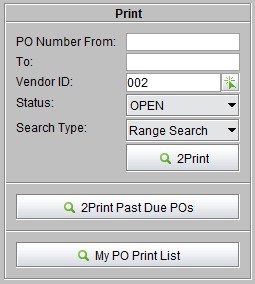 |
There are two search types: range search, which requires the user to fill out the PO number from & to, and match search which requires the user to fill out the PO’s key word to search.
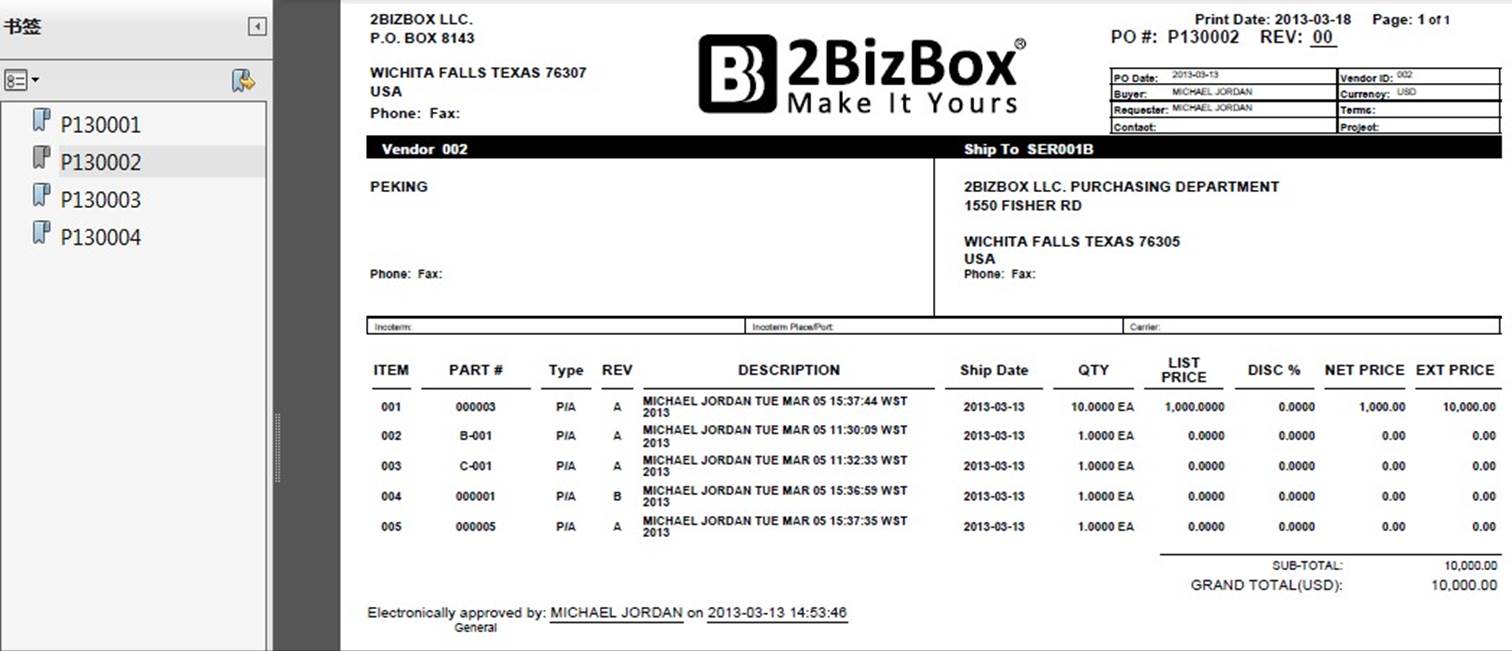
The search results interface lists all POs under specified conditions. Choose the PO that needs to be printed, and click the print button to print.
 |
Below is the PDF file generated to print in batch:
 |
Click the button to check all past due Pos. The search results will list all past due POs of all vendors.
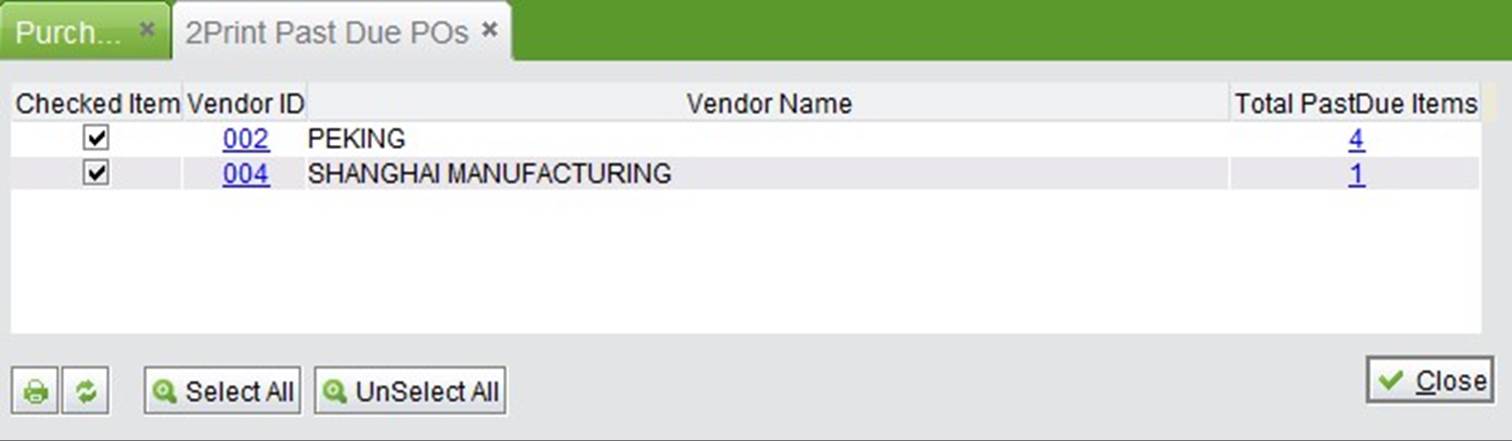 |
Check the item to be printed and click “Print” to print the PO.
In addition to searching POs by conditions, you can add the POs to a print list to print in batch. To add a PO to print list, simply click the “Add to my print list” button. After that, click the “My PO Print List” button to see the print list. You can also add the PO to be printed at the print list interface directly.
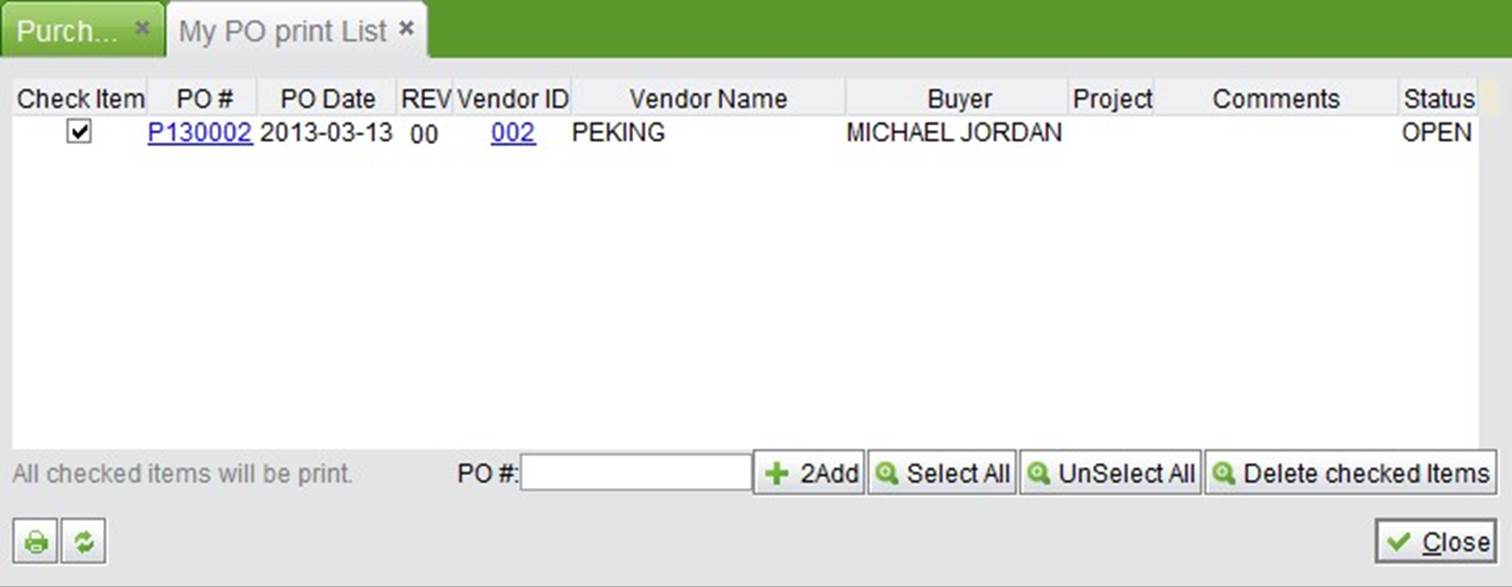 |
At the bottom of the interface, input one PO# to add the PO to the print list.
 |
When all Pos that need to be printed are added to the list, click the “Print” button.
You can manage PO boilerplates and PO approval at the “Control” interface on the PO homepage. Refer to the “Buyer Code” in chapter 7.2.8.
After adding a boilerplate, while updating the PO, you can choose it directly. Some commonly used templates can be added in advance. Add PO Boilerplate
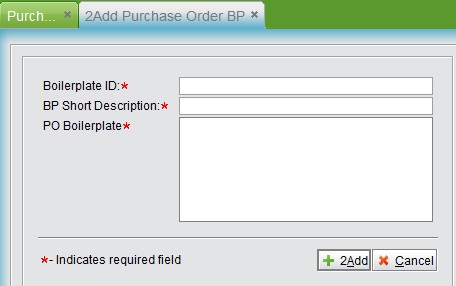
Click “Add PO Boilerplate” to go to the adding interface, the information you need to fill out is listed below: Boilerplate ID: this can be 1-3 digits of Chinese symbols, letters, or numbers.
BP short description: enter a short description here.
PO Boilerplate: fill out the detailed template content here.
 |
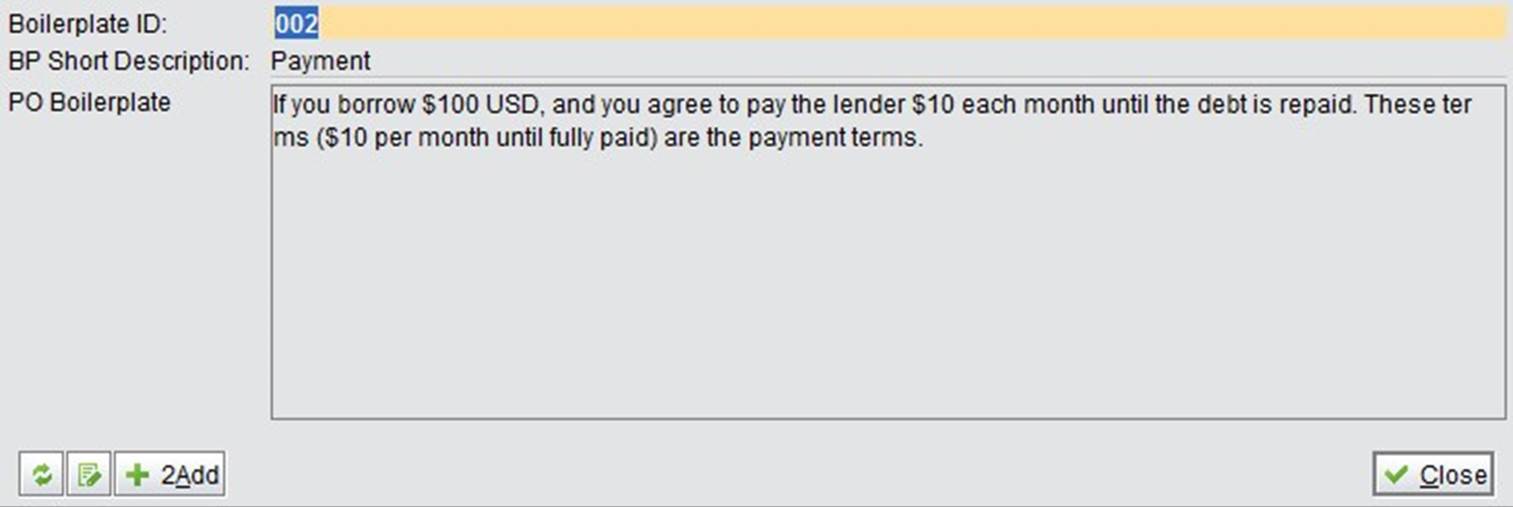
When filling out all information, click “Add” to finish adding the template and return to the BP property interface.
Here, you can click the “Update” button to update, or click” Add” to add new one.
 |
Input the PO BP ID# and click the button to see the BO content.
 |
Input the PO BP’s ID# key word and click the button to search related BPs.
At the search results interface, click the BP row to see the BP detail. When selecting one BP, you can “Update” or “Delete” it.
 |
Click “Add PO Approval” to enter the adding interface.
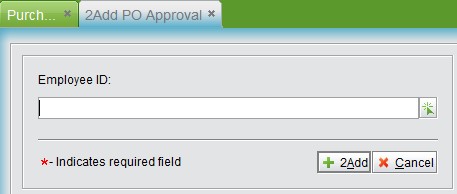 |
Input or choose the approval’s employee ID, then click “Add” to go to the update PO approval interface:
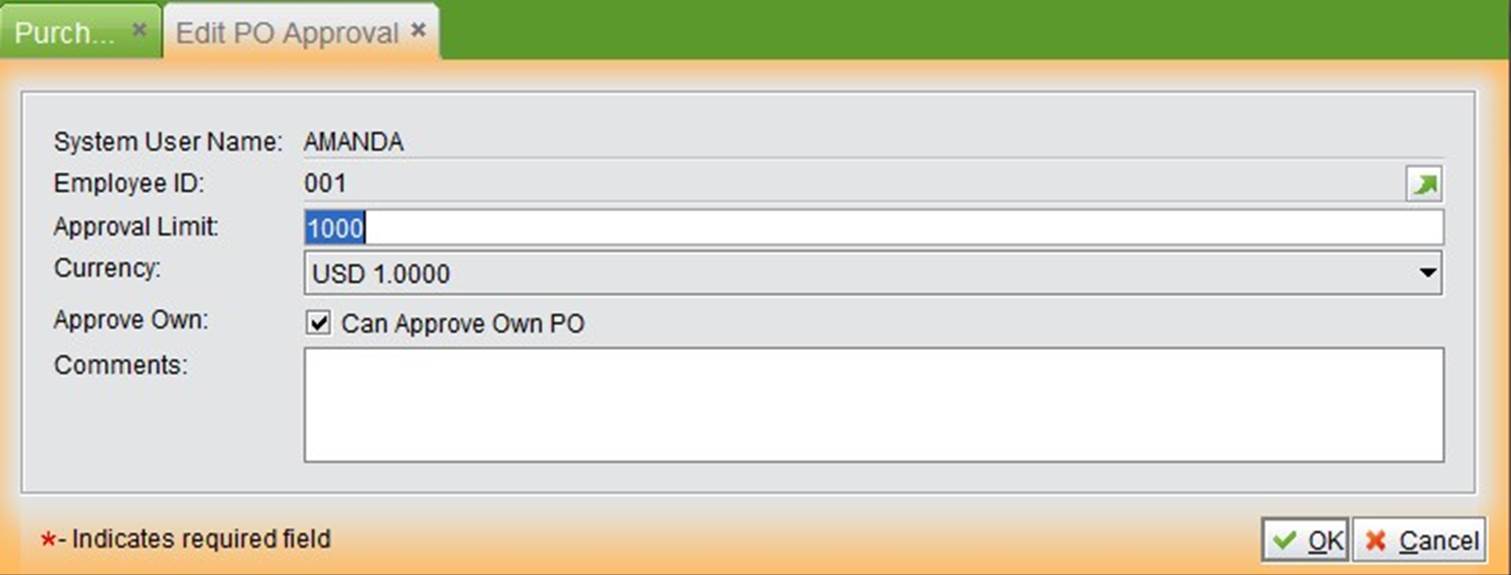 |
Set the approval limit and if users can approve their own PO based on approval permission. PO amounts exceeding the approval limit are not permitted to be approved. When filling out the information, click” OK” to finish, and return to the PO approval’s basic information interface.
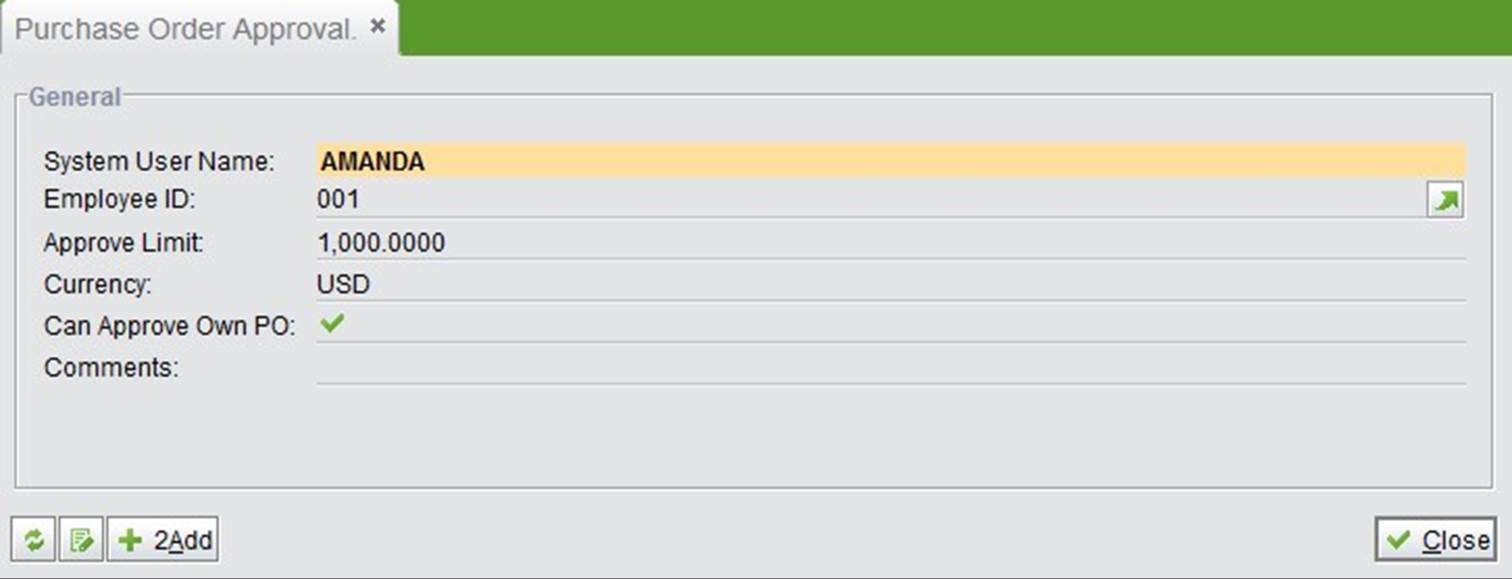 |
Input an employee ID and click the button to see the approval.
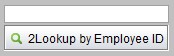 |
Input a user name and click the button to see the approval.
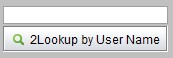 |
Click the button to see all PO approvals.
At the search result interface, you can select corresponding approvals to update or delete.
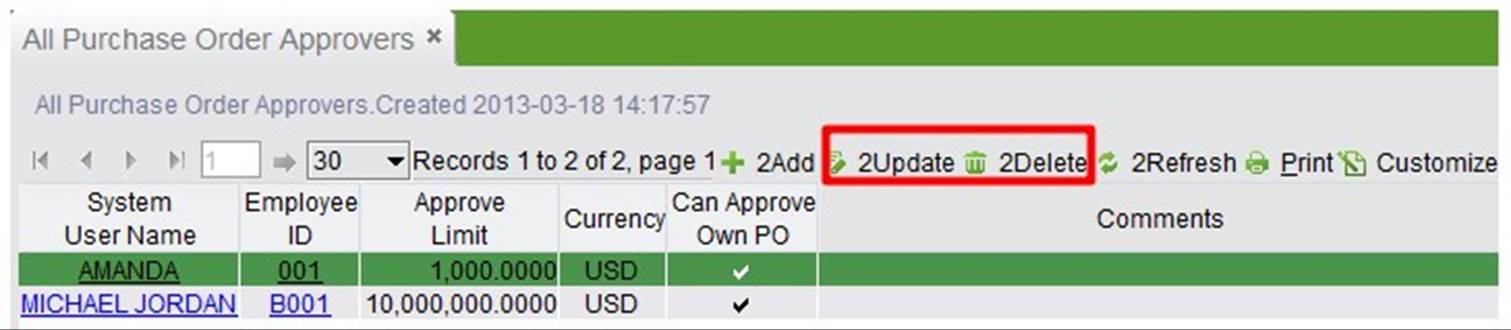 |