2BizBox® Manual |
Go back to 6.0 Main |
The purpose of an Engineering Change is to manage the evolution of a product from the current approved configuration to a new approved configuration. A 2BizBox Engineering Change Notice (ECN) includes the part to be improved, drawings affected, description of the type of change, reason for change and action to the parts in inventory.
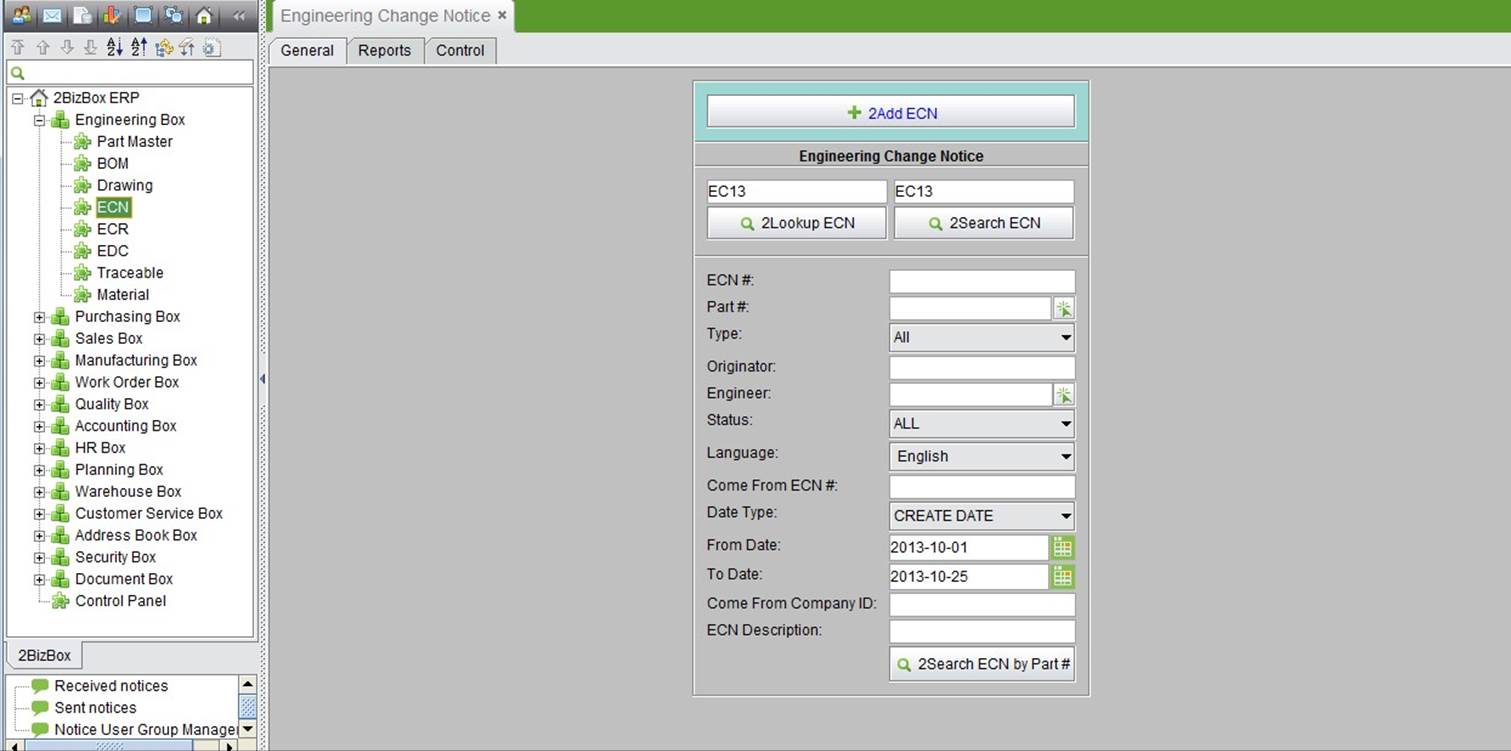
Through the engineering change module, you can add, view, or search engineering change orders. The engineering change interface is shown below:
 |
When you need to make a change to a part, go to the ECN homepage and click “2Add ECN” to add a new ECN. An interface like the one below will appear:
 |
Part#: the part# to undergo the engineering change; click the button to pick from the parts list. Part Type: the type of part undergoing the engineering change; pick from the drop-down list.
Click the “2Add” button to enter the Update ECN interface to enter more information.
The ECN update interface appears as below:
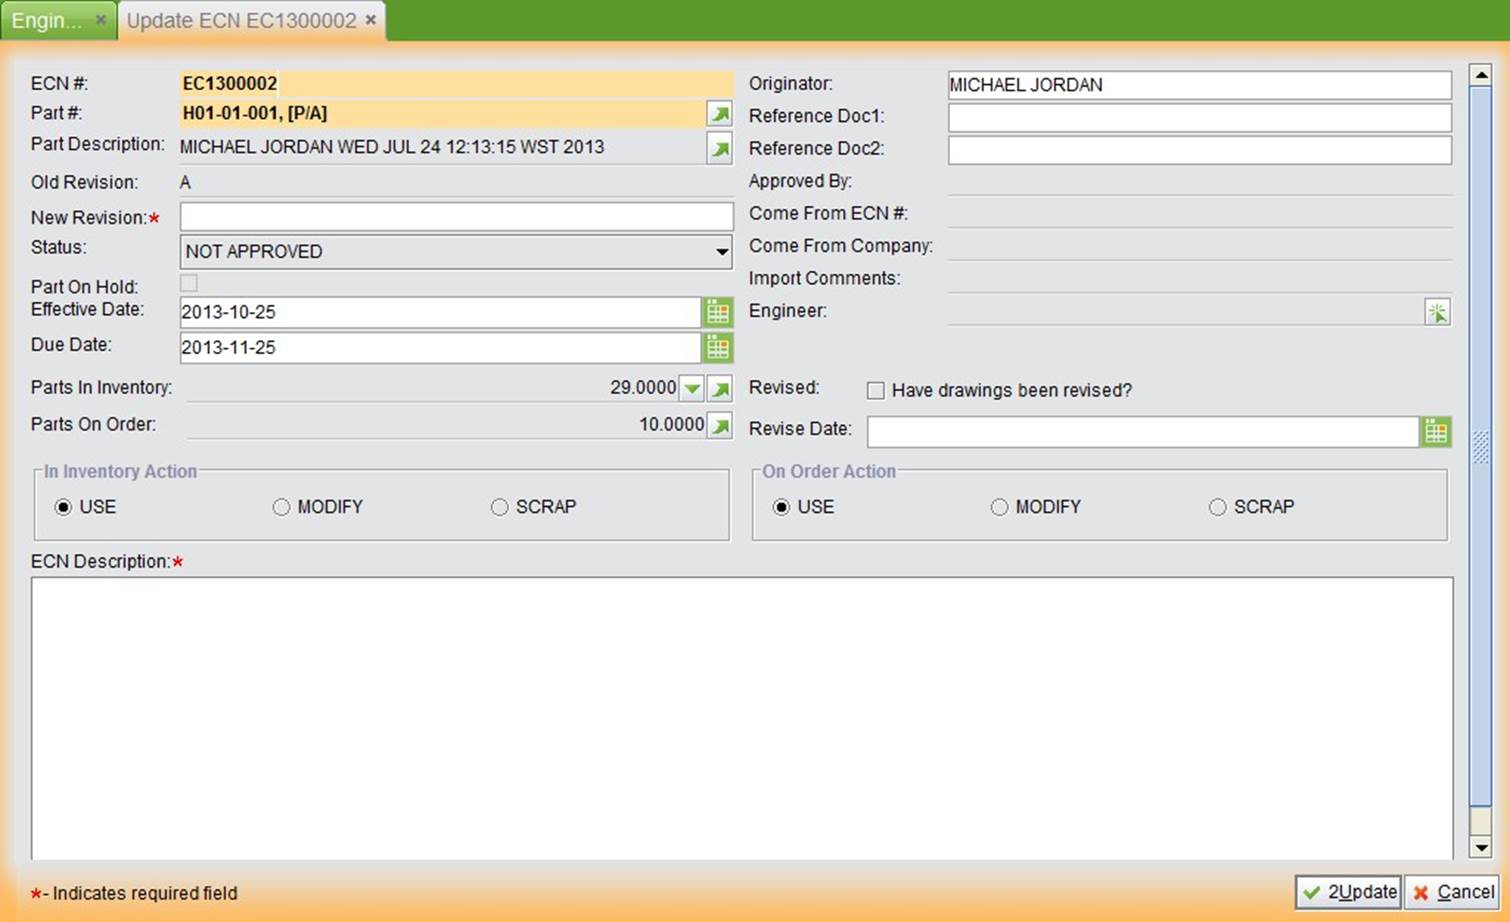 |
The information needed fill out the interface includes:
Parameters |
Note |
New Revision |
The target revision of the part after the change is closed. |
Effective Date |
The date when the part’s new revision goes effective. |
Due Date |
The due date of the change project. |
Originator |
The engineering change’s originator, by default it is the user who created the order. |
Reference Doc 1/2 |
Fill out the related order to the ECN. |
Engineer |
Select a user from the pick list as the engineer that is responsible for this ECN. |
Revised |
When changing the part, was its drawing altered? |
Revise Date |
Choose the part drawing’s revision date. |
In Inventory Action |
How to deal with the part in warehouse inventory. |
On Order Action |
How to deal with the parts on orders? Like work order, purchasing order. |
ECN Description |
The detailed description of the ECN. |
When you have filled out all the necessary information, click “2Update” to go back the ECN’s property interface.
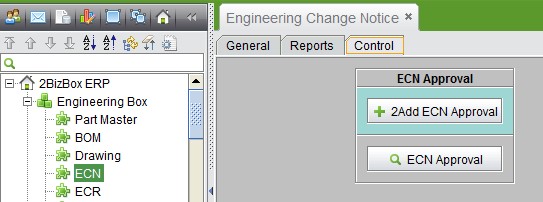
After an ECN is created, its status is “Not Approved.” Click the “Approve” button to approve it. Then, the part revision will update to the new revision. ECN approval needs to be added at the interface “ECN - Control.”
 |
When major flaws appear, and it is confirmed that they are due to the quality problems of key parts after examination, immediate change should be taken, like scrapping related parts inventory or modifying a purchasing order. To update those parts, make engineering changes for parts at specified time period; parts in the warehouse and being purchased can be used continually. Based on the different situations above, there are two processing methods for engineering changes in the 2BizBox system: inventory and order. Also, the 2BizBox system provides 3 ways of dealing with related parts: “Use,” “Modify” and “Scrap.”
At the ECN interface, you need to confirm what action should be done for parts in the warehouse and on orders. You can also see the part inventory and on-order’s details. Click “Parts in Inventory” to see a part’s detailed inventory information and make suitable changes. For scrapped parts, a NCR need to be created. Click “Parts On Order” to see all purchasing orders and work orders related to the part. Then make a choice to modify or scrap related orders.
 |
Once a part is changed, how should you handle the related work order? You can hold the part, then the newly created work order cannot be setup, and the already setup work order cannot complete receiving and issuing. After approving an ECN, you can update it again. Check “Part on Hold” to hold the part.
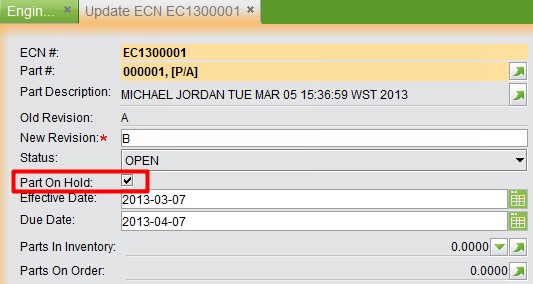 |
When an ECN part is on hold, its related work order’s setup status is all locked.
 |
The system supports ECN’s lookup and search functions.
Fill in a complete ECN# to view the ECN.
Fill in the keywords of the ECN# to search for related ECNs.
Use multiple conditions to search ECN.
In addition to the basic lookup report, the system provides more reports, including all open and all past due
ECNs. You can find this function at “Engineering module – ECN - Reports.”
Click the button to see all open ECNs.
Click the button to see all past due ECNs. Past due ECNs show the current date, not the effective change date.
An ECN can be effective after it is approved.
Go to “ECN - Control” and click “Add ECN Approval.”
 |
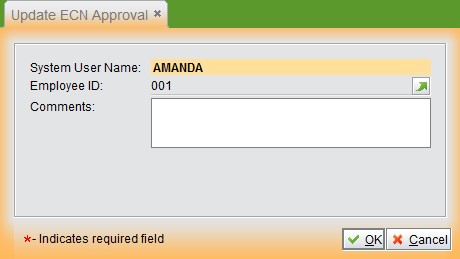
Input or choose the employee ID to be given approval. Click “Add” to enter the interface “Update ECN Approval.”
 |
Add approval comments and then click” OK” to finish.
 |
Click “ECN Approval” to see all ECN approvals.