2BizBox® Manual |
Go back to 6.0 Main |
The Parts Master is the core of the engineering module. It is also the core foundation data of the entire 2BizBox software. The parts module contains a company’s materials, semi-finished products, finished products and other data, providing the most basic data materials for the entire system. Before the 2BizBox system is formally launched, Your company should import all used materials into the system in accordance with established material encoding rules, which can also be used by various modules of the system.
First of all, we will add a part to take a look at what basic information a part has.
Firstly, in accordance with part management rules to enter a part number and select a part type, to submit, the system will generate a new part in accordance with the user’s choice
Users can complete further updates for new parts.
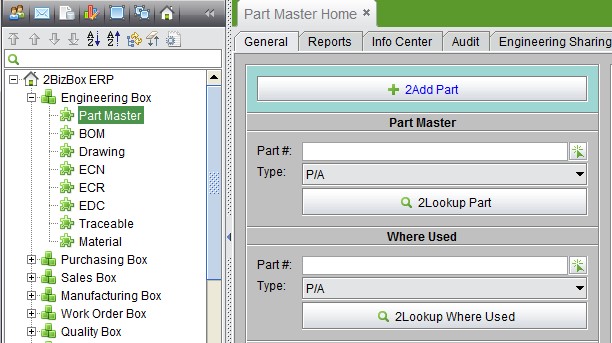
Go to “Engineering Module->Aart Master->General,” and click “Add Part” to enter the adding part interface.
|
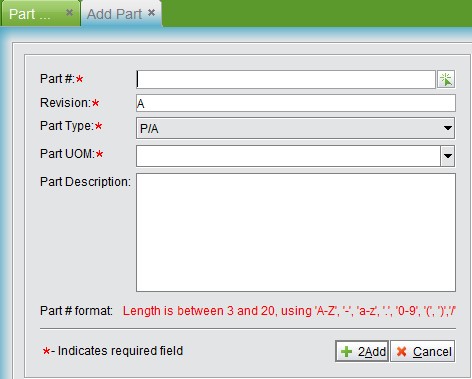
At the Add Part interface, input the desired part number, revision, part type, part UOM and part description:
 |
Note:
1. The length of the part number is 3-20 letters, Arabic numerals, dashes, dots, or slash characters;
2. In 2BizBox, once a part number is created, it cannot be deleted. “Part Number + part type” identifies a specific part; part number and part type cannot be repeated.
3. Part number is automatically generated by the system; you can also choose seq# to generate a part number automatically. Go to “Control Panel - General – Company Settings” to set it. Prior to entering new parts, it is recommended to develop detailed part encoding rules for adding new part numbers. These rules should be consistent with the company's rules to facilitate future management.
4. Part type and parts BOM can be added in the “Control Panel.”
After this information is filled in, click "Add" to enter the parts updating interface.
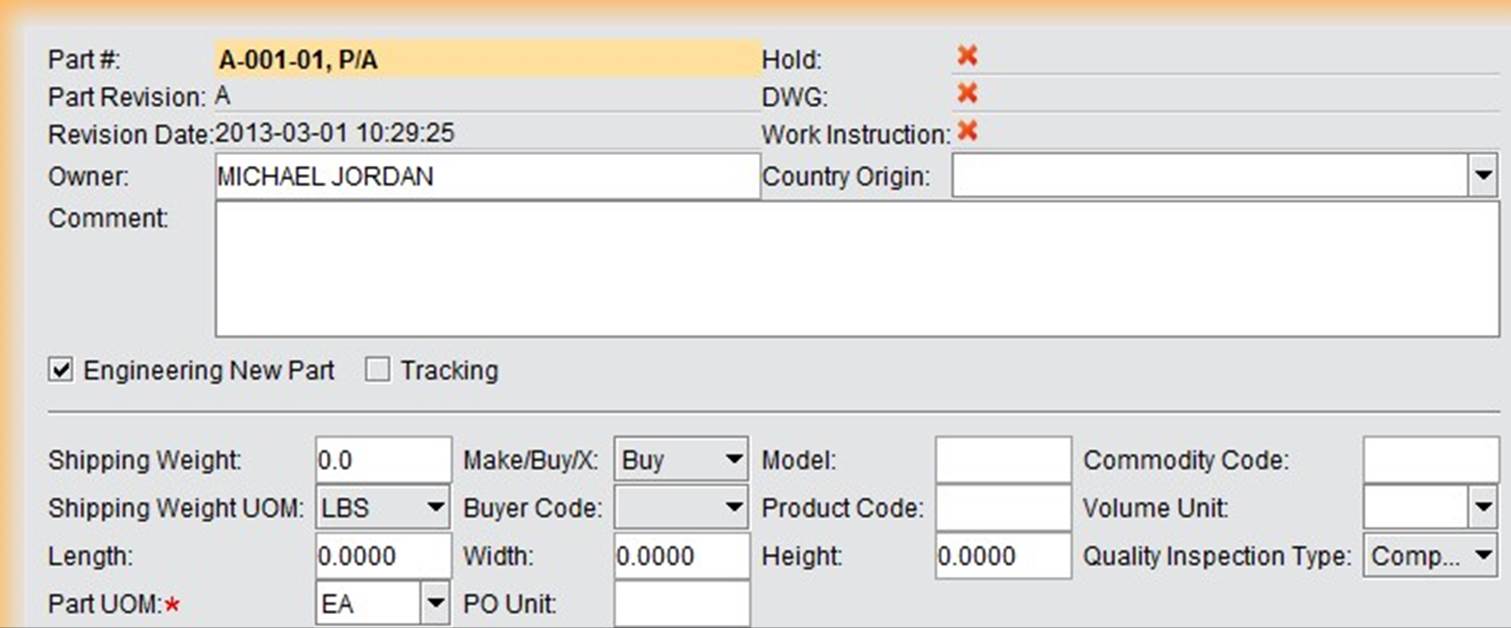
At the updating part interface, you need to add basic information like parts suppliers, manufacturers, build inventory and add multi-language description. There is ample information about part updating, but please note the following points:
Not all parts of the information can be arbitrarily changed; many properties are maintained automatically by the system, such as "pending" status and the average cost;
Certain attributes are modified in a detailed information interface, such as the BOM mark. If it is not a BOM part, there is a Create button in the detailed information interface; click it to add its BOM; l Part number and part type are the key attributes of a part and cannot be modified;
 |
Part Number |
Part number and part type are used to identify a part. 2BizBox supports up to 20 digit part numbers and hybrid coding, including numbers, English characters, and special characters. |
Part Revision |
Current parts revision. Change parts with an engineering change notice; the new version number will be assigned to the part. |
Revision Date |
Revision date indicates a part’s current version’s effective date. Once you have completed an engineering change, the part’s revision date will be automatically updated at the part interface. |
Owner |
The part owner is, by default, whoever created the part |
Hold |
When a part is on hold is being changed or improved, which is caused by engineering change notice. |
DWG |
DWG shows if the part has drawing. |
Work Instruction |
Work Instruction shows if the part contains a work instruction. |
Country Origin |
Input a part’s country of origin. The system will record the related country name, choosen from the drop-down list. |
Comment |
Fill in a part’s comments for use during look up. |
Engineering New part |
If checked, a new engineering part is being created. |
Tracking |
This indicates if the part needs tracking. If a part needs tracking, the system will define the tracking level, and then each department must maintain the tracking level during production. The tracking level can be controlled in the system. |
Shipping Weight |
The shipping weight of a part. |
Make/Buy/X |
This shows whether the part is to make, buy or X. X means that it cannot be made; bought is just a material stored in the warehouse. |
Model |
The part model. |
Commodity Code |
A part’s commodity code is used at international trading. It can also be self-defined for a part search or MRP report. |
Shipping Weight UOM |
Part weight UOM can be selected from drop down list. |
Buyer Code |
The part’s buyer code is generally the part category defined by the company, like imported part, standard part, etc. for efficient management. |
Product Code |
The product code is self-defined. |
Volume Unit |
The system default for a part’s packing volume unit include cu.m, cu.in and cu.ft. |
Length/Width/Height |
A part’s length, width and height when packing |
Quality Inspection Type |
A part’s quality inspection type, choosen from a drop-down list. Indicate if you are conducting an inspection while receiving at the control panel. |
Part UOM |
The UOM while adding a part; it can be added in the control panel. |
PO Unit |
The quantity unit while purchasing a part. |
When you are finished filling out the information, click “OK” to finish.
Below the part vendor, you can add manufacturer information for the part. The manufacturer is who produced the part. If the part was made or bought, you need to record its vendor and manufacturer information; for example, the manufacturer’s part number, revision and quality. At the manufacturer row, click “Add” to choose a manufacturer ID#, then enter the part manufacturer interface:
 |
The part manufacturer interface’s description of parameters is listed below below:
Parameters |
Description |
MFG ID |
The MFG address ID# in the system; see more in “Address Module” |
MFG Name |
The manufacturer’s name for MFG ID# |
MFG Part# |
The part # that the MFG specified for the part produced |
MFG Part Unit |
The part unit that the MFG specified for the produced part. |
MFG Part Rev |
The MFG part revision specified for the produced part. |
Q |
The authorized quality code of a part provided by the MFG |
R |
The quality rate code of a part provided by the MFG. |
P |
Check to confirm the MFG will be the preferred user choosing part MFG. |
S |
Check to confirm the part is preferred to be sold. |
Remarks |
MFG Part further remarks. |
When you have finished filling out all information, click “OK” to finish.
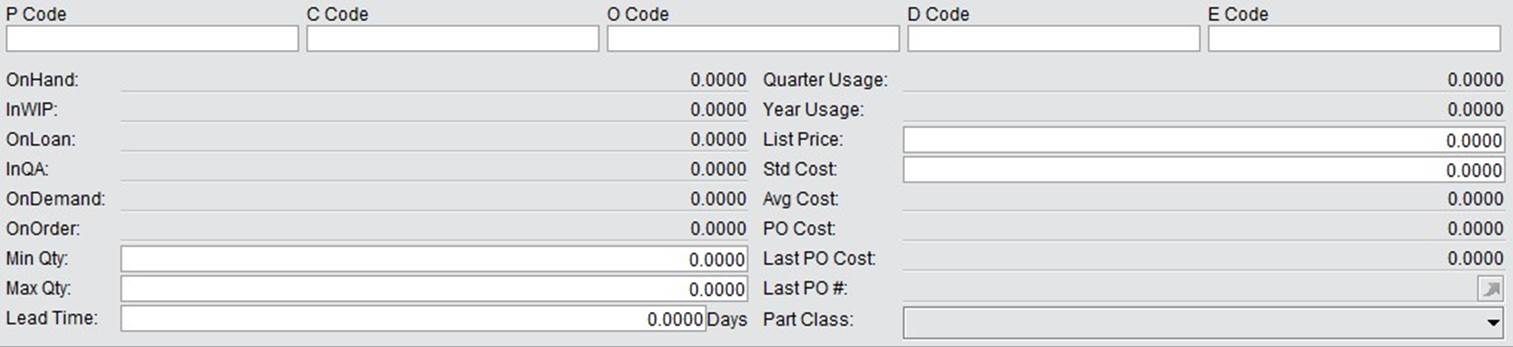
Update part inventory, including part’s inventory, on order, price, usage, etc. Some of the parameters can be set when you are creating a part, like list price, minimum & maximum quantity, while some are calculated by the system and cannot be changed, like OnOrder quantity and average cost.
 |
Parameters |
Description |
Onhand |
A part’s actual inventory in the warehouse. The system will update the quantity automatically. Generally, users don’t need to change it. If needed, you can go to “Accounting module->Inventory->Update Inventory by Part #” to adjust it. |
In WIP |
The part’s quantity put into production. |
On Loan |
The part quantity borrowed by on loan orders. |
InQA |
The part quantity in the quality inspection area, created by NCR. Click the button to see all QA part’s location information. |
On Demand |
The part’s demand quantity, which is calculated from sales orders and work orders. If 100 of part A are sold, then part A’s demand quantity will increase by 100; when a work order is created for 100 of part A, then the demand will also increase for the corresponding part that is used to assemble or produce to part A. |
On Order |
The part’s order quantity is the part quantity in a PO order or quantity in an already setup work order, but not received to the warehouse yet. |
Min Qty |
The part’s minimum inventory quantity; safety stock. It can be defined according to the company’s situation. |
Max Qty |
The part’s maximum inventory quantity. It can be defined according to the company’s situation. |
Lead Time |
The period within which the part needs to be delivered to the customer. The unit is days, and it can be self-defined. |
Quarter Usage |
The average part usage in the last quarter; it is calculated by the system. On Part Properties, you can click the link to view a detailed usage report. |
Year Usage |
Last year’s part usage; it is calculated by the system. On Part Properties, you can click the link to view a detailed usage report. |
List Price |
The part’s list price, the original price without any discount. |
Std Cost |
The part’s standard cost, it is the standard reference cost or the planned cost set by the user. |
Avg Cost |
A part’s average cost is automatically calculated and maintained by the system based on purchasing or manufacturing costs. |
Last PO Cost |
The part’s purchasing price in last purchasing order of the system. |
Last PO# |
The last PO# the part is related to in the system. |
Part Class |
Part Class is used for physical inventory. Use ABC’s classification method to set the part’s counting cycle. Part class can be added at “Warehouse->Physical Inventory->Cycle Count.” |
P/C/O/E Code |
It is reserved for the field, but not used in the system yet. |
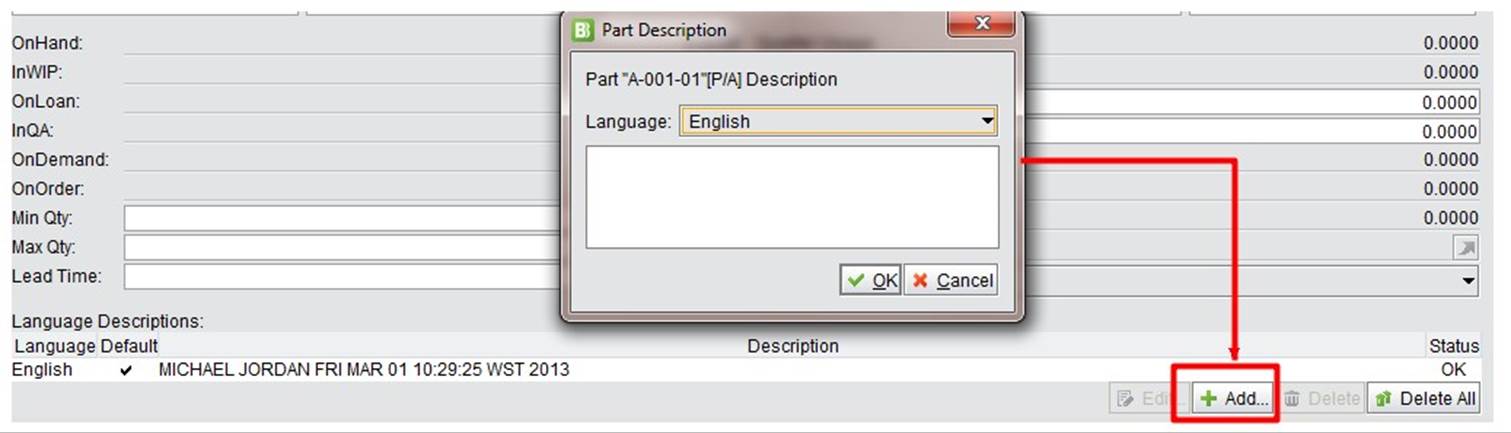
Languages description is used to describe parts in multiple languages. It provides direct support for companies with international trading. For example, if a company’s default language is Chinese, they can also add English part descriptions. Thus, English type orders can be directly generated for international communication.
In the languages description row, click “Add” to add more information. Currently, 2BizBox supports simplified Chinese, traditional Chinese and English. 2BizBoxLITE can support many languages.
 |
When you are finished updating all part information, click “Update” to finish adding a part. If you need edit the part again, click the “Update” button at the bottom left of the “Update Part” interface.
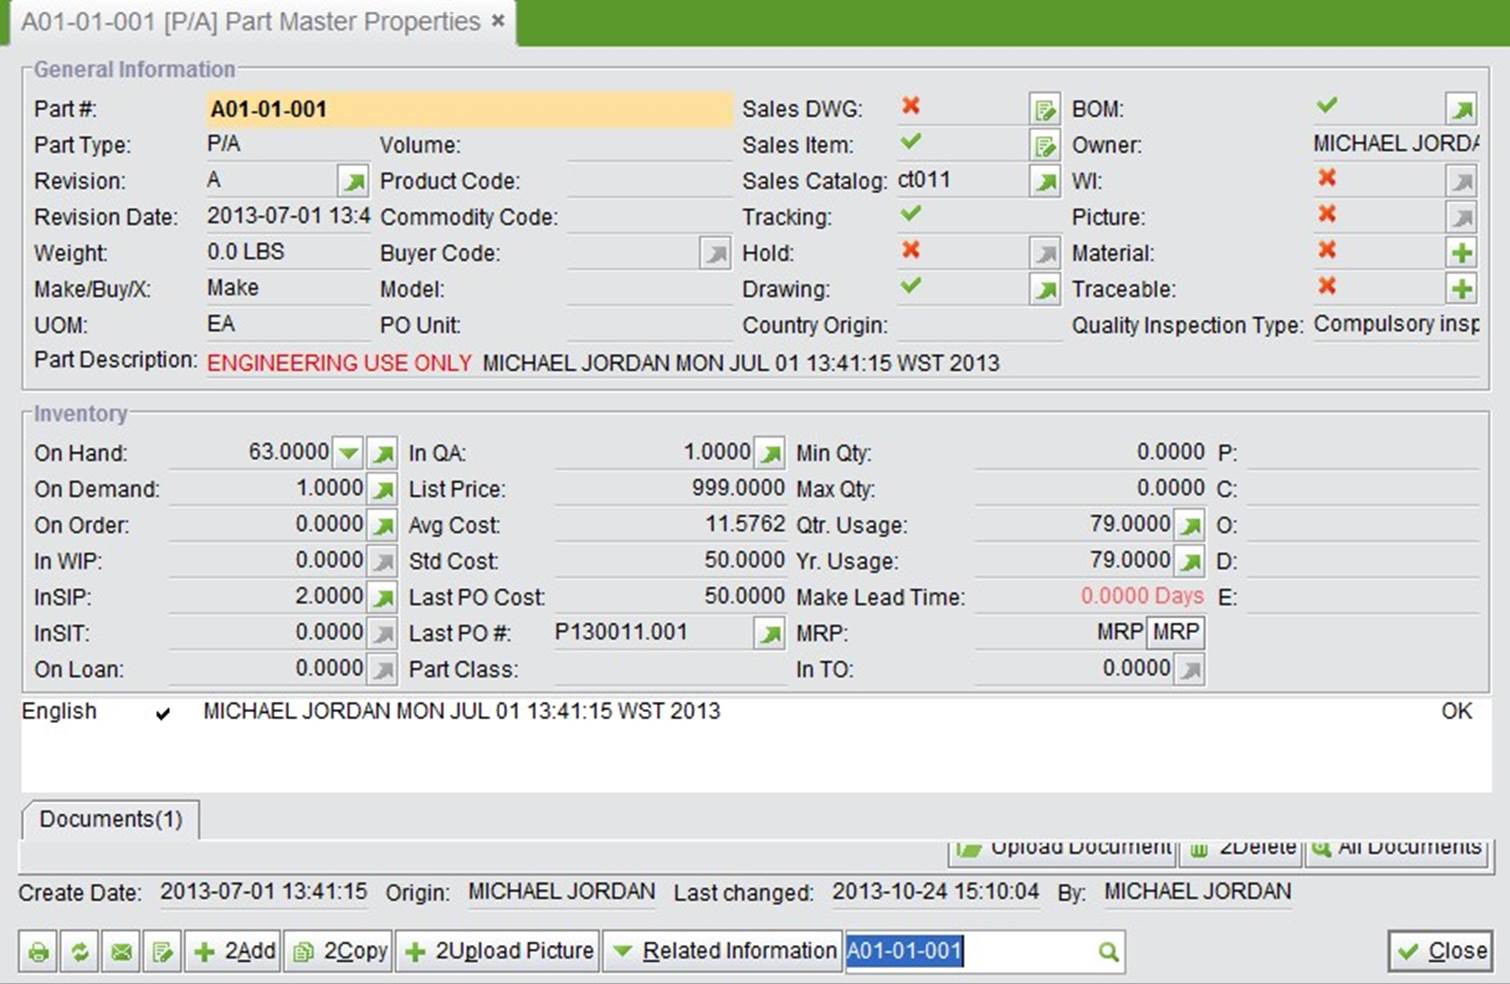
There is lots of information in the part property interface that is related to orders in the 2BizBox system, like part revision, BOM, work instruction. You can click each of them to see more information.
Parameters |
Description |
Revision |
A part’s revision is controlled by ECN; click the button to see detailed ECN. |
Buyer Code |
You can assign a specific buyer code for a part; click the button to see more information. |
Sales DWG |
Used at the CG/DG module to indicate if the DWG is salable; click the button to change the status. |
Sales Item |
Used at the CG/DG module to indicate if the part is sellable; click the button to change the status. |
Sales Catalog |
Used at the CG module to specify which sales catalog the part belongs to. |
Tracking |
Indicates if the part can be tracked; it is setup when updating the part. |
Hold |
If a part is in hold status, click the button to enter ECN. |
Drawing |
Indicates if the part has a drawing; click the button to see a part’s drawing list. |
BOM |
A part’s BOM; click the button to see its BOM. |
WI |
Indicates if the part has WI; click the button to see its WI list. |
Picture |
A part’s picture; the system can store more than one picture of a part to be shown when selling. |
Material |
The part’s material information is used for specifying a part’s size, material quality, etc. Click the button to create or see its detailed information. |
Traceable |
The part’s exact traceable requirements; click the button to set. |
On hand |
Click the button see the part’s detailed inventory information. |
 |
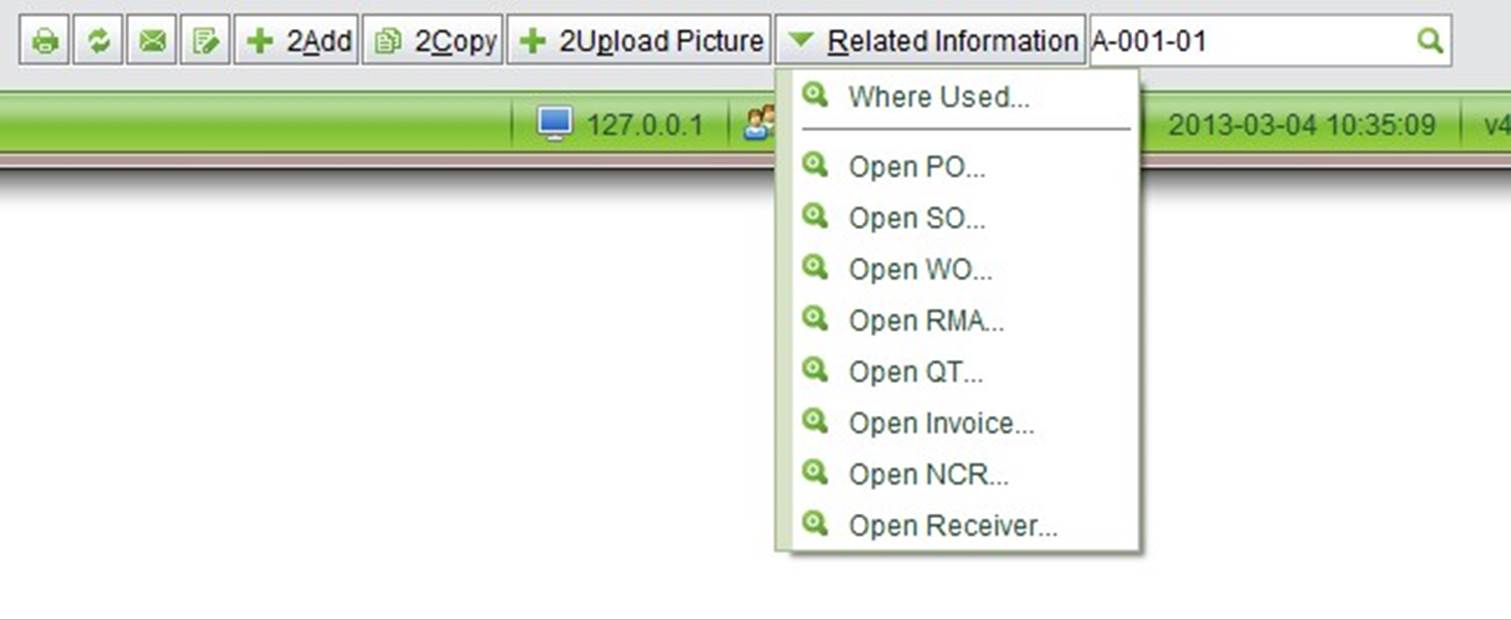
At the bottom of the part interface, there is a “Related Information” button to be used for searching the part’s related information.
 |
Parameters |
Descriptions |
Where Used |
Lookup all BOMs that use the part |
Open PO |
Lookup all open POs which include the part |
Open SO |
Lookup all open SOs which include the part |
Open WO |
Lookup all open SOs which include the part |
Open RMA |
Lookup all open RMAs which include the part |
Open QT |
Lookup all open QTs which include the part |
Open Invoice |
Lookup all open Invoices which include the part |
Open NCR |
Lookup all open NCRs which include the part |
Open Receiver |
Lookup all open Receivers which include the part |
In 2BizBox, one part is identified by its “Part number +part type.” Only created part types in the system can appear in the part type drop-down list when adding a part.
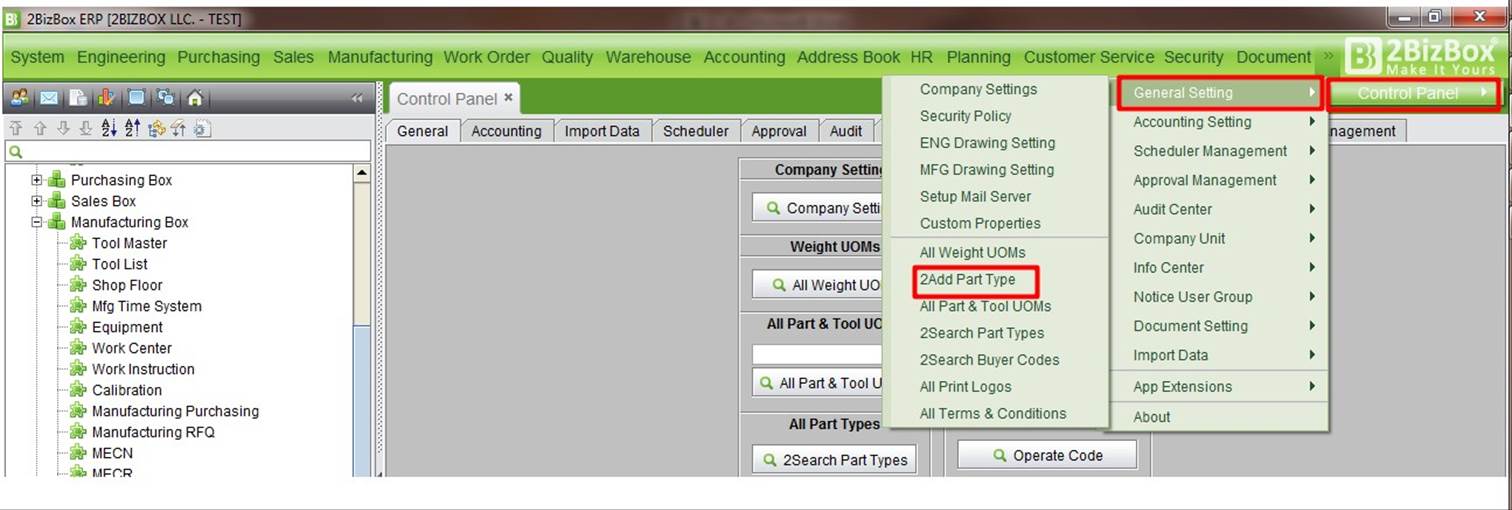
Go to “Control Panel->General->Search all part types,” to see all part types in the system.
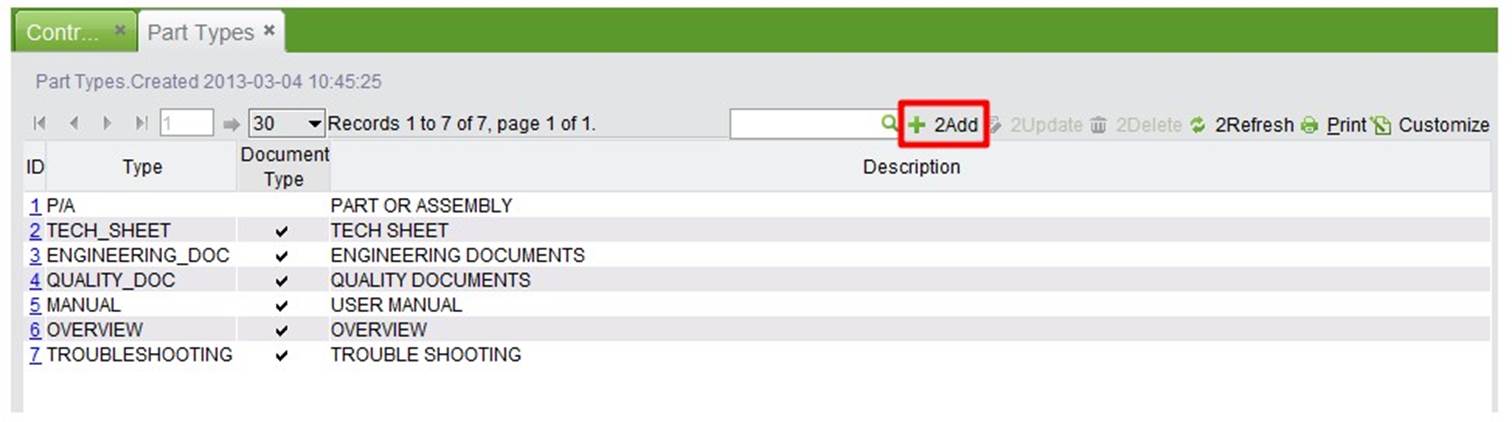 |
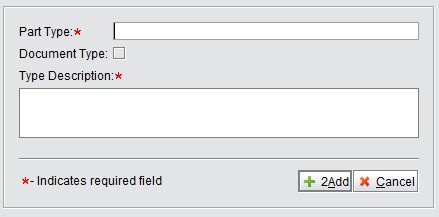
At the above part type list interface, click the “Add” button to go to the part type interface. After inputting part type name and description, check the “Document Type,” to indicate that the part type is also a part document type. See more in the “Document module” chapter.
 |
Click “Add” to create a part type, or to go to the updating interface below:
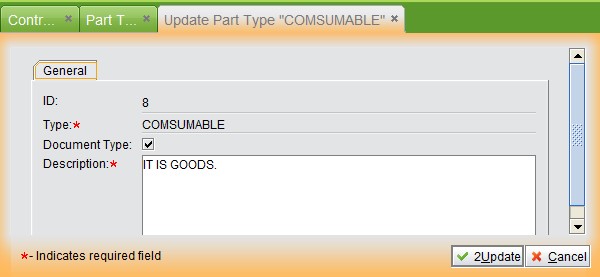 |
Click “Update” to finish adding the part type. In addition, you can click “Control Panel->General->Add part type” at the main menu to go to the adding interface directly.
 |
You cannot change a part type by “Updating Part.” Go to “Engineering module->part master->General->Change part” and pick a part number to replace the old part type with a new one.
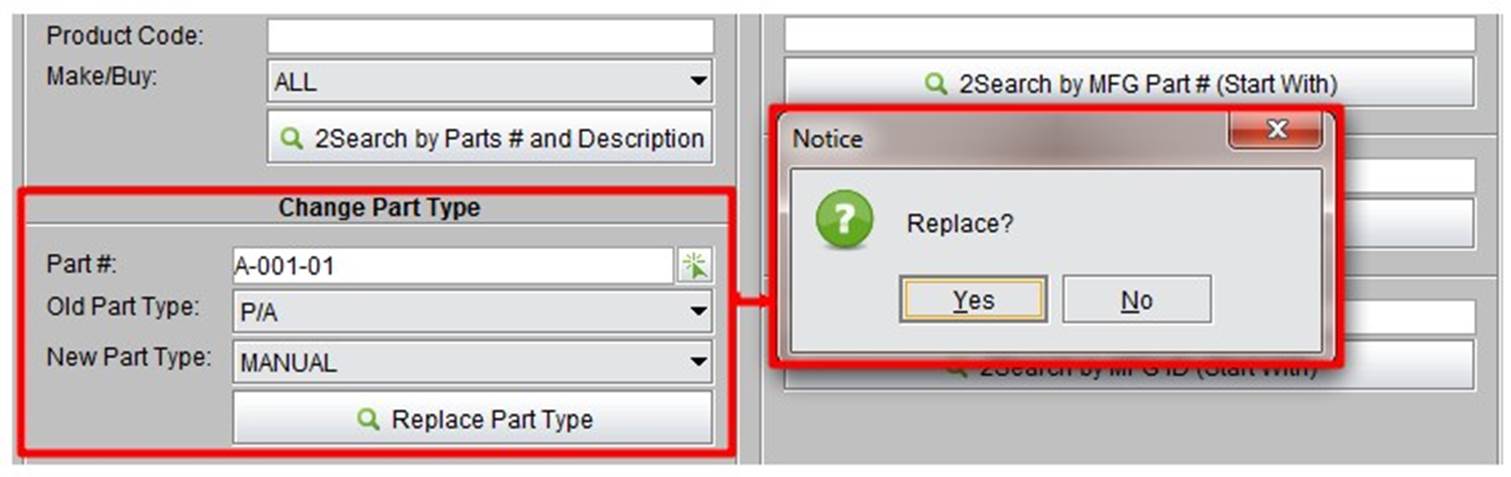 |
Note: you are only allowed to change the part type of a part that is not used in the system, say, there are not any OnHand, in related orders, or OnDemand.
The 2BizBox system provides many easy ways to look up and search for parts needed.
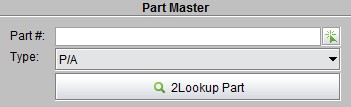
Input a part number and click the button to see its detailed information.
 |
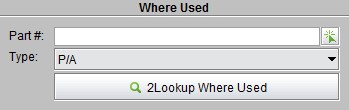
Input a part number and click the button to see where the part is used, BOM’s item level, OnDemand and OnHand.
 |
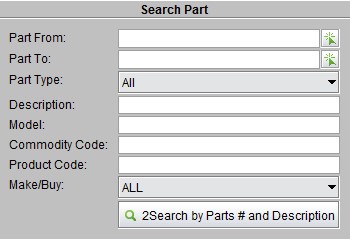
Search Parts by conditions like number range, part type, description, model, or commodity code. The more conditions defined; the more precise search results will be.
 |
Search parts by part number and part type.
 |
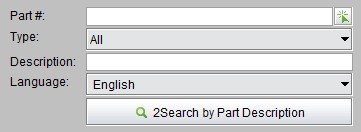
Input what the part description starts with and click the button to search all related parts.
 |
Input the description’s key word, part type, part number key word, and/or language and click the button to search all related parts. Key words and language type must be matched.
 |
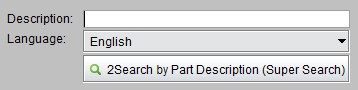
Input key words of a part description and choose a language. Click the button to search all related parts.
 |
The purchased part itself has a part number made by the manufacturer, called the MFG part number in the 2BizBox system. Generally, we’ll create a new part number for a MFG part number to record and manage manufacturing information in the system. MFG number can be added while updating a part.
Input what the MFG part # key word starts with and click the button to search all related parts.
 |
Input what the MFG part # key word contains and click the button to search all related parts.
 |
Input what the MFG ID keywords starts with and click the button to search all related manufacturer parts.
 |
At the “Engineering Module->Part Master->Reports” interface, you can lookup a part’s related reports, e.g., part on hold, parts with BOM, etc.
Click the button to see all parts on hold in the system. For information about “On Hold” parts, please refer to the chapter “Engineering Change.”
 |
Click the button to search all parts with a BOM in the system.
 |
Click the button to search all parts with work instructions and their related information.
 |
At the search results interface, click the “WI” button to see the WI detailed interface.
 |
Click the button to see all inactive parts.
Input a positive number at “List Price Adjust Percent” to increase price; input a negative number to decrease price.
Commodity Code: if you input a commodity code, it will batch update the listing price of parts with the commodity code; if you leave the commodity code empty, all part’s list prices will be updated.
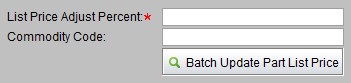 |
After filling out the fields, click the button to enter the price perview interface. Click the “commit” button in the bottom right to update all parts’ list prices that appear here.
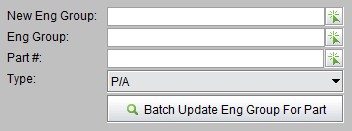
Check the use of the engineering group at “Control panel->Company settings.” For more information about the engineering group, please refer to the chapter “Multi-company part.” Input a new eng group #and eng group # (old eng group), part# and part type, then click the button to see all related parts and engineering group information. Click “Commit” to update parts to be part of the new engineering group.
 |
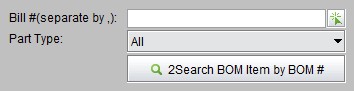
Input the BOM# here and click the button to search all parts under the BOM#.
 |
Here you can click “Engineering Info Box” to see all statistics of engineering information.
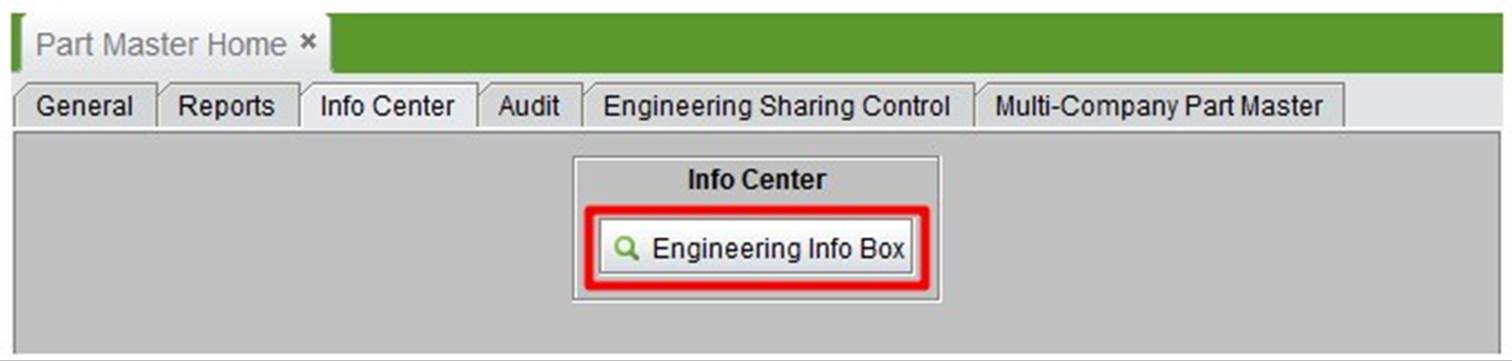 |
Click the value at each row to check all related order information.
Auditting part information, like checking BOM parts without items uncovers parts marked with a drawing and a picture but without them actually. Generally, the right operation will not be a problem, but some error may occur if mistaken operation occurs. Use the audit function to find the part with error and correct it.
The audit part BOM flag is checked if a part in system has a BOM flag but no item. Input key words of a part to check for BOMs without items; keep the field empty to audit all parts.
 |
This function is used to check for parts/tools that have a drawing flag but no actual drawing. Input key words to check parts/tools without a drawing flag, or keep the field empty to audit all parts/tools.
 |
Check which part have a WI flag but no WI content. Input part key words to check for parts without part WI flag, or keep the field empty to audit all parts.
 |
Check for part which have a picture flag but no picture content. Input part key words to audit or keep empy to audit all parts.
 |
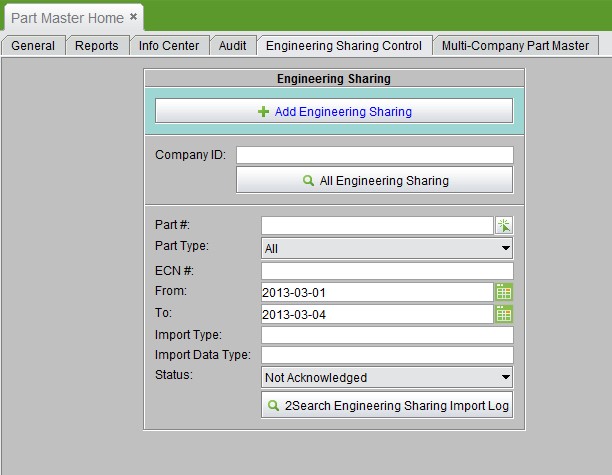
The engineering sharing control is for sharing parts and drawings among companies . Through the task scheduler, the shared information is exported to a network server, where other companies can import information and get the latest parts information. For example, the head office can set the task of regularly exporting parts information; the subsidiary regularly sets import parts information tasks, which can realize both parts information sharing and synchronization. Here we look at the specific operation of engineering information sharing.
 |
To add a sharing part for engineering sharing, click “add engineering sharing” to enter the adding interface:
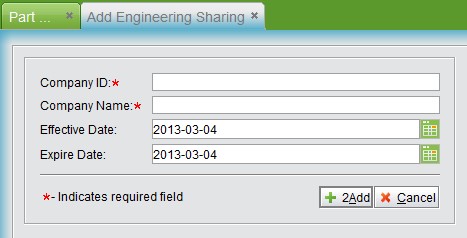 |
Input “Company ID” and “Company Name.”
ID and Name are to specify the engineering sharing group, they have nothing to do with company information in the address book.
Input an “Effective date” and an “Expire Date” to confirm the sharing period.
Click “Add” to update part sharing and go to the update interface.
At the update interface, choose which parts to be shared:
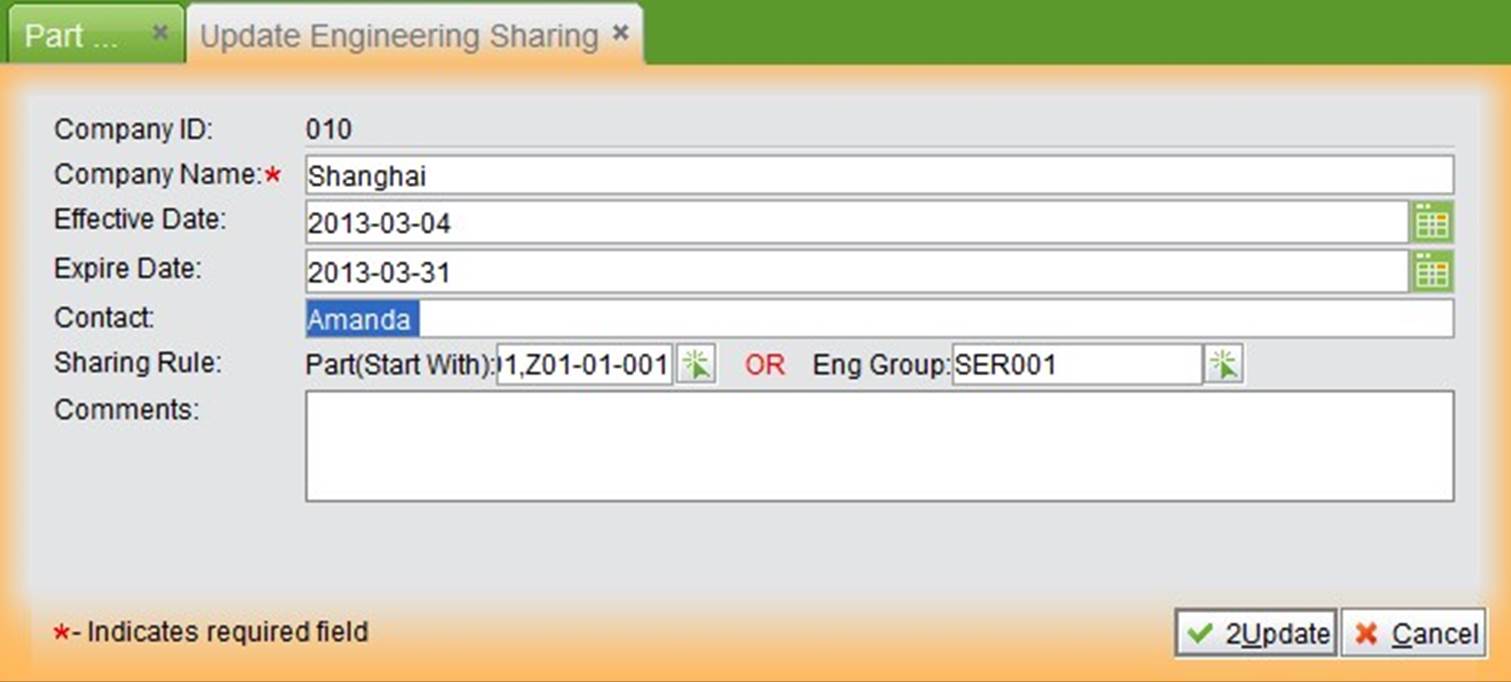 |
There are many was to add engineering sharing.
Click the “![]() ” button to choose which parts to be shared;
” button to choose which parts to be shared;
Click “Update” to finish. Open the engineering sharing interface to see the shared part added by clicking “Sharing Parts under Rule.”
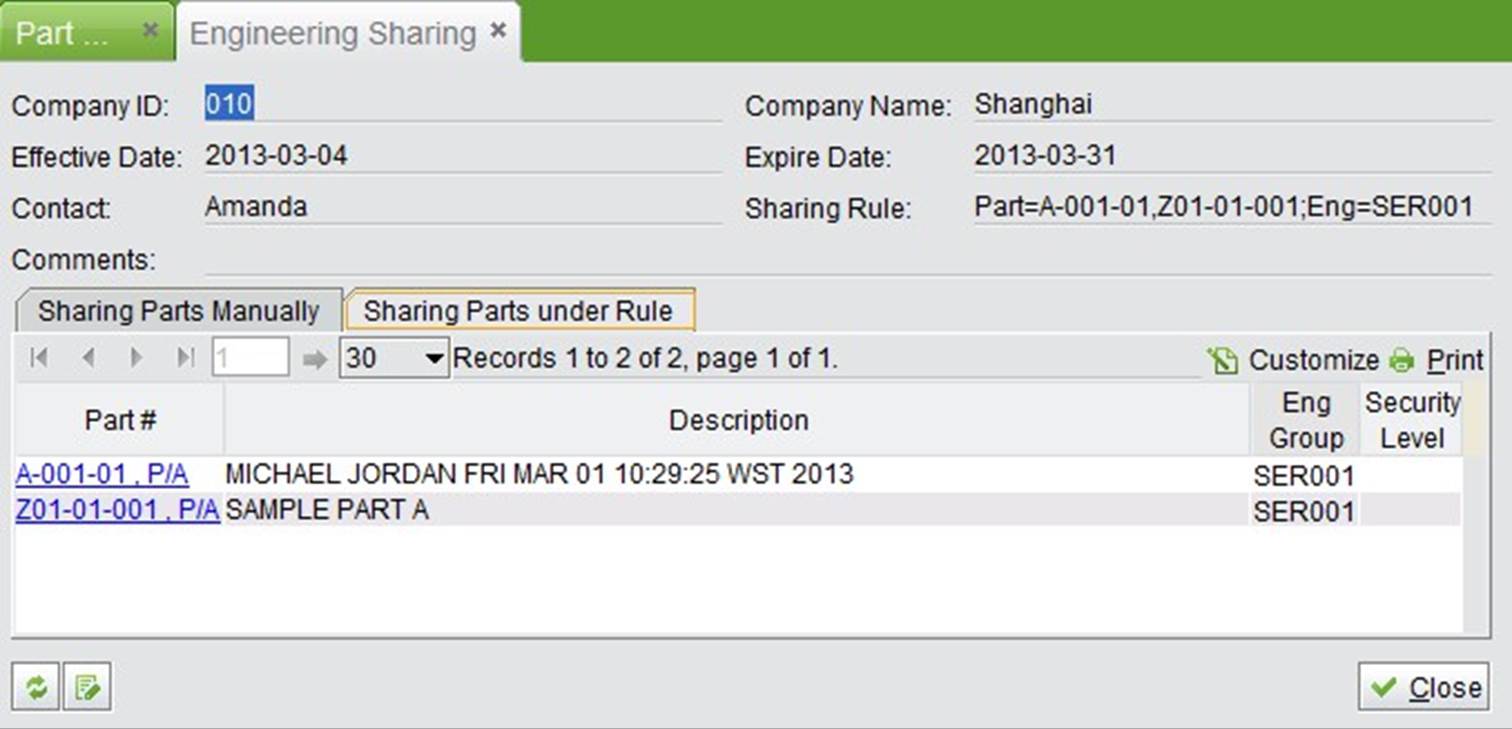 |
At the above interface, you can see that the shared parts can also be added manually.
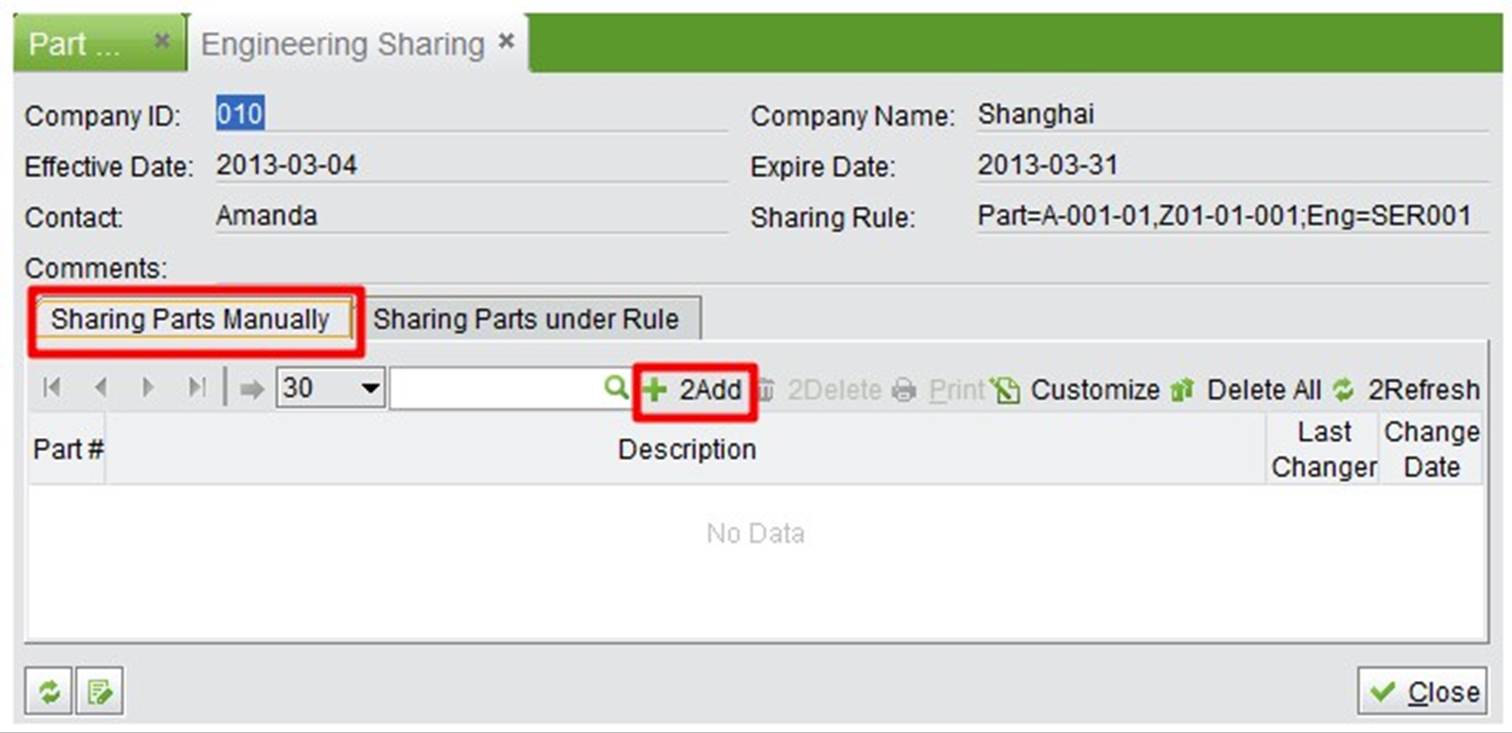 |
Click the “Add” button:
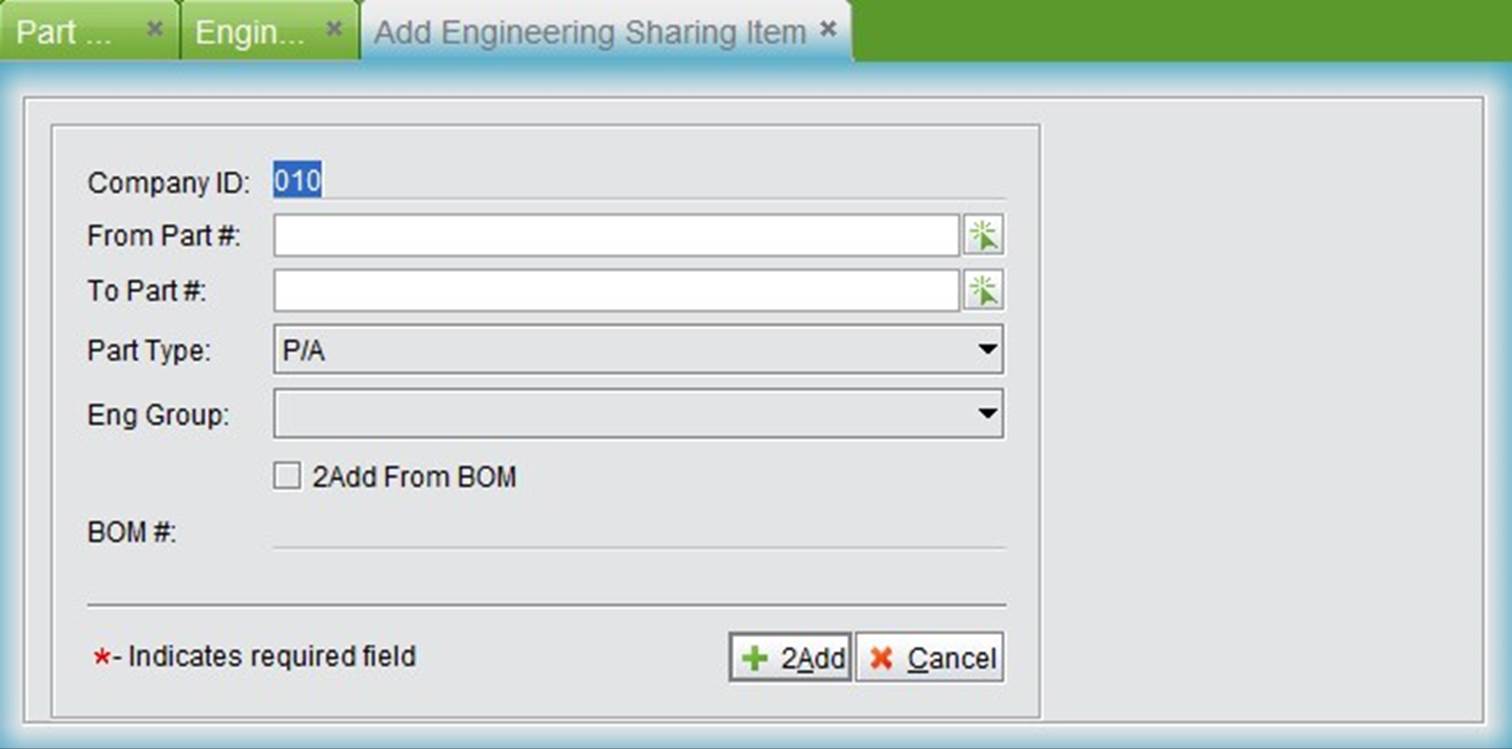 |
Input “From Part#” and “To part #,” click “Add” to choose the parts to be shared;
Check “Add from BOM,” input BOM#, and click “Add” to choose the parts to be shared.
You can delete the uneeded parts by selecting them.
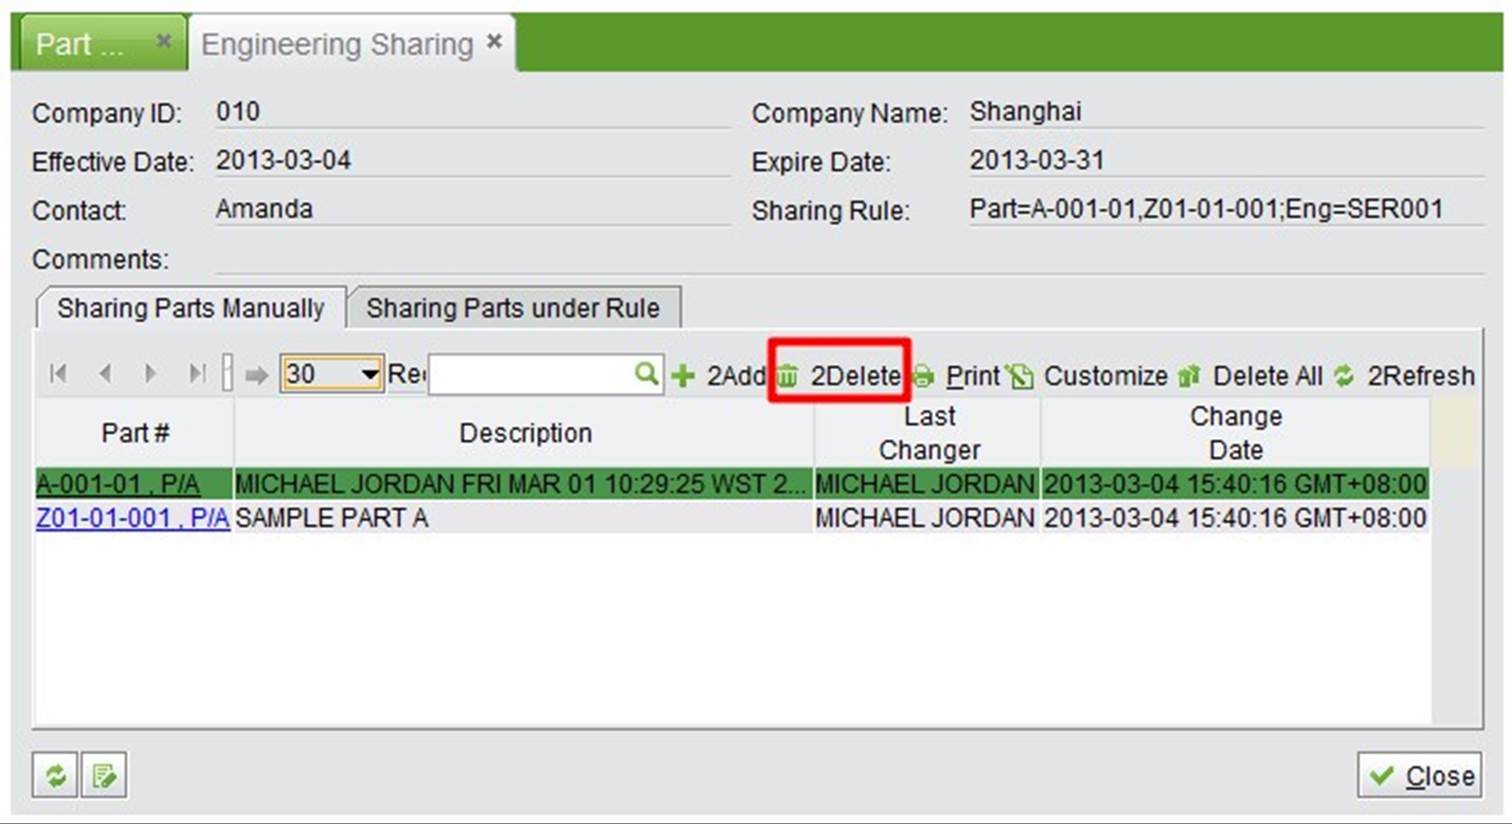 |
After adding shared parts, go to “Control Panel->Scheduler” to add part information to the export task.
 |
Click “Scheduler Management,” then “Add” at the bottom of the scheduler management list interface to add a task:
At the below adding task interface, fill out the detailed content of the task:
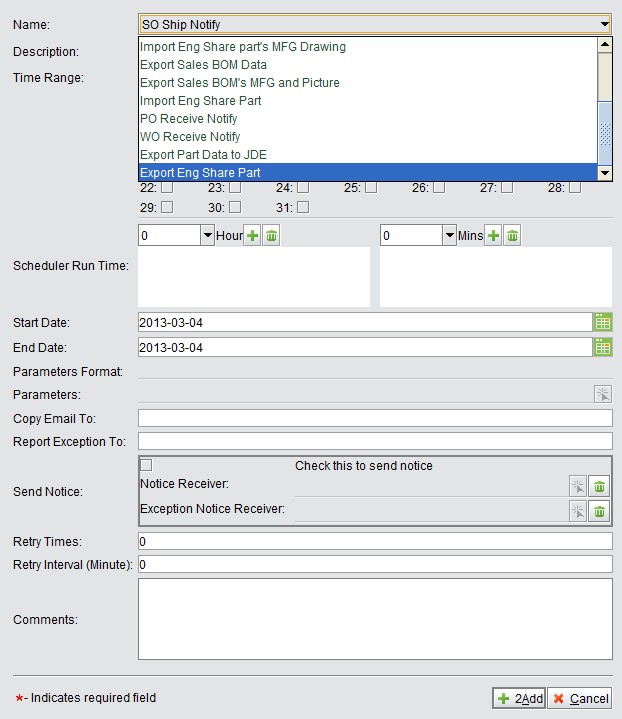 |
Click “Add” to finish adding. After that, 2BizBox will export the shared part information in the specified time.
In the last section, sharing Part Company was introduced; next, we need to setup the engineering sharing part import task. Similarly, go to “Control Panel->Scheduler,” add task” Import Eng Share Part,” other settings are the same as exporting engineering shared parts. Note: the run range of import and export tasks should be the same, import run time should be a little later than export’s to make sure the information update is effective. Also, while setting “Parameters,” the import and export server address should be the same.
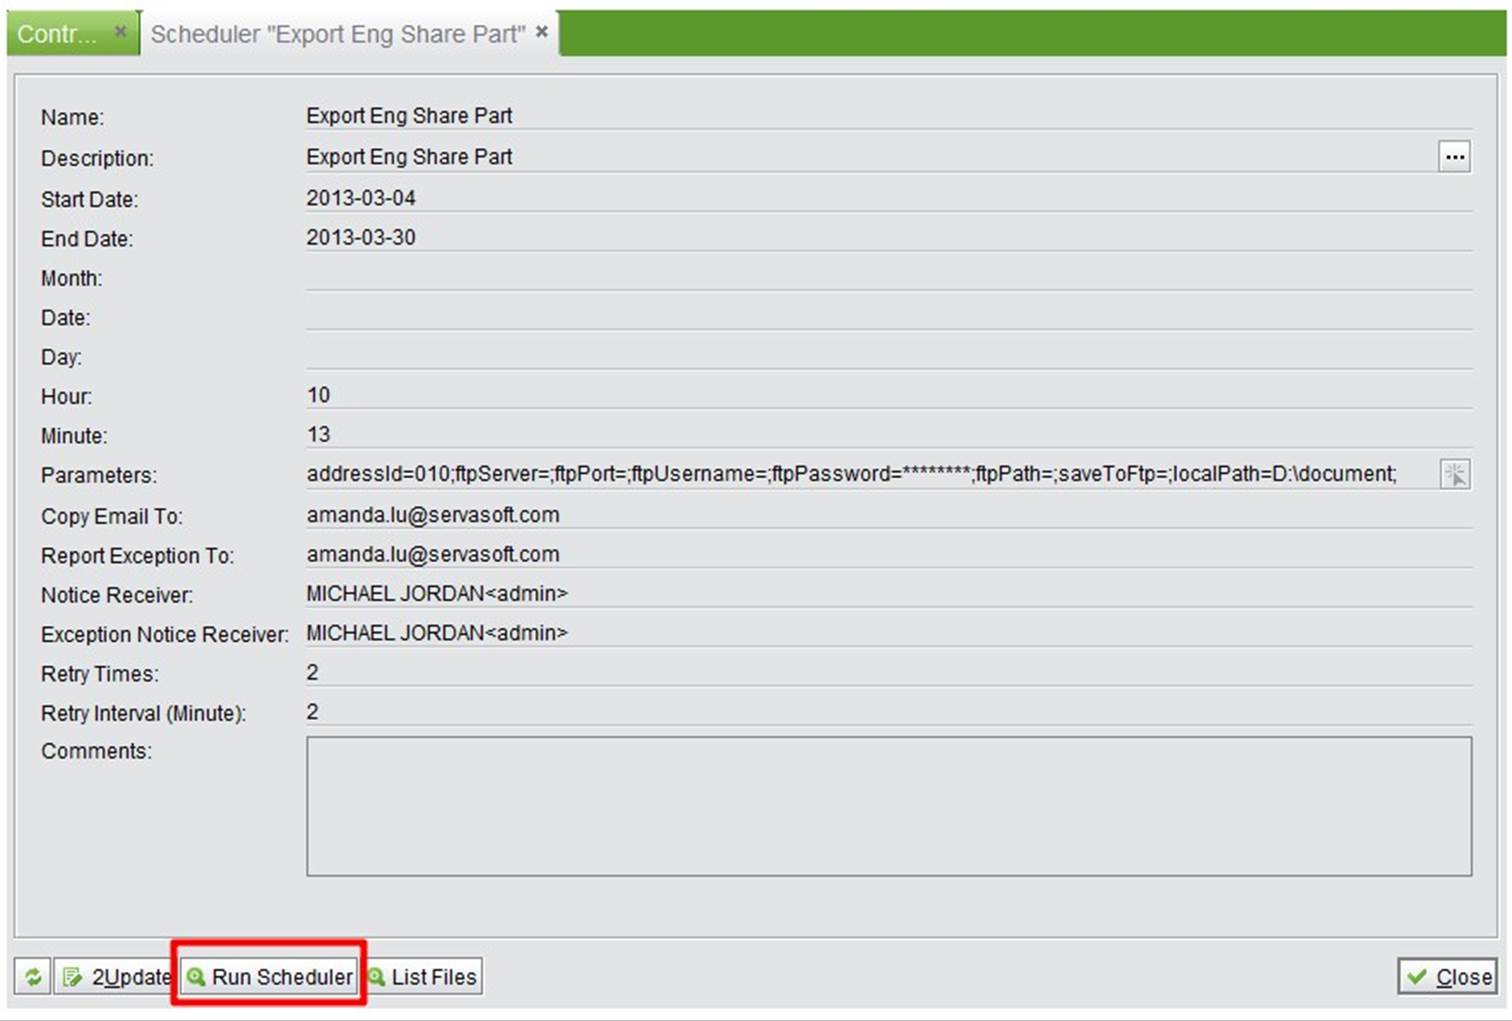
When the importing and exporting tasks are finished, test if the tasks run successfully. At the “Scheduler Management” interface, click the” Detail” at each row to check for detailed task information.
 |
Then click “Run Scheduler” at the bottom of the newly opened interface; when the “Operation Finished” window opens, to check server to see the newly generated part information.
 |
The company sharing the part also needs to test if the import task runs successfully in the same way.
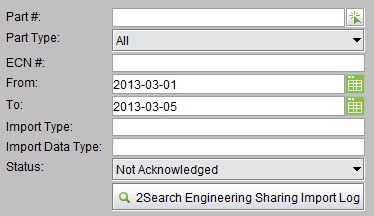
When the import is finished, go to “Engineering Sharing Control->Search Engineering Sharing Import Log” to see all imported shared parts, and acknowledge them. For parts not acknowledged, visit the property, related quotes, sales, purchasing, work order, etc; a message will open.
 |
You can complete practical operations with the multi-company part master: put some parts into specified engineering groups where only specific users can edit these parts to keep some parts confidential. Through the engineering group, part editing permission management can be easily assigned.
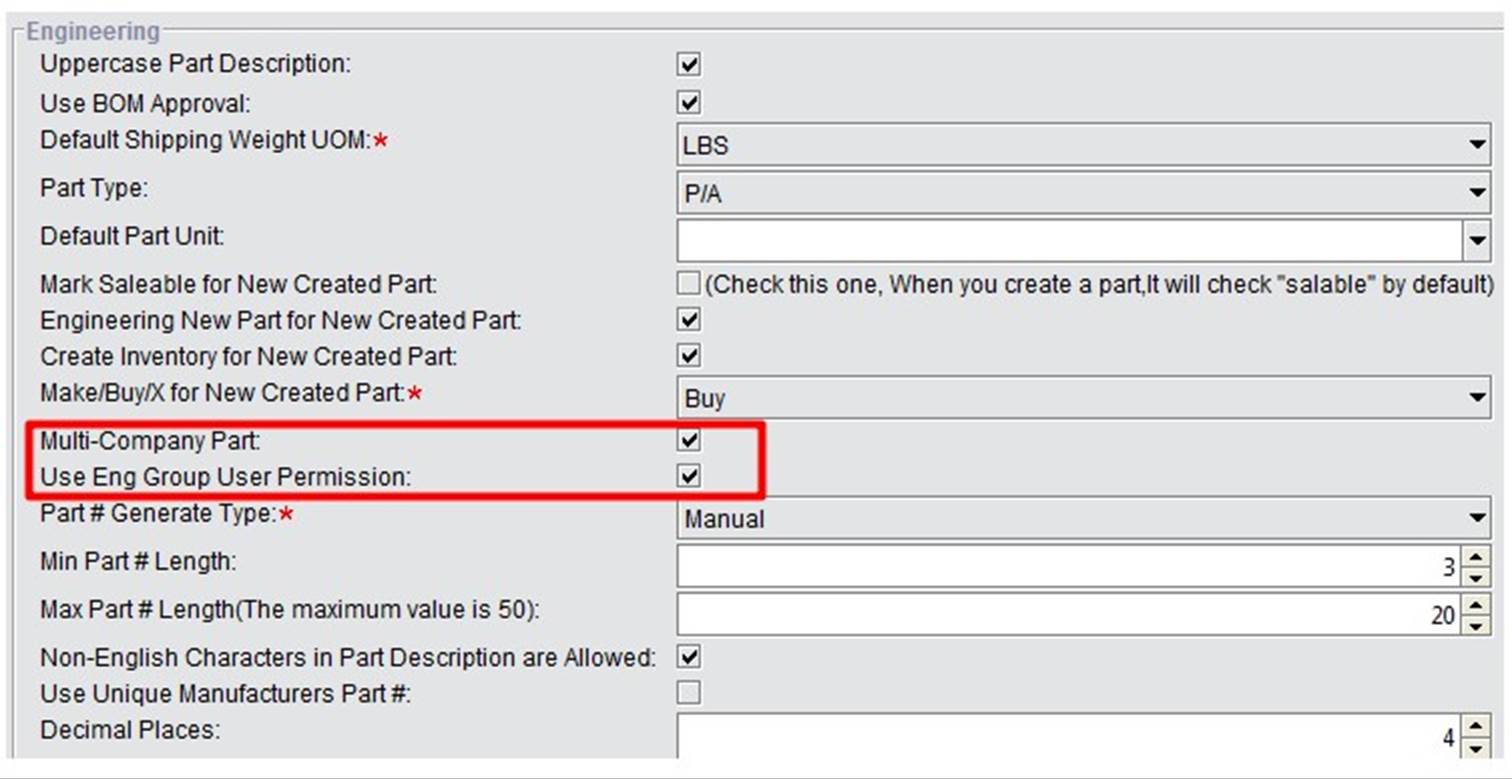
First, go to “Control Panel->General->Company Setting,” check “Multi-Company Part” and “Use Eng Group User Permission” to use the multi-company part master.
 |
After checking the the settings, restart the 2BizBox Client. A “Multi-Company Part Master” tag will appear under “Engineering Module->Part Master.”
 |
Click “Search Eng Group” to see all Eng group information. There, you can find out if the system has a current company as the default parent engineering group. Click “Add Sub Eng” and input an engineering ID# and name - click “Add” to finish adding the sub engineering group.
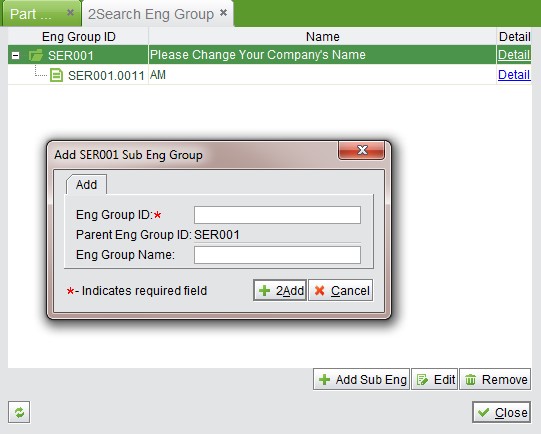 |
After you have added the Eng Group, you need to add an eng group user. Go to the “Multi-Company Part
Master” interface, click “Add Eng Group User,” and enter an “Eng Group” and “Employee ID.”
 |
Click “Add” and then “Update” to finish adding the eng group user. This also means that the user has permission to update parts in the eng group. With same operation, more eng group users can be added to the Eng group.
After the eng group and related group user have been created, where can you add the group parts? When you start “Use Multi-Company Part Master,” “Eng Group” appears at the part property interface. See the picture:
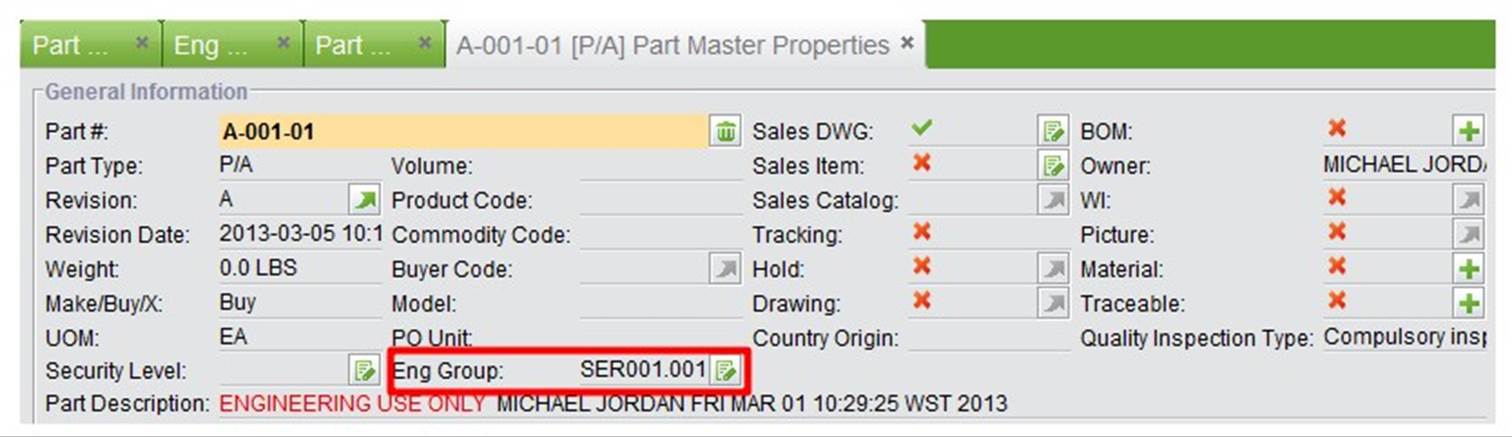 |
Click the button behind the “Eng Group,” and pick or change a new group for the part.
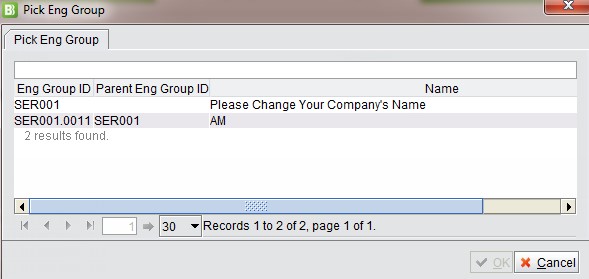 |
In addition, at the “Add Part” interface, you can directly assign the part to a related eng group by selecting one from the drop-down list.
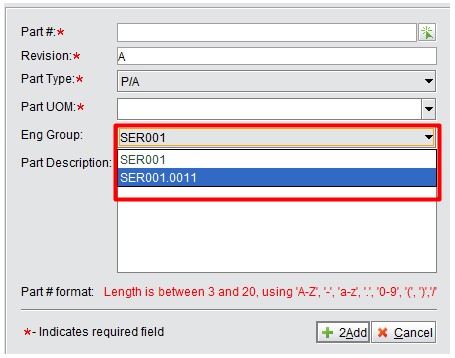 |
To test the newly added eng group user permissions, assign part A to engineering group S1 and part B to engineering group S2. An eng group S2 user can check part B with no problem, but when they attempt to look up and update part A, there this message will appear:
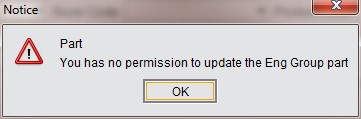 |