2BizBox® Manual |
Go back to 5.0 Main |
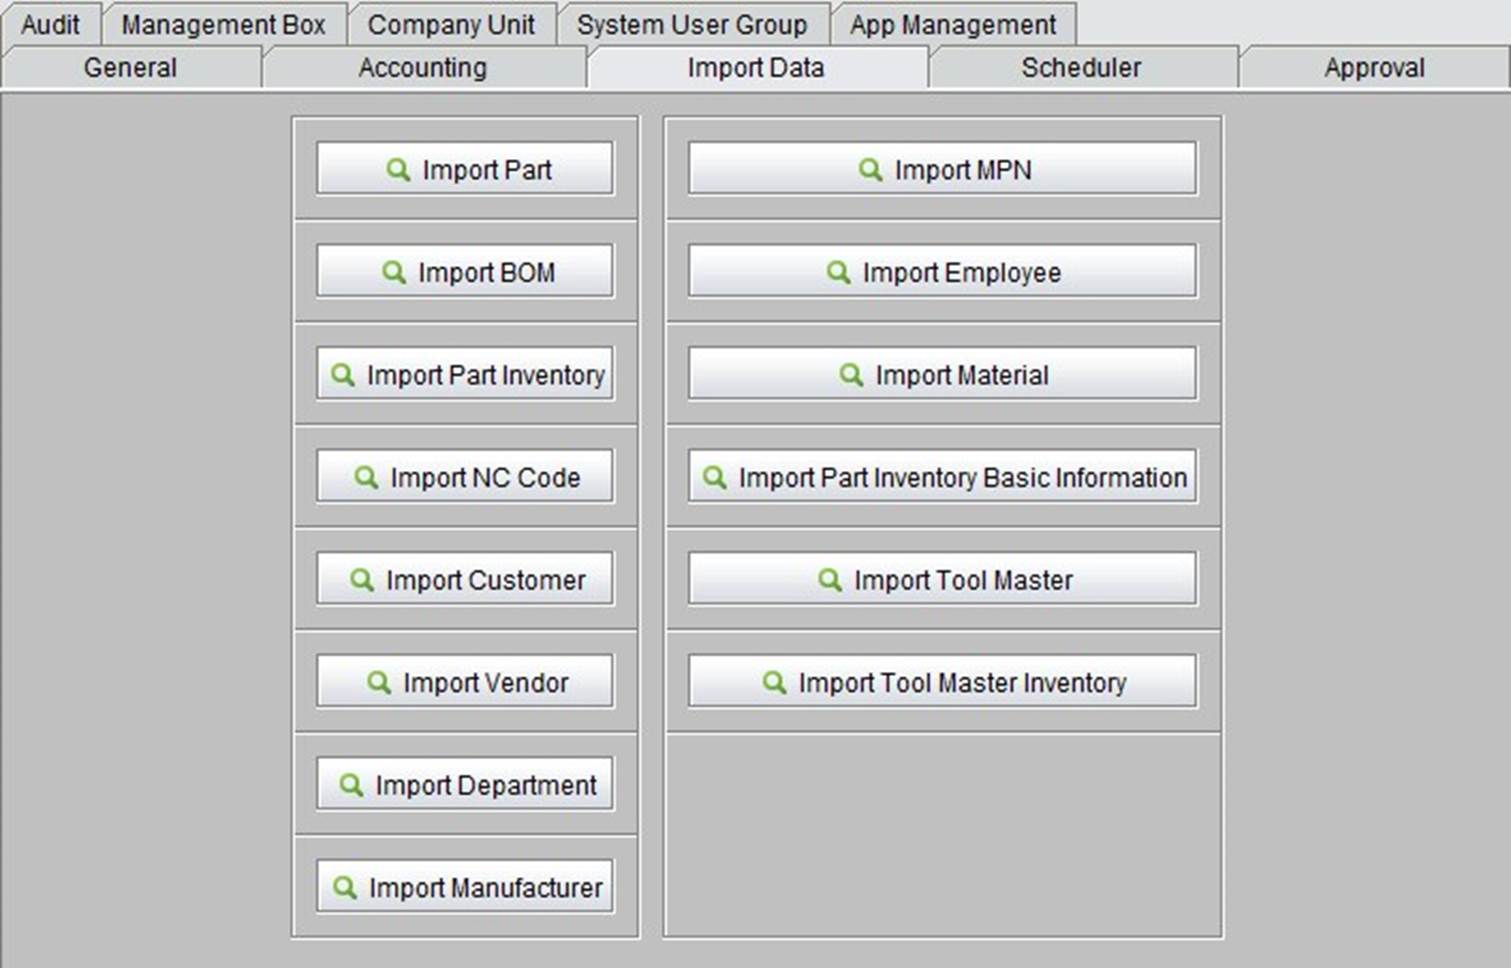
The 2BizBox system supports many basic items, like BOM, Customer, Vendor, Employee and tools being imported in bulk in “Import Data” sub module in the Control Panel. The 2BizBox system provides a set of templates for each data type. Prepare the data strictly according to template requirements. Steps for importing data into the system are always the same: (1) Download the appropriate template; (2) Prepare the basic data based on the template downloaded; (3) Check the data for errors; (4)Save the data to the template database; (5) Show any duplicate data; (6) Upload data. Now we will use “Import Part” as an example to show how to use the “Import Data” function:
|
The “Import Part” function is used to import a part’s basic information, like part number, part type, part UOM, description, etc. Oftentimes, a company will have thousands of parts that are impossible to add one by one. In this case, the template provided by 2BizBox will be very helpful. After downloading the corresponding template, prepare the basic information based on the template requirements to be imported into the system in bulk with the function.
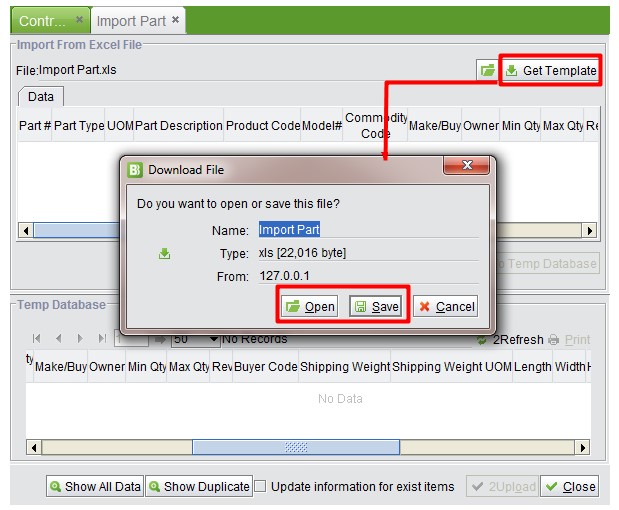
Clicking ”Import Part” will take you to the import interface, which is divided into two parts. Click the top right button“![]() ” to open the template with formatting xls.
” to open the template with formatting xls.
 |
All templates contain two sheets inside: “Template” and “Description.” “Template” provides all basic information needed for a part, but not all are required items. Refer to the “ Description” sheet for further information. For example, notice that “Part Number,” “ Part Type” and “Part UOM” are all required when importing a part, and “Part Type” must be added in the system.
 |
After the basic information is prepared, let’s see how to import it. Click “Import” to choose the file, and the part information will appear for the first part. If there is an error, the system will provide a diagnosis, e.g., error: part type does not exist. You can click the error data to combat the issue directly.
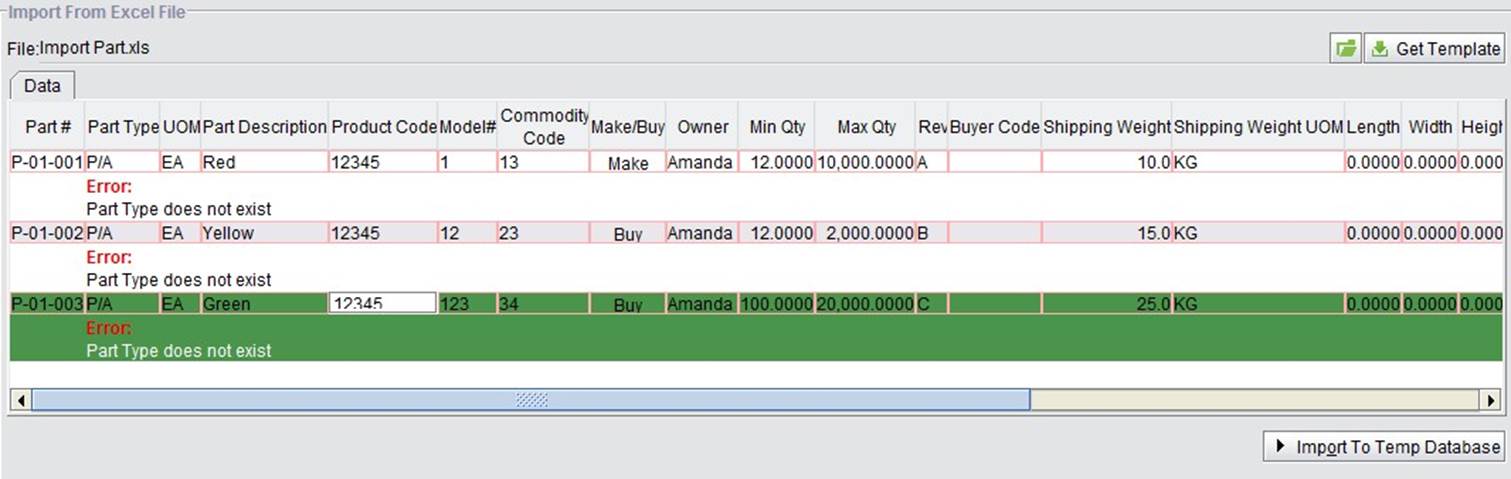 |
When the error is corrected, click “Import to Temp Database.” All the imported data will appear in the temporary database and the system will check if there is duplicated data or pre-existing data items. Existing data simply means that the part number and part type are the same as some data already in the system.
 |
Data in temporary database can be modified. When the modifications are completed, click “Update.” Click “Delete” to delete the data; “Show Duplicate” to check those duplicated date; and “Update information for existing items” to replace the old data with new data. Be cautious when completing this last step.
When you have confirmed that all information is correct, click “Upload”. All data will be imported to the 2BizBox system. Click “Clear Temp Data” to delete all data in the temporary database.
Import BOM means to import a Bill of Materials part and its related parts. The import format is as below:
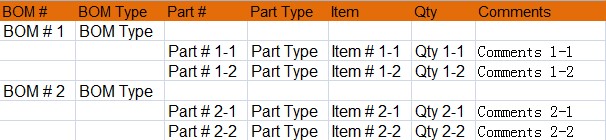 |
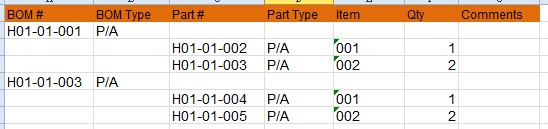
BOM Type, Part Number, and Part Type must already exist in the system. The “part number” below “BOM” is also part below the BOM part. “Item#” is BOM item seq#, by 001, 002..; “Qty” is BOM part item’s quantity. You can import multi-level BOM. For example: part H01-01-001 is assembled by one H01-01-002 and two H01-01003, and H01-01-003 consists of one H01-01-004 and two H01-01-005, then the BOM template can be made as pictured below:
 |
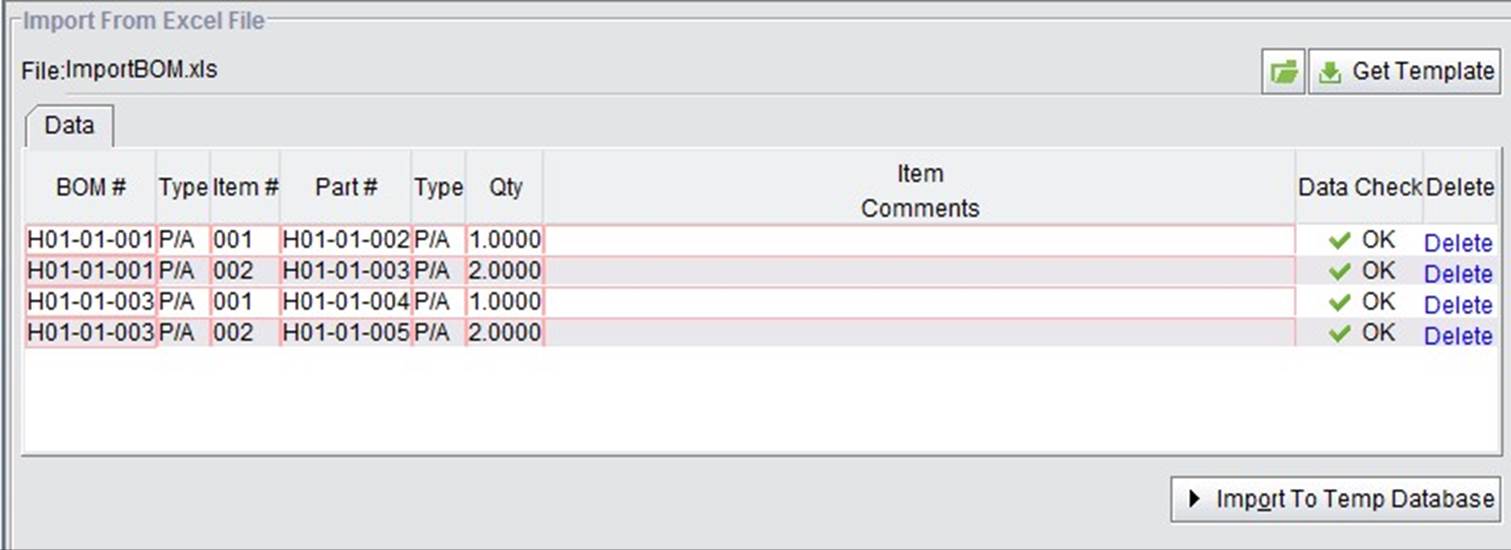
Click “ Import” to import the BOM information as shown below. If no error occurs, click “Import to temp database:”
 |
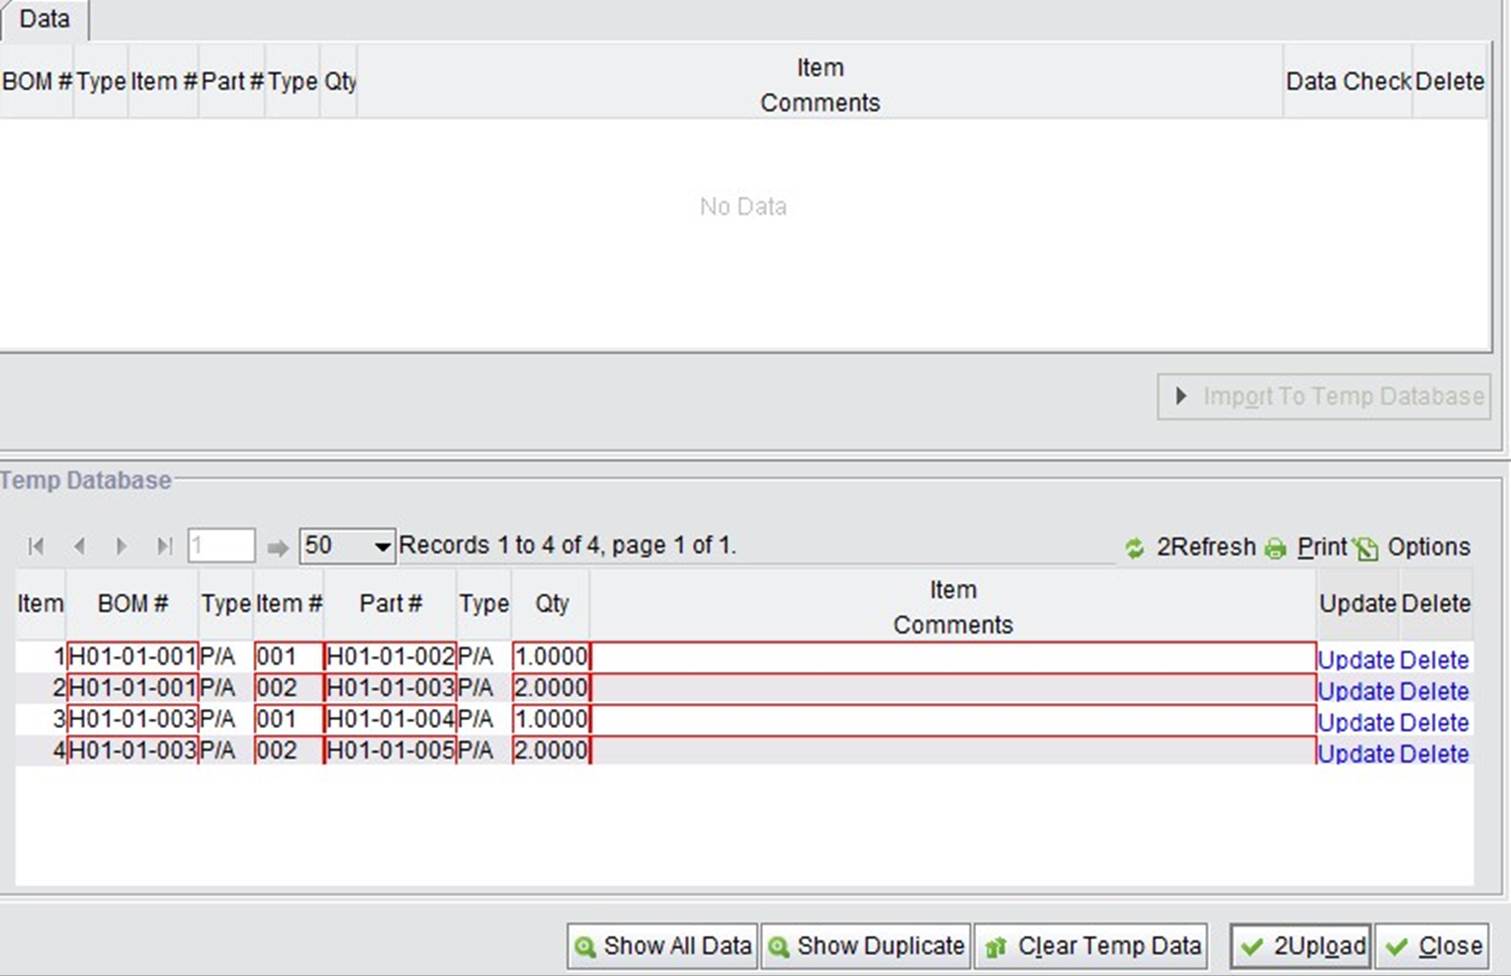
After the data is imported to the temporary database, the system will check for duplicated data. Pre-existing and repeated BOM cannot be imported again. Click “Show Duplicate” to view the duplicated information to update or delete it. When all the data is confirmed correct, click “Upload” to finish the BOM import.
 |
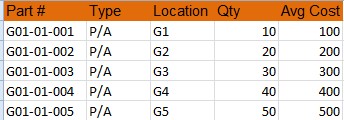
Import part inventory is used to import a part’s warehouse location, quantity and average cost. The template is shown below. The part and part type must be in the system already. Unit cost is part of standard cost.
 |
After importing, click “Import to Temp Database:”
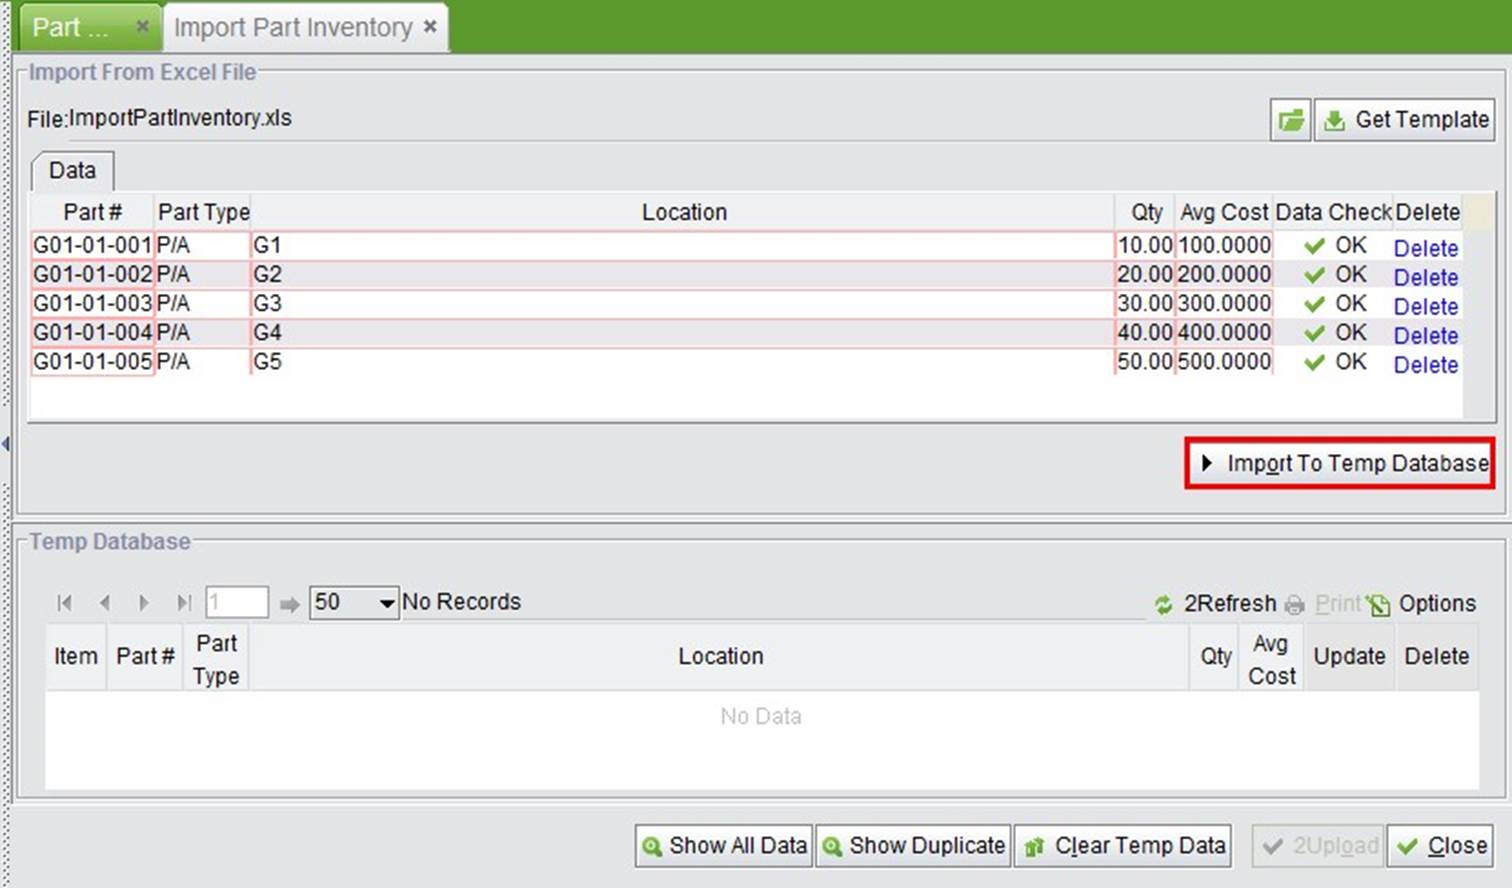 |
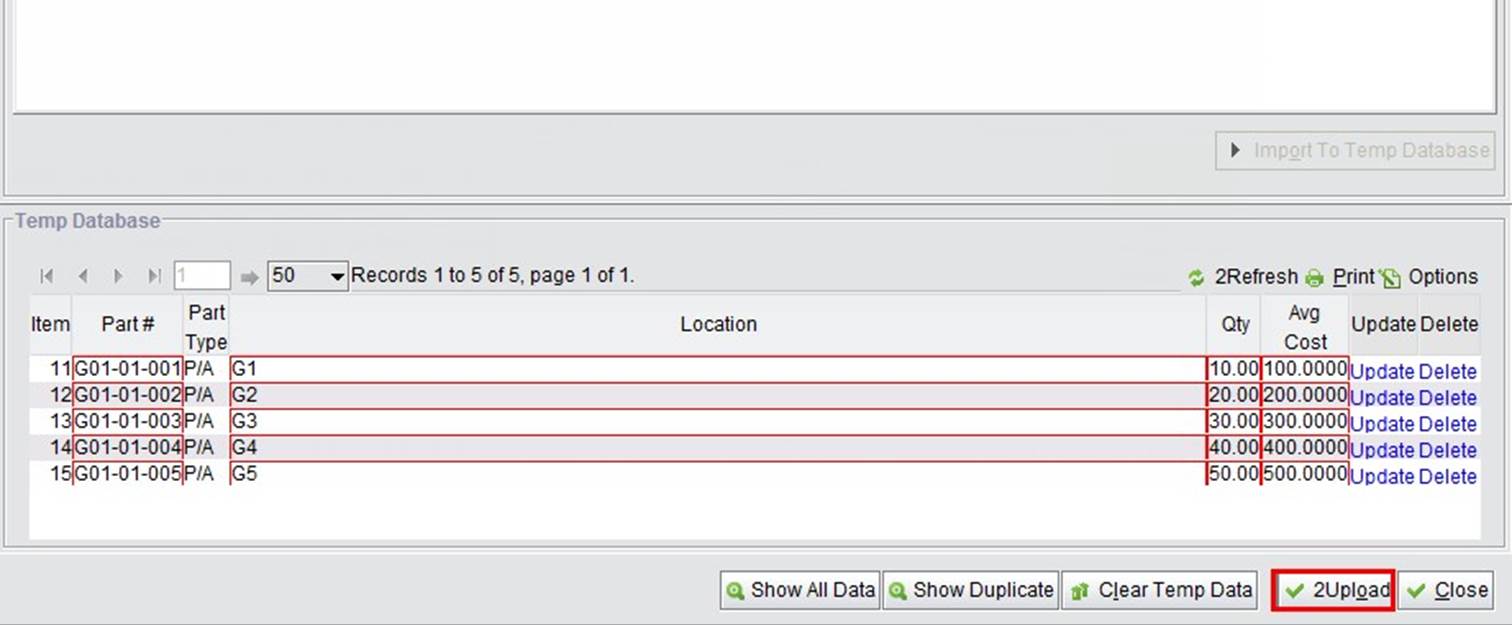
If no error occurs, click “Upload” to finish.
 |
NC code is the code description used when creating NCR. For more information, please refer to chapter “Quality Module.” The NC import template is quite simple; just fill in the code and its description.
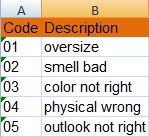 |
For the next importing step, refer to the chapter titled “Import Part.”
The importing information of customer, vendor and department is the same as those described above. The template is as below:
Address number, name and currency are required. Currency refers to the currency type previously added in the system. Customer/vendor/department address number cannot be repeated.
The import manufacturer template as is below; addresses number and name is required.
In MPN, or part manufacturer information in part master, you can import manufacturer information for an existing part. Part#, part type and manufacturer# are required and must exist in system already. Manufacturing part is also required.
Import Employee is used to import employee information in the HR module. Employee#, first name, last name and user name are required. The template looks like that shown below:
 |
A part’s material information records what type and what size the specific part is. Refer to Part Material Property in Chapter 6.9: Engineering Module, Material. The material template is shown below. Part number and part type are required. Inner diameter, outer diameter and length unit can be choosen in the drop down list.
 |
Part inventory basic information includes part information excluding part location and inventory quantity. The template is shown below:
Importing Tool Master is similar to importing parts. You can import a tool’s basic information, like tool number, tool type and tool UOM. Tool type must be added to system already.
 |
Tools inventory information includes a tool’s location, quantity and unit cost. The template is shown below. Tool# and tool type are required.