2BizBox® Manual |
Go back to 5.0 Mainhome |
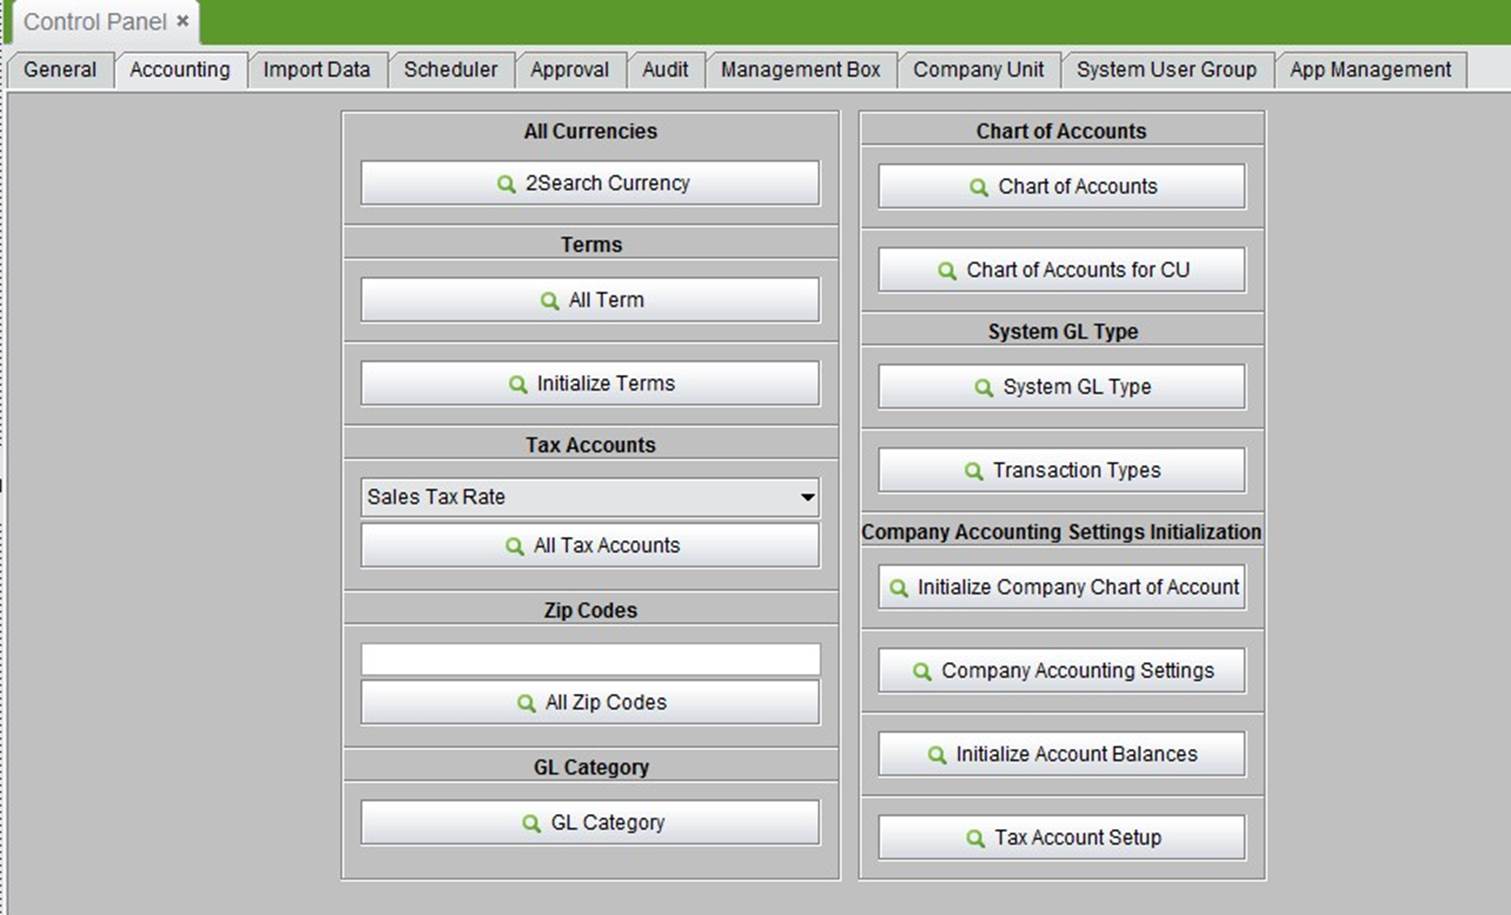
Go to “Control Panel->Accounting” where you can set most of the accounting parameters. For those accounting parameters not set during the initialization process, you may set or change them here. Except the introductions, which are explained here, further information will be covered in the “Accounting” module.
|
2BizBox supports multiple currencies, and all accounting can be calculated using different exchange rates. 2BizBox allows users to set local currency and original currency. Local currency is set at the initialization stage and cannot be changed once confirmed. Subsequently, you can add more currencies and set corresponding exchange rates.
Click “2Search Currency” in the “Control Panel” -> “Accounting” interface to see all currencies.
At the search results interface, click “2Add” to add new currency and input the desired currency name and symbol of the currency:
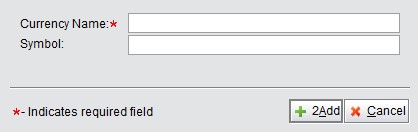 |
Click “2Add” to enter the currency update interface and click ”Update” to finish.
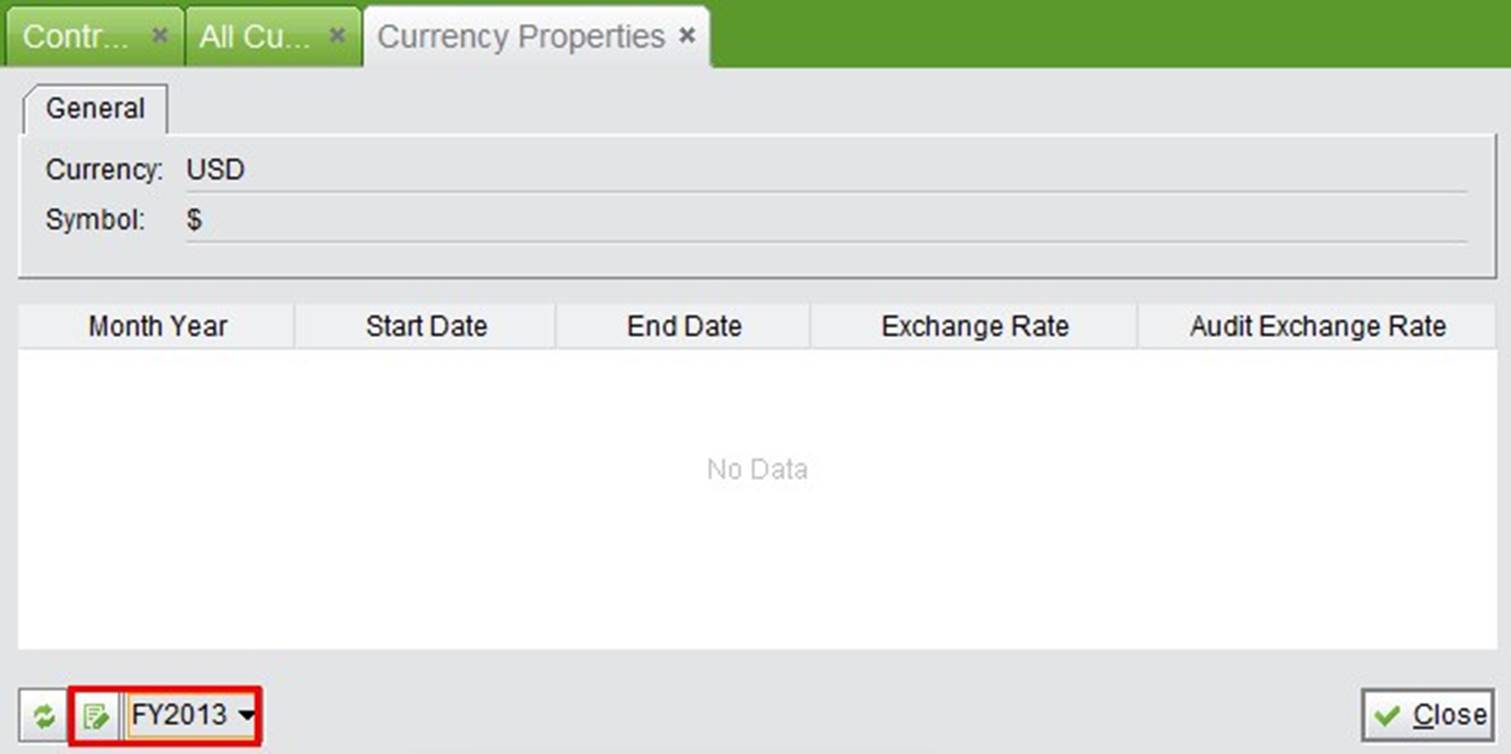
After returning to the general interface, you still need to set the exchange rate between local currency and original currency. Choose a fiscal year “FY20**” from the bottom drop down list and click “Update” to set the exchange rate.
 |
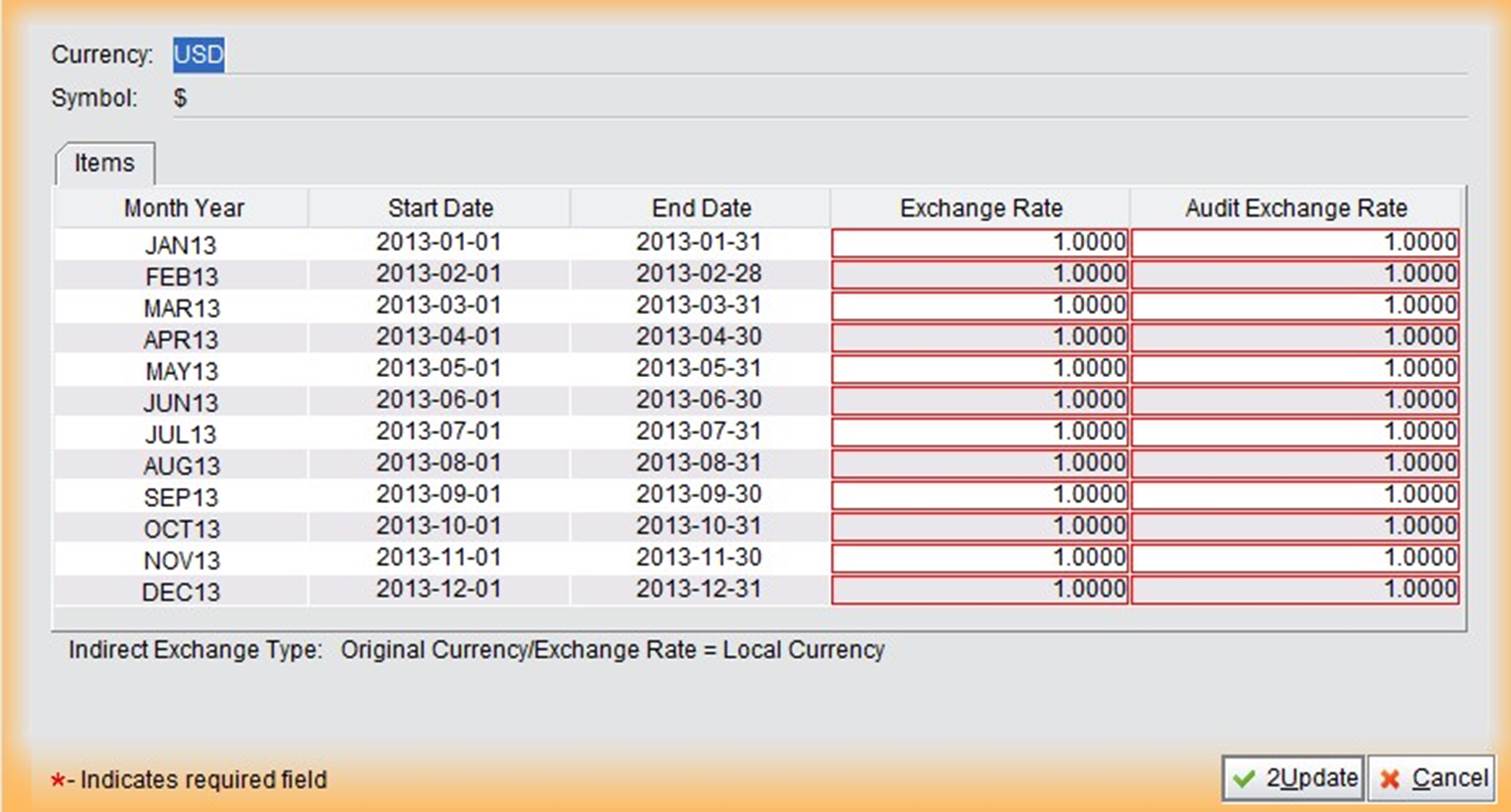
Before setting the exchange rate, confirm the exchange rate type in the accounting settings. These can be found in “Control Panel” -> “Company Setting.”
2BizBox provides two exchange rate types:
Indirect exchange rate: exchange rate=original currency/local currency Direct exchange rate: exchange rate=Local currency/original currency
Exchange rate types can be found below the exchange rate settings. Input the exchange rate in the first red column in advance, and edit it at the end of the accounting period. After adding a new currency, you may choose the corresponding currency when creating orders.
 |
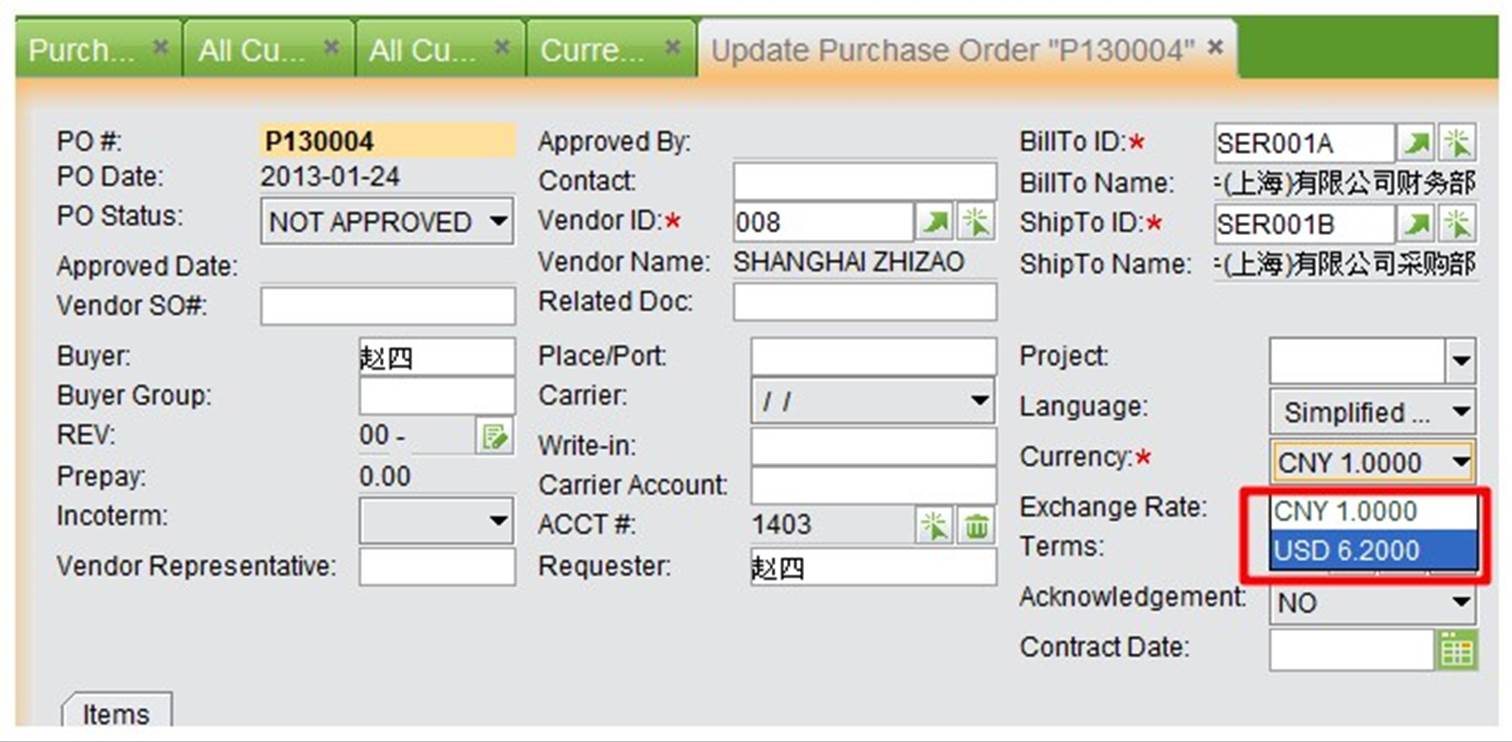
Additionally, you can set a currency for a particular customer/vendor, and then when creating a new order, the currency will be chosen automatically.
 |
Here the terms mainly refer to the payment date required by the vendor. The payment term can be added to the address book and follows the process of SO/PO/AP/AR. You may also manually select the payment terms for SO/PO/AP/ARs when updating. With the payment terms, the accountant can check, do accounting age analysis, and forecast cash flow by AP or AR payment terms of related orders.
Click “Control Panel” ->“Accounting” ->“All Terms” to see all payment terms in the system.
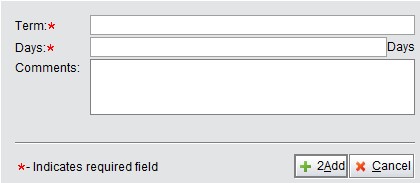
In search results, click “2Add” to create a new payment term by filling in the name, days and comments.
 |
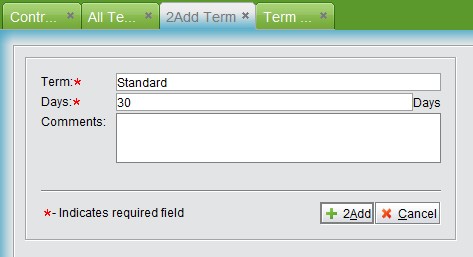
Then click ”Add” to generate an ID automatically and click “Update” to finish.
 |
To initialize terms is to initialize payment terms filled in some orders manually but not existing in the system. You can replace the current payment terms with these. Click “Initialize Terms” to enter the initialization interface where all old terms are listed. Check them; click “Add into Term,” move the old terms to the new payment term system. Finally, click “Replace Term in Orders” to replace all old terms of orders with new payment terms.
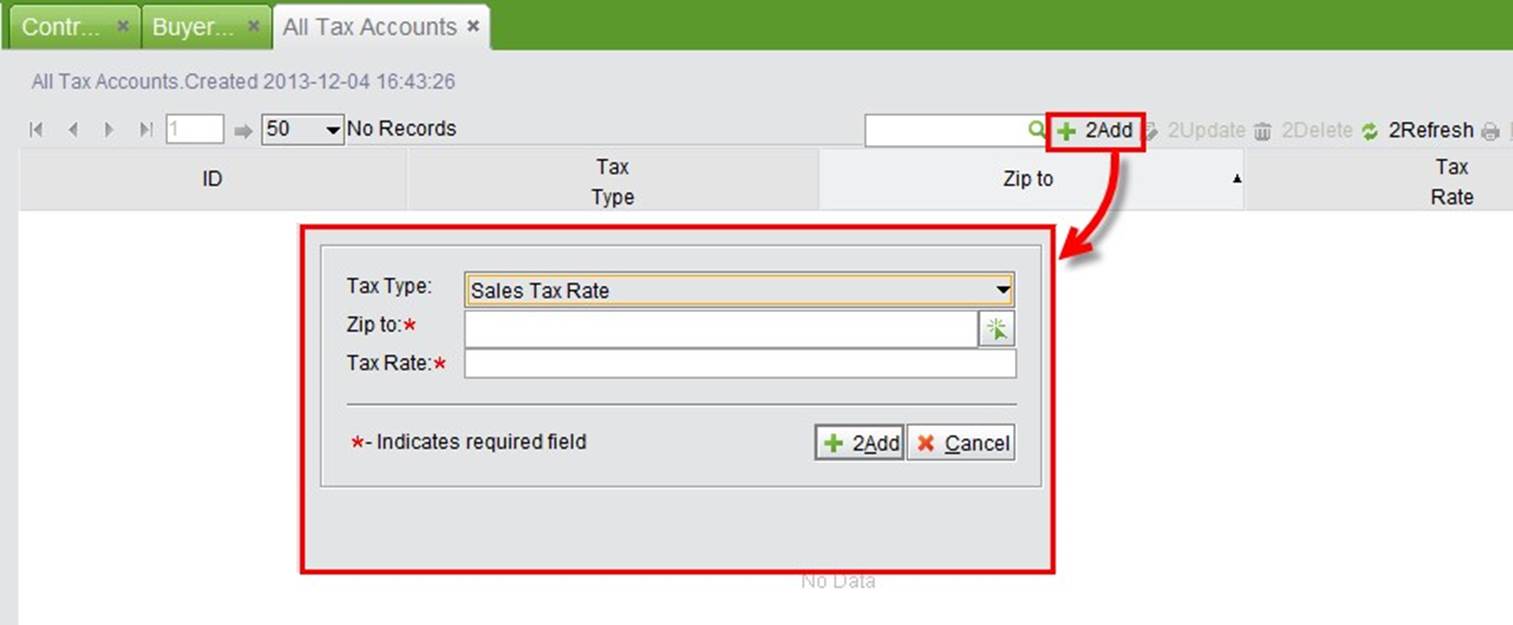
Tax accounting in 2BizBox includes a sales tax rate and a purchase tax rate. You can also set different taxes by first adding a zip code.
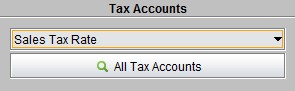 |
Click “All Tax Accounts” to see all tax information. At the search results interface, click” Add” to add a new tax. Choose the desired tax rate type, input a zip code and tax rate, and click “Add” to confirm the information. A default ID will be generated automatically.
 |
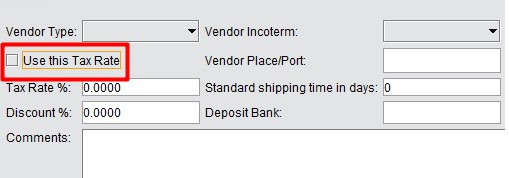
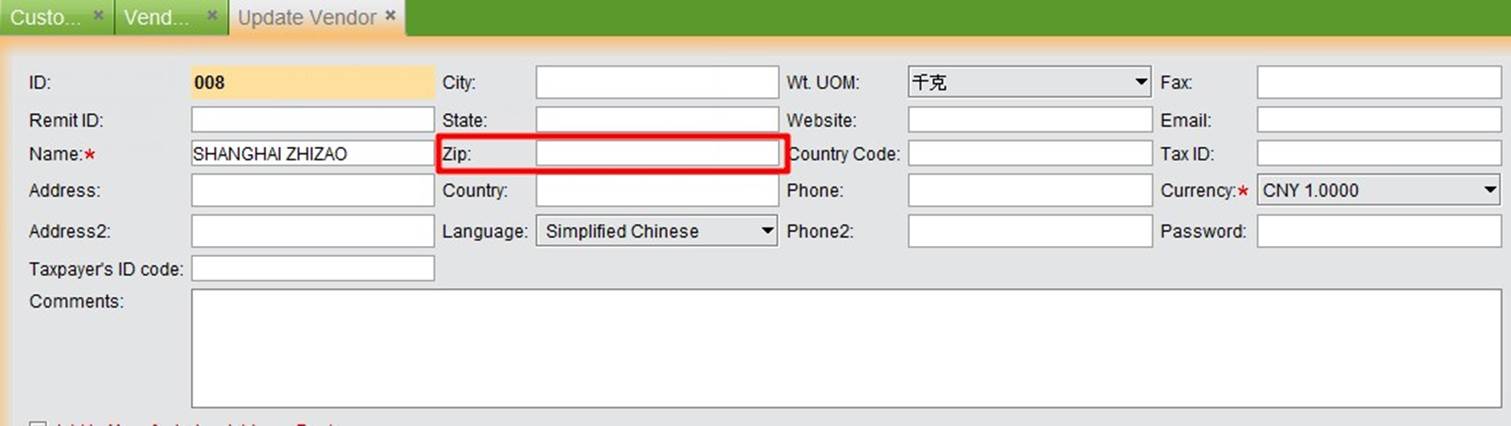
After finishing the tax update, enter “zip code” in the customer/vendor address interface. Thus, when creating a corresponding sales order or purchasing order, this tax rate will be used. Be sure not to check the “Use this Tax Rate” box, otherwise, PO or SO will use the tax rate set in the address book. See below:
 |
As discussed in the last section, a zip code is used for adding sales tax and purchase tax.
Zip code tax is only applicable for users in the United States, which does not have a VAT system. Different states have different consumer tax rates. Consumers in different states, areas, cities may have different tax rates for various commodities. Zip codes are also used in the address book. You can set the tax rate for different vendors/customers according to your company’s needs.
 |
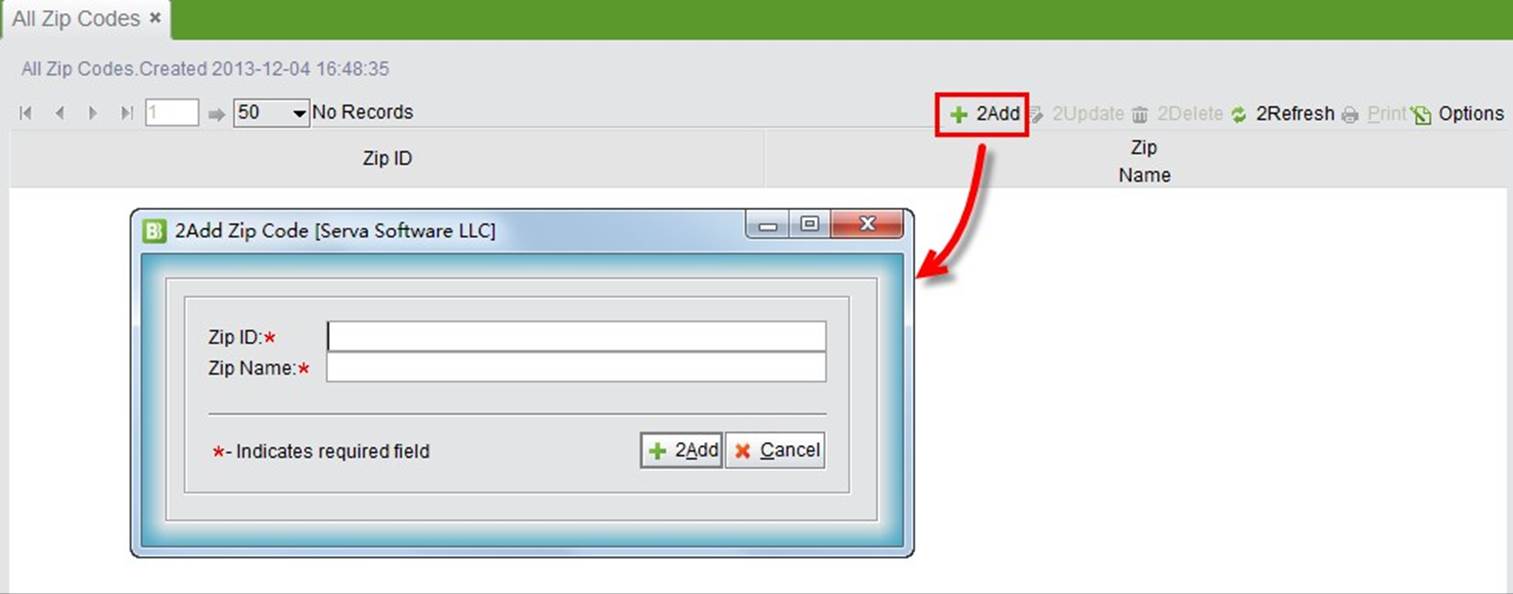
Click “All Zip Codes” to see all zip codes in the system.
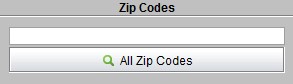 |
At search results interface, click “Add” to add a new zip code. In the adding interface, fill out the zip code ID and name.
 |
Provide entrances to edit your account chart, account chart for CU and view all transaction types.
Click the button “Chart of Account” to view your accounts chart. You can add, edit and remove the accounts from your account chart. Use the function buttons at the bottom to edit your account chart.
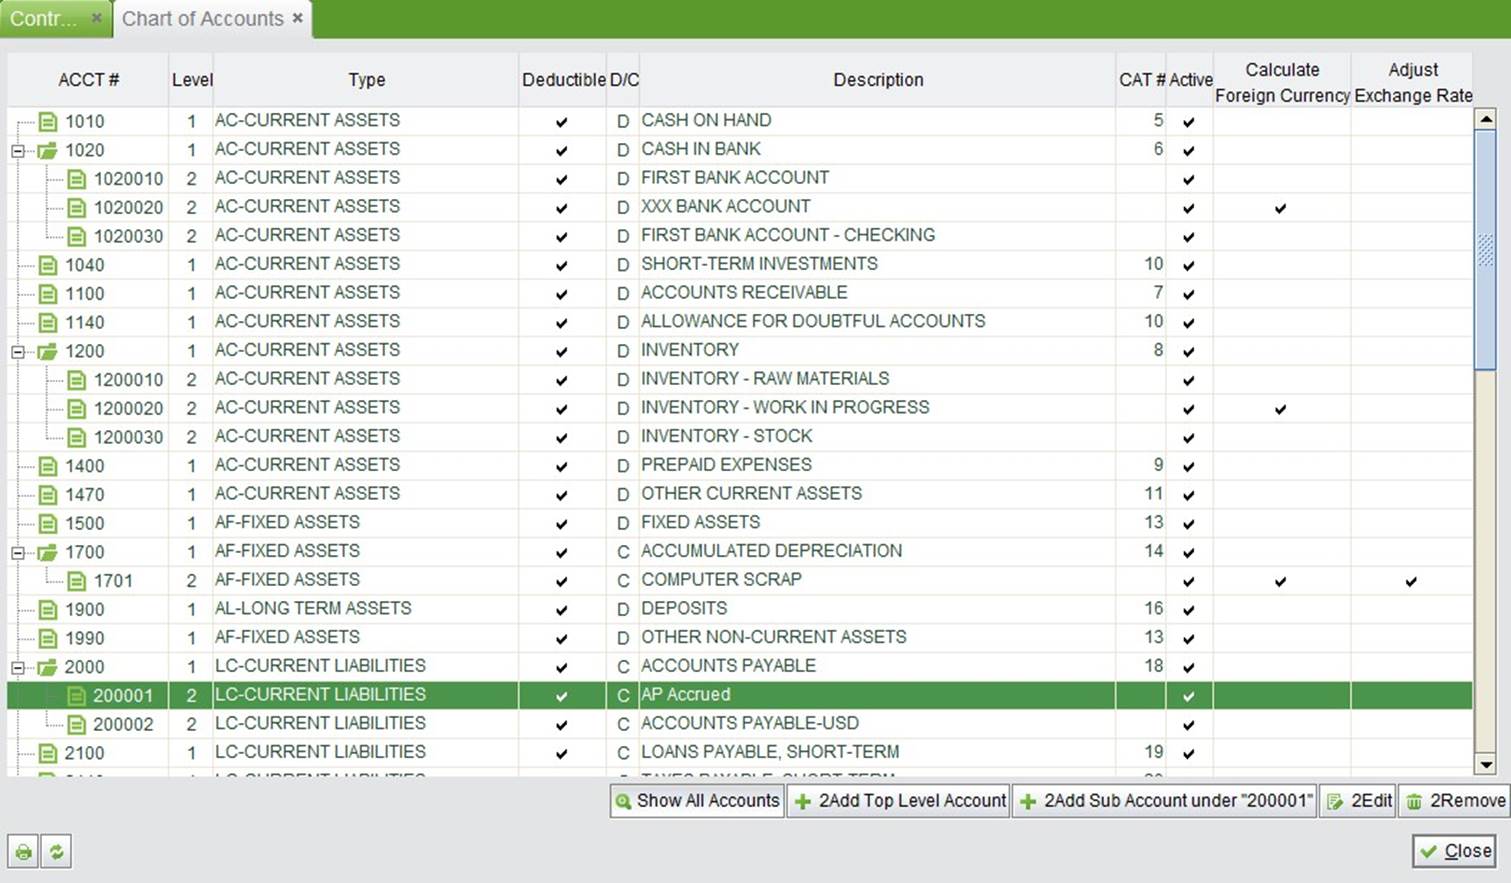 |
Show All Accounts: click to show all the accounts, including the inactive ones.
2Add Top Level Account: click this button to add a top level account. The following window will pop out for you to enter the required information of the account.
2Add Sub Account under “******”: select a top level account, then click this button to add a sub account under the selected account.
2Edit: click this button to edit a selected account.
2Remove: click this button to remove a selected account.
Edit the chart of accounts for the company unit. Company unit is added under “Company Unit” tab of the Control Panel.
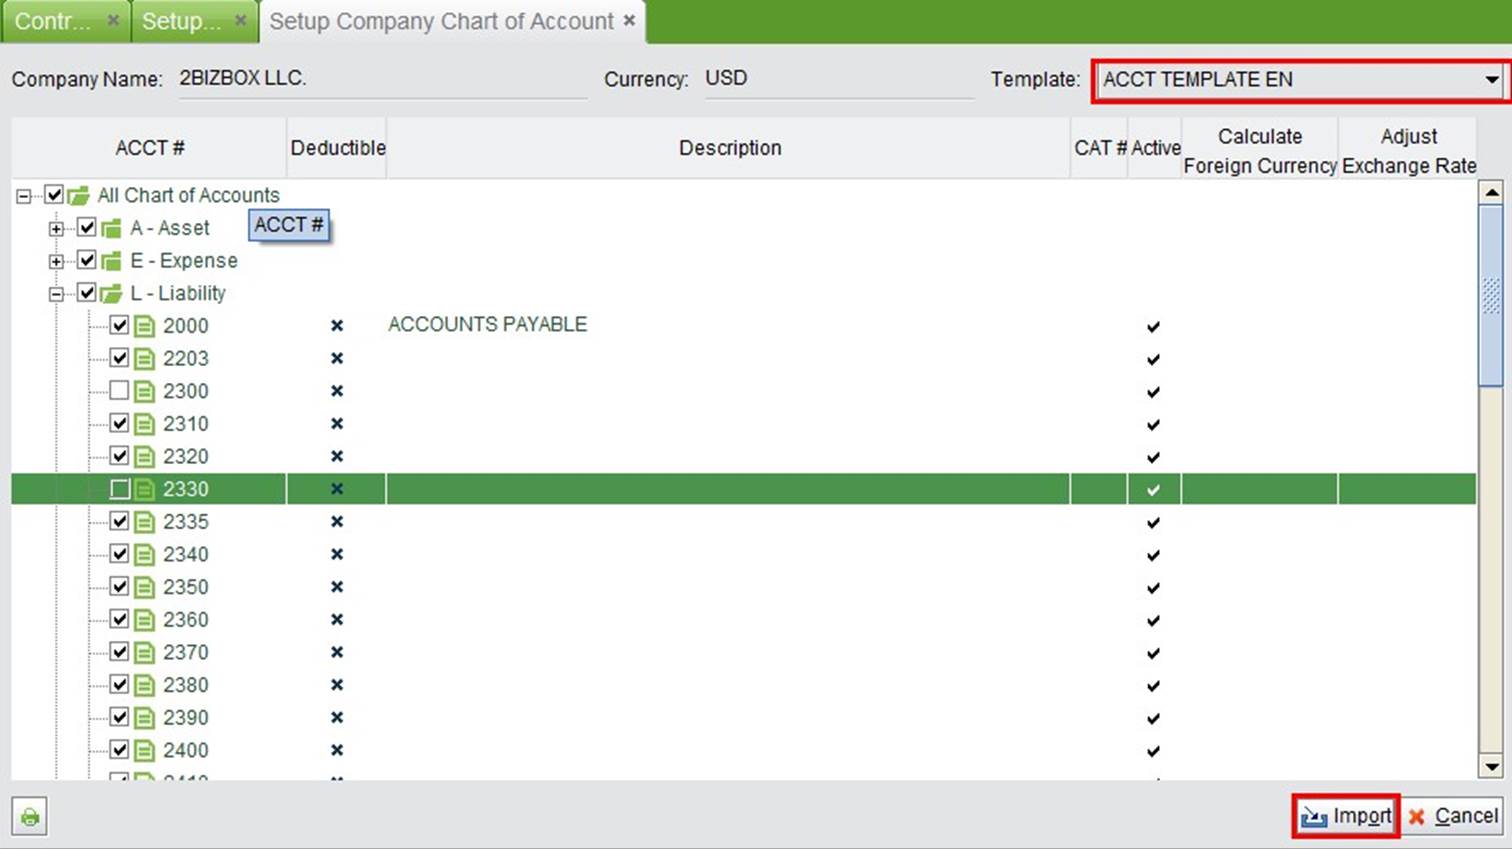
You can initialize a chart of accounts by clicking “Initialize Company Chart of Account” and completing the template provided. Select the needed account number, click the bottom right “Import” button to initialize, but note that the existing chart of account will be removed if you import the self-defined template.
 |
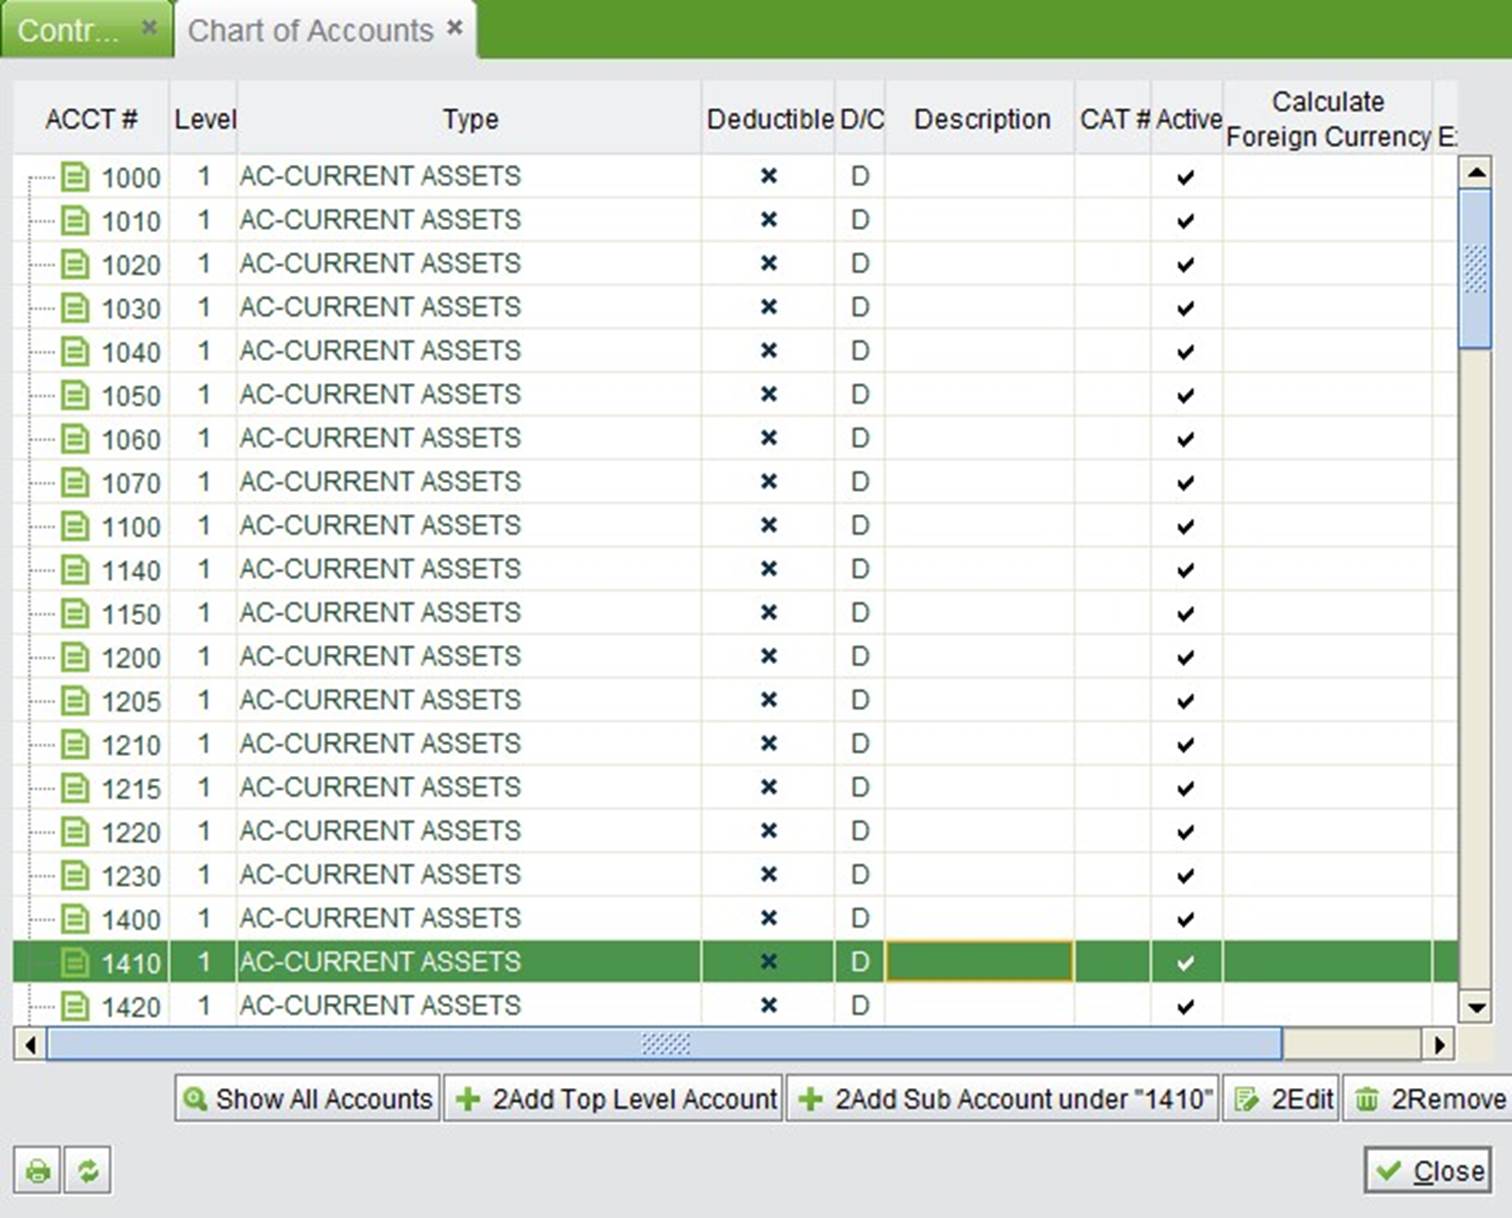
After finishing the initialization, go to the chart of account list where you can add, edit, or remove some account numbers.
 |
Also, you can edit the chart of accounts in “Accounting” ->“GL” ->“Reports” ->“Chart of Accounts.”
Provides entrances to initialize the account chart, change accounting settings, initialize account balances and set up tax account.
Initialize your company account chart by importing accounts from the account templates provided.
 |
Company Account Settings are the most complicated settings in 2BizBox involving every aspects of accounting related businesses of your daily operation. Most of the settings are compulsory and some depend on your accounting rules. Once click on one of the settings, you may edit it at the right side.
 |
Company Currency: Set local currency. This is set during system initialization.
Accounting Configuration: Select the accounting method here, the USA or Chinese.
Fiscal Year: Fiscal year is the time frame used for accounting calculation to reflect company accounting and operation results. China’s accounting rules require all companies to use the international calendar as the fiscal year: Jan 1st - Dec 31st, with each month as a ledger period. A ledger period of 13 or 14 days may also be used in Chinese accounting.
Retained Earnings Account: Retained earnings account includes the profit retained.
Inventory Cost Valuation Method: Inventory Cost Valuation is the calculation method for company product cost. There are two valuation methods in the system: Weighted average cost (WAC) and standard cost. Weighted average cost is the default valuation method. WAC uses the weighted average approach; both the inventory and cost of goods sold are based upon the average cost of all units in stock at the time of reporting. Standard cost uses the standard costing method approach. Both inventory cost and the cost of goods sold are based on the standard fixed cost assigned to the items within the item manager at the time of reporting. Work Order Debit Account: The default work order debit account is generally used by the receiver GL of a work order. It indicates increases in the inventory debit account.
WIP Start Using Date: Set work in production start using date. Once the date is setup, all issued parts to WIP can create WIP GL by “work order item WIP report.”
Work in Process Account: The default debit account of WIP GL.
Purchase Order Debit Account: AP post GL default debit account and scrap GL default credit account NCR of scrapped part.
Value-added Tax: Includes purchase tax and sales tax. If accumulating purchase (sales) tax is disabled, 2BizBox will not accumulate the tax on purchase (sales) orders to any specified chart of accounts. Instead, the purchase (sales) tax will be included in inventory with purchase (sales) parts. If accumulating purchase tax is enabled, it will either accumulate separately or accumulate together. To accumulate separately is to employ different tax rates to be posted to different charts of accounts. Sales tax that accumulates together will not be differentiated; all tax rate amounts will go into one chart of accounts.
Purchase Prepay Account: Debit account of prepaid payments GL.
Purchase Inbound Freight: Accumulated freight chart of account of AP posted to GL.
Manufacturer PO Debit Account: The default debit account for AP posted to the GL of a manufacturer’s PO. Sales Order Credit Account: The default credit account of AR posted to the GL; generally it involves the inventory commodity account.
Sales Prepay Account: The credit account of AR payments.
Sales Outbound Freight: Freight account of AR.
COGS: Account of AR COGS.
COGS-scrap: The default debit account of NCR for COGS scrapped GL.
Cost of Production: Account of machine cost during the process of production. Asset Depreciation Account: Set asset depreciation account Labor Cost: Whether to add labor cost for the company.
Machine Cost: Whether to add machine cost for the company.
Employee Labor: The account of employee labor cost during the production process.
Business Income: Business income account of AR posted to the GL.
Accounts Payable: Accounts payable setting. Set up different AP accounts according to currency types.
Vendor Payment Variance Account: This account is used for AP and AP credit Memos when there is variance between a vendor invoice amount and actual payment amount.
Accounts Receivable: Accounts receivable setting. Set different AR accounts according to currency type.
Payment Bank Transfer Fee: Set account for payment of any bank transfer fees.
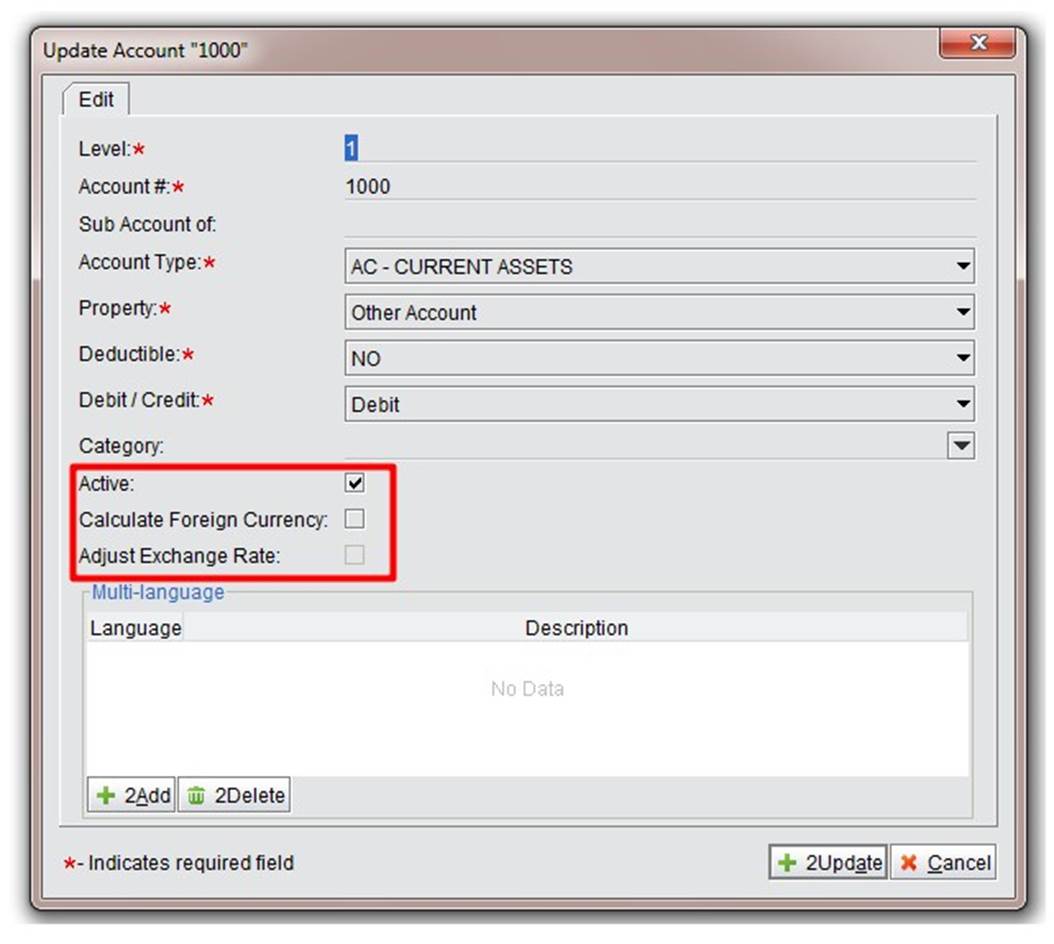
Foreign Exchange Gains/Loss Account: Account setting for foreign exchange gains/losses. For many companies in China, especially those doing foreign trading, it is necessary to deal with USD and RMB at the same time. There are two processes for foreign trading: (1) recording real-time gains/loss of foreign currency received or paid; (2) adjusting exchange rates for foreign currency when closing entries. For the fist option, input real-time exchange rates when receiving or making payments. GL and gains/loss will be generated automatically. For the second one, set the exchange rate of the foreign currency in advance. There are “Calculate Foreign Currency” and “Adjust Exchange Rate”options in the chart of accounts. For example, Serva Software LLC conducts business in USD and has a USD bank account; the two items need to be checked.
 |
Checking Account: The debit account of receiving payments GL.
Next Check Number: The default starting check number of a payment voucher.
GL Batch Number (yymm##): The number setting of a manually created AP.
Near Zero (Accept Vendor Invoice): This field is kept in the system, but not used now.
Accept GL Transaction back-dated this many days without complaint: Record the date range for which settings are editable in the system. The GL will be editable back dated the specified number of days from today.
Unbilled Receivable Account: Unbilled receivable account.
Unbilled Business Income Account: Unbilled business income account.
General Ledger Lock Date: The GL will be locked (not editable) on the date set here. If you are using the US accounting method, the user can set the date here. If you are using Chinese accounting, the field will be hidden; the GL lock date will be controlled by the accounting period.
Check Print Adjust: While printing, the check and vendor information margins can be adjusted.
Zip Code Tax Rate: the field function system kept now.
AP Accrued Account: Set the AP accrued account here.
Depreciation Reserves: Set the depreciation account, used for the credit account when receiving a dissembled work order.
Financing Expenses: Set the financing expenses account from the account list.
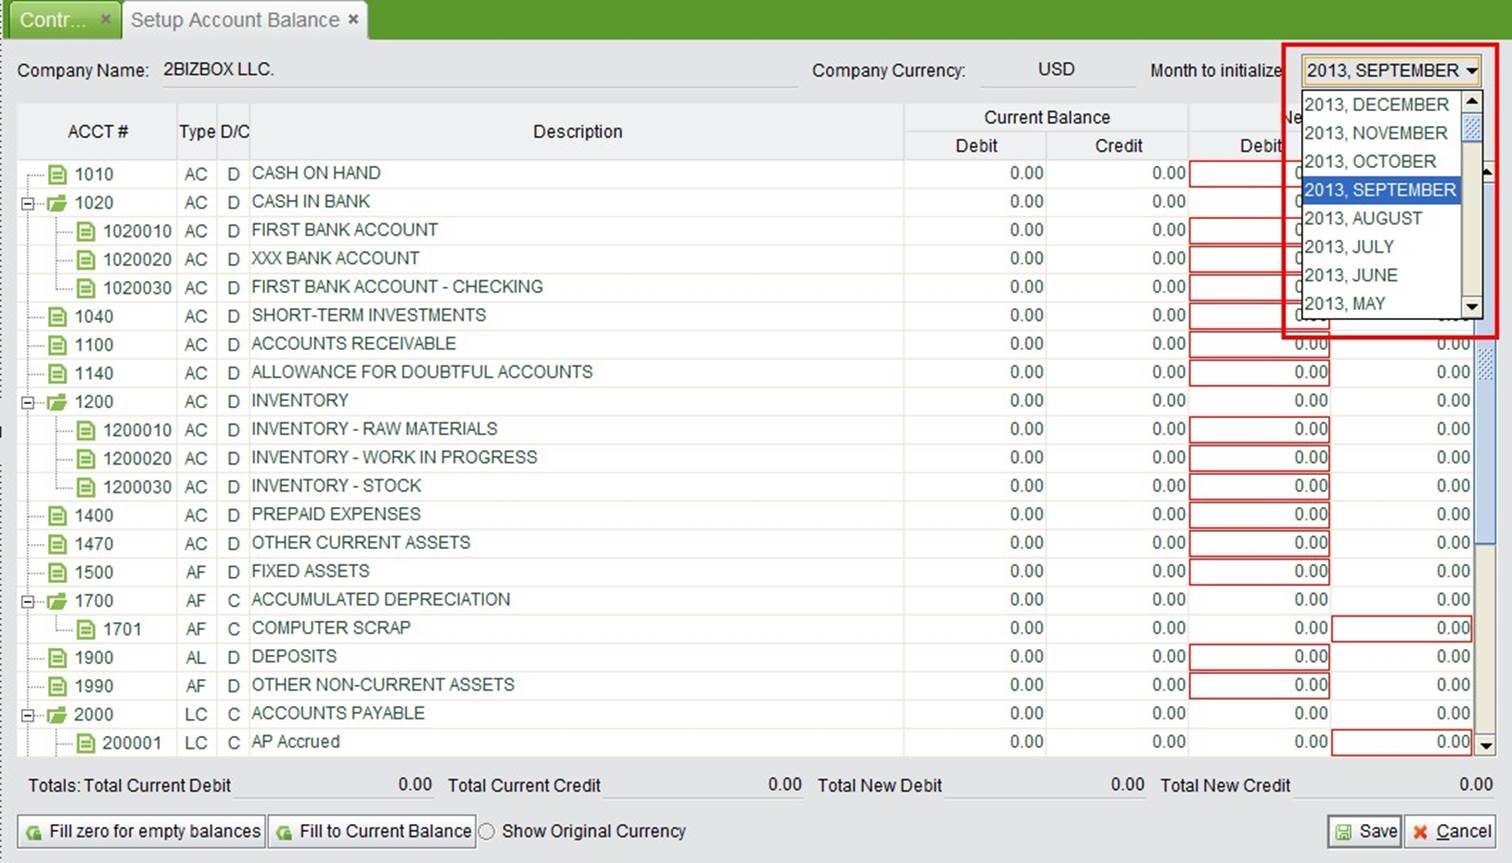
Click the button to open the Update interface of account balance initialization. You must initialize the beginning balances in your reporting sets of books before formally run 2BizBox to manage your accounting.
At the top right corner, you may select your startng month from the drop down list. Then enter the balance of the account in the red text box.
 |
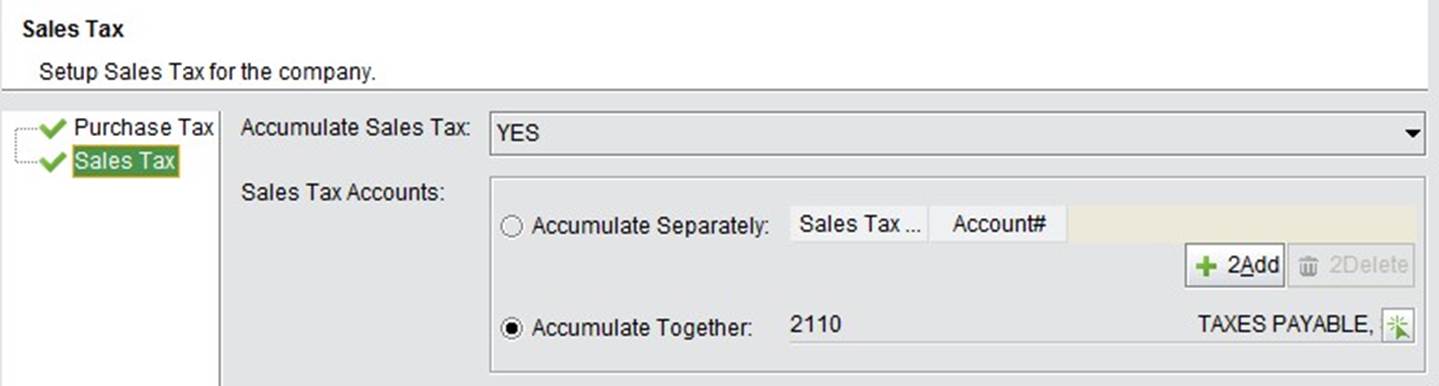
Set whether to accumulate Purchase Tax and Sales Tax separately. If not separately, set the account for each tax. Refer to “Value-added Tax” in “Company Accounting Settings” for more detailed information.
 |