2BizBox® Manual |
Go back to 3.0 Main |
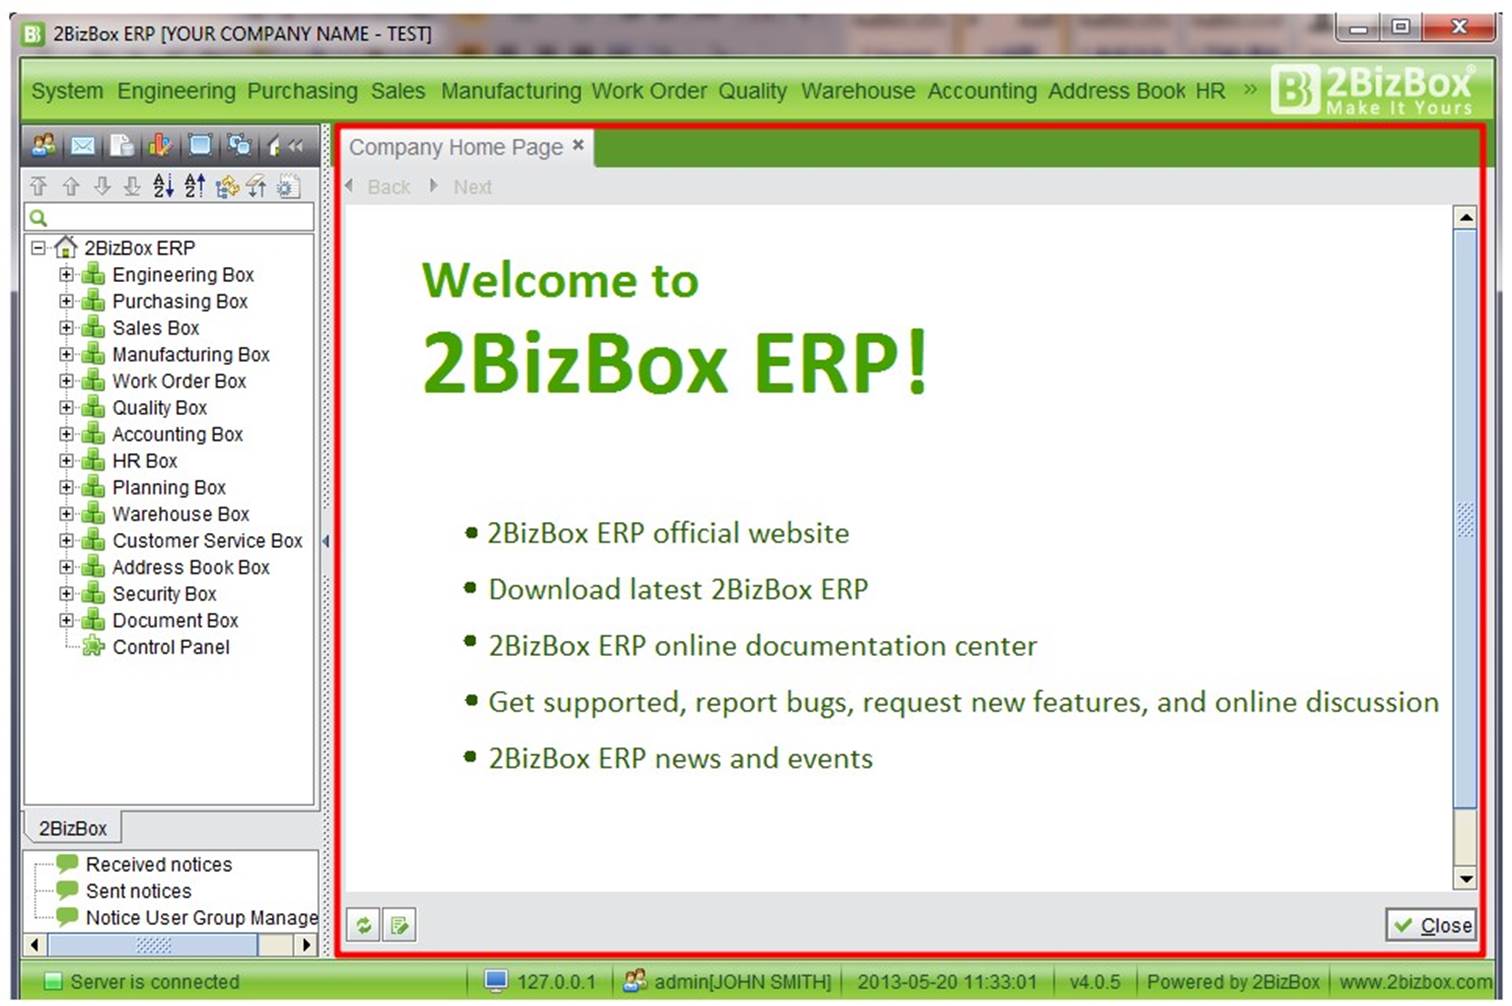
After entering into the system, the 2BizBox main screen will appear. Here you can enter System Setup and explore different Modules to experience various 2BizBox functions. While using 2BizBox, all operations will be completed within the red lined frame; other parts are system functions.
|
The following section will give a comprehensive explanation of the modules from top to bottom.
The top left corner of the main window shows your company’s name. It can be set up in the Control Panel. See more in the “Control Panel” chapter.
The top right corner shows your company’s logo which can also be set up to link to the Serva Software LLC official website. The logo can be changed in the “Control Panel.” See more in the Control Panel chapter.
 |
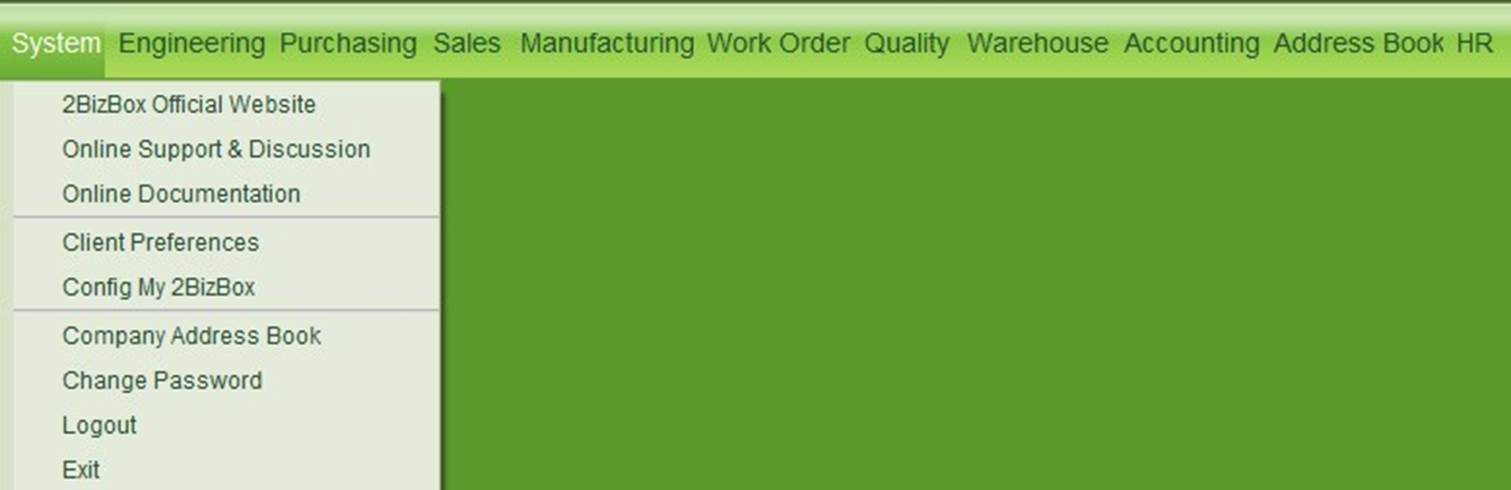
In the menu above the main window, click” System” to enter Basic System Setup.
 |
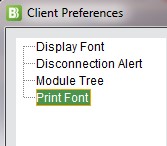 |
Display Font: Self-define system font and size; restart to active.
Disconnection Alert: an alert window will pop up when there is a disconnection.
Module Tree: to open the hidden module tree; when the mouse moves to the splitter, the hidden module tree will appear automatically.
Print Font: setup print font here
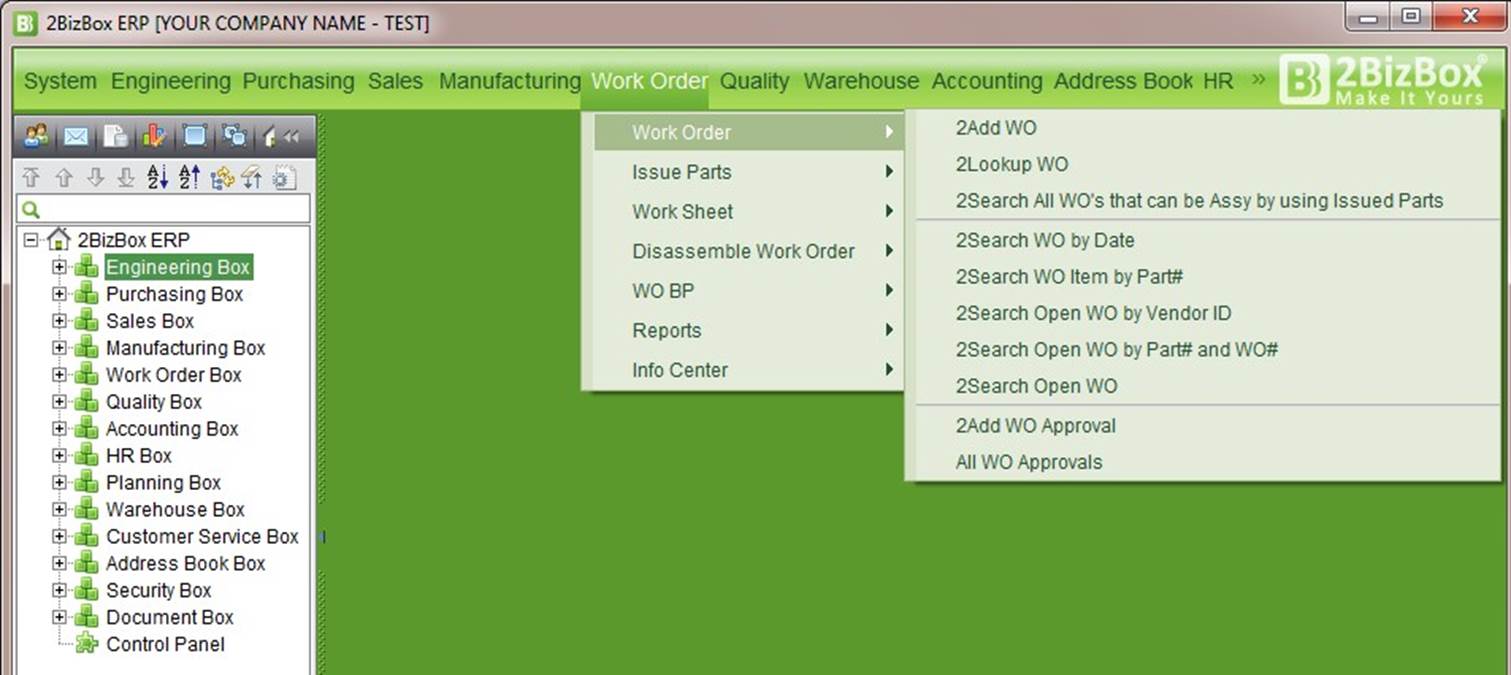
In addition to the left function menu, the top main menu of the window also provides fast access to Modules. Click it to see more functions.
 |
Above the Module Tree, there are some function buttons; move the cursor over each icon to view the button labels. Click to operate them.
From left to right, they are:
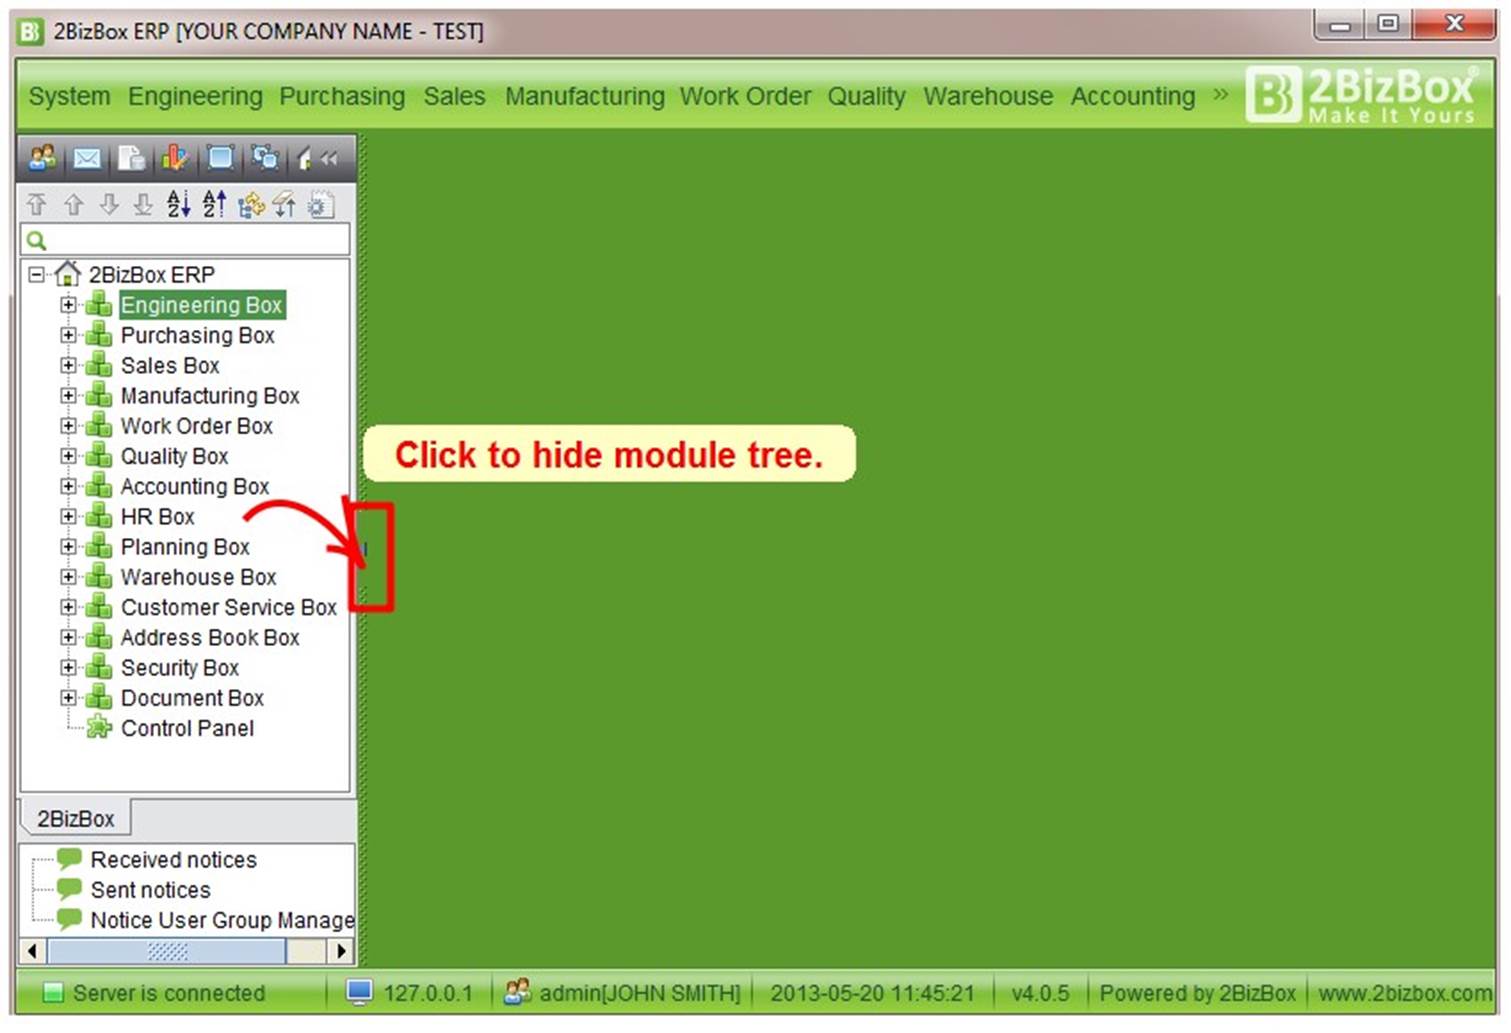 |
The Module Tree shows all 2BizBox modules. Click “+” to expand sub-modules, click a module name to operate.
Click the right arrow of the module tree to hide the module tree.
Use the buttons above the module tree to configure the module tree’s appearance and sequence.
From left to right, they are:

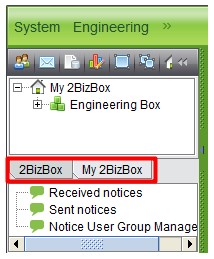
After configuration, the module tree will display “My2BizBox.” Click the tabs to switch.
 |
The Notice Center can be used to create system user groups and send messages to system users or system user groups. Also, it can be used to send messages to system users and outside email addresses in relation to 2BizBox orders.
Click “Received notices” to check for messages.
 |
Received notices are divided into two parts: top and bottom. Details on notices can be seen by clicking the title. You can “Reply,” “Reply All” and “Forward” messages. There are three buttons “Send Notices,” “Delete Notices” and “Refresh” at the top right corner of the interface.
Sent notices: click the button to go to the Sent Notices screen. Delete: select a message and press the button to delete it Refresh: click the button to refresh.
In addition, search for notices using the search function at the top of the interface. The parameters include “sender,” “sending account,” “theme,” “starting time, “and “expire time.”
Click “Sent Notices” to view sent notices. Similar to received notices, the functions “Reply,” “Reply to all,” or “Forward” can be completed by selecting a message. Also, at the top right of the interface, there are “Send Notice”, “Delete Notice” and “Refresh Notice” options.
Send notice: click “Send Notice” button and fill in the required content in the Send Notice interface to send a message
Receiver: click the arrow to select a receiver (or multiple receivers). Click “Delete” to delete all receivers. Check “All Users” to send notices to all users.
Subject: input the notice subject here.
Content: input the notice content in the blank space.
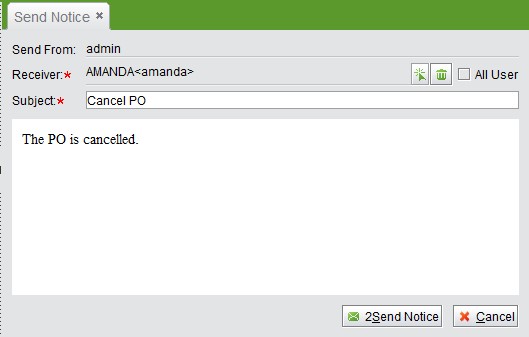 |
After you are finished, click “2Send Notice” to send.
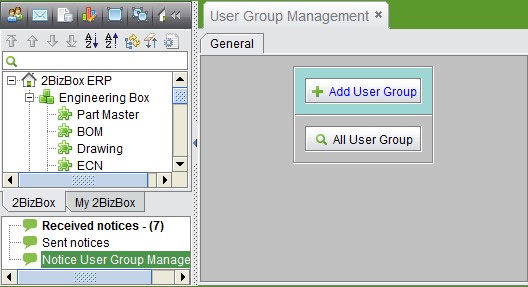
Use this tab to add users to a user group and directly select receivers from a user group when sending a notice. For companies with many system users, user group management is quite useful.
Click “Notice User Group Management” and select “Add User Group:”
 |
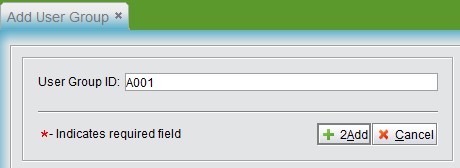
Input the user group ID and click “2Add:”
 |
Go to the user group update screen, if “Global” is checked, the user group will be considered the “System User Group.”
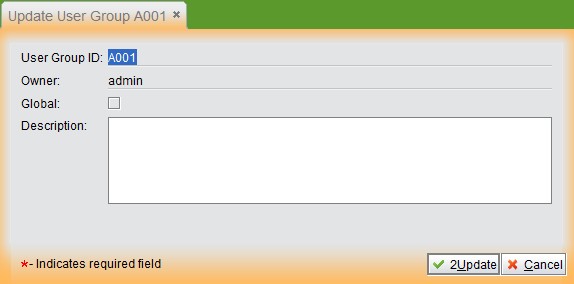 |
Click “Update” to create the user group. At the user group interface, click the “Add” button to add users. Select the bottom right “Add” button to finish.
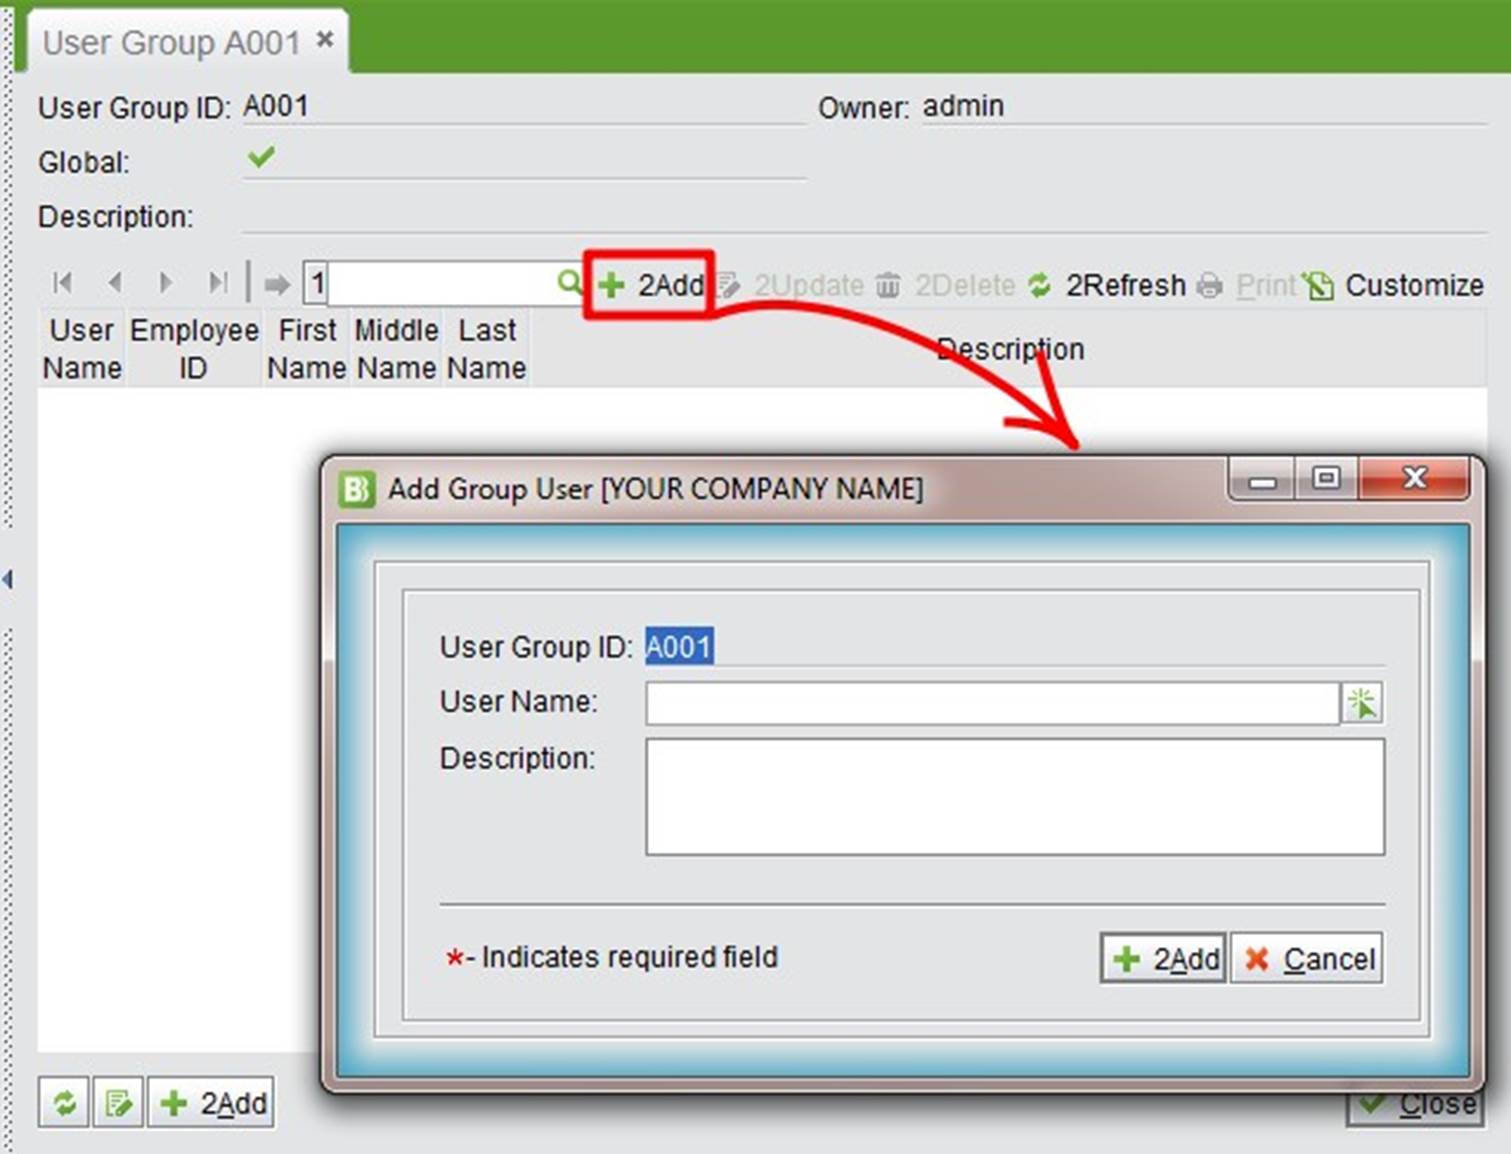 |
More users can be added by repeating the above steps. Users can be edited or deleted. Thus, while sending notices, the “Pick User from Group Users” tab can be seen.
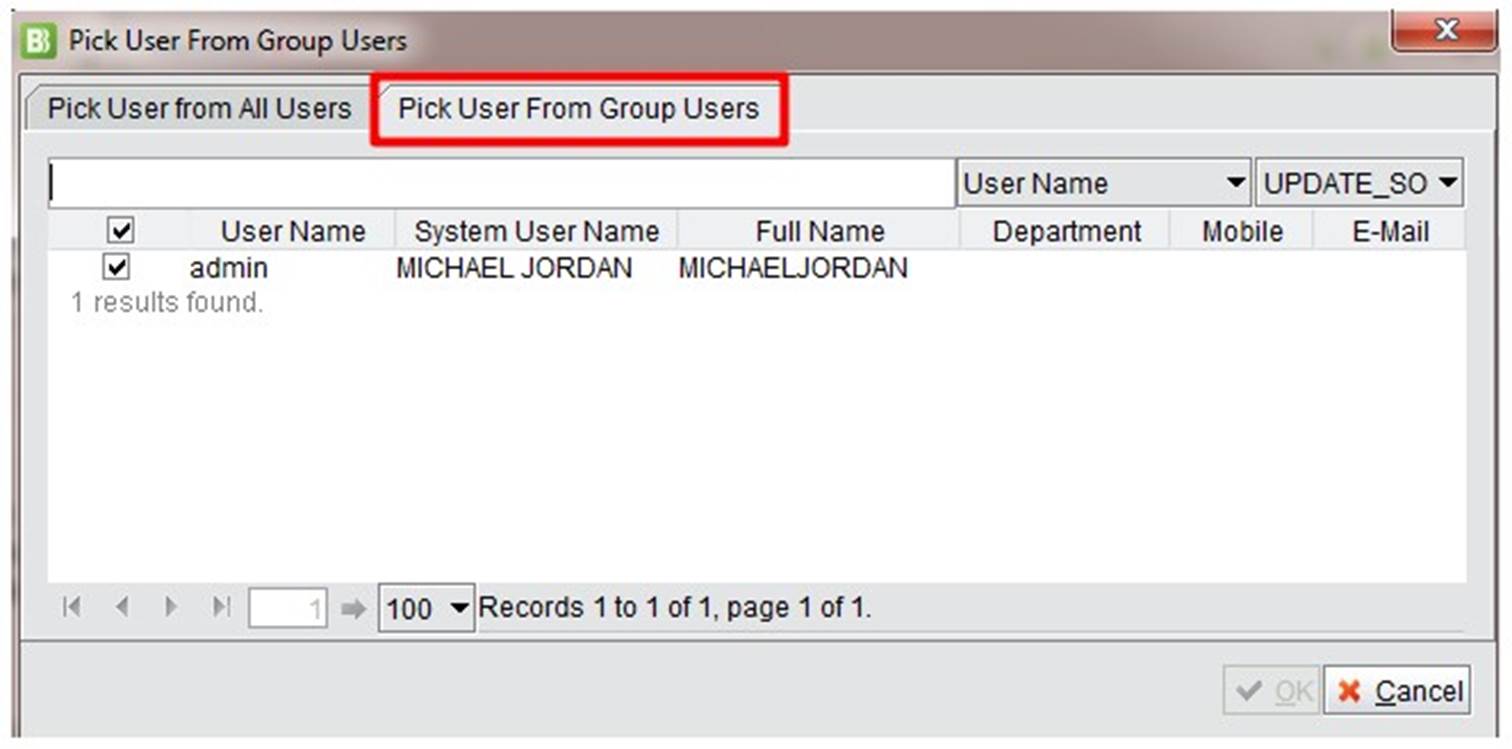 |
Click “All User Group” to notify an entire user group. Select individual users to edit or delete them.
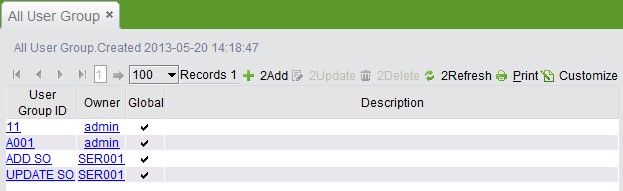 |
The system status is displayed at the bottom of the interface.
From left to right:
Server is connected: Displays the server connection status. This refers to the connection between the 2BizBox client and the 2BizBox server, not Internet connection status.
Server IP address: Displays the 2BizBox server’s IP address
Current user: Displays the current username and system username
System time: Displays the time and date
2BizBox system version: Displays the current system version being operated
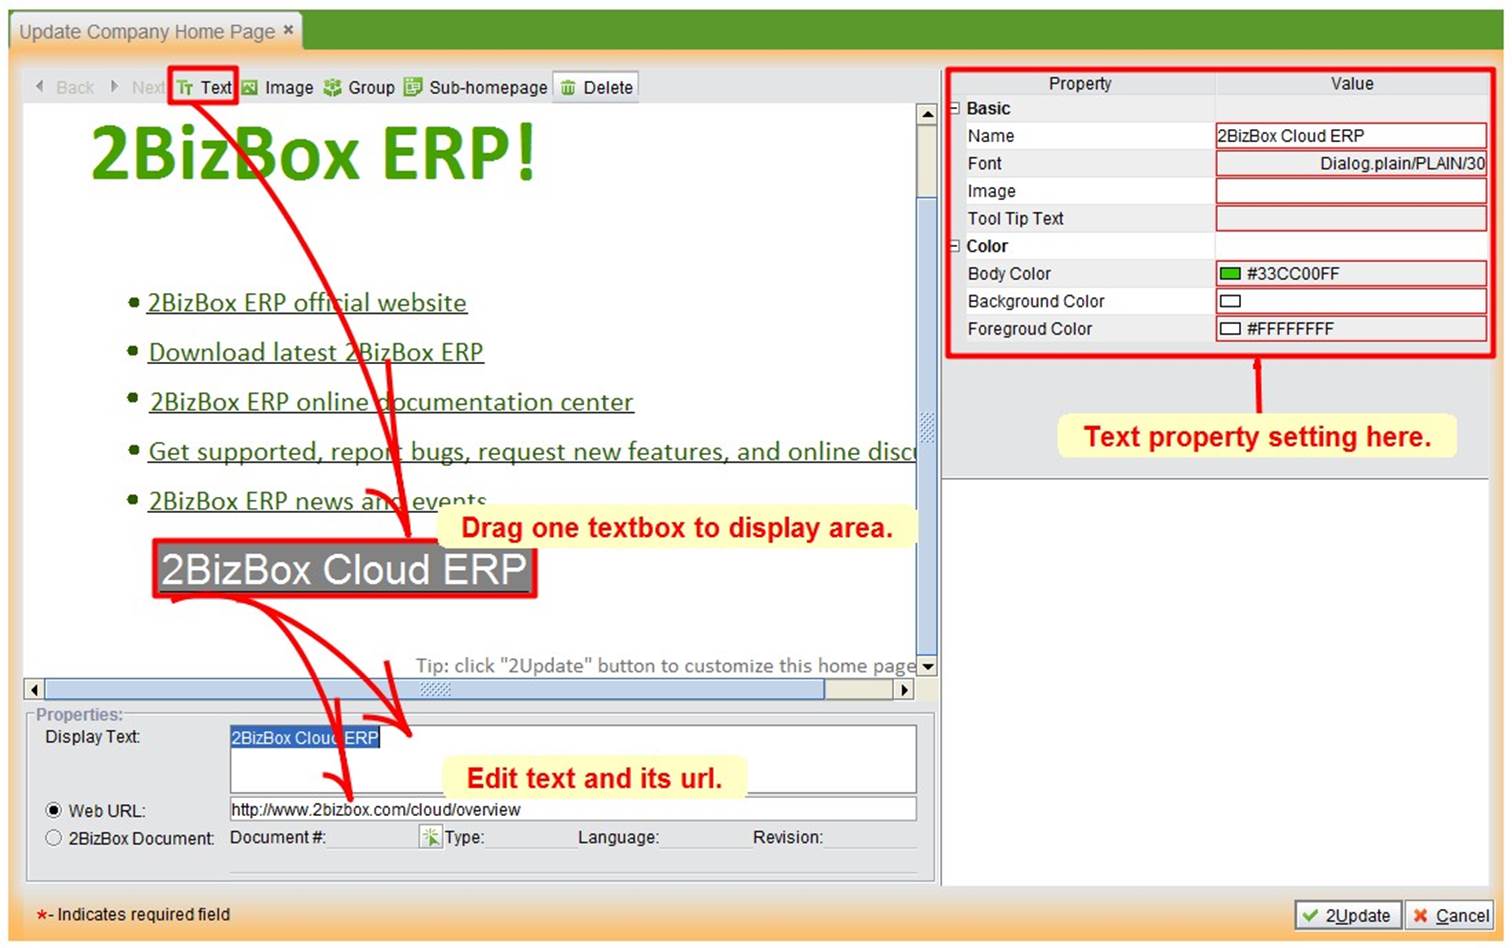
The content of the company homepage can be customized. Click the edit button at the bottom left to update it.
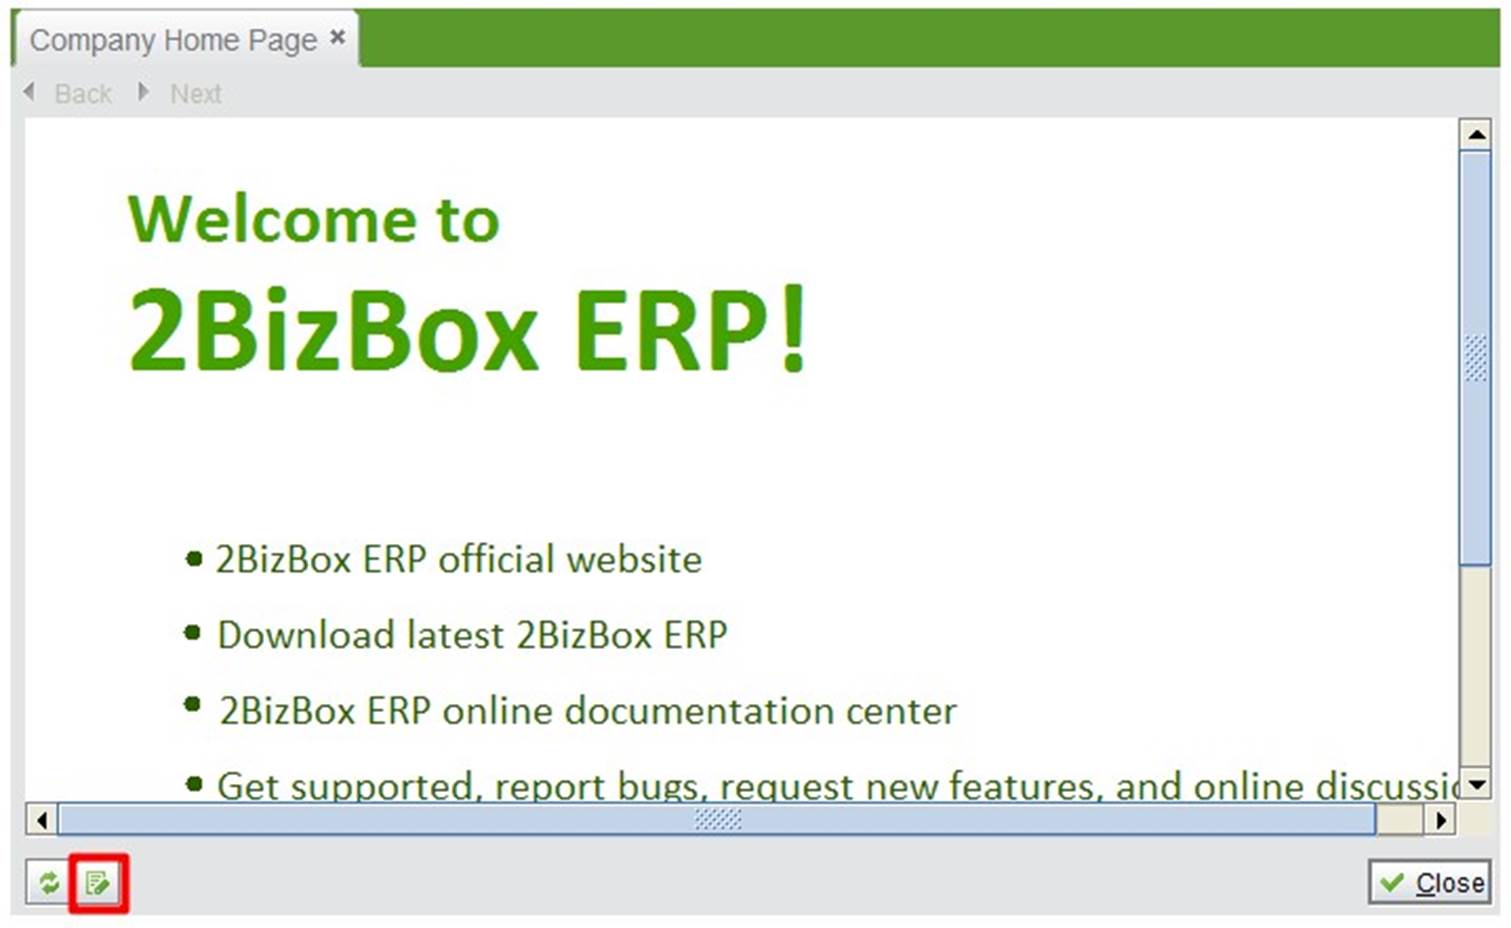 |
At the update screen, text images and hyperlinks can be added. Links to modules can also be created. For example, you may create a direct link to the HR module.